
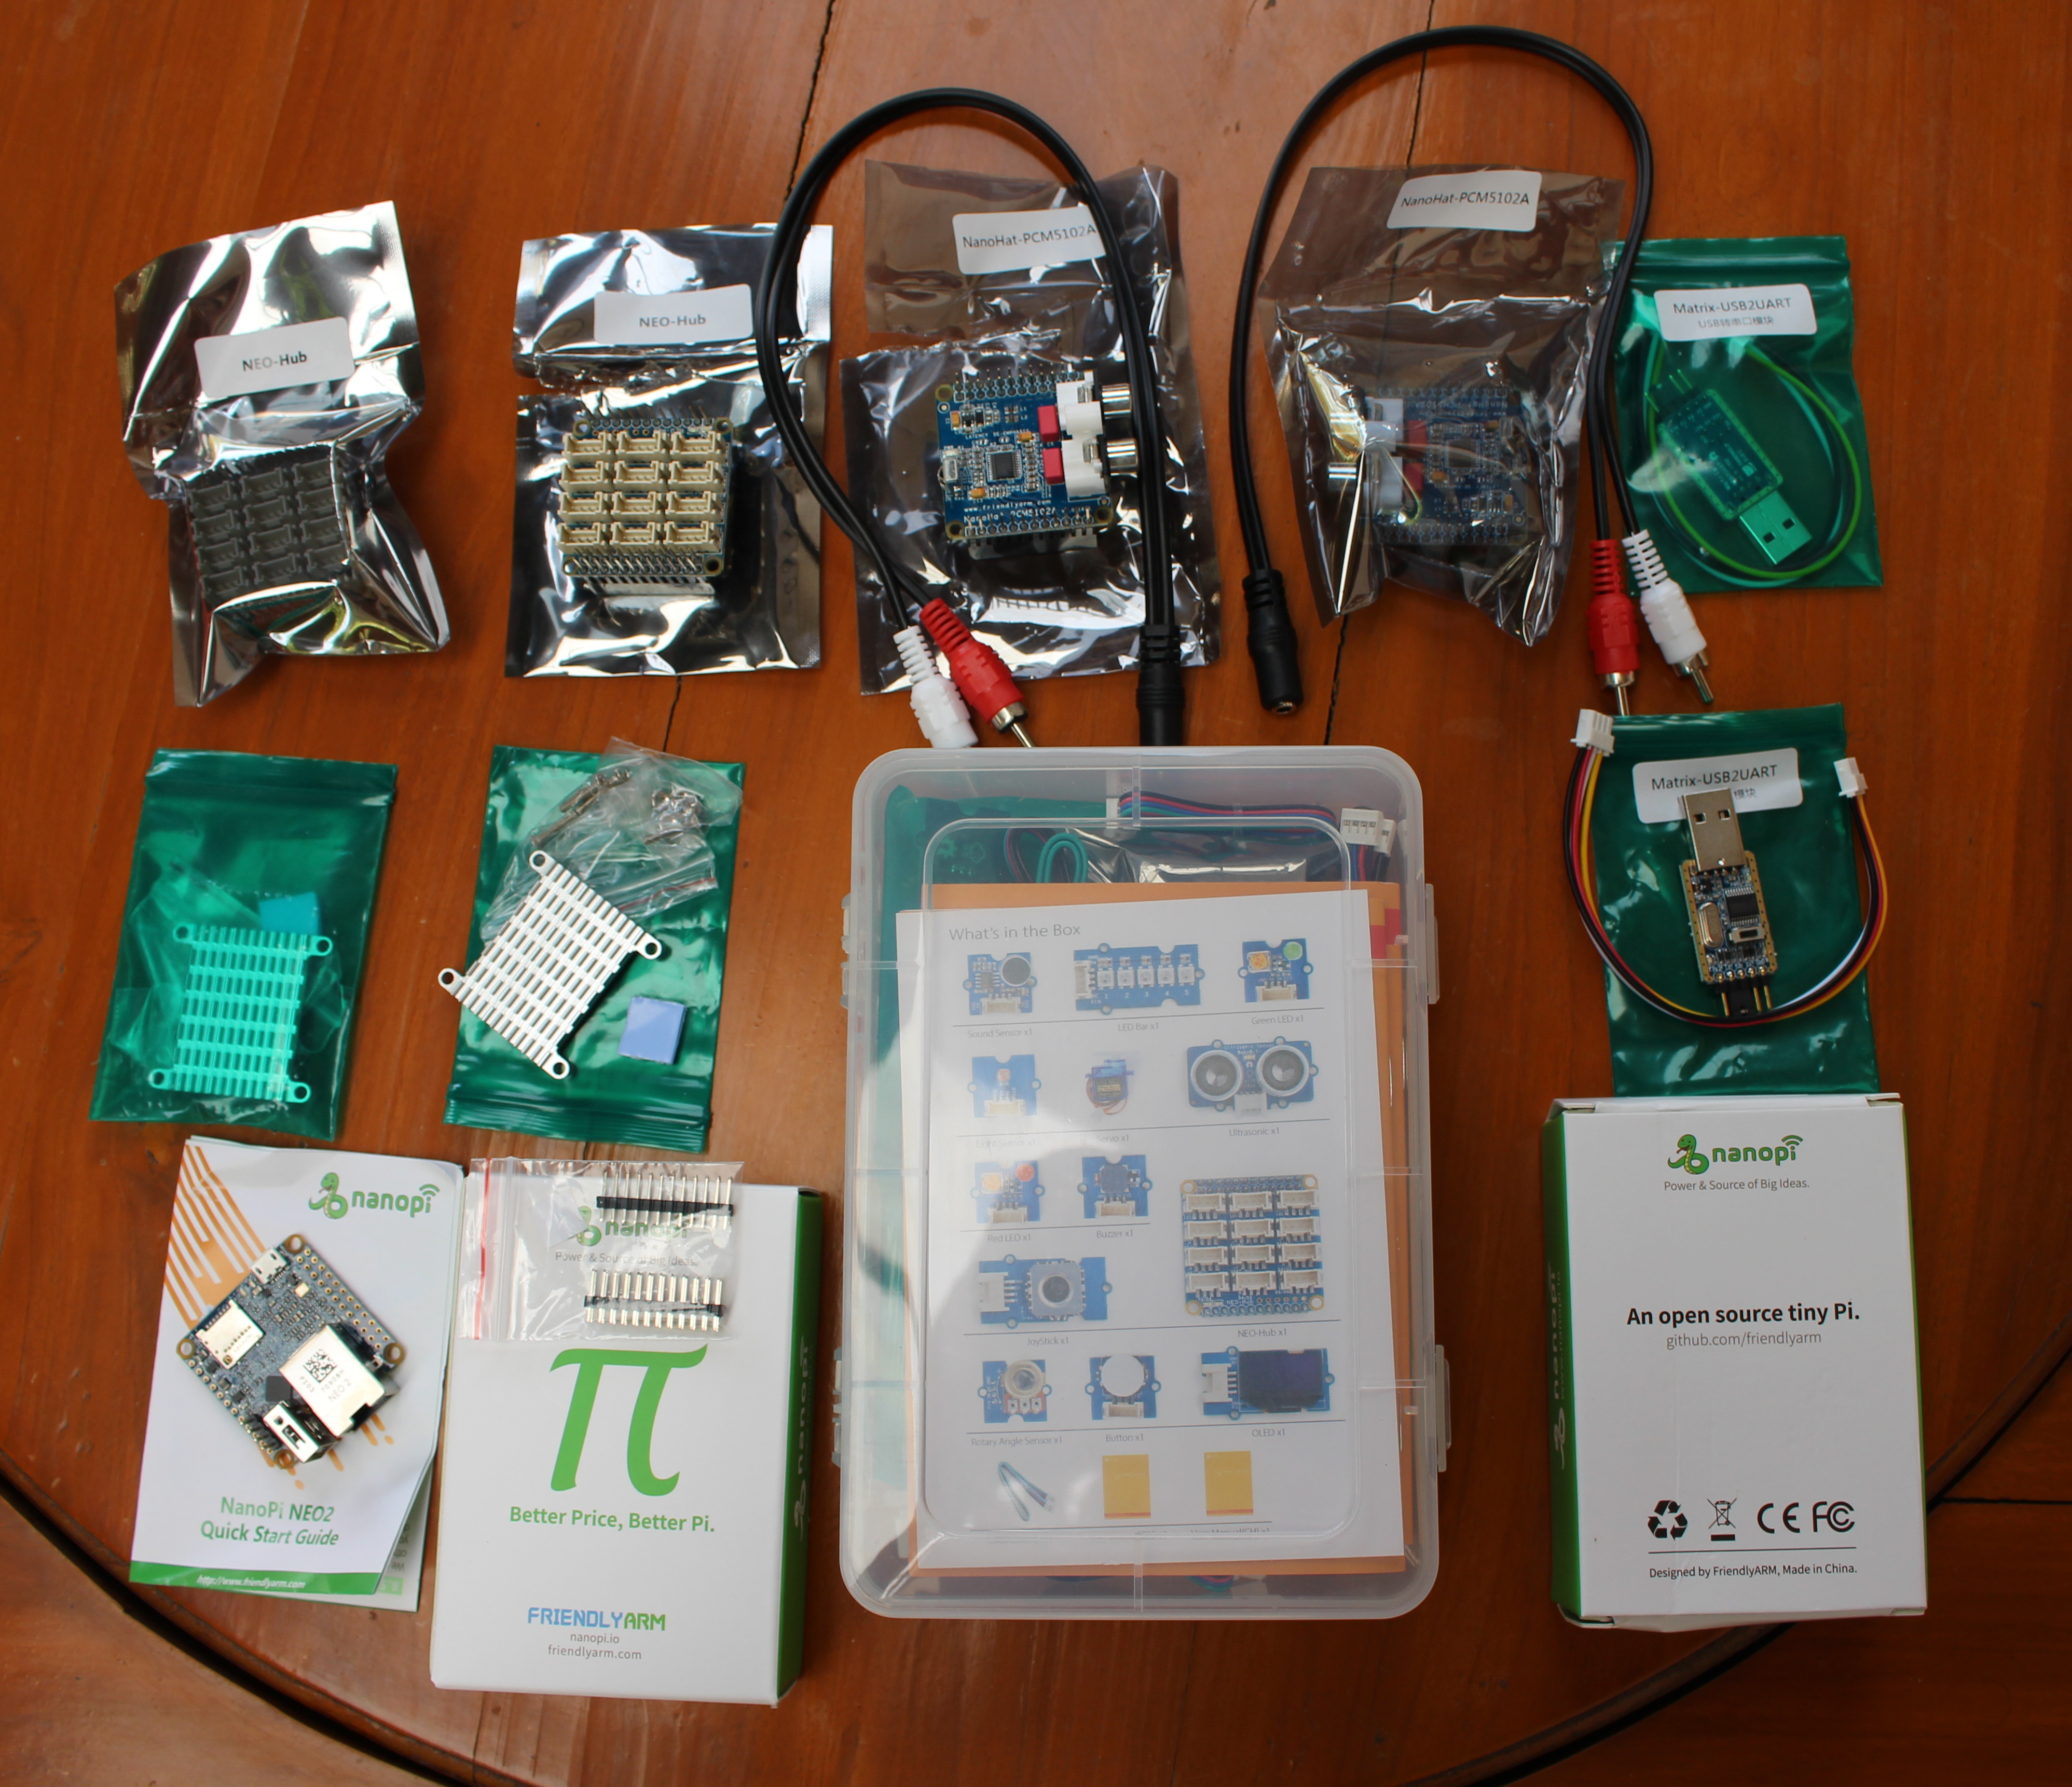
NanoPi NEO 2 development board is an update of NanoPi NEO with a quad core 64-bit Allwinner H5 processor + 512 MB RAM, Gigabit Ethernet, and an extra audio header, which can be a great little board for headless application since there’s no video output. FriendlyELEC ask me whether I wanted to review to board with some of their NanoHATs add-on boards, and while I asked for NanoHat PCM5102A audio board and NEO Hub which I intended to use with Grove modules from my Wio Link Started Kit, I get a bit more than expected, as the company included sets of NEO 2 boards and accessories, NanoHATs, two serial debug board, and their BakeBit Starter Kit with several Grove modules to play with.
Since I have so many things to look at in this first post, I’ll just describe the hardware, assemble it, quickly check the paper documentation, and give some of my impressions about the kit I receive.
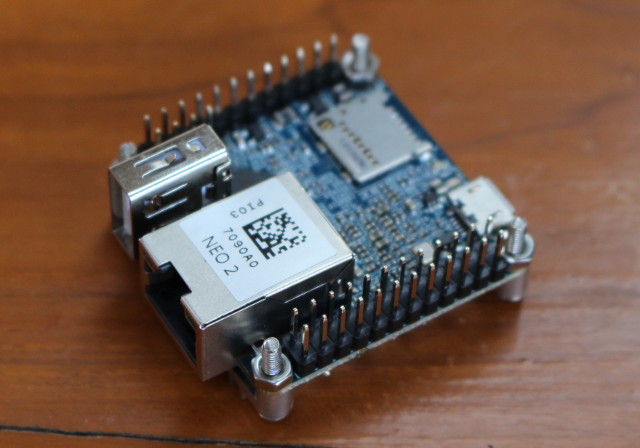
Let’s start with NanoPi NEO 2. It’s super tiny, as exactly the same forum factor as NanoPi NEO, except for the low profile Ethernet jack.

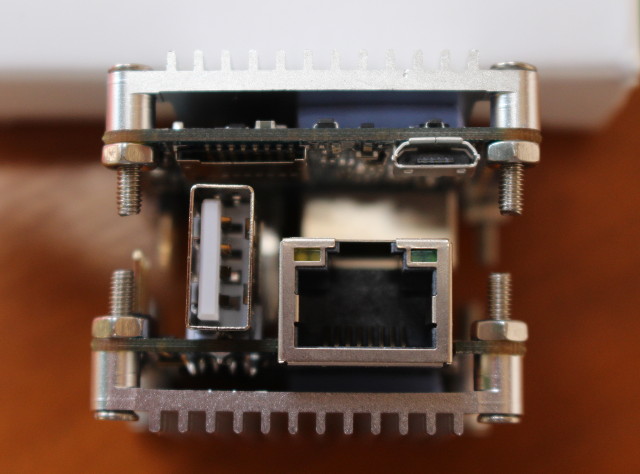
The bottom side comes with Allwinner H5 processor SoC, and Samsung K4B4G1646E-BYK0 DDR3L memory (512MB), while the top of the board features Realtek RTL8211E Gigabit Ethernet Transceiver. The board just has four ports/connectors: a micro SD slot, a micro USB port for power, a USB 2.0 host port, and an RJ45 connector.
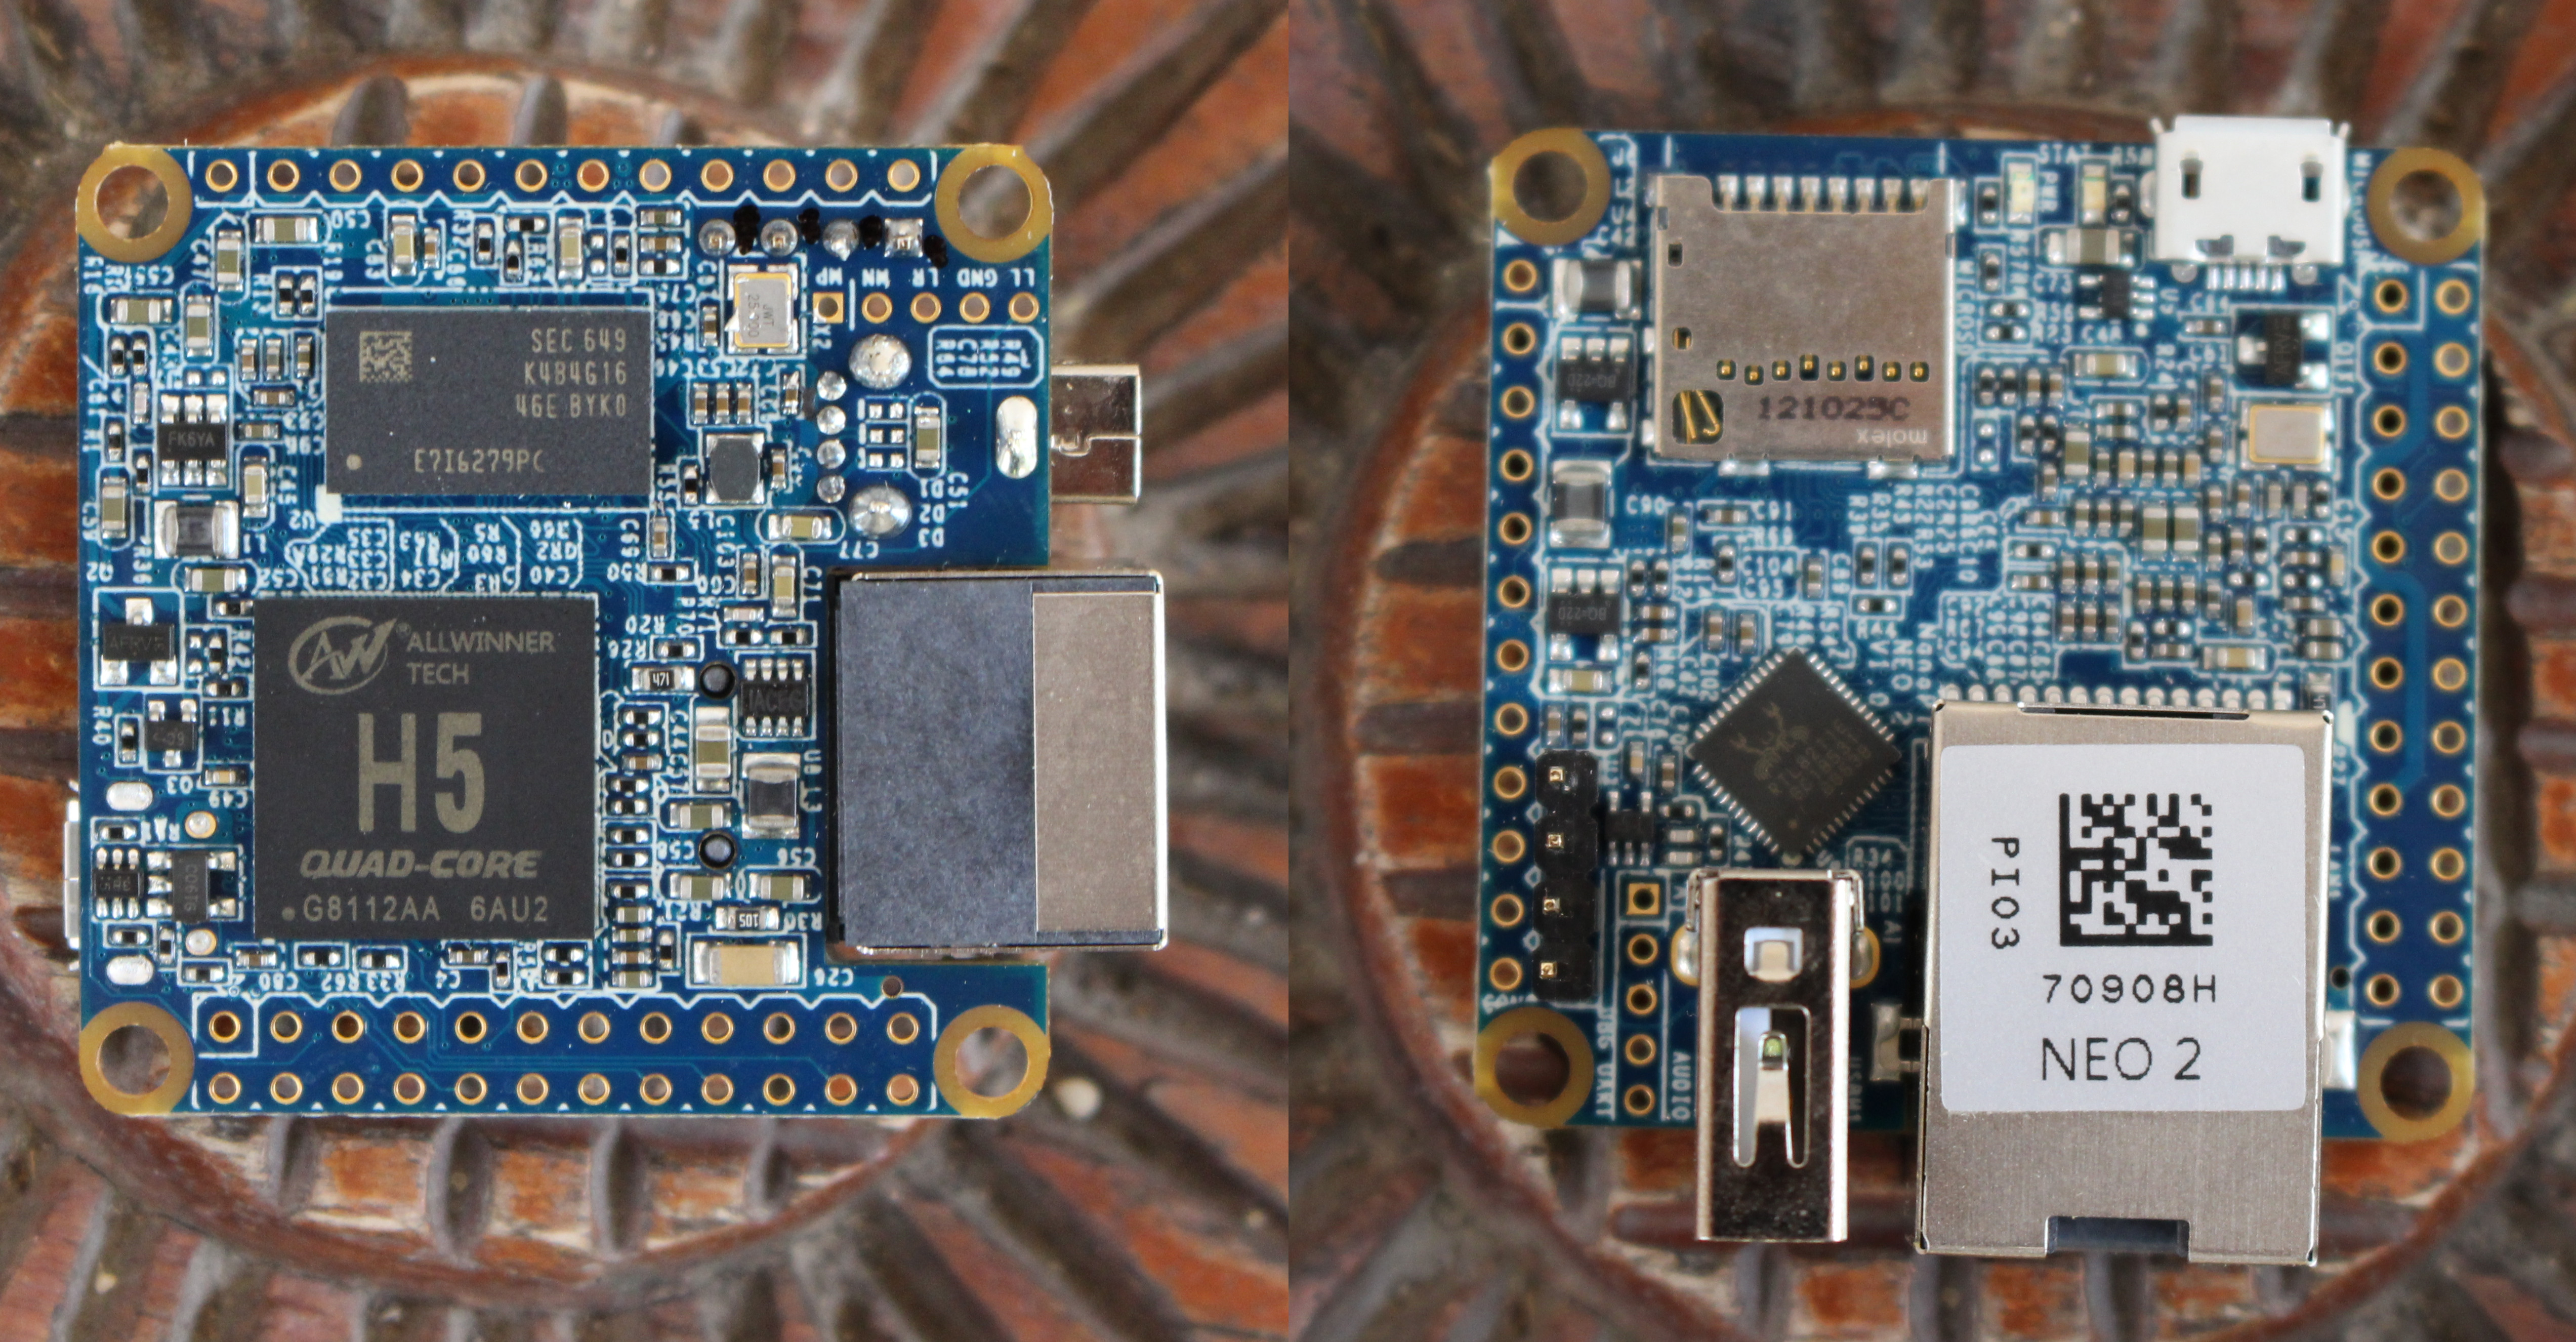
There are also two headers (2x 12 pin + 12x pin) for I/O just like for the first NEO board, as well as an extra 5-pin header for audio on the right of the 4-pin UART header. The audio header is also present on NanoPi NEO v1.3 board, but not the older boards. See pinout table for details.
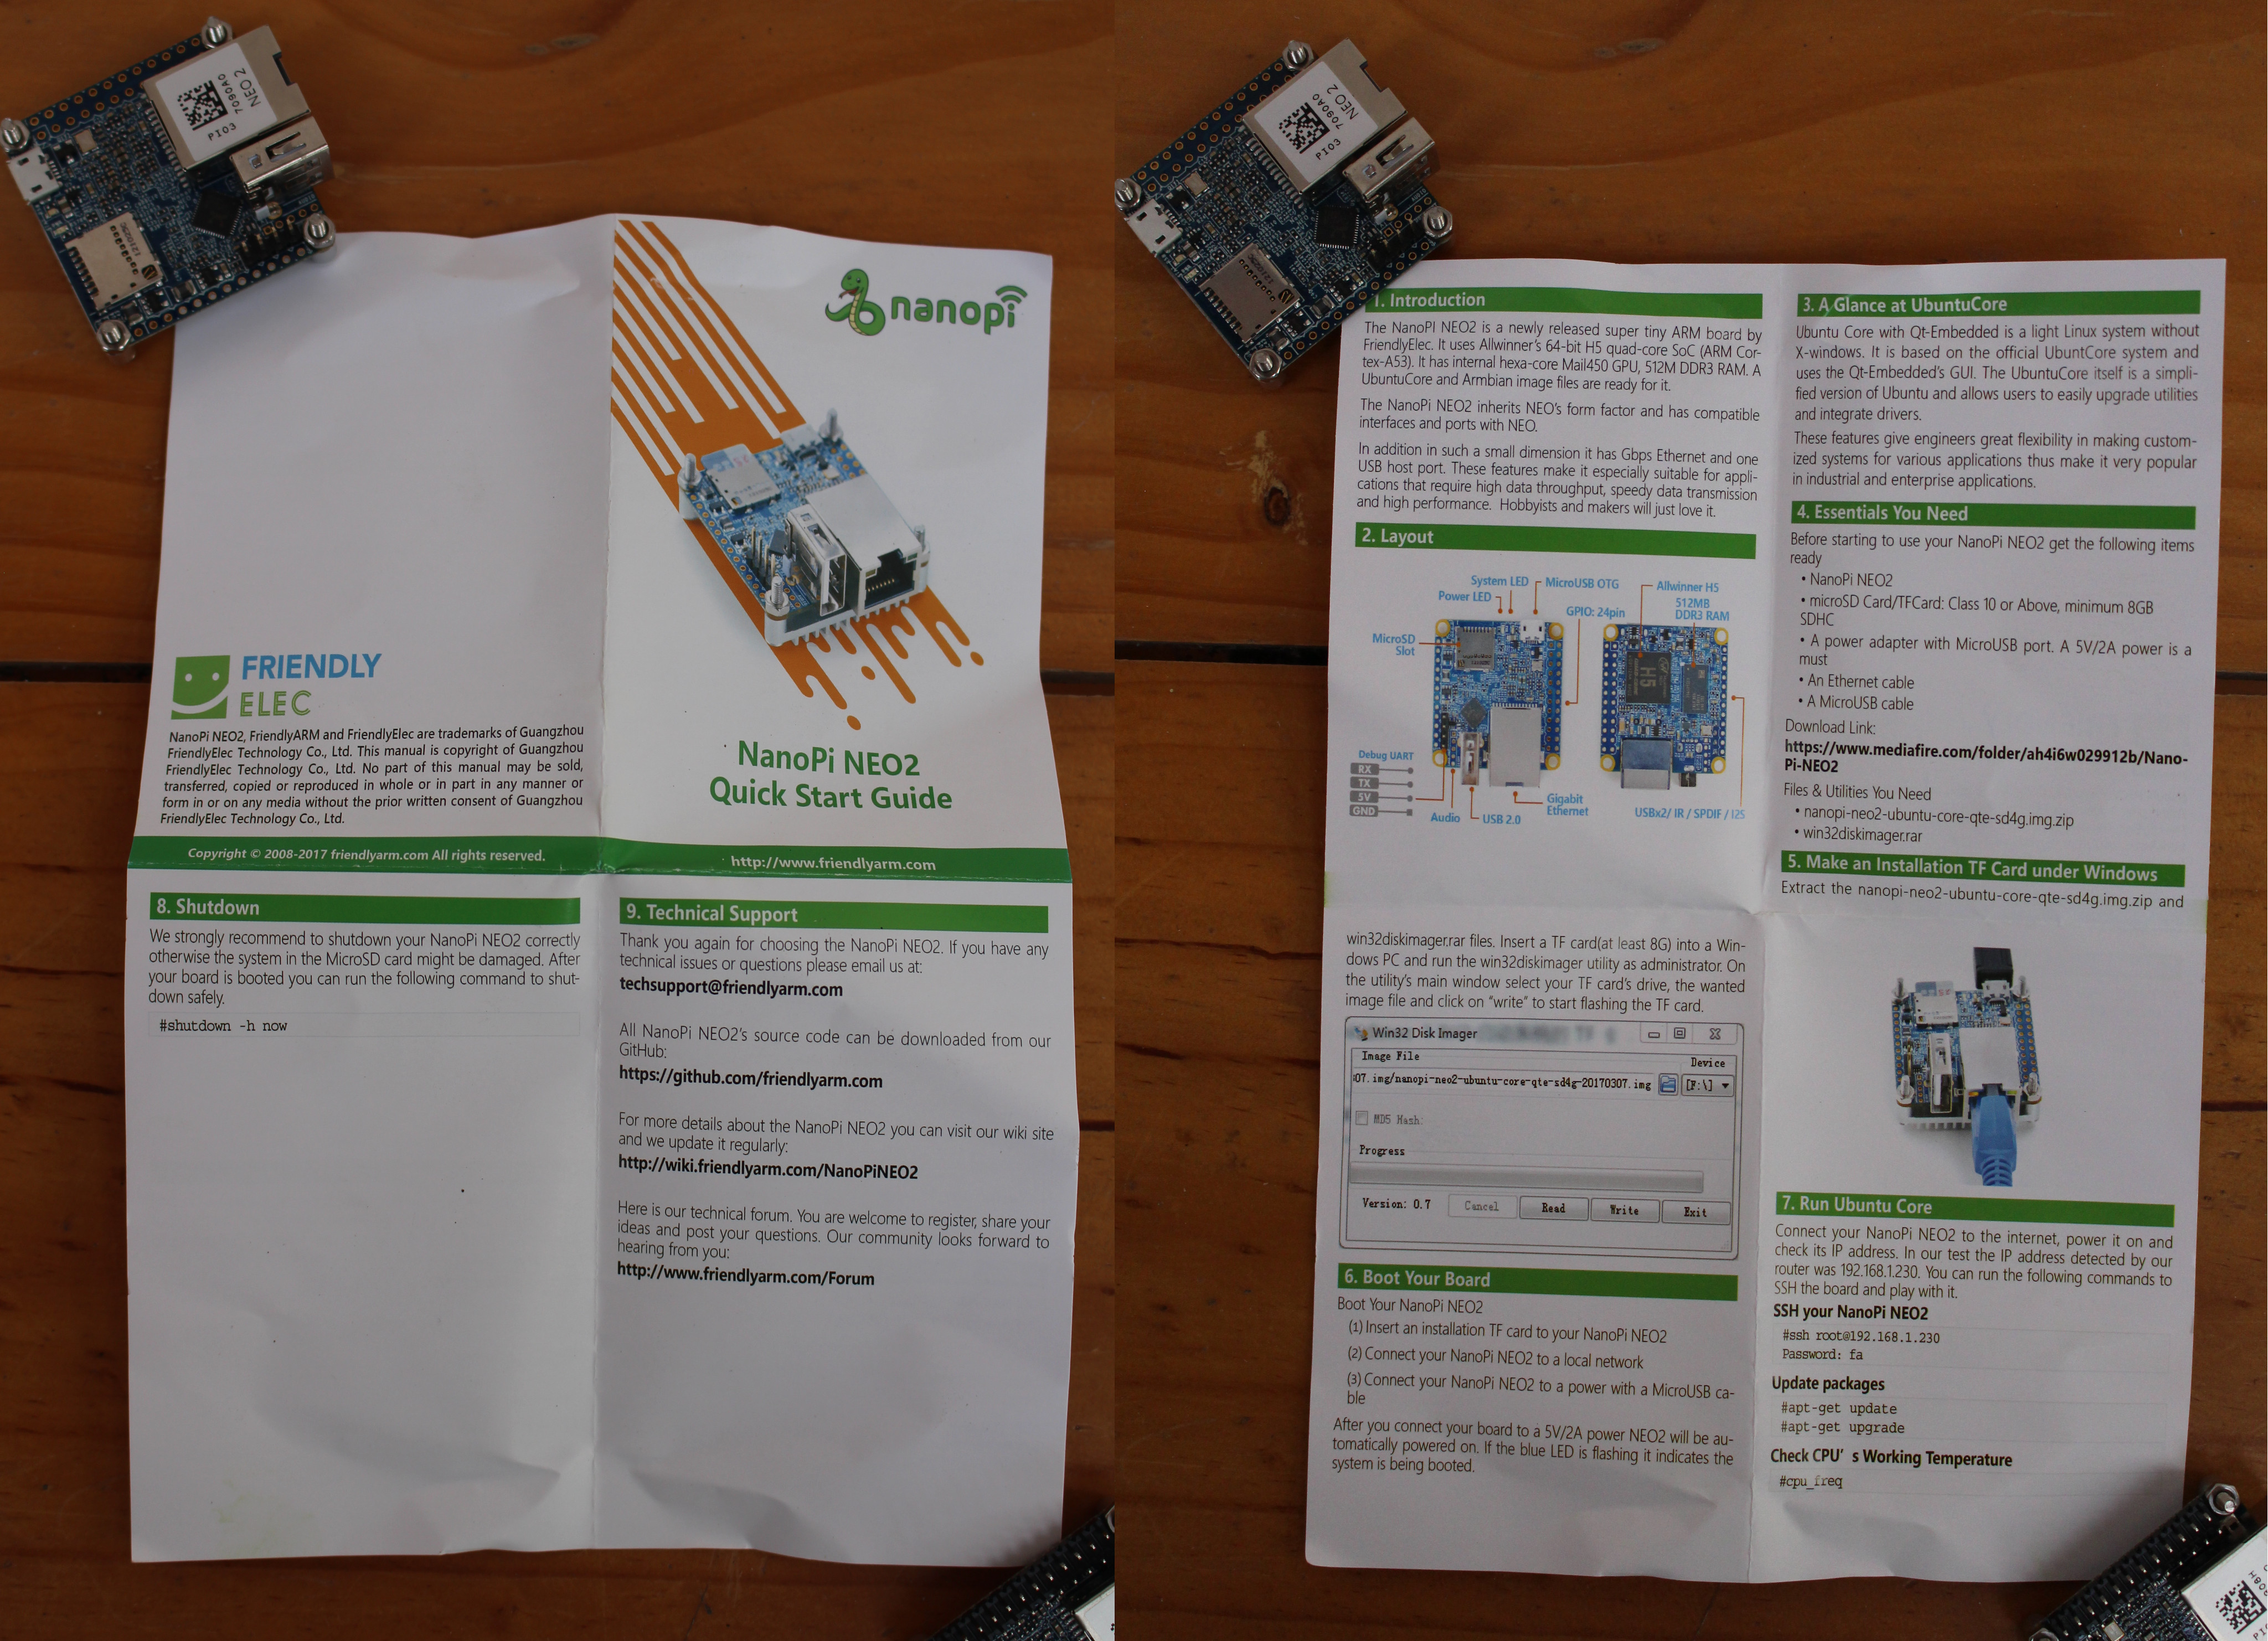
Each package with the board also includes a Quick Start Guide describing the board, and explaining how to use the company’ Ubuntu Core + Qt image. As you can see from the photo above, the boards also make great paper weights, but I’m sure you’ll find something more interesting to do with them… 🙂
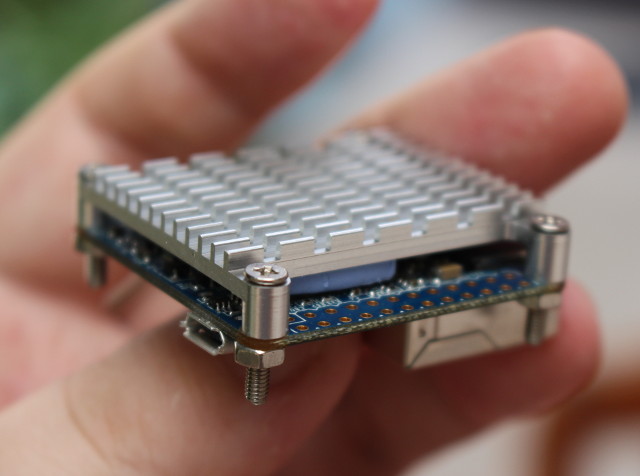
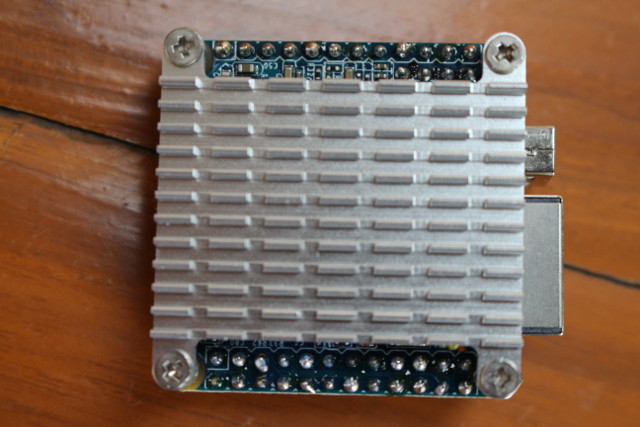
I also get a heatsink + thermal pads + screws and nuts kit, not included by default. Installation is very easy. First remove the two protective plastic sheets on the blue thermal pad, place it on Allwinner H5 processor, and then add the heatsink on top and secure it with the screws and nuts. Just make sure you orientate properly without covering the IO pins.
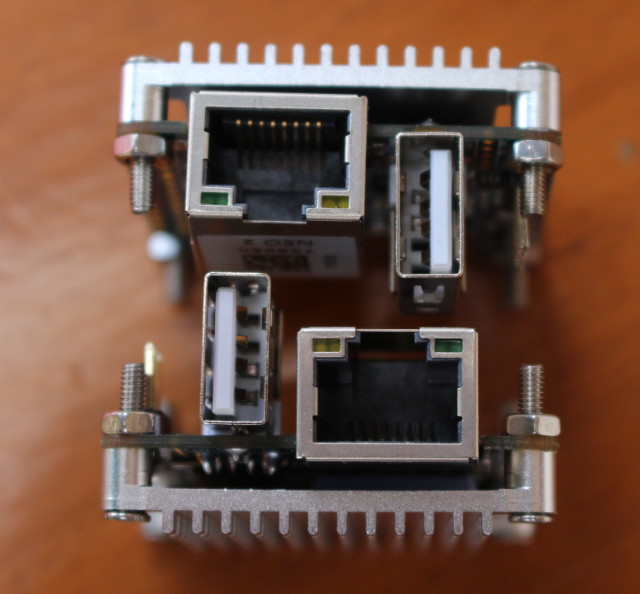
I did that for both, and checked possible combinations for those who want to build NanoPi NEO (2) farms. The first combination is to place the boards in opposite direction, and then use some spacers (mine were not suitable) to hold both boards in place as shown here.
The configuration above takes the less space, however, you may want to have all Ethernet ports on the same side, and the low profile Ethernet jack allows for a more compact design compared to what was possible with NanoPi NEO.
 This takes about 5 x 4.5 x 4 cm, so if we round that up you could have 1 meter x 1 meter x 4.5 cm deep cluster with 800 NanoPi boards (3,200 cores). You’d just have to find out how to power and cool it down… The 512MB memory might limit use cases for clusters. FriendlyELEC also sells an acrylic case for 8 board clusters.
The main use case for NanoPi NEO (2) board is probably IoT and electronics projects, so I soldered the two headers which are provided with the board (inside the package).
First I thought I made a mistake when I installed the heatsink first, but actually the nuts help keep the headers in place while soldering, so I did not have to use a sponge to push the headers while soldering, as I normally do.
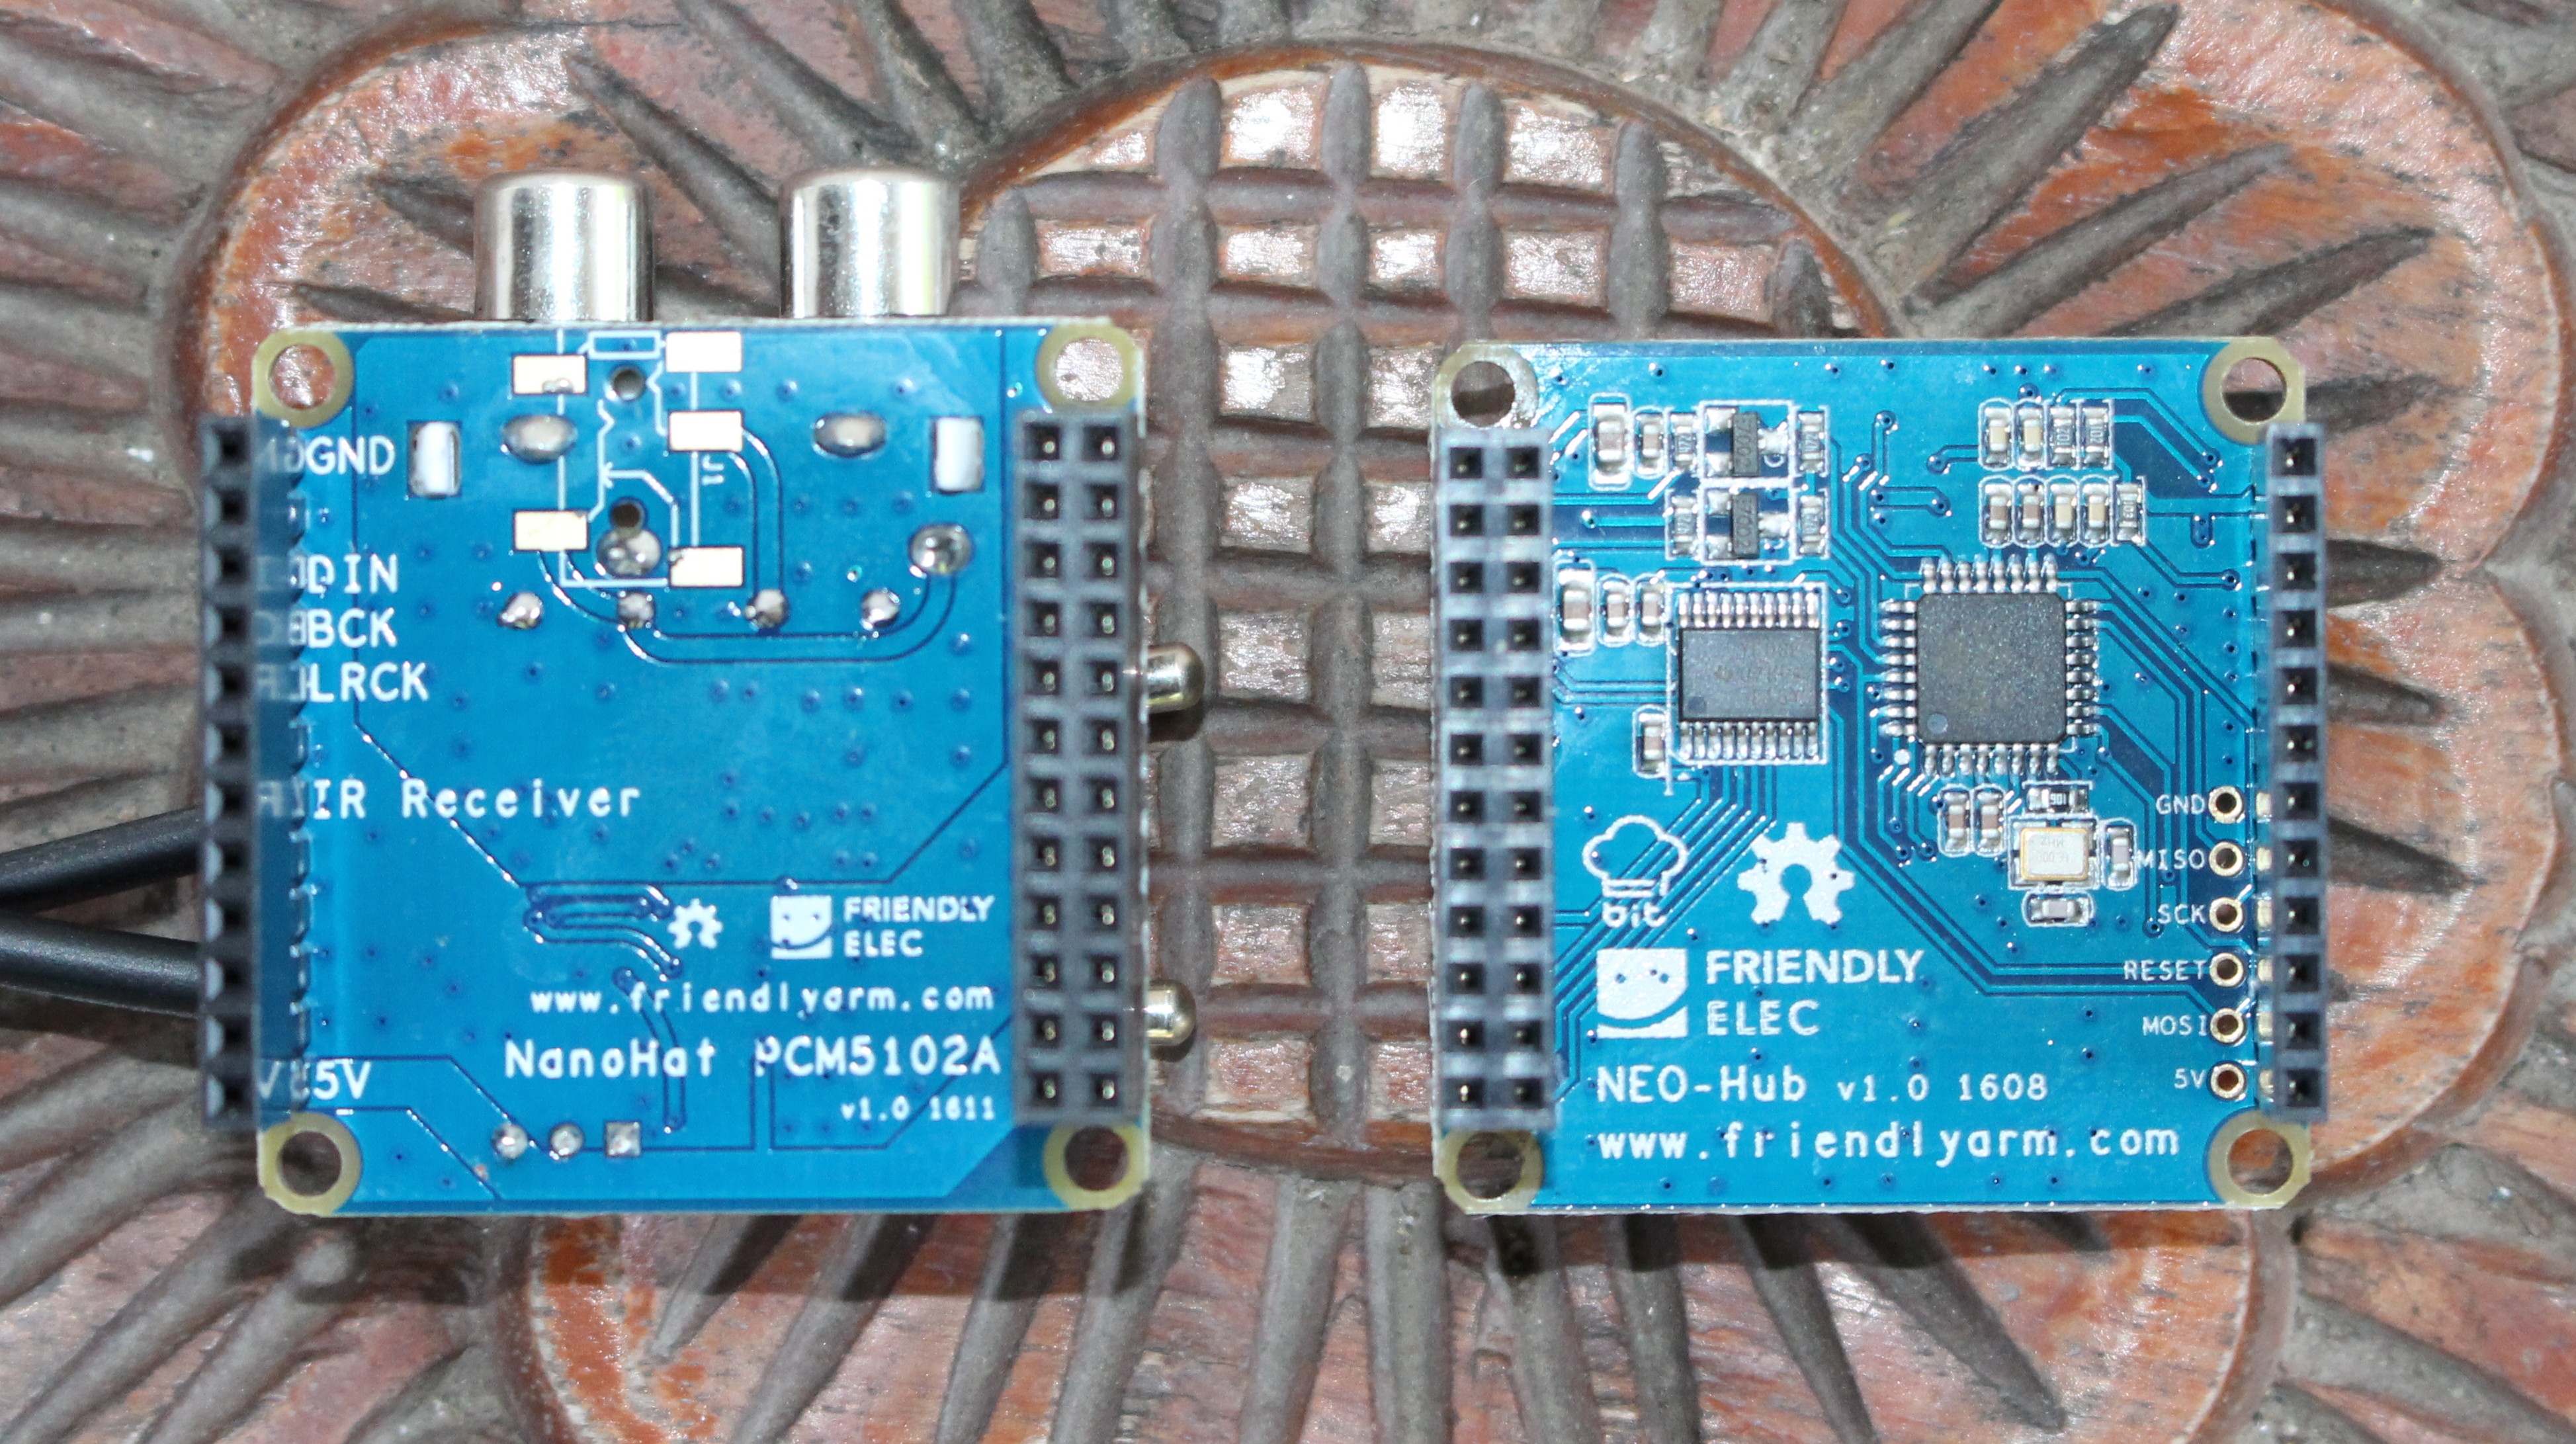
NanoPi NEO 2 boards are now ready. So let’s checkout the two add-on board I got: NanoHAT PCM5102A audio board with Texas Instruments PCM5102A audio stereo DAC, stereo audio output via RCA connectors, and an IR receiver, as well as NEO Hub (aka NanoHAT Hub) with 12 Grove connectors (I2C, Digital I/O, Analog Inputs, UART) compatible with Seeed Studio offerings.
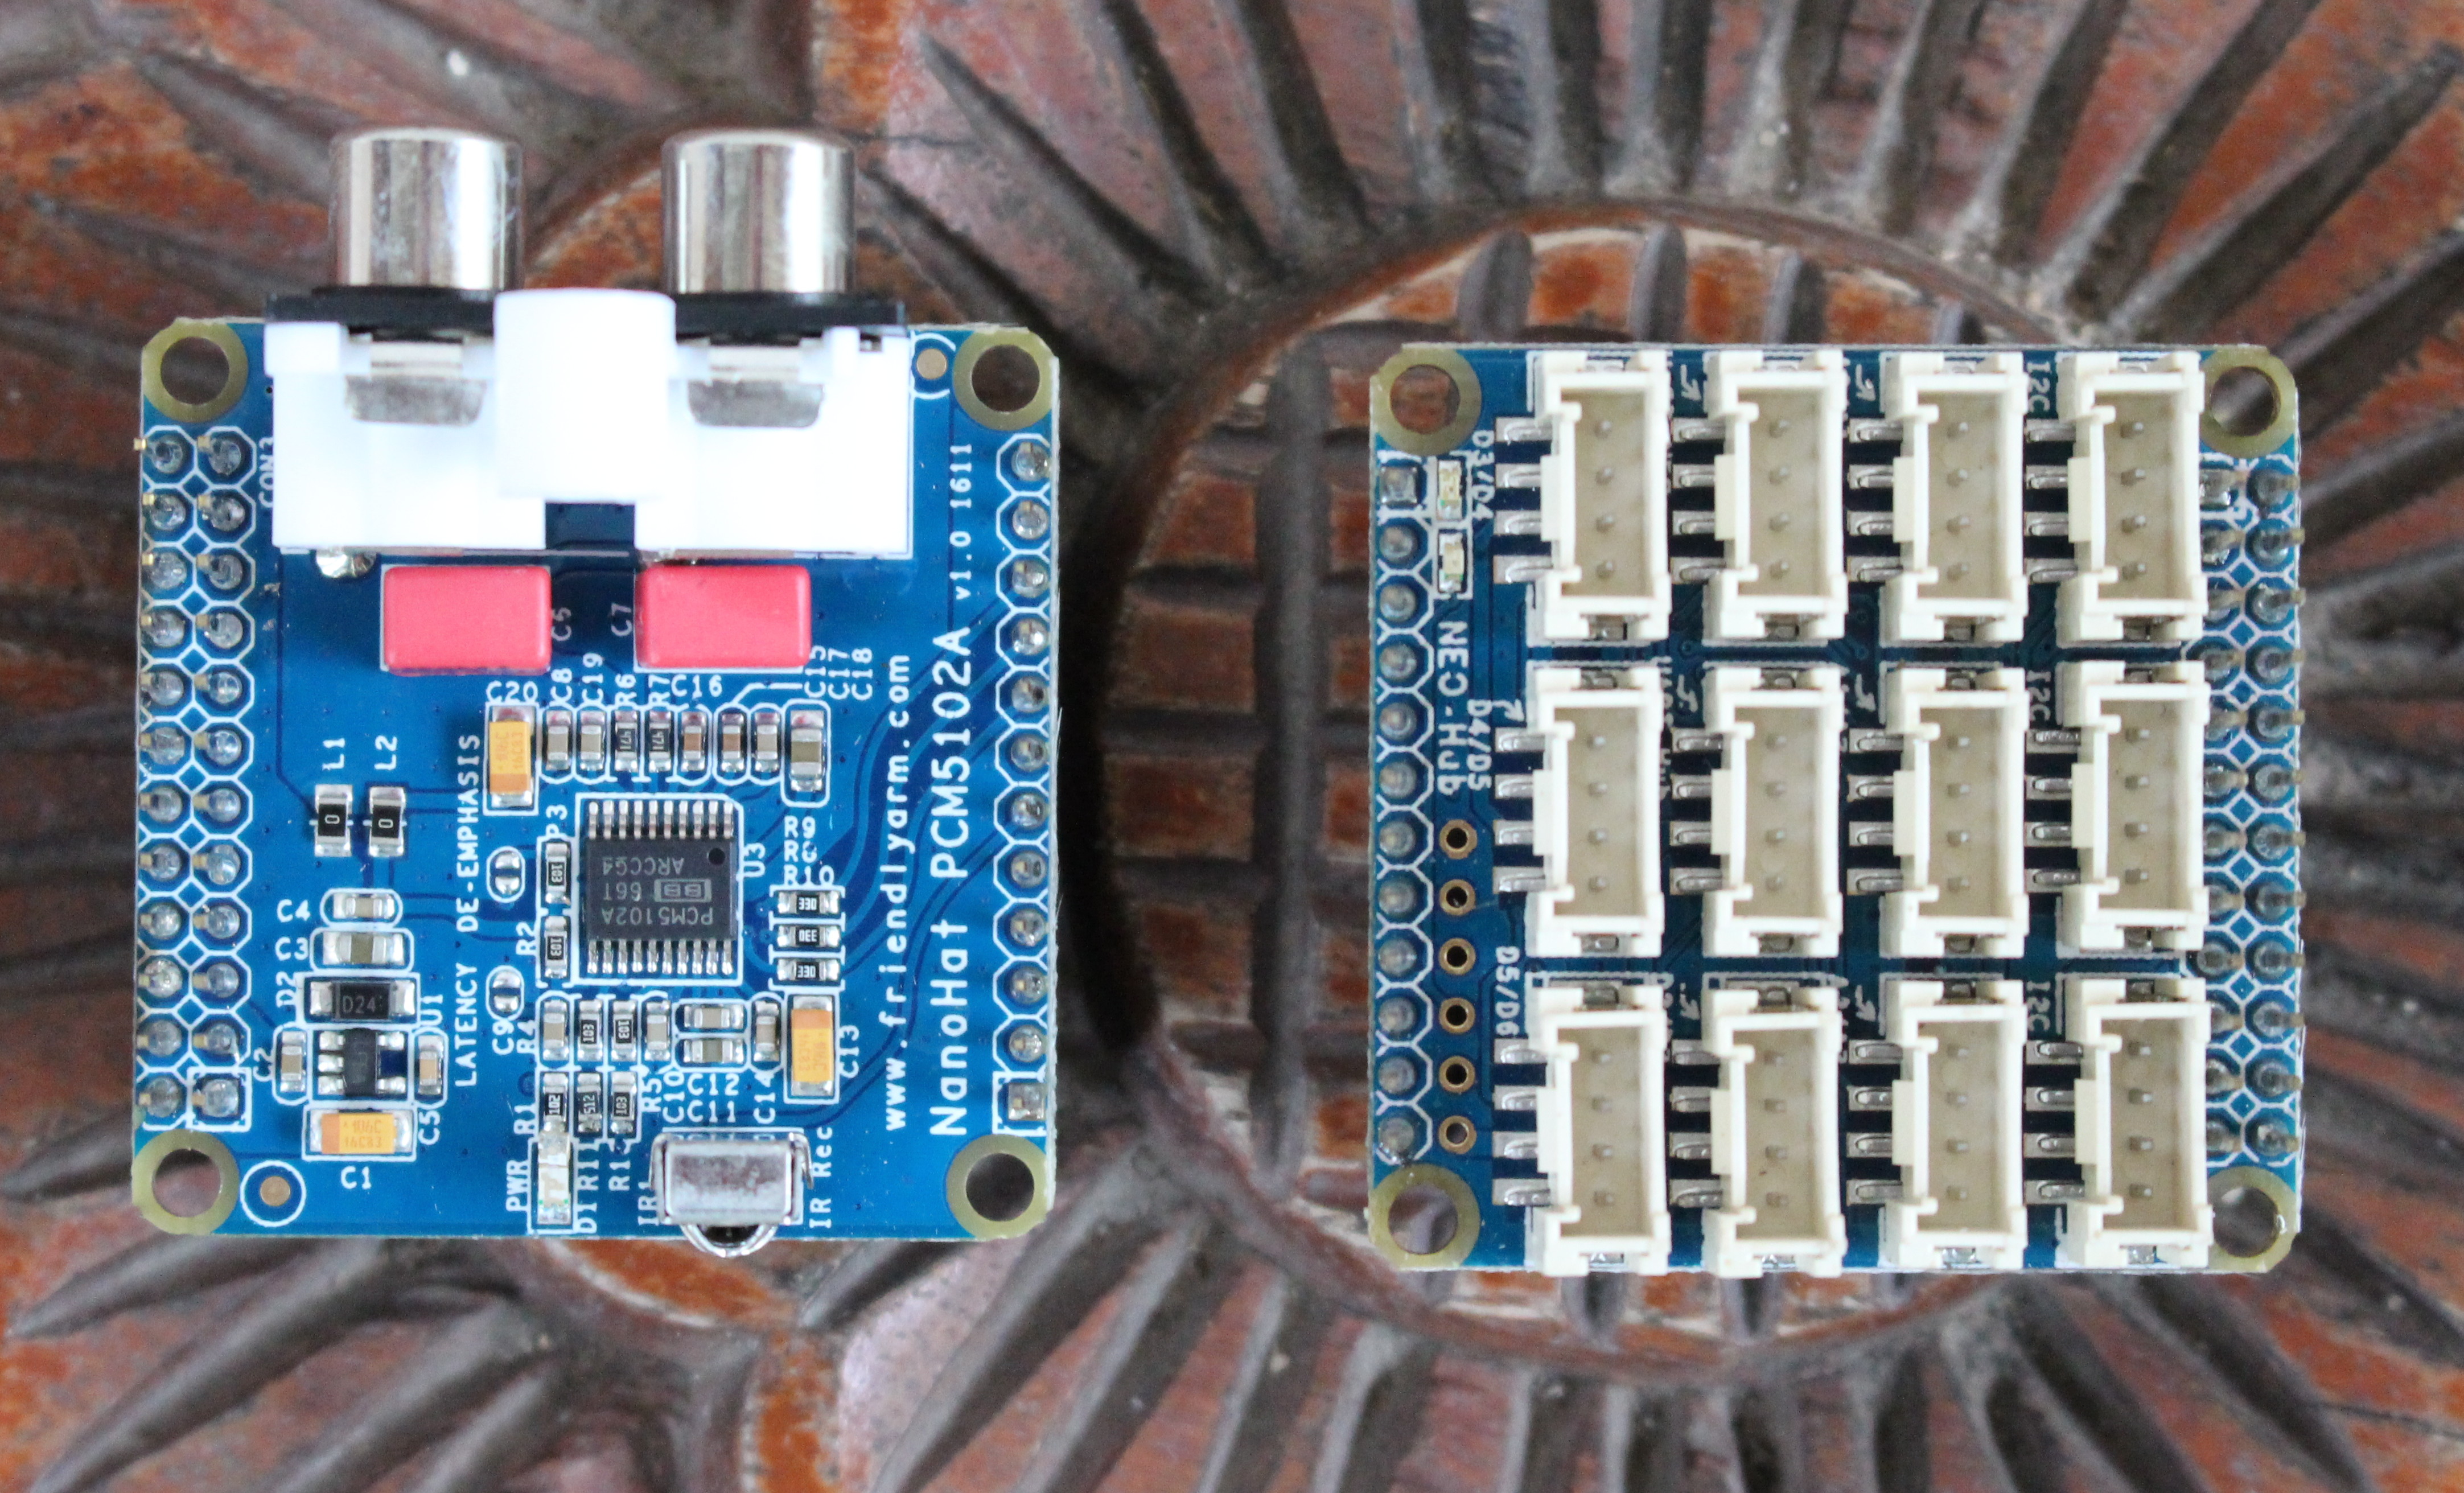
NEO Hub also includes an unpopulated SPI header.
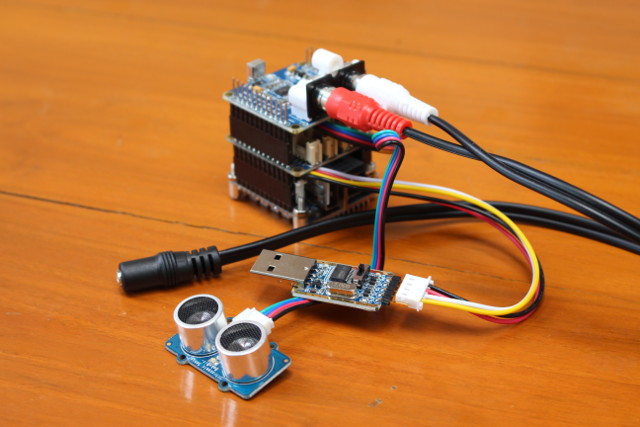
The NanoHats sit on top of NEO (2) board, and you can still connect the UART to TTL debug board if you need to access the serial console. NanoHat PCM5102A also comes with 2x RCA to 3.5mm female jack to connect headphones or speakers.
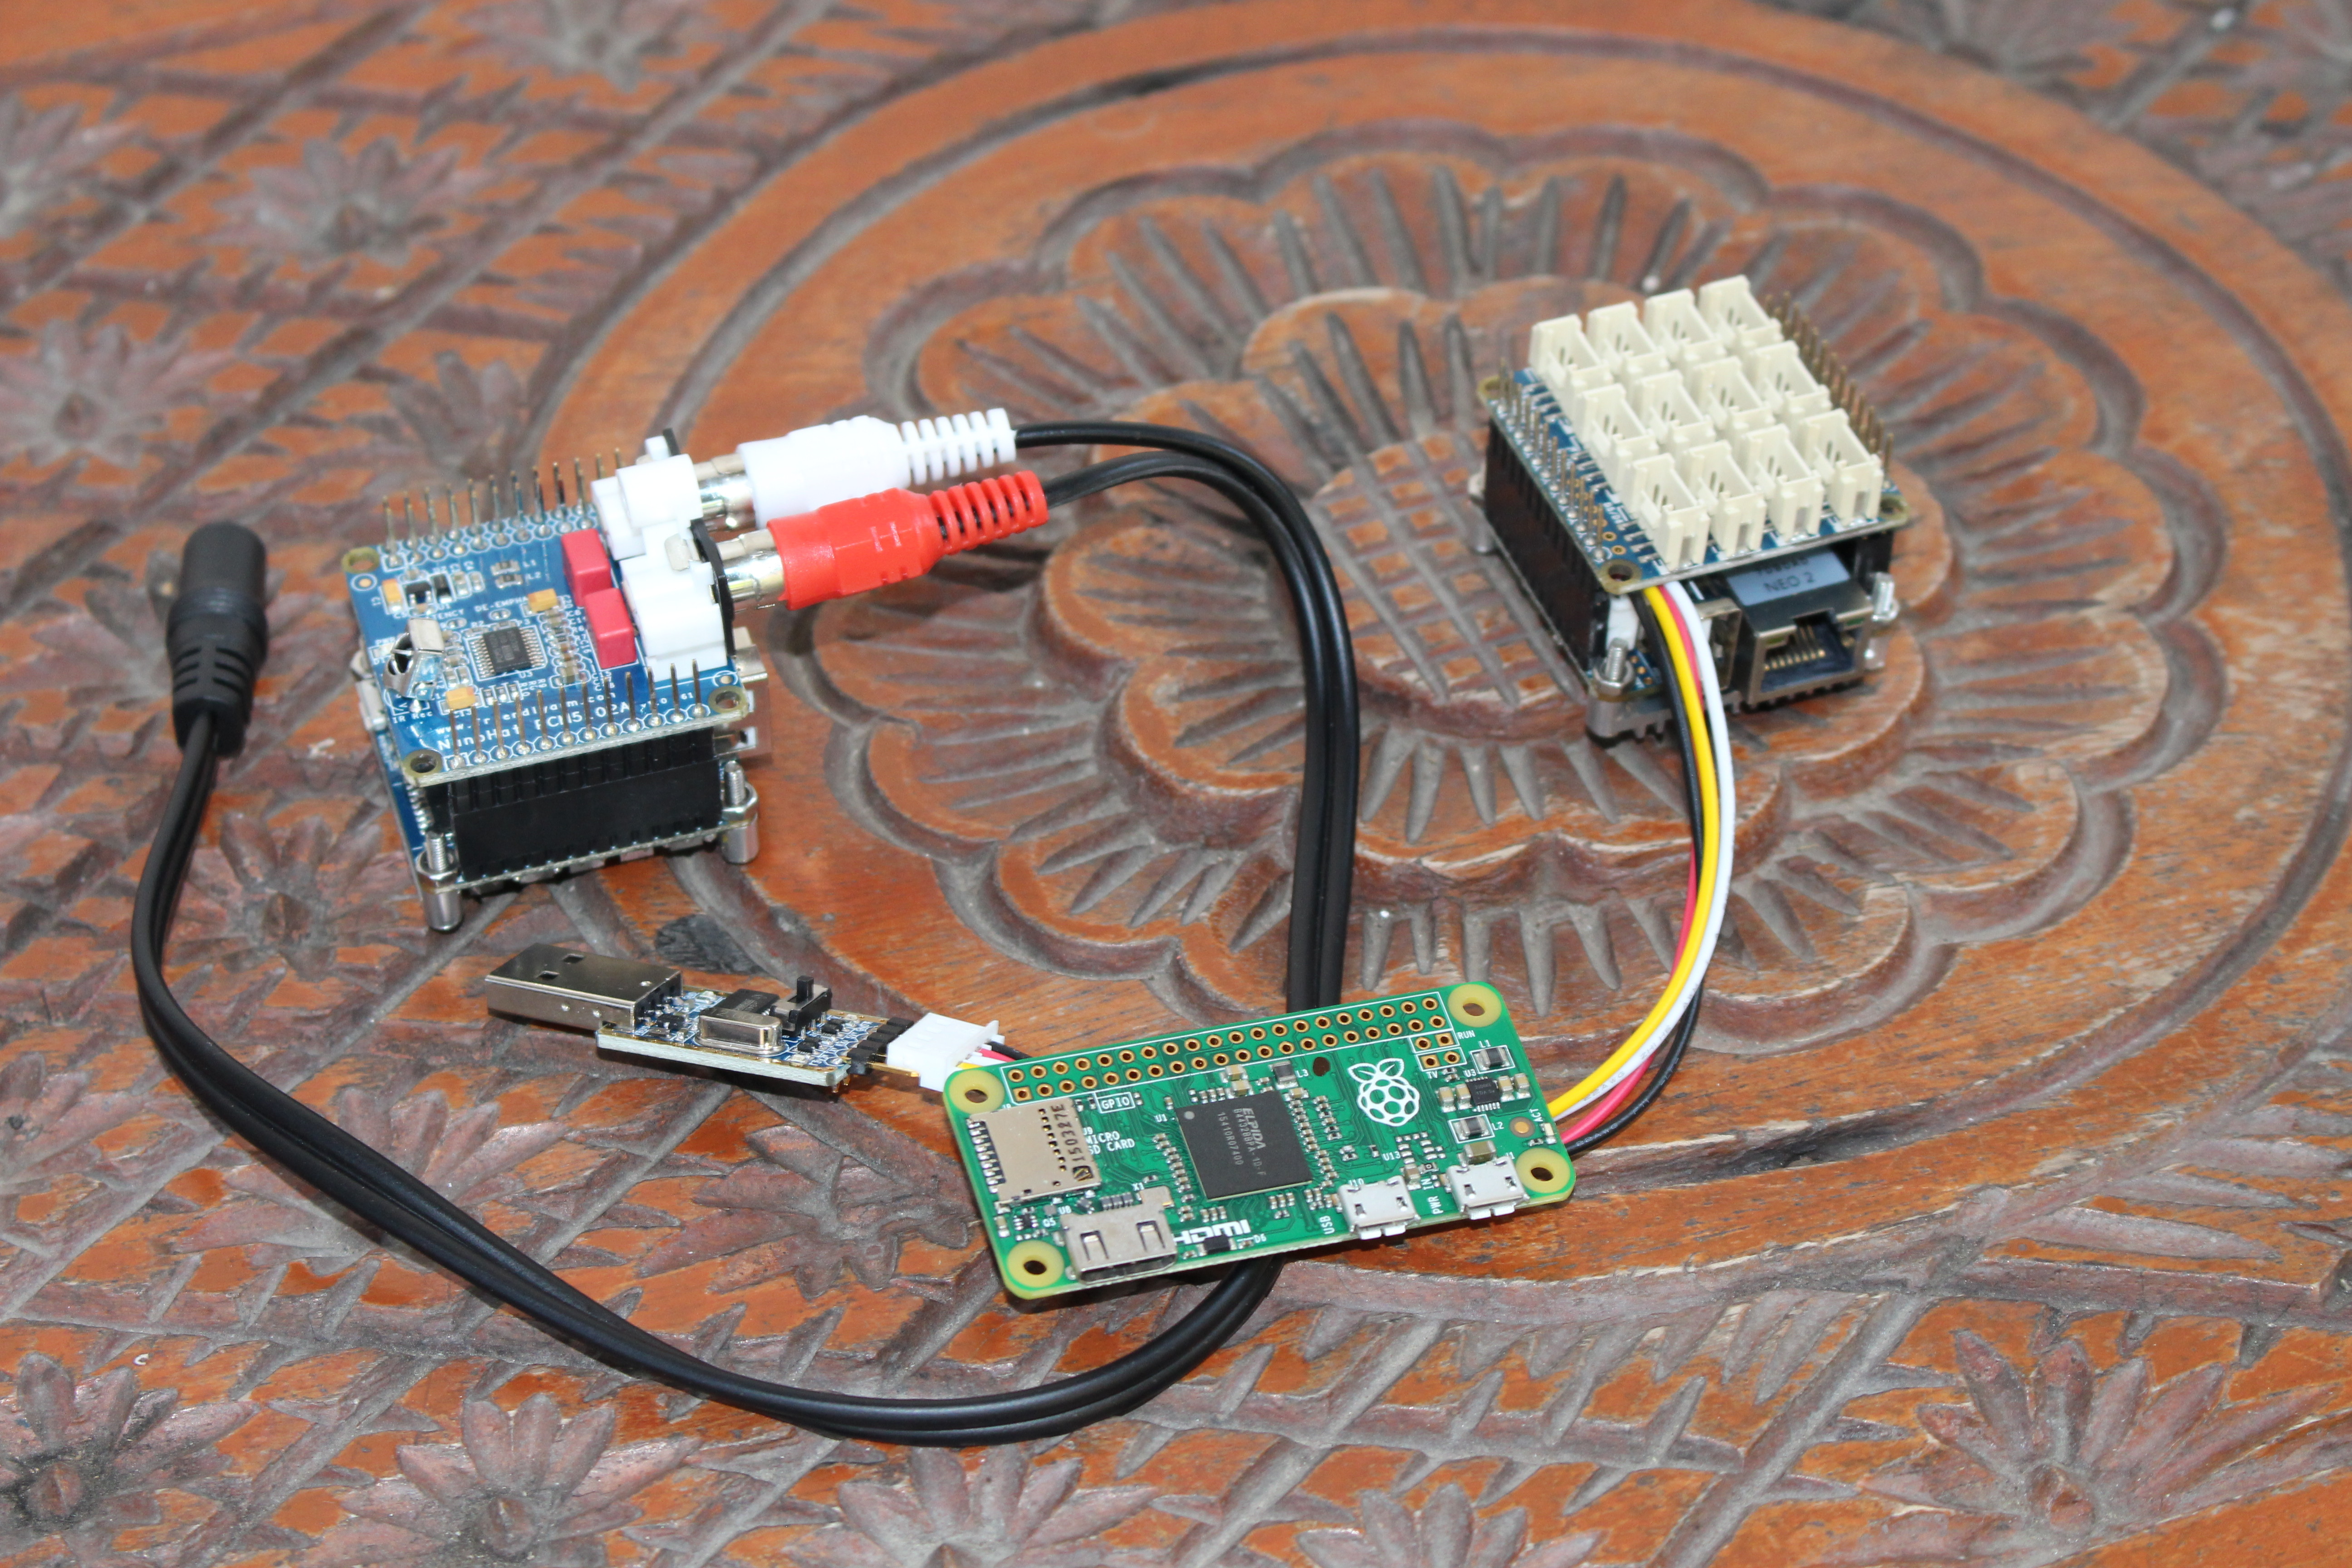
Since NanoHats includes male headers, it’s also possible to stack them.
In some ways, NanoPi NEO (2) and NanoHAT are the more powerful equivalent of Wemos D1 Mini and shields based on ESP8266, and I really like the design of both solutions.
If you already own some Seeed Studio grove modules, you just need the NEO Hub, but Bakebit Starter Kit appears to be a nice way to expereriment with all sorts of sensors, LEDs, and servo.
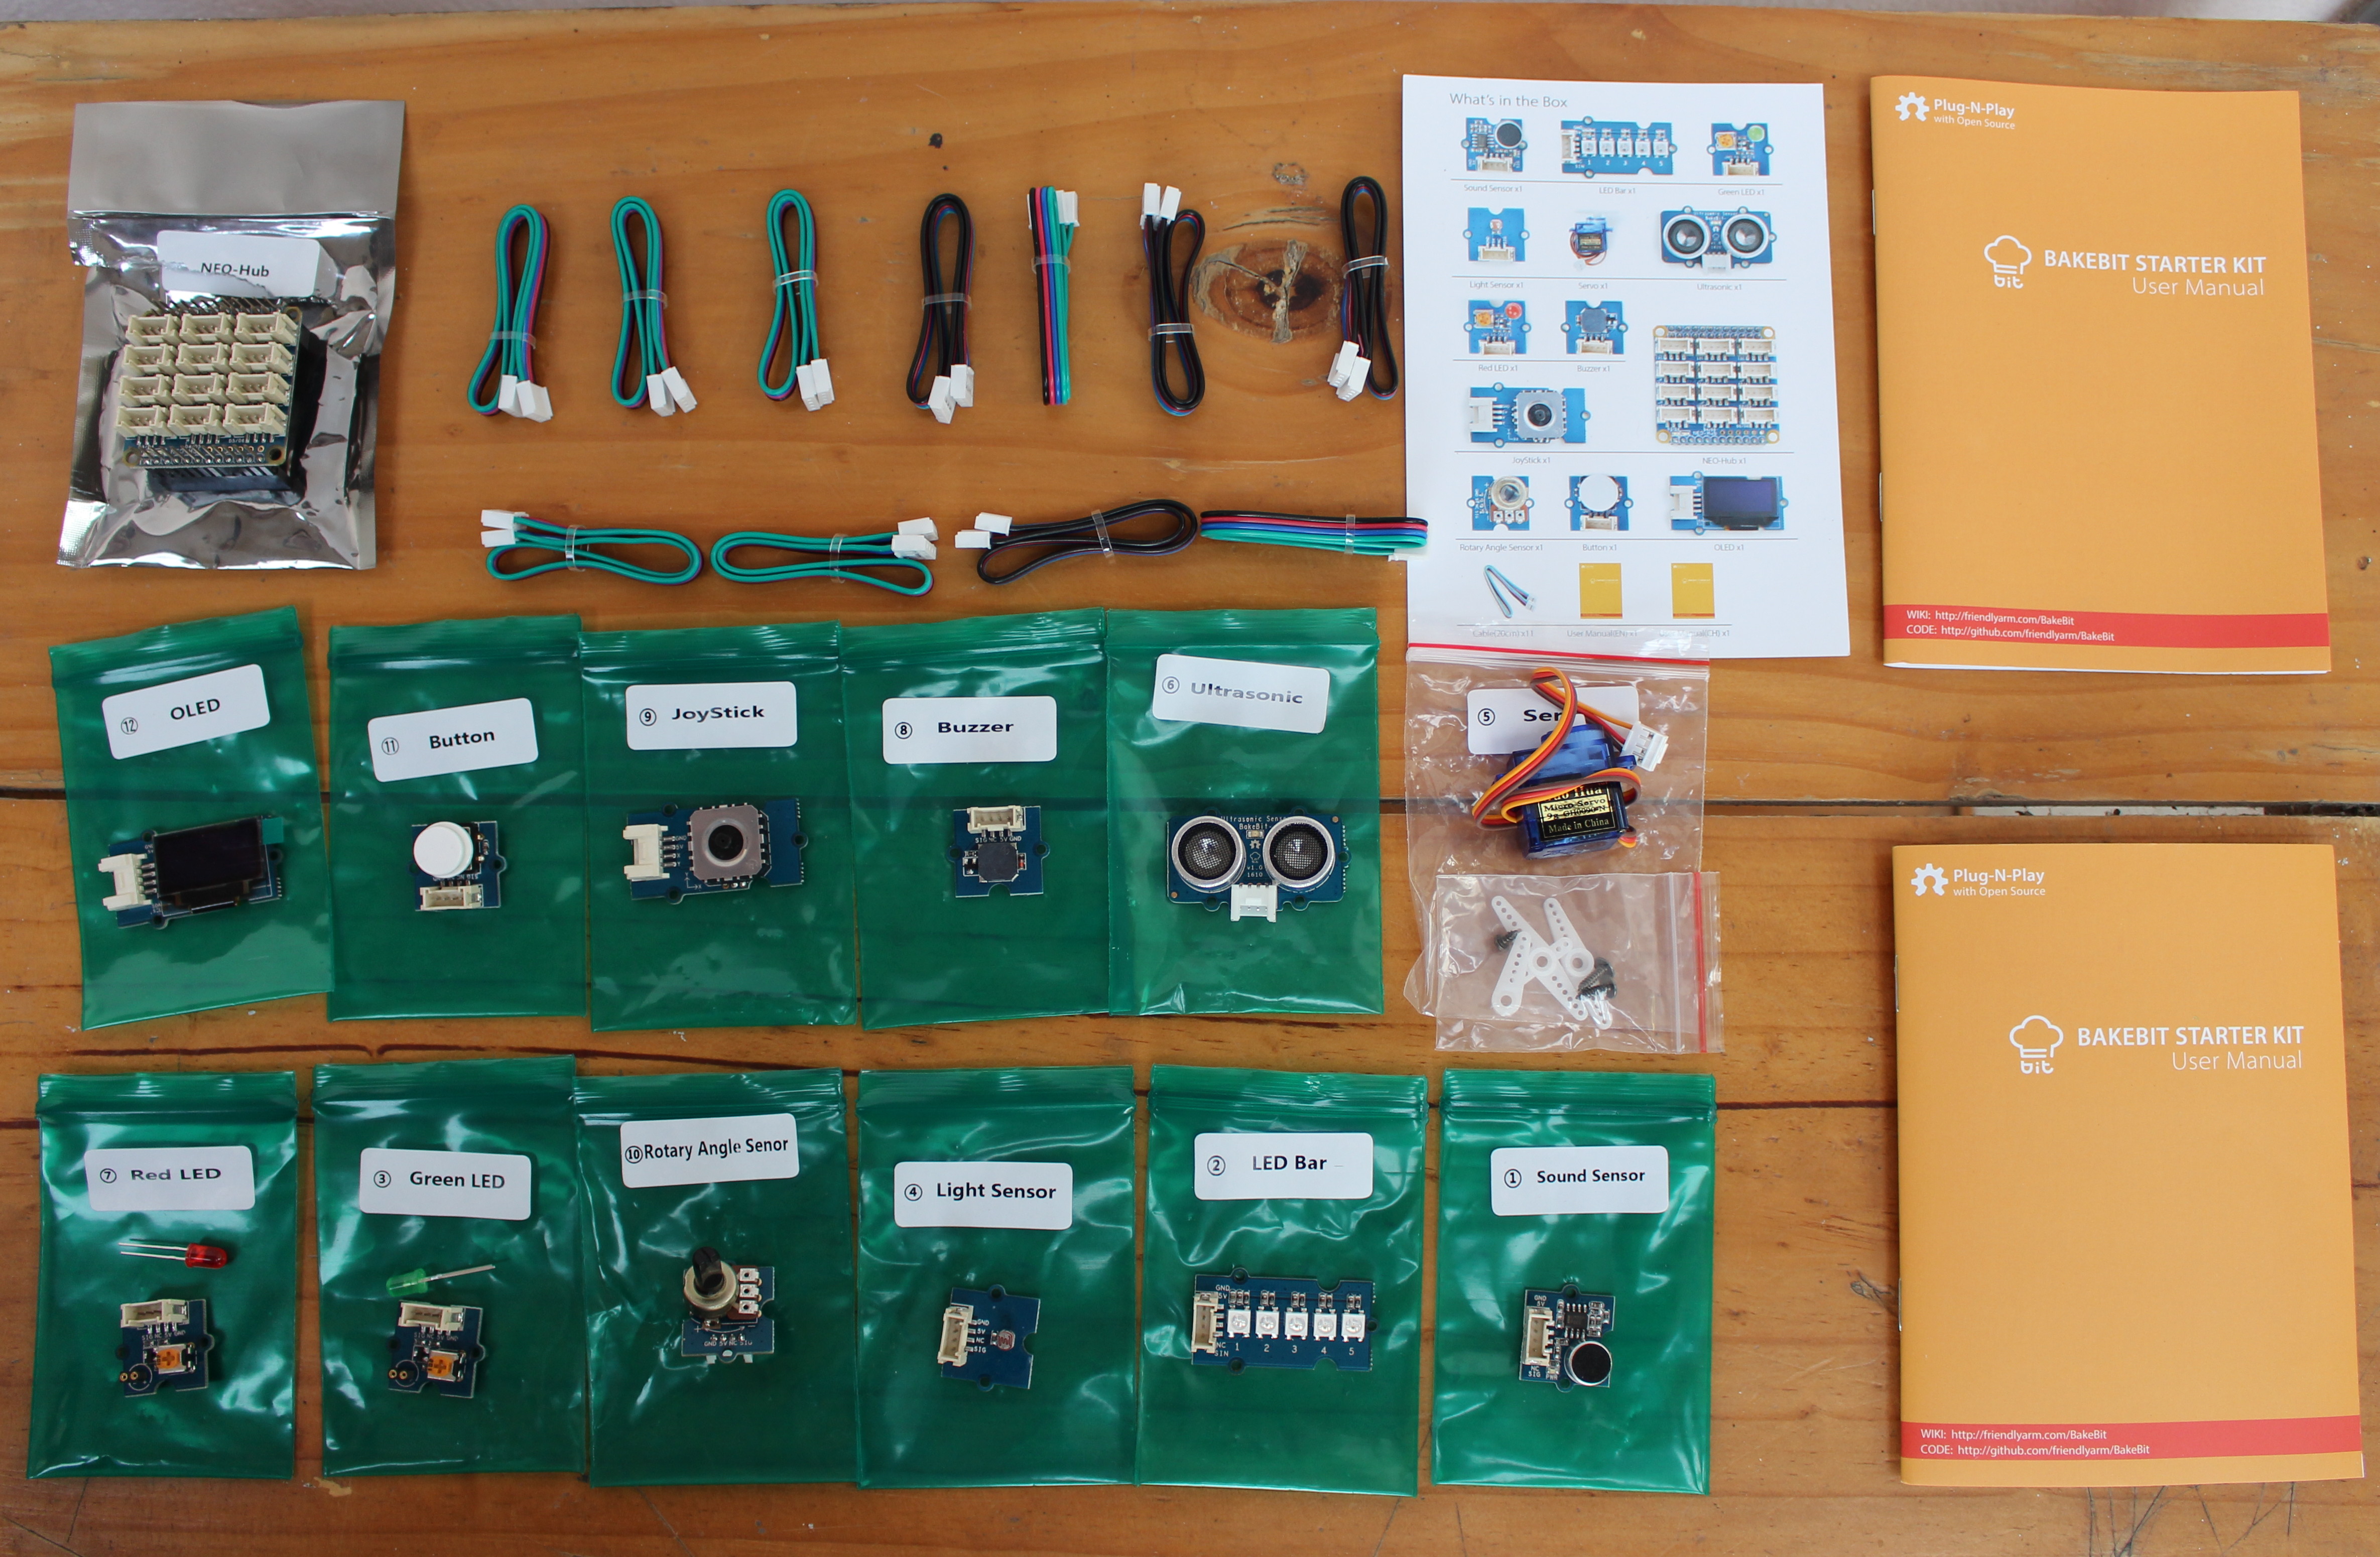
There are twelve modules in total: 2 LED modules, an LED bar, on OLED display, a button, a joystick, a buzzer, an ultrasonic sensor, a servo, a potentiometer, a light sensor, and a sound sensors. The kit includes two detailed user manuals: one in good English, one in Chinese.
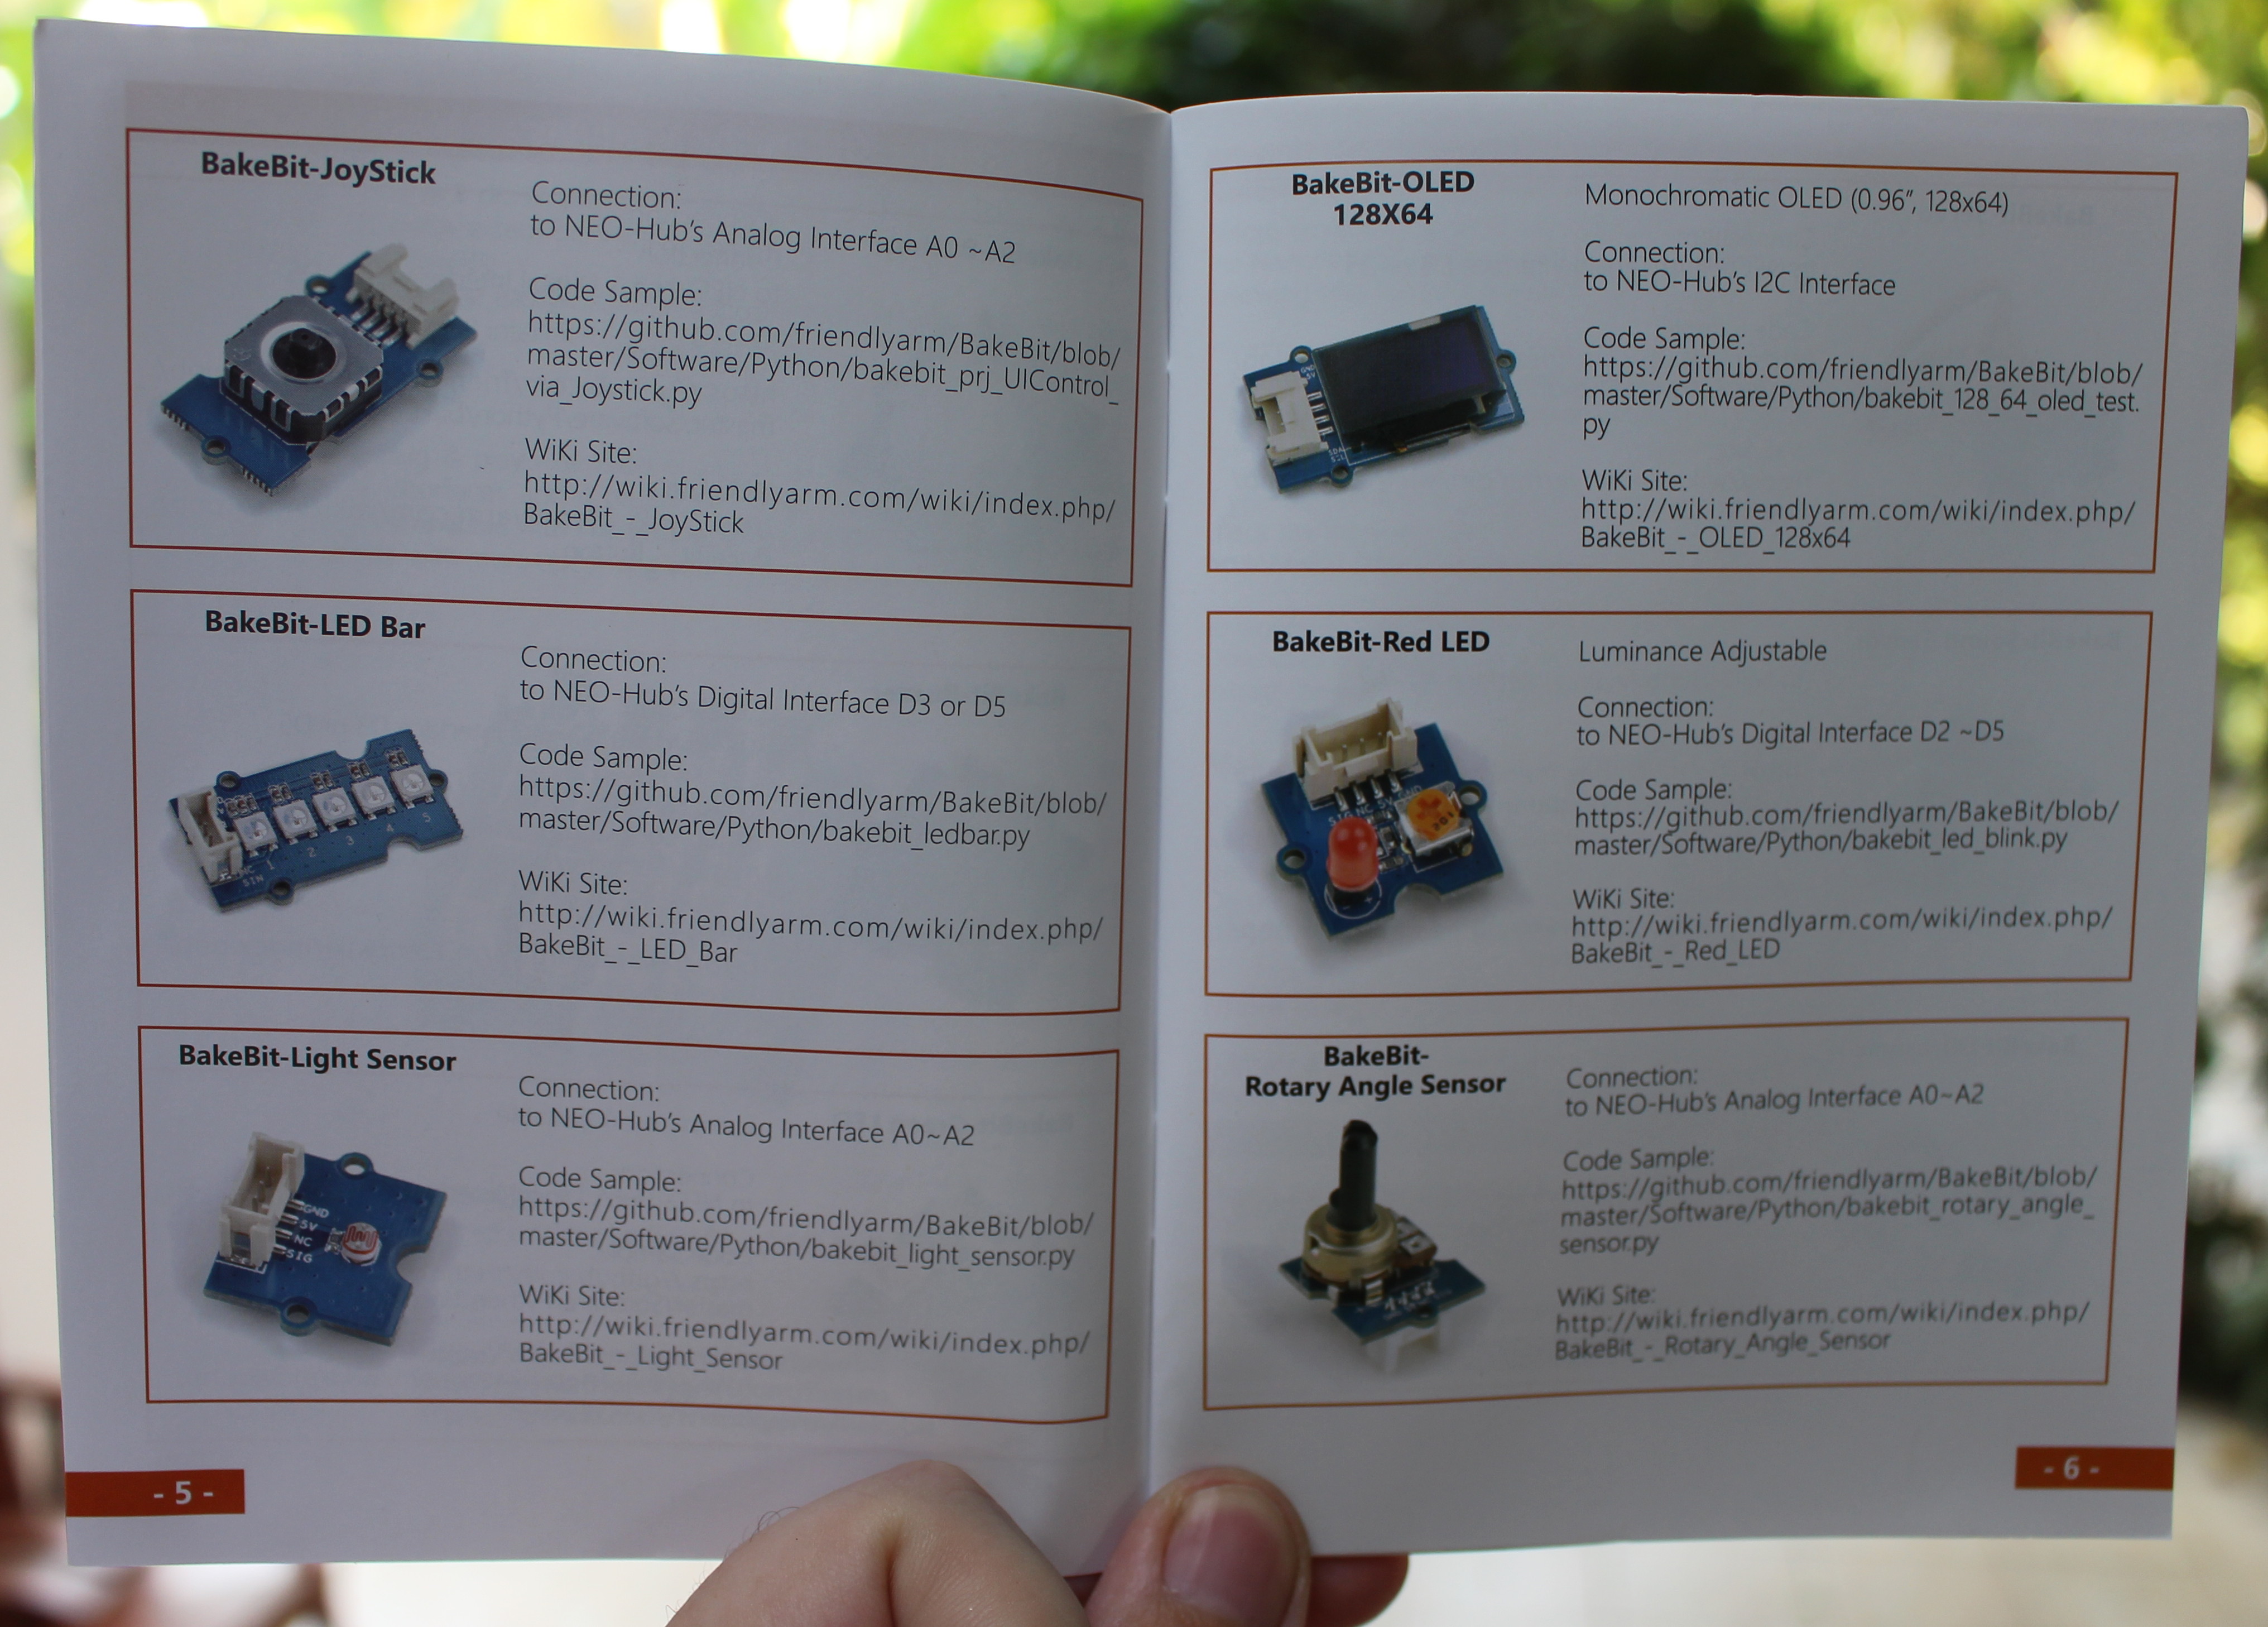
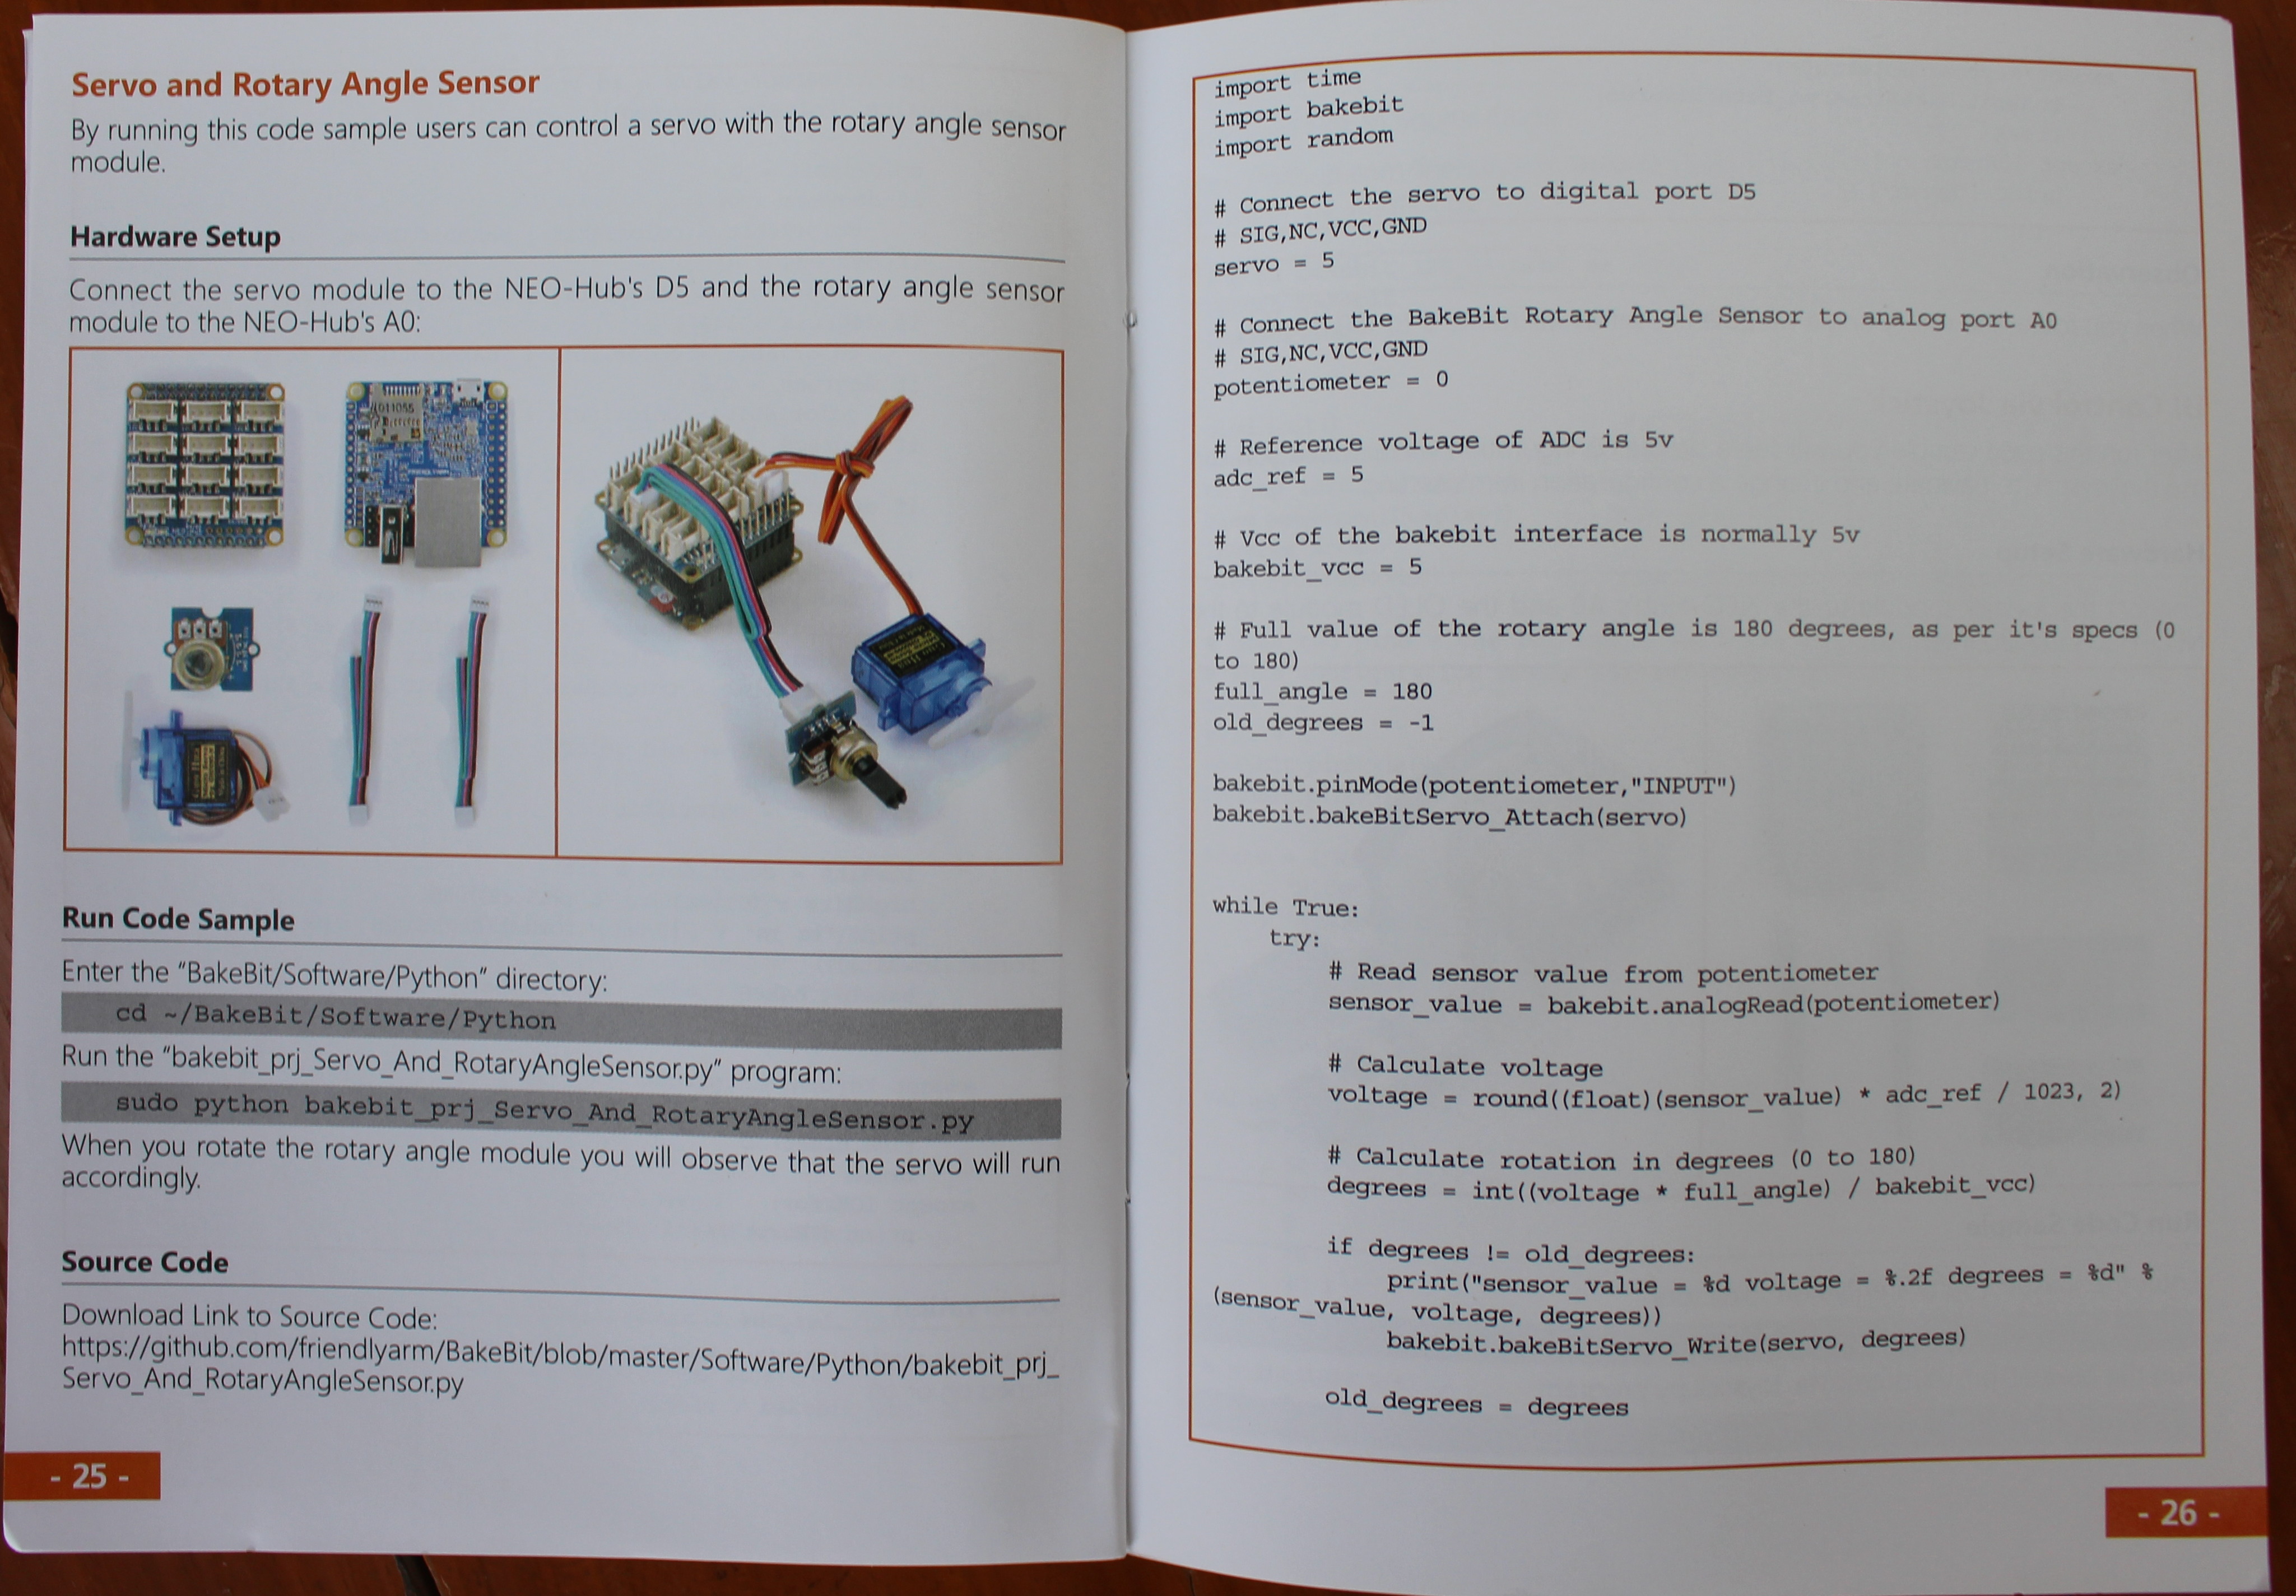
The first part explains the features and interface for each module with a Wiki link, and latter on you have some easy projects with source code leveraging the NEO hub and some of the modules.
You can also access the documentation online.
FriendlyELEC boards may be slightly more expensive than Shenzhen Xunlong’s Orange Pi boards, but documentation appears to be clearly a step or two ahead, and they have an ecosystem of modules that’s currently lacking on Orange Pi boards.
Some price info about the kit I’ve received:
- NanoPi Neo 2 board – $14.99
- Heatsink set – $2.97
- NanoHat PCM5102A – $9.99
- NEO Hub – $12.99 (Not needed if you buy Bakebit Starter Kit)
- BakeBit Starter Kit – $29.99
You’ll need to add shipping, but it’s normally only a few dollars extra for registered airmail. You’ll find additional accessories by scrolling down on NanoPi Neo 2 page on FriendlyARM store. The next step will be to install an operating system, which will be FriendlyELEC’s Ubuntu Core + Qt image, or Armbian nightly build, in order to do some basic tests and run benchmarks like I did for NanoPi NEO, and following up on that I plan to write an extra post reporting on my experience playing with NanoHat PCM5102A and Bakebit Starter Kit.
Continue reading:

Jean-Luc started CNX Software in 2010 as a part-time endeavor, before quitting his job as a software engineering manager, and starting to write daily news, and reviews full time later in 2011.
Support CNX Software! Donate via cryptocurrencies, become a Patron on Patreon, or purchase goods on Amazon or Aliexpress


