
This is the fourth part of a review about Xtream Codes IPTV Panel, software to become your own content provider, and manage streams, clients, and resellers. The first three parts:
- Review of Xtream-Codes IPTV Panel Professional Edition – Part 1: Introduction, Initial Setup, Adding Streams…
- Xtream Codes IPTV Panel Review – Part 2: Movie Data Editing, Security, Resellers, Users and Pricing Management
- Xtream-Codes IPTV Panel Review – Part 3: Updates and New Features for Version 2.4.2
Main Server Change – Part 1: New Server
Changing your Main Server could bring you troubles, if you do not know what you are doing. Many different reasons to change the Main server such as crashes, new one. making a Load Balancer to be a Main Server…
Remember, it’s all about the existing backup, and you’ll restore your backup later, after successfully changing the Main Server. That is not difficult and everybody can do it. But if you install your backup with your former configurations-Servers etc, it will need some corrections after the backup install is finish, and for example all your Clients, Servers ( and your Old Main Server) will be in again after you install your backup.
I’ll try to explain what that’s all about and show different examples.
- Changing the Main Server sounds and looks pretty easy, piece of cake, right?
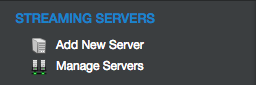
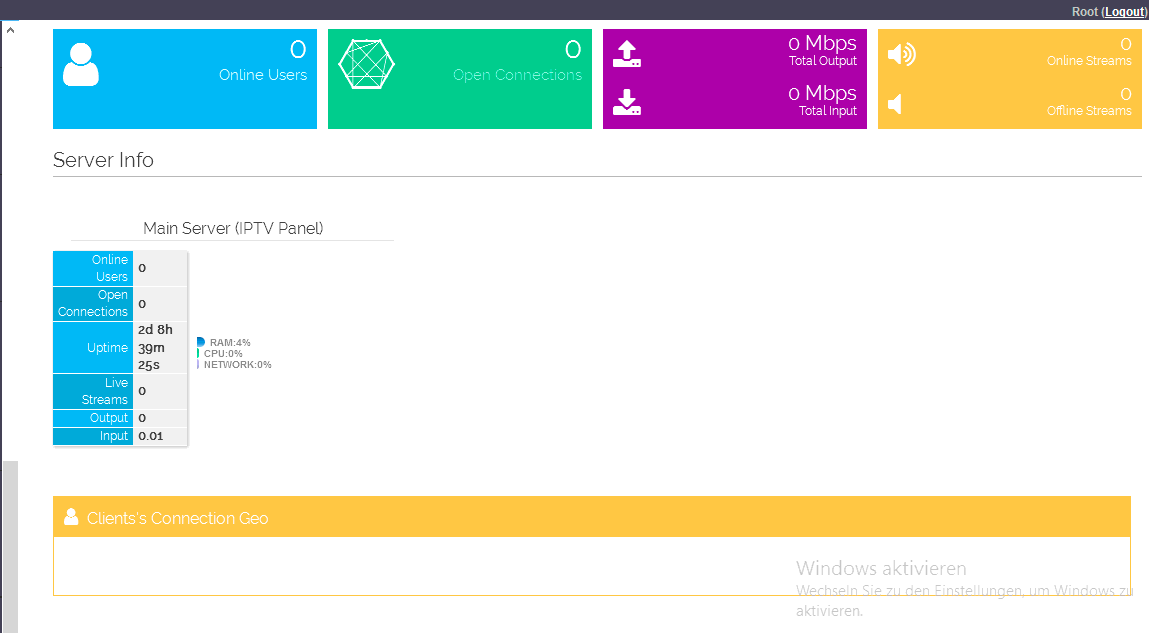
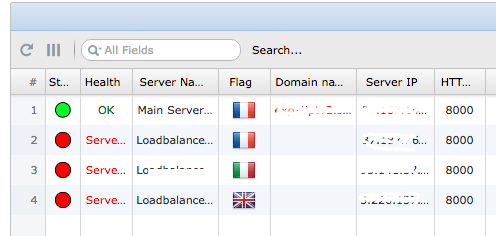
But let me tell you, it’s not! Be absolutely sure about what you are doing before. We start with “Manage Server” left side in the Panel.
 Then you scroll down to the end and you’ll see this:

Warning: Make sure that you took all necessary steps before you press this button, all will be gone in a flash… BEFORE YOU Press MAIN SERVER CHANGE
Step 1: Do a Manuel Backup; this is still possible, since Xtream-Codes thought it would be a good idea to take the manually install Backup-Button off the road, for later installing your FULL BACKUP again by yourself!. NOT A GOOD IDEA, Xtream-Codes!
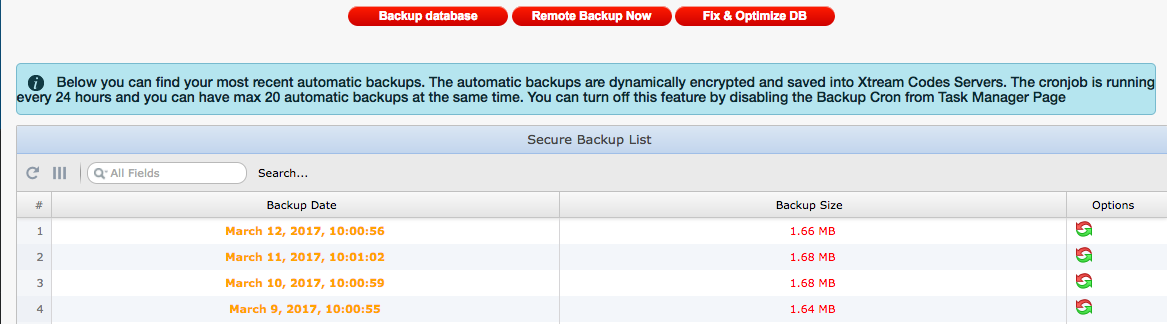
Step 2: Do a fresh automated backup on Xtream-Servers.
- Database Manager—Remote Backup Now
 Step 3: Take your time to think about your scenario! What do you want to do? Changing to a brand new Main? Formatted the old one only? Making an Existing Load balancer Main now? You see? Different procedures. It needs different preparing on this step of the game.
You have to think about the existing BACKUP, with all your clients and streams in, right? Or you want to loose them? I guess not. Again, think about, that the backup and later installing of your backup contains all your streams, clients etc…but also the old Server configurations.
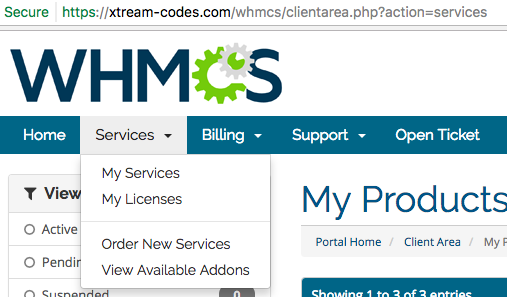
Have also your ROOT ACCESS from the Panel at hand, because after pressing the CHANGE-Main Button…it happened a few times, that I could not login anymore in the CMS without root user/pass. You can find this Root USER/PASS in your Client Area WHMCS with Xtream-Codes,
Click My SERVICES—-
 Press this then after:
![]() And you see all what you need after:
And you see all what you need after:
![]() We now change the Main to a NEW ONE:
We now change the Main to a NEW ONE:
After pressing the Button

A warning pops up, asking, “Are you Sure”?
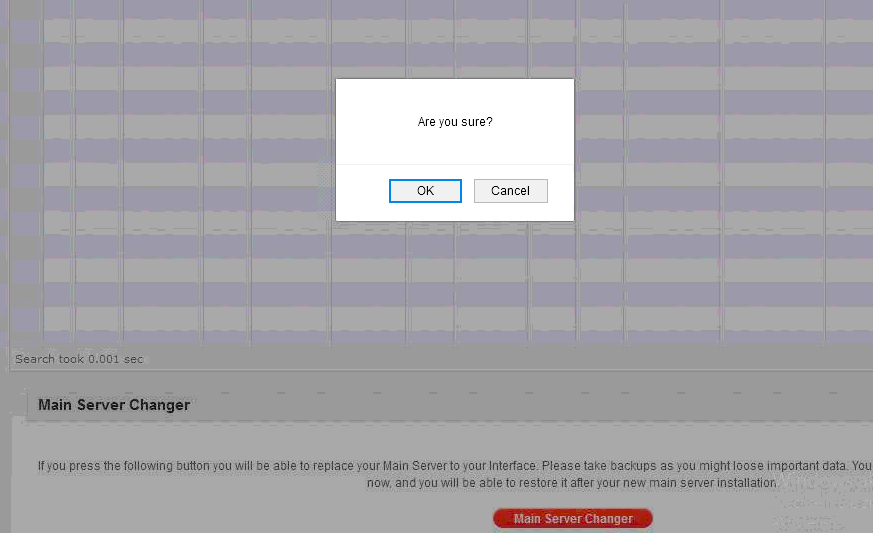
We press OK! Seat belt on, and then this should come (In former versions I was simply getting kicked out the CMS, and have to login with Root user/pass only, Admins could not. This seemed to be fixed to a friendlier follow up now…)
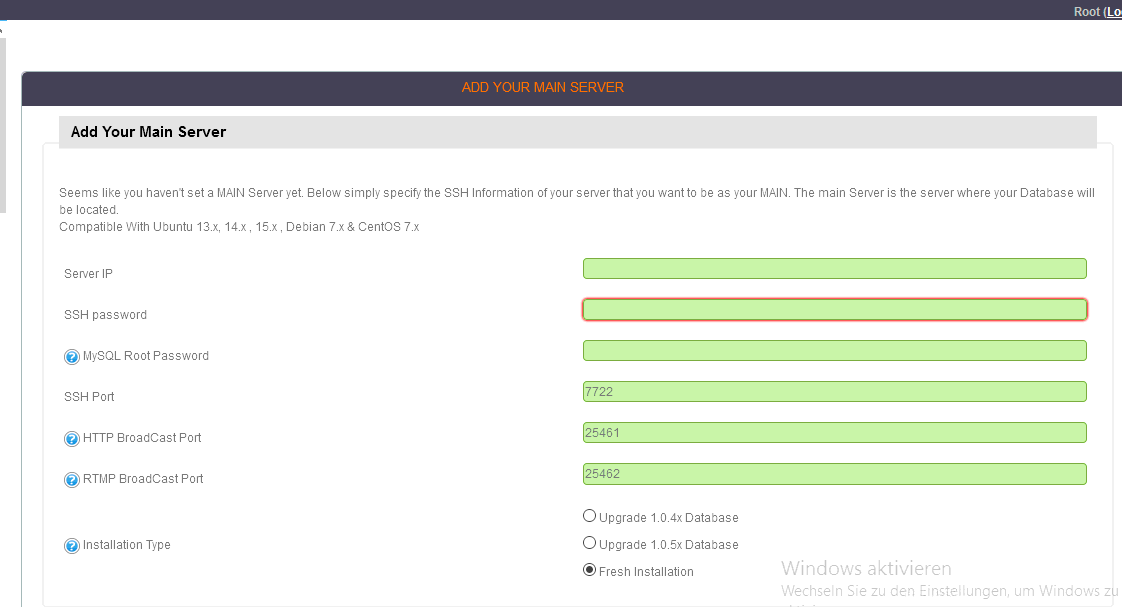
Now you put your NEW MAIN’s IP and SSH ROOT Password in, also your MYSQL ROOT Password, if any. If you are not sure, then in most cases simply put your ROOT SSH in again. Also, check the SSH Port, standard is Port 22, except if you changed it before. Don’t care about the rest now; you can change it later easily. Your New MAIN SERVER will install now, if all necessary data’s was right. And after a couple of Minutes, your New Main is installed
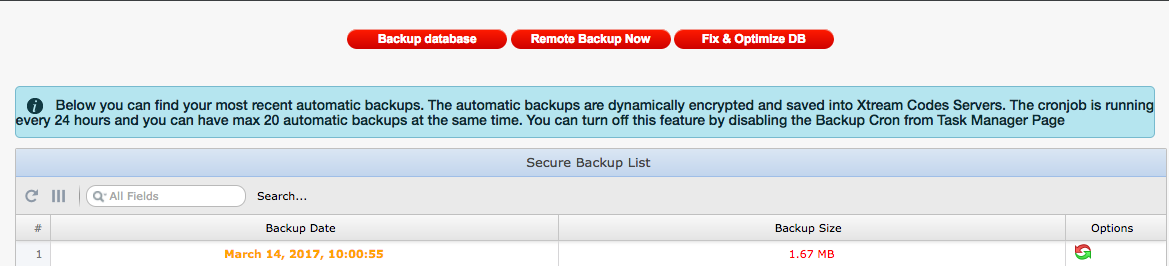
After Installation of your NEW Main is finished, you want to restore the backup. Like I said, Xtream-Codes gives you right now (Sure that they will bring it up again) only the choice to install a Remote Backup from Xtream Codes Servers. To do this, you do as follows: Go DATABANK Manager and you see all your Remote Backups
Right click the curved red and green arrow (load Backup), and after you choose your Remote Backup, this shows up:
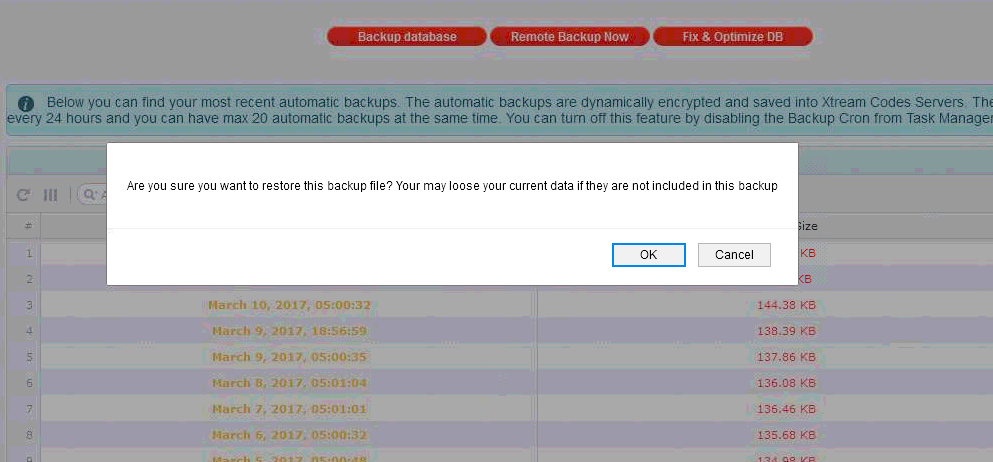
Press OK, and you see that Databank with all your Values is restored.

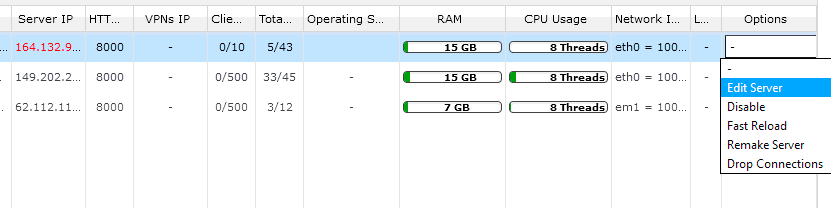
NEXT STEP, like I mentioned already above: after your Backup is installed, you will see, that your former OLD MAIN SERVER seems to be installed again! YOU HAVE TO GO ‘EDIT-SERVER…EDIT MAIN… and CORRECT IP AND SSH! This will do it then!.
And after successful installing the new Main (if he is a brand new one) , and installing the Backup then after, you Main will show the former IP of your Main, cause he was still in the installed backup in!
No problem at all, simply go edit Main-Server, insert again IP and SSH Root Password, and right SSH port, commonly Port 22, if you don’t changed it in your New Main.
It also appears that your Load Balancers need a FULL REMAKE
 PRESS FULL REMAKE ALL LB’s
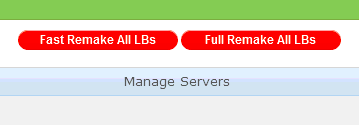 AFTER PRESS FULL REMAKE ALL LOAD BALANCERS, HERE WE GO
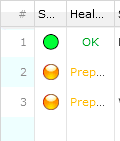 It is possible, that you have to have to repeat this action with remaking all Load balancers. But be assured, it will work.
This was Part 1 of CHANGING the MAIN SERVER. I guess you know, what follows later, the little bit more complicated procedure of Changing The Main under different scenarios:
- We make an existing Load balancer to a NEW MAIN
- The preparation to do this
Changing Main Server – Part 2: Convert Load Balancer to Main Server
Scenario: We want a running Load balancer as a new Main Server! The right now “running” Main we want to send in retirement, right? This example requires that you have a few Load Balancers up and running. In case you have only 2 dervers in total, it’s not so complicated at all. Like I said above, each scenario is different. There are Admins with 20 or more Load balancers, and there are small ones, with 2 or 3 in total.
Do exactly Step by Step as follows, no twisting, no turning, no upside down please.. 🙂
Step 1: You go to TOOLS left Side, and transfer temporarily all streams from the future Main Server to another Load balancer of your choice! That’s how I have done it, not sure it will work later if you go another way, letting the streams on the future Main (the Server is a LB right now), but we have to delete this Server later out of the Panel configuration to make him Main! Reason: After we push the Remote-Backup back in, he will appear as a Load balancer again, and we can’t make him a Main Server without deleting him in the Panel.
Go exactly this way right from the start! NO REMOTE BACKUP BEFORE!! (Still hope that Xtream-Codes will implement the old feature back in soon, because not many can handle phpmyadmin, to implement a databank backup by their own later, or they should put a “hint or kind of warning” in before, something like Remote Backup now? Just in case the Admin forget it! Remember also, that the cron job “Remote Backup” is only once each 24 hours, so better do this manually Remote Backup before.)

In general, a good idea in safety reason, the Remote Backup’s, it is a way more safe then before. Here we go now:
After you’ve transferred your Main Server’s streams to another server, check first, the Main is really empty, it will need sometimes 1 or 2 or more minutes, depending of the quantity of your transferred streams. Now we have an empty Main, it’s the one, we do not need anymore after.
We have also to transfer the streams from the Load balancer we want as a NEW MAIN, making him completely empty. No streams on it. We do the same with the Load balancer we want as Main now! We are transferring his streams to another Load balancer the same way we have done before with the Main who has to go.
Step 2:
We do a REMOTE BACKUP after we transferred all streams, and to be on the safe side, a manual Backup to your Computer as well. First you press BACKUP DATABASE (the Backup File will load down to your computer), and direct after, we press REMOTE BACKUP NOW (Backup is loaded into Xtream Codes Server).
Step 3:
We go MANAGE SERVER and at the bottom we see Main-Server-Change again:

Let’s summarize what we have done.
- We have the Main and the future MAIN now with no Streams on it
- We are still in the process to change our Main Server
- Backups are already made (we are with an empty Main Server and an empty Load balancer right now)
- We have all our necessary data’s, IP and SSH Root Pass from the Load Balancer we want to put as a New Main. Login data’s ROOT for our CMS, just in case…
After that, we go MANAGE SERVERS-EDIT SERVER-DELETE SERVER.
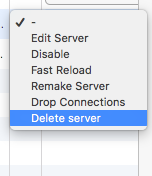
We delete the Load balancer we want as NEW MAIN. Now we can press the Button Main Server Change.

All necessary follow up’s standing already in Part 1 above!
We are ready to go!
- Just in case you forgot or out of whatever reason you prefer to do a manually “load” of your saved databank backup, it’s also possible with phpmyadmin later.
- In case you cannot do, open a ticket, XC is happy to help you out!
- Don’t forget, Xtream-Codes support is not open 24/7!
- And one of the most important last steps, after successfully installed the new Main, don’t forget to switch the old former MAIN OFF!
- Switch him off, or make a new install! and sure you have to sort out your streams later, balancing them again.
- In all other cases, like you have only 2 Servers, the procedure is similar and not complicated, cause of your limited streams, and clients. This example was written in case you got a few more Load Balancers running.
- Don’t hesitate to open a ticket in case you are in trouble, Xtream Codes will help you in any cases.
I hope this little How-To helps you guys a little.
Ray

Support CNX Software! Donate via cryptocurrencies, become a Patron on Patreon, or purchase goods on Amazon or Aliexpress


