
Leon ANAVI may be a full-time software engineer, but in his spare time he has started to develop open source hardware project with the help of others and by himself. Last year, I got hold of his RabbitMax Flex HAT for Raspberry Pi, and tested it with the provided LCD display, one temperature sensor, and a Raspberry Pi 2 board. The board also featured IR receiver & transmitter, and I tried to use it with my aircon remote control, but at the time I did not find a way to do it easily, and control my TV with LIRC instead. Leon has now made a simpler, smaller, and cheaper add-on board for Raspberry Pi Zero, and other Raspberry Pi boards with a 40-pin header, with 3x I2C headers, two IR transmitters, and one IR receiver. He sent me a sample of “ANAVI Infrared pHAT”, and after quickly describing the board, I’ll show how to I could control my air conditioner with a Raspberry Pi 2 board and his Infrared pHAT.
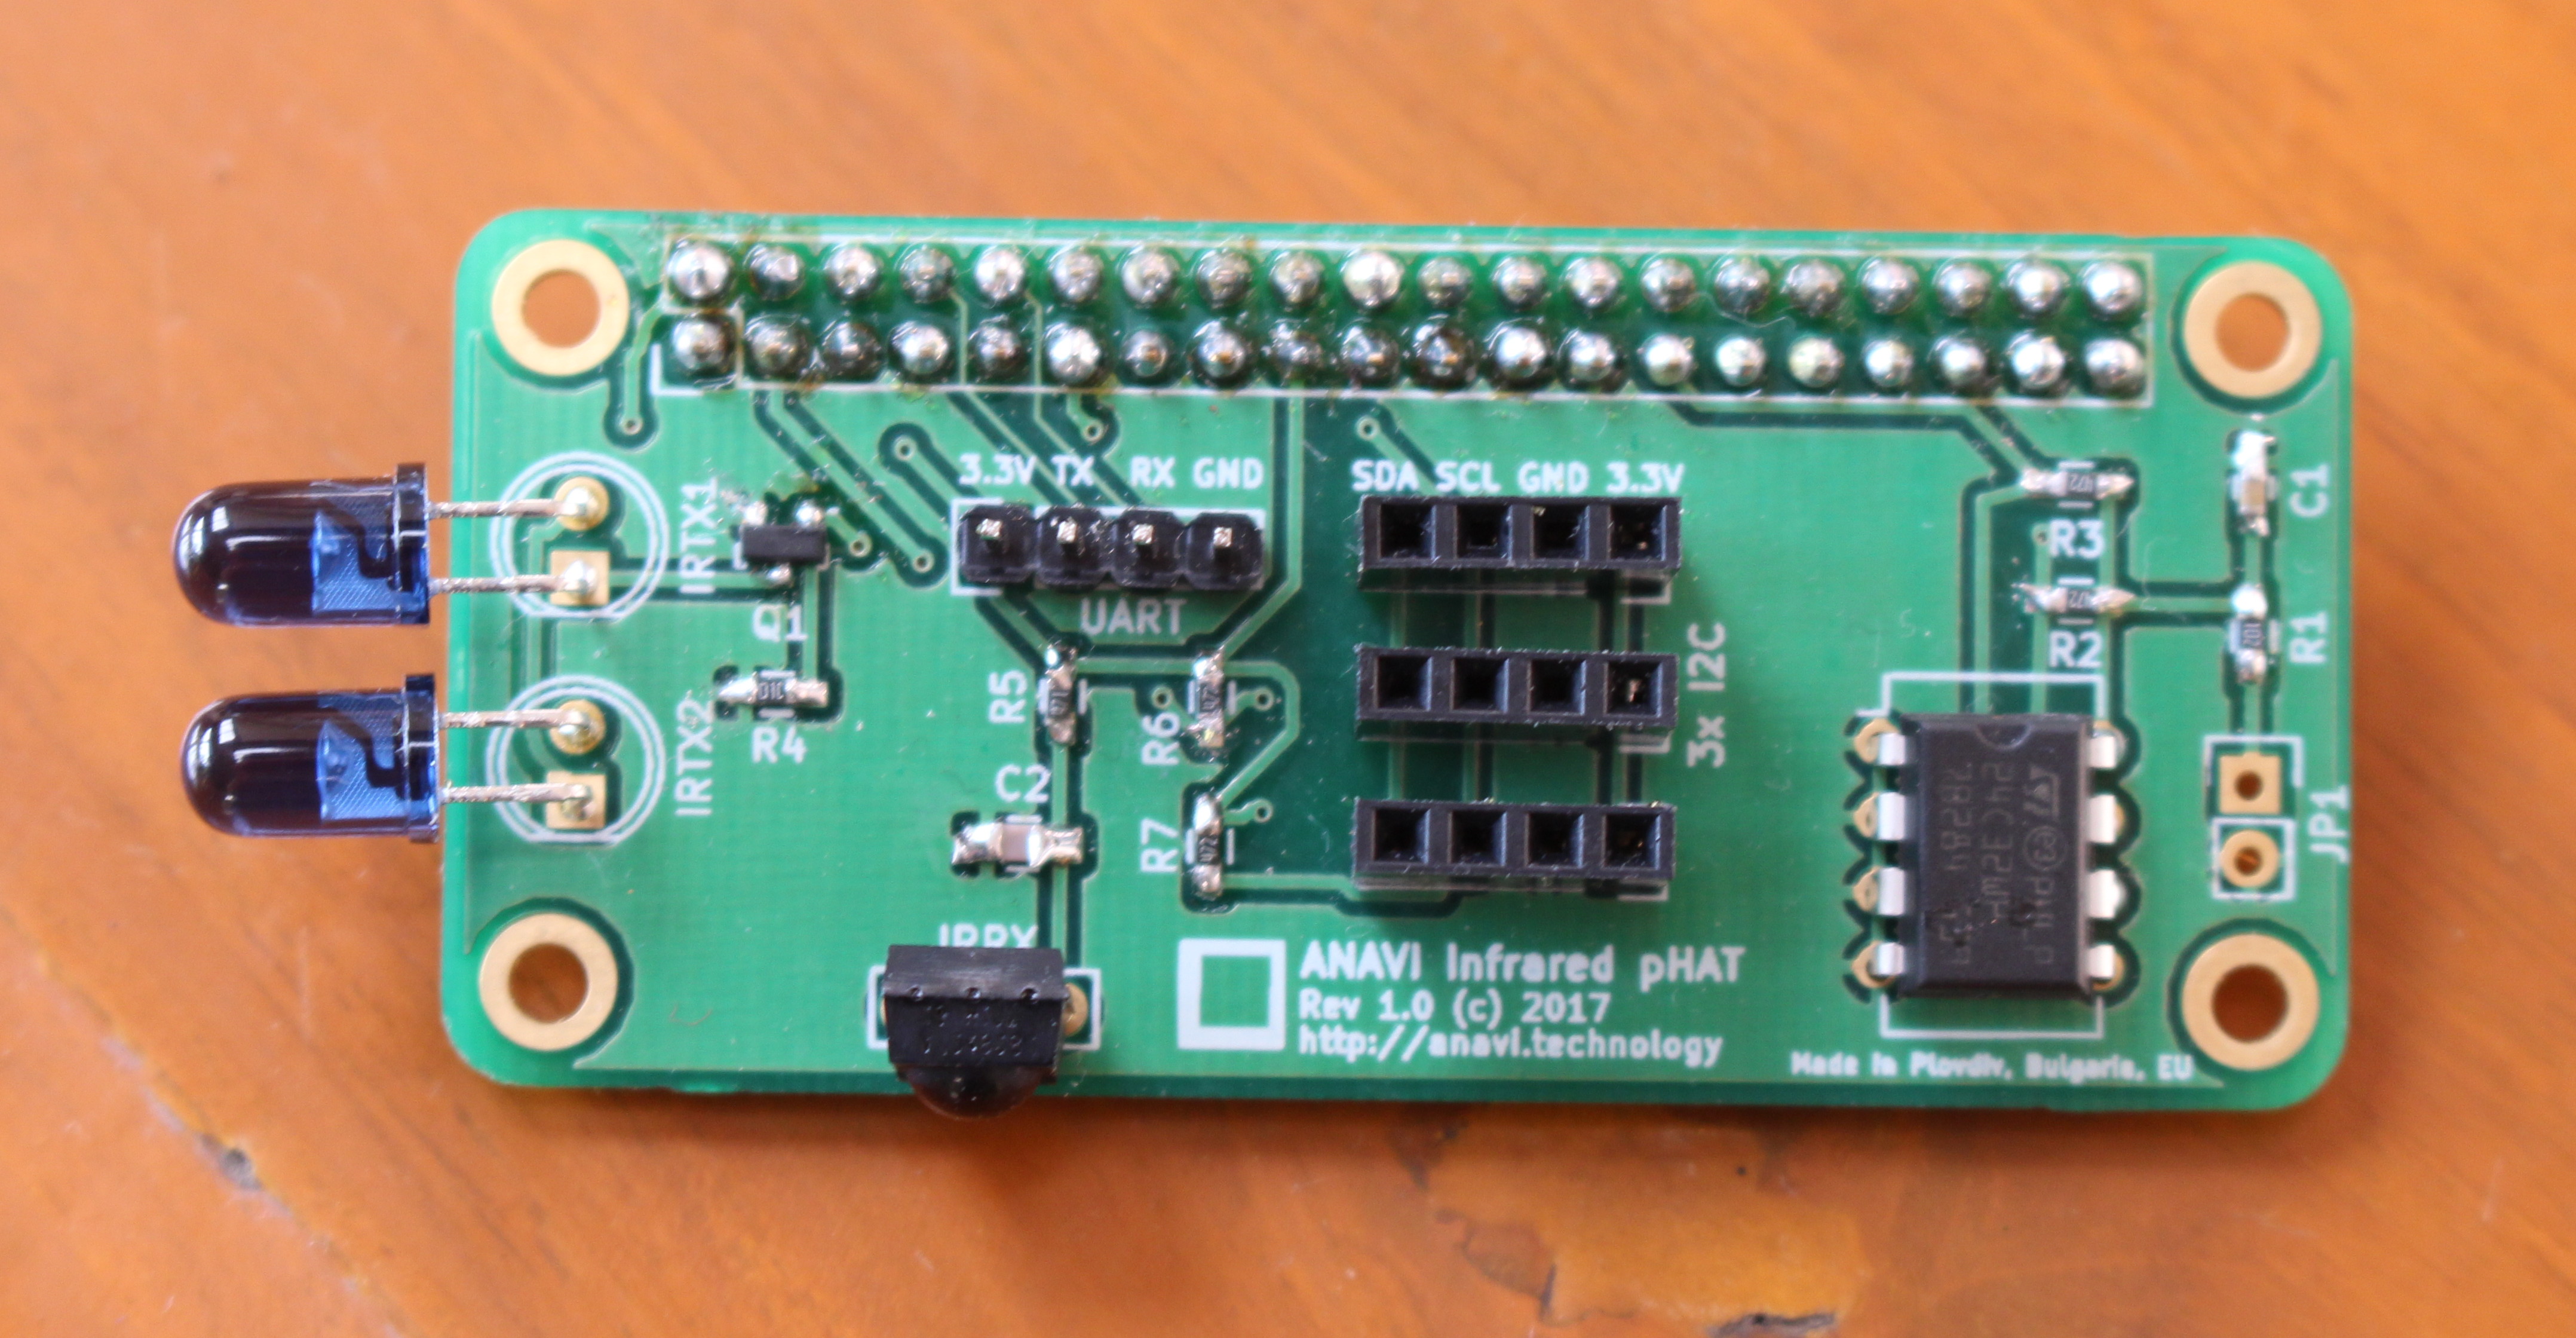
ANAVI Infrared pHAT
The top of the has the 3x I2C header for 3.3V sensors, a UART header to access to serial console, two x 5mm IR transmitters (IR LEDs), and one IR receiver (IR photo sensor). It also has an EEPROM to store the HAT ID.
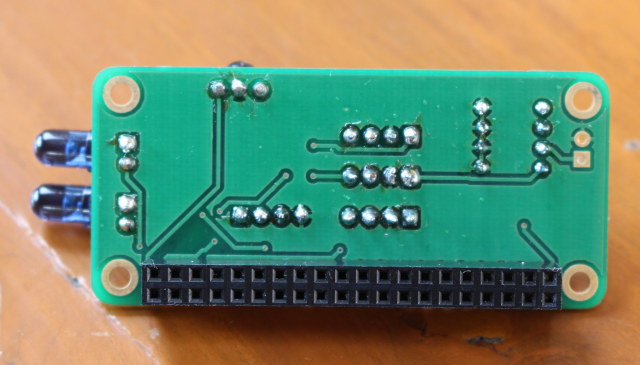
The other side comes with the 40-pin female header to connect to your Raspberry Pi board.
 The board was designed with KiCAD, and the hardware design files are released under a “Creative Commons Attribution-Share Alike 3.0 United States” License on github.
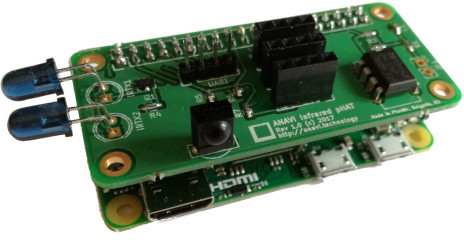
ANAVI Infrared pHAT Connection to Raspberry Pi Board
There’s only one step: insert the board on the 40-pin connector of your RPi board. You can only make one mistake, inserting it the wrong way. It has to be connected in away that it covers part of the board.
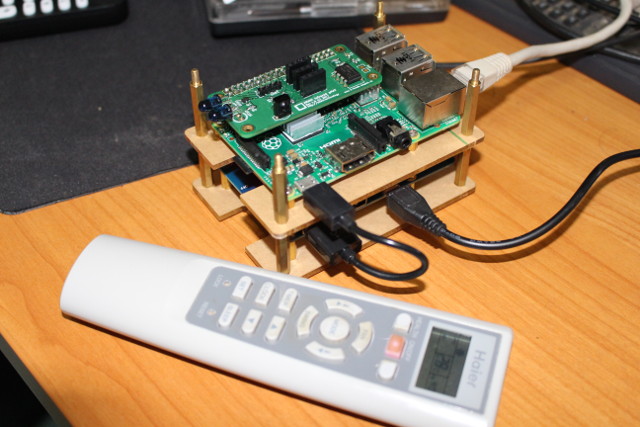
I’ve connect it with a Raspberry Pi 2 board with a battery kit, but it fits even better on the Raspberry Pi Zero, or newly released Raspberry Pi Zero W.
Setting up Raspberry Pi, and Controlling the Air Conditioner with LIRC
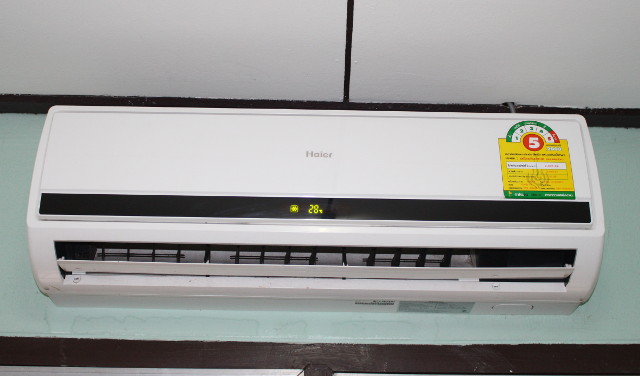
It’s time to start software setup in order to control the Haier air conditioner pictured below.
 You’ll need to install Raspbian, and some packages including LIRC, but I’ve already explained how to do that in RabbitMax Flex Getting Started Guide, so I’m not going to repeat those steps here, especially you can find them in ANAVI Infrared pHAT user’s manual too, and I’ll assume you have already setup your board.
The reason why I could record IR commands from my TV remote control, and not my aircon remote control last time around, is because aircon remotes send not only one byte but also status info each time. The trick is to use mode2’s “alternative display mode” to capture pulse/space data as raw config files.
Let’s do that:
|
1 2 |
sudo systemctl stop lirc mode2 -m -d /dev/lirc0 |
Now I faced the IR receiver and pressed the power key on the remote control:
|
1 2 3 4 5 6 7 8 9 10 11 12 13 14 15 16 17 18 19 20 21 22 23 24 25 26 27 |
4989552 3046 3019 3052 4278 615 1683 552 554 581 1675 573 718 552 555 579 1676 573 561 573 1814 580 1676 603 1666 572 561 584 691 569 554 580 553 571 562 572 693 577 556 579 554 600 1669 581 1806 577 557 578 555 579 554 580 1833 551 556 579 554 580 554 601 677 572 561 573 560 575 1680 579 1808 575 559 576 556 578 557 578 686 605 1664 573 1682 577 557 586 678 573 1683 576 1679 579 555 580 1806 577 1688 591 1670 579 1677 571 693 577 557 577 556 579 1685 563 694 576 556 578 556 600 547 577 687 573 561 573 559 583 551 576 713 546 562 573 587 547 559 607 695 575 1680 579 564 570 1676 572 717 574 559 575 585 550 1678 581 1683 596 |
Wow, that’s a whole bunch of numbers, but that’s exactly what we need as those are the duration of the high and low levels of the IR signal. I have repeated the same command, but capturing 4 keys: off, on, up to 29C, and down to 28C.
|
1 |
mode2 -m -d /dev/lirc0 > lircd-haier-ac.conf |
Then we need to edit our lircd-haier-ac.conf file manually:
|
1 2 3 4 5 6 7 8 9 10 11 12 13 14 15 16 17 18 19 20 21 22 23 24 25 26 27 28 29 30 31 32 33 34 35 36 37 38 39 40 41 42 43 44 45 46 47 48 49 50 51 52 53 54 55 56 57 58 59 60 61 62 63 64 65 66 67 68 69 70 71 72 73 74 75 76 77 78 79 80 81 82 83 84 85 86 87 88 89 90 91 92 93 94 95 96 97 98 99 100 101 102 103 104 105 106 107 108 109 110 111 112 113 114 115 116 117 118 119 120 121 122 123 124 125 |
# LIRCD File for Haier Aircon # begin remote name achaier flags RAW_CODES eps 30 aeps 100 ptrail 0 repeat 0 0 gap 28205 begin raw_codes name off 3050 3017 3050 4281 599 1677 570 557 578 1678 579 686 574 586 548 1681 577 561 573 1809 574 1682 597 1672 575 558 577 688 571 563 571 588 547 560 574 690 579 554 580 553 603 1693 544 1823 570 557 577 582 552 555 579 1834 549 559 576 557 577 588 567 679 580 553 571 1684 574 1682 576 689 570 563 572 561 573 561 573 691 599 1670 578 1678 580 553 571 694 576 1679 578 1678 580 579 545 1816 577 1685 594 1669 579 1677 570 694 576 584 550 558 576 1684 574 685 574 560 574 559 607 540 574 691 578 555 579 554 570 563 576 688 576 557 578 555 580 554 600 701 579 1676 572 562 572 1689 569 714 576 557 577 1679 579 1677 571 562 604 name on 3052 3040 3025 4287 593 1698 549 557 577 1679 579 686 573 560 573 1688 571 557 578 1809 573 1683 597 1672 575 590 544 715 544 563 571 562 573 561 573 1813 580 553 571 563 608 1687 544 1817 577 556 578 555 579 555 579 1809 574 558 576 557 577 557 598 679 581 553 570 1685 573 1688 571 688 570 563 572 562 572 587 547 692 598 1671 577 1684 574 553 571 694 575 1681 577 1678 580 553 581 1812 571 1680 599 1669 578 1678 580 685 574 565 569 559 575 1680 578 687 572 561 573 560 606 541 572 693 582 551 578 555 579 554 570 695 575 557 577 557 577 556 599 703 577 1683 575 553 571 1685 573 716 574 559 575 1680 578 1678 580 1676 602 name 29C 3054 3013 3052 4280 601 1669 577 556 579 1677 570 694 576 558 576 1685 573 555 579 1834 549 1680 599 1670 577 562 573 1809 574 559 575 1681 576 1680 578 686 580 554 574 559 606 1663 574 1813 570 563 572 561 573 561 578 1808 580 554 580 553 571 562 604 675 573 559 575 1713 545 1678 580 687 573 558 575 559 576 557 577 688 602 1672 565 1685 573 560 574 691 578 1678 570 1685 574 559 574 1814 579 1676 603 1667 570 1691 567 692 578 555 579 554 580 1677 571 719 550 557 577 556 603 545 575 689 570 563 571 562 573 560 574 690 579 555 579 554 570 570 596 699 571 1684 573 560 574 1682 576 1835 587 1669 570 1685 573 561 573 560 606 name 28C 3045 3016 3050 4282 598 1698 550 584 550 1685 573 685 573 561 574 1681 577 557 577 1836 547 1714 575 1663 574 559 575 690 580 553 570 1712 546 1688 570 1813 570 562 572 562 603 1666 571 1816 578 555 579 555 579 554 580 1807 576 583 551 556 578 556 605 673 570 589 545 1684 574 1682 576 715 544 563 571 567 567 561 573 692 599 1670 578 1677 580 553 571 694 581 1675 578 1677 581 553 570 1817 577 1678 601 1669 578 1704 554 684 575 559 575 558 576 1686 572 686 573 560 574 560 605 541 573 692 578 555 578 555 580 553 571 694 575 558 576 557 578 555 600 702 578 1704 553 554 570 1691 567 716 575 1680 577 1679 579 554 580 1677 603 end raw_codes end remote |
Note that you need to delete the first “big number” from each captured command. For example, I had to delete “4989552” from the first capture of the power key. If you want full control, you’ll need to record all keys. You may want to read lircd.conf manual to understand parameters like aep or aeps. I used the default values, but in case it does not work for you, or works unreliably, you may have to adjust them, possibly from data obtained using an oscilloscope. I did not have such problem, and copied the file to /etc/lirc/lircd.conf:
|
1 |
sudo cp lircd-haier-ac.conf /etc/lirc/lirc.conf |
In theory, you can restart lircd from the command line:
|
1 |
sudo systemctl restart lirc |
but in my case, I always had troubles when running irsend command:
|
1 2 |
irsend: could not connect to socket irsend: Connection refused |
So I had to reboot the board with sudo reboot to enable changes. Later I used the reload command (to take into account the update config) after restart, and I could avoid a reboot:
|
1 |
sudo systemctl reload lirc |
Once it’s all working, we can list the keys we’ve just defined in lircd.cong:
|
1 2 3 4 5 |
irsend LIST achaier "" irsend: 0000000000000001 off irsend: 0000000000000002 on irsend: 0000000000000003 29C irsend: 0000000000000004 28C |
To turn on the aircon:
|
1 |
irsend SEND_ONCE achaier on |
Then I was not sure what action would happen when I recorded the up key once setting the temperature. So I first set the temperature to 23C to check whether it would increment the temperature to 24C, or set it to 29C:
|
1 |
irsend SEND_ONCE achaier 29C |
And the later happened, which means you need to record all temperatures you want to set, and there’s no such thing as UP and DOWN keys.
You’ll already guessed how to turning off the aircon:
|
1 |
irsend SEND_ONCE achaier off |
Then I realized that since “29C” and “28C” commands send the temperature, it might also send the power status, and indeed I can turn on the aircon @ 28C directly with with 28C command. So instead of recording keys for your aircon, you are actually recording “scenes” which you could name “night”, “25Cfanlowswingup”, “off”, and so on. I added 25Cfanlowswingup with temperature set to 25C, fan speed set to low, and swing set to up, added it to lircd.conf, and a single command would turn on the aircon and set all those values:
|
1 |
irsend SEND_ONCE achaier 25Cfanlowswingup |
Pretty neat.
While the instructions above will work with any board with IR receiver (for first time setup) and IR transmitter, you may be interested in getting ANAVI Infrared pHAT on Indiegogo for $9 plus shipping ($5 to $7). There are also other rewards including the pHAT, I2C sensors, and debug tools. The campaign has already surpassed its funding target ($500), and delivery is planned for September 2017.

Jean-Luc started CNX Software in 2010 as a part-time endeavor, before quitting his job as a software engineering manager, and starting to write daily news, and reviews full time later in 2011.
Support CNX Software! Donate via cryptocurrencies, become a Patron on Patreon, or purchase goods on Amazon or Aliexpress


