
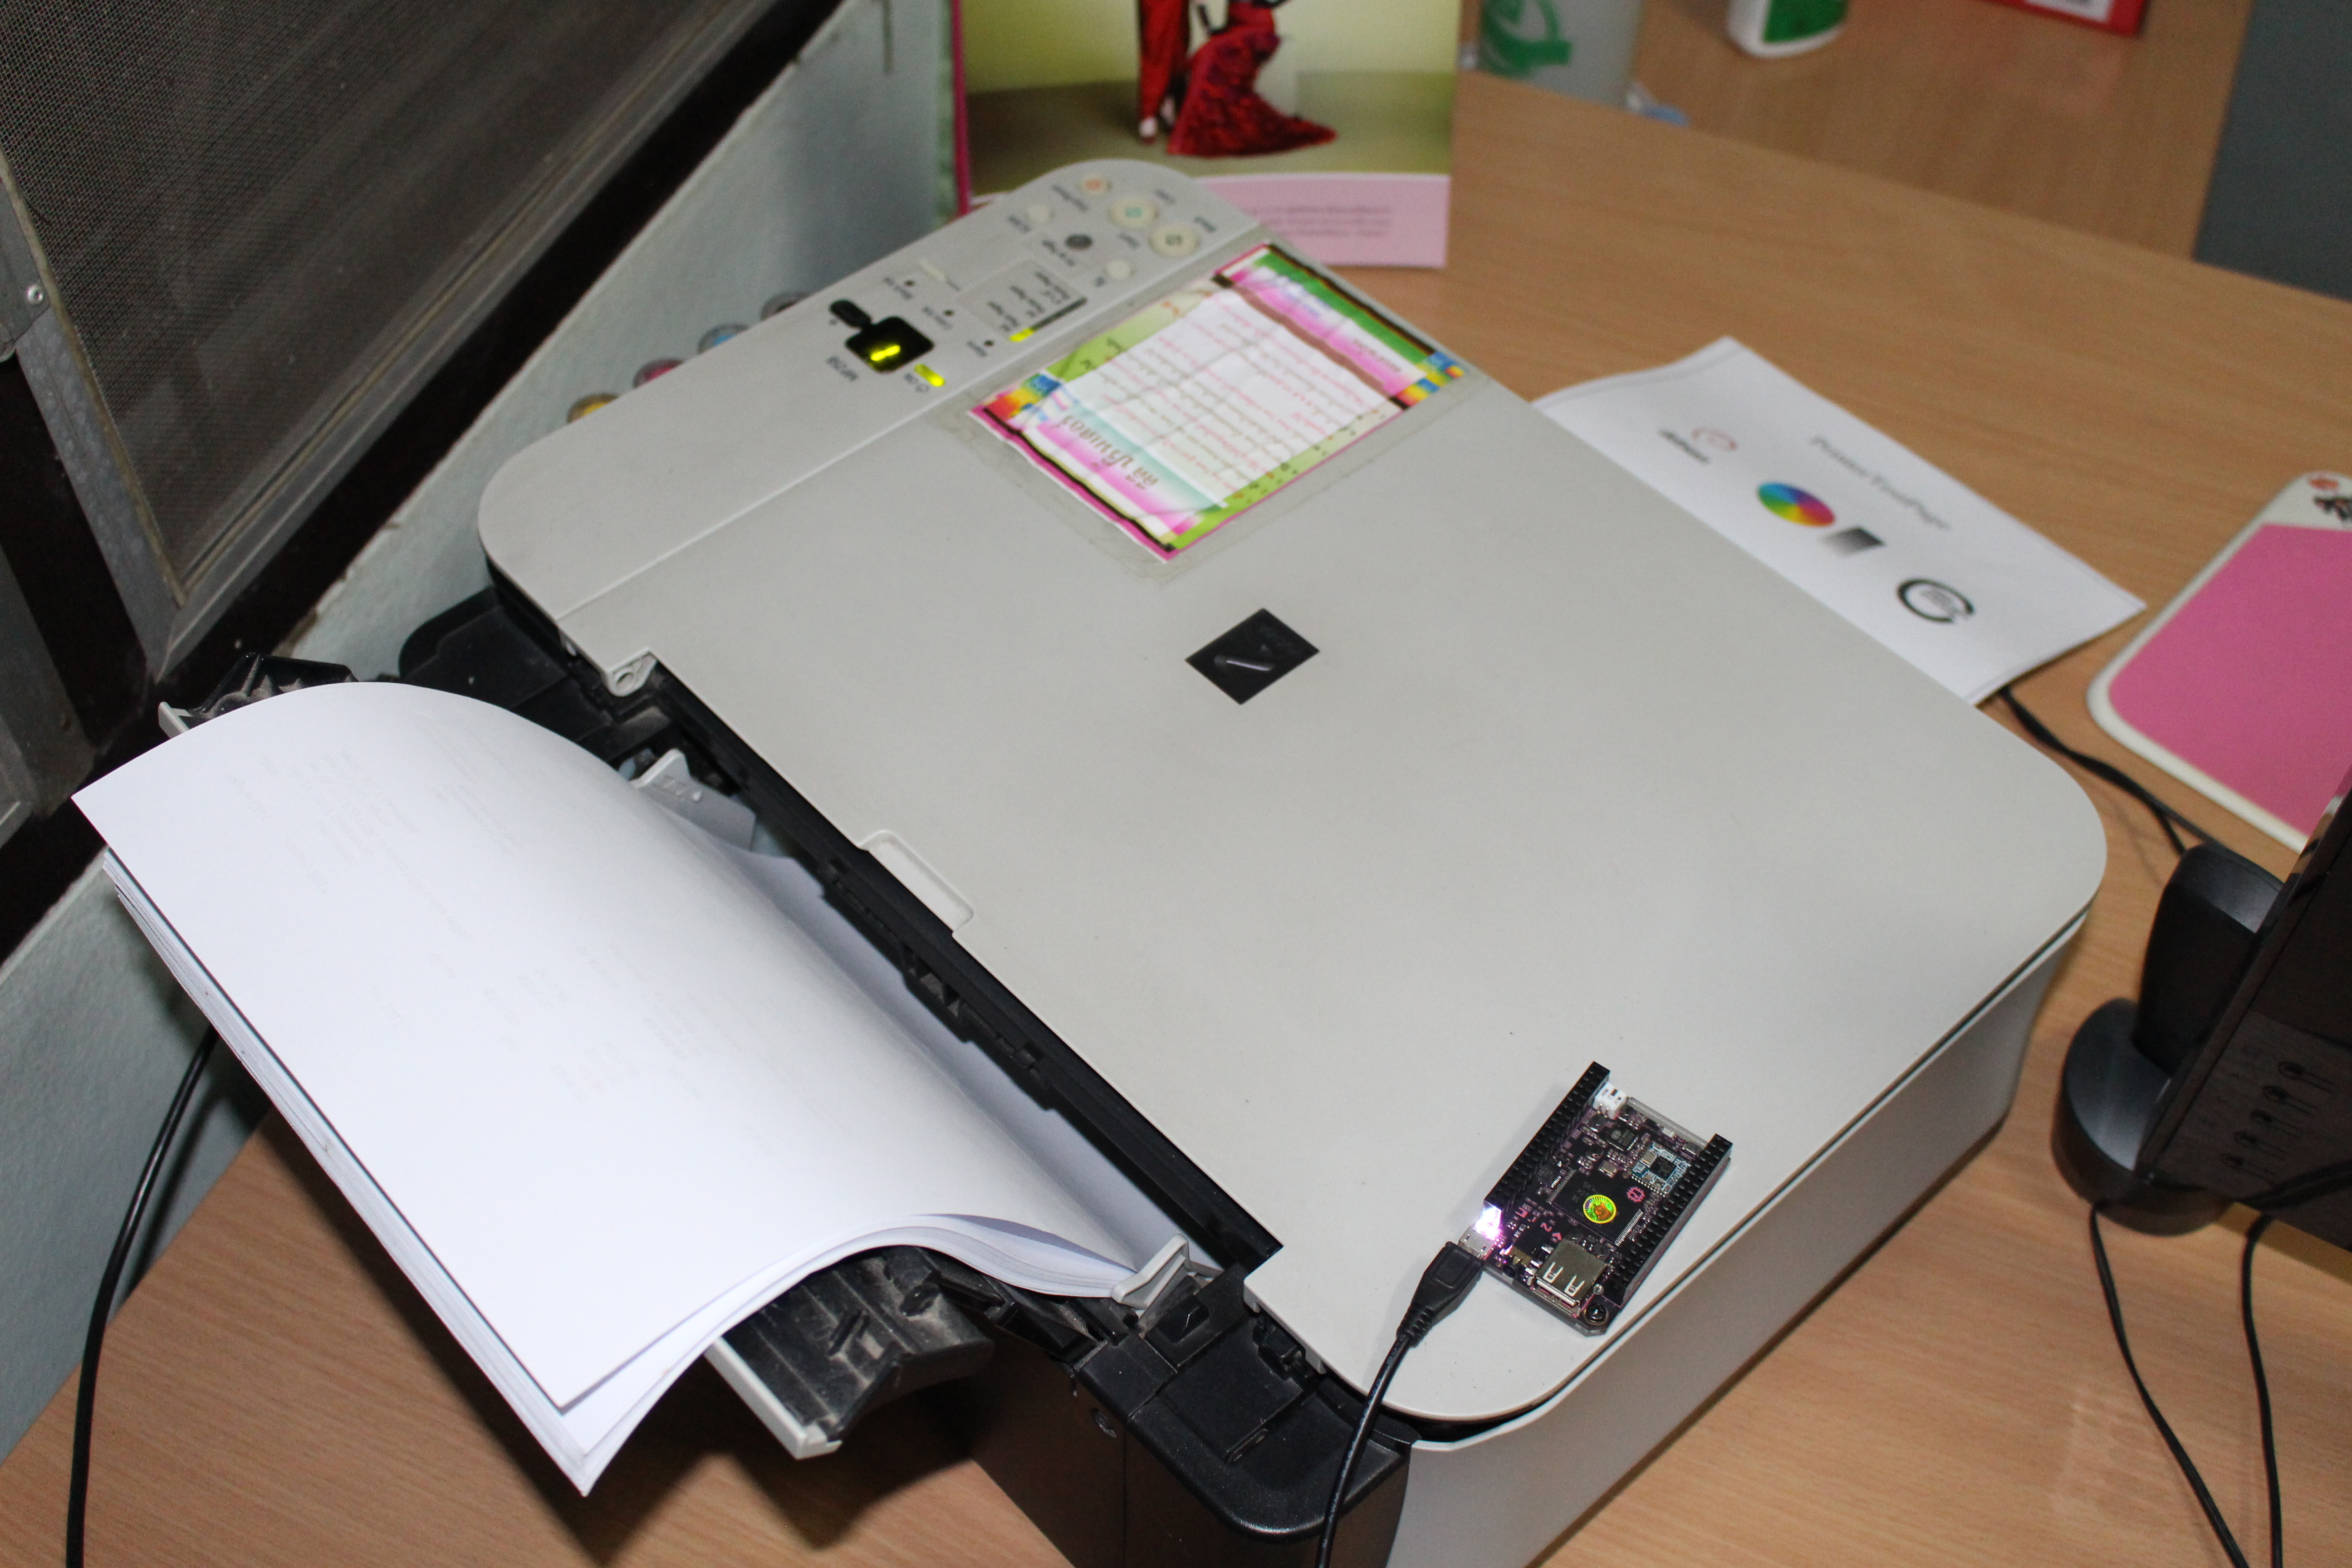
We have a Canon Pixma MP250 series multi-function USB printer connected to a Windows 10 laptop at home, and for several years, I had no problems printing from my Ubuntu computer to that printer. However, this setup recently stopped to work, and whatever I would do, printing would never start from my Ubuntu PC, even though the file was (allegedly) successfully transfered to the Windows 10 laptop connected to the printer. So I decided to setup my own printer server, as well as a scanner server since it’s a multi-function printer, using one of the boards from my collection. As I opened my cabinet, I wondered whether I would use an Orange Pi board, Raspberry Pi board, or Nano Pi board, but I needed WiFi since there’s no Ethernet in the office where the printer is located, and I found that Next Thing CHIP board was the ideal candidate as it comes with a USB port, built-in WiFi, and storage, and I paid just under $15 in total to have it shipped to South East Asia. So I’ll report my experience setting up CUPS printer server and SANE (Scanner Access Now Easy) on the board. Those are generic instructions working on Debian / Ubuntu, so they will other work for Raspberry Pi, Orange Pi, Nano Pi board, etc… via WiFi or Ethernet.
While I reviewed PocketCHIP last year, I had yet to actually use a standalone CHIP board. I did not want to connect it to a display, so I used some of the “Headless CHIP” instructions to set it up. I used a micro USB to USB cable to connect it to my computer, and use minicom to connect to /dev/ttyACM0 with 115200 8N1 settings, and yould access the command line with chip / chip credentials:
|
1 2 3 4 5 6 7 8 9 10 11 12 13 14 |
Debian GNU/Linux 8 chip ttyGS0 chip login: chip Password: Linux chip 4.3.0-ntc #1 SMP Fri Feb 19 09:37:25 PST 2016 armv7l The programs included with the Debian GNU/Linux system are free software; the exact distribution terms for each program are described in the individual files in /usr/share/doc/*/copyright. Debian GNU/Linux comes with ABSOLUTELY NO WARRANTY, to the extent permitted by applicable law. chip@chip:~$ |
Then I configured WiFi from the command line, by first listing SSIDs:
|
1 2 3 4 5 6 7 |
nmcli device wifi list * SSID MODE CHAN RATE SIGNAL BARS SECURITY CNX-TRANSLATION Infra 1 54 Mbit/s 92 ��▂��▄��▆��█ WPA1 WPA2 CNX-SOFTWARE Infra 11 54 Mbit/s 92 ��▂��▄��▆��█ WPA1 WPA2 LungBoon Infra 13 54 Mbit/s 44 ��▂��▄__ WPA1 * SSID MODE CHAN RATE SIGNAL BARS SECURITY |
and connect to my the closest access point from the list above:
|
1 |
sudo nmcli device wifi connect CNX-SOFTWARE password youractualpassword ifname wlan0 |
The next step is to check whether CHIP has successfully connected to the wireless router with the command:
|
1 2 3 |
nmcli device status DEVICE TYPE STATE CONNECTION wlan0 wifi connected CNX-SOFTWARE 1 |
That’s all good. The micro USB to USB cable works, but it was unstable in my case, with the two LEDs something going dark due to power issues, which means CHIP consumes more power than NanoPi NEO + armbian, as I’ve been running it from a USB port for several weeks… CHIP ships with Debian with XFCE4, so it might be a good idea to remove the corresponding packages:
|
1 |
sudo apt remove xfce4* |
Alternatively, you could flash Debian without GUI based on the instructions here.
So since WiFi had been setup, I connect the board to a 5V/2A power supply, and logged it to the board with SSH, and everything became much more stable. I received the board in the middle of the last, so I updated the system first:
|
1 2 |
sudo apt update sudo apt dist-upgrade |
Now that the initials setup was done, I could start the printer server setup, with the steps below greatly inspired from instructions on Next Things forums.
By default CHIP board hostname is “chip”, so I changed it to something more specific by editing /etc/hostname and /etc/hosts, and replacing chip with CNX-PRINTER. You’ll need to restart avahi-daemon for the changes to take effect:
|
1 |
sudo /etc/init.d/avahi-daemon restart |
At this point, we can access the board with CNX-PRINTER.local instead of using the IP address or chip.local. So I could SSH to the board with:
|
1 |
ssh chip@CNX-PRINTER.local |
If you are doing this from a Windows machine, you’ll need mDNS (Bonjour) installed for .local addresses to be recognized, and one way is to simply install iTunes.
The next step is to install CUPS server:
|
1 |
sudo apt install cups |
CUPS will start automatically, and the web interface will be accessible from the locahost interface on port 631, but since I have not connected a monitor, this would not be convenient, so we can enable remote management with:
|
1 |
sudo cupsctl --remote-admin |
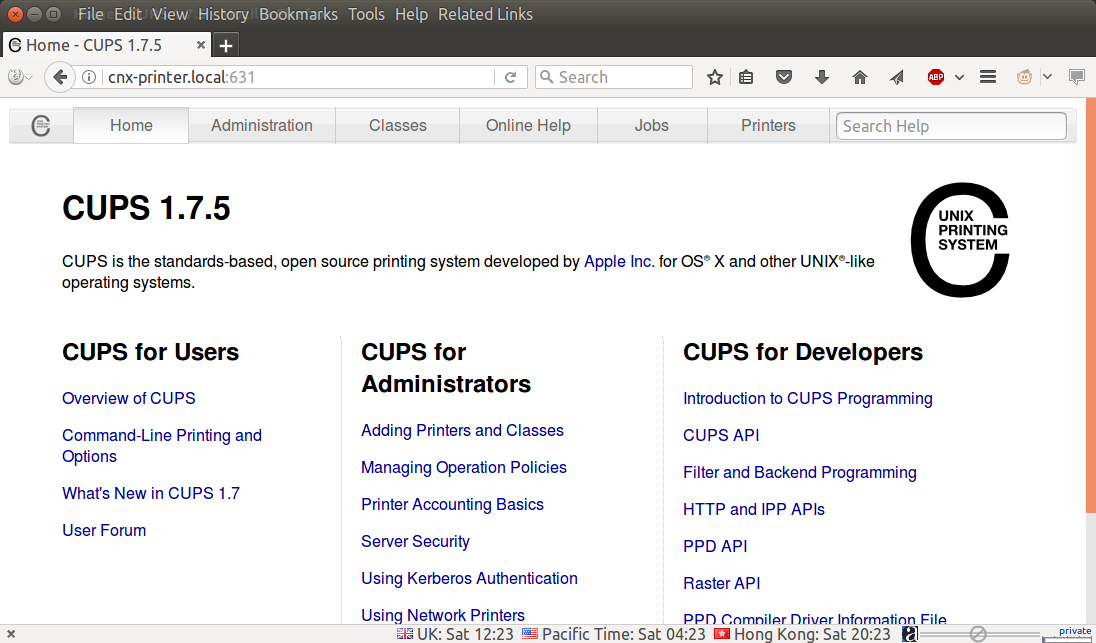
At this point I could access the web interface by going to http://cnx-printer.local:631/ in my preferred web browser.
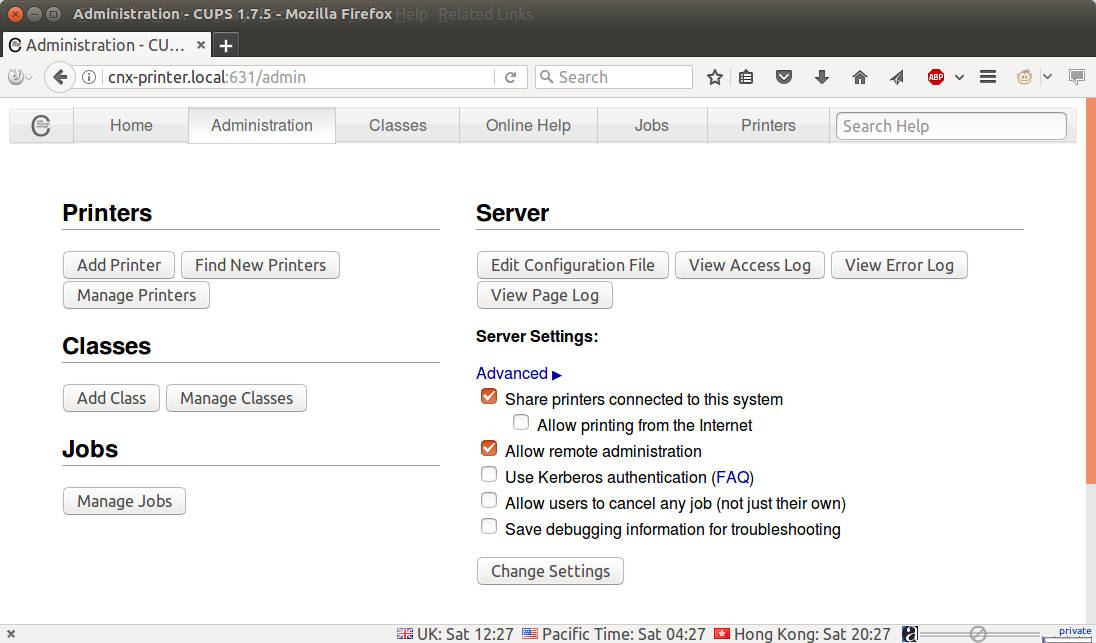
If you have not already done so, you may want to connect the printer to the board’s USB port, and power it on at this stage. Now we can click on Adding Printers and Classes.
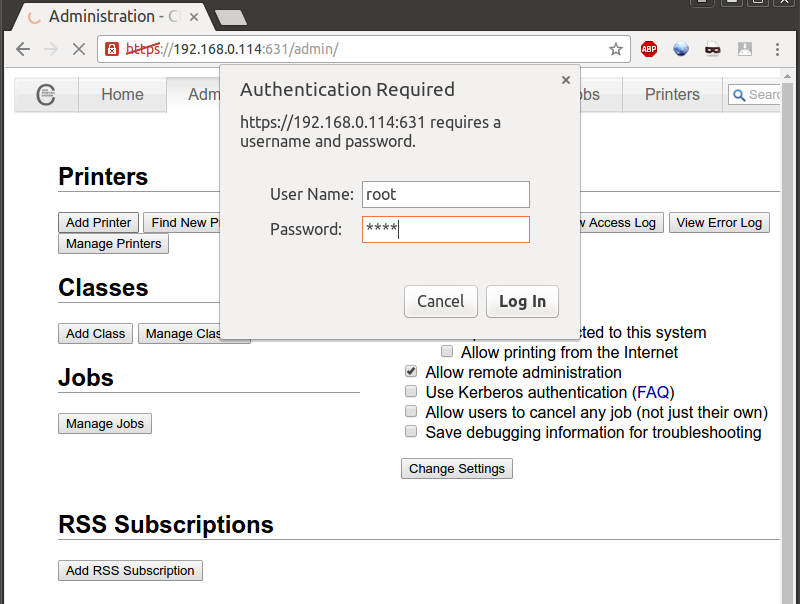
and then click on Add Printer, which will switch to an HTTPS connection with a self-generated certificate, so you may get a warning, but you can safely add the certificate to carry on. You’ll then be asked for a username and password. Don’t login with chip user, but instead root. The default password is also chip, so you may want to change that in the board.
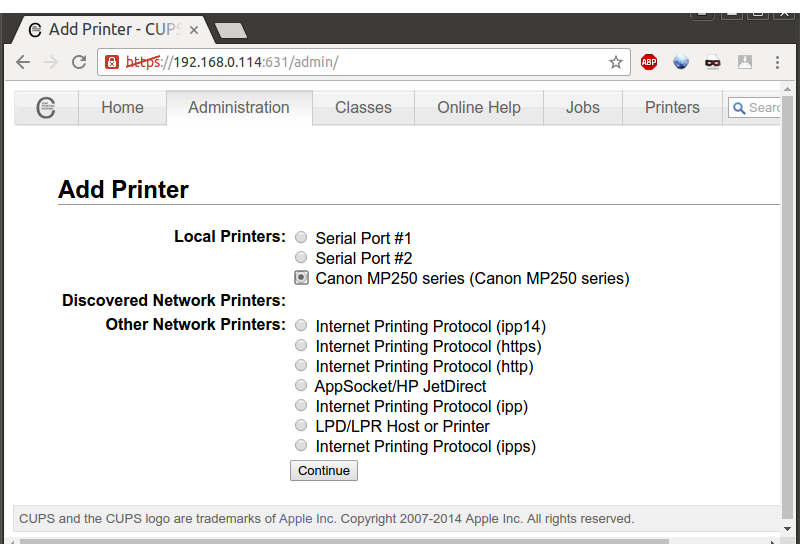
The next page is called “Add Printer”, and my printer was automatically detected. So I selected “Canon MP250 series (Canon MP250 series)”, and clicked on Continue button.
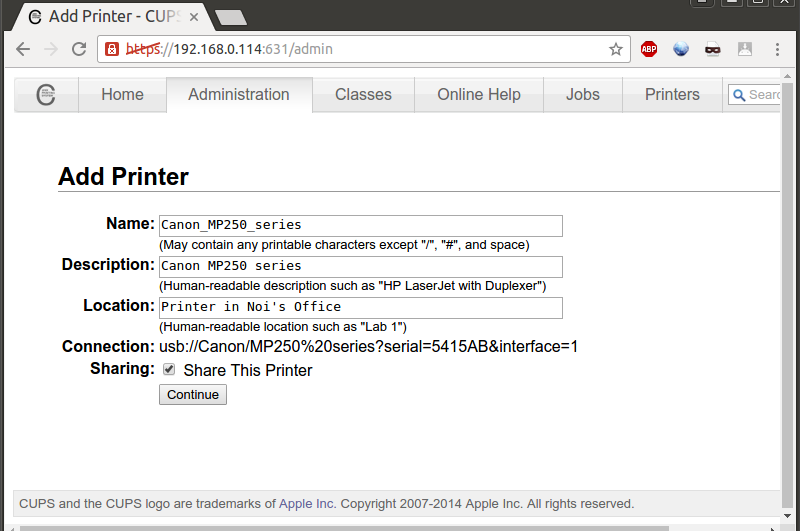
You can add some location information on the next page, and also remember to tick Share This Printer, before clicking on Continue. Note that if you’re going to use Windows clients, you may want to note the Printer Name, in my case Canon_MP250_series, as we’ll need it.
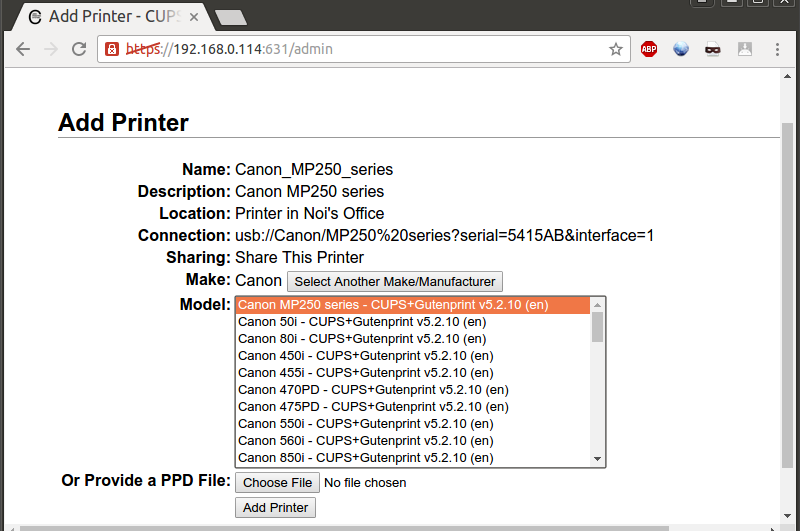
The next page will show a list of models, but in my case everything was already selected, to I just had to click on Add Printer to carry on with the setup.
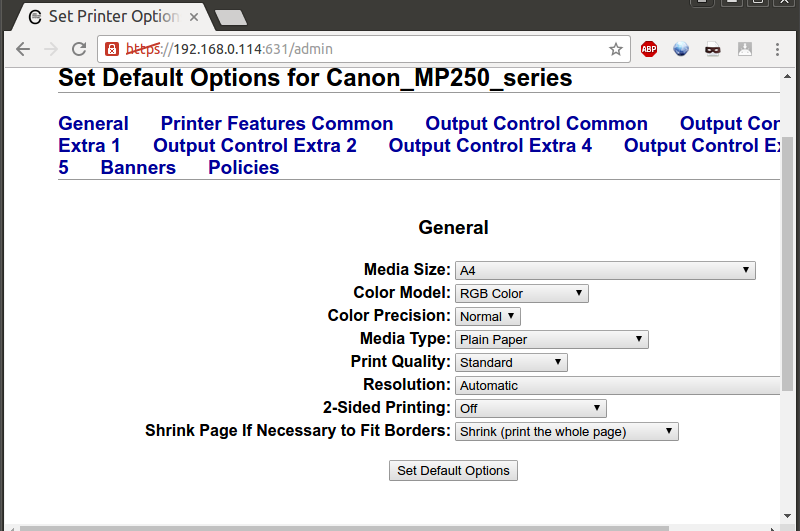
Finally, you’ll be asked to define some default options, but again I did not change anything there, and clicked on Set Default Options to complete the setup.
The next step was to fo the Printers in Ubuntu to see what I had to do to configure the network printer, and the answer is: Nothing at all. The new networked printer was automatically detected and added to the list of printers.

I went ahead, and clicked on Print Test Page, and it worked beautifully, although it started a little slower than usual.
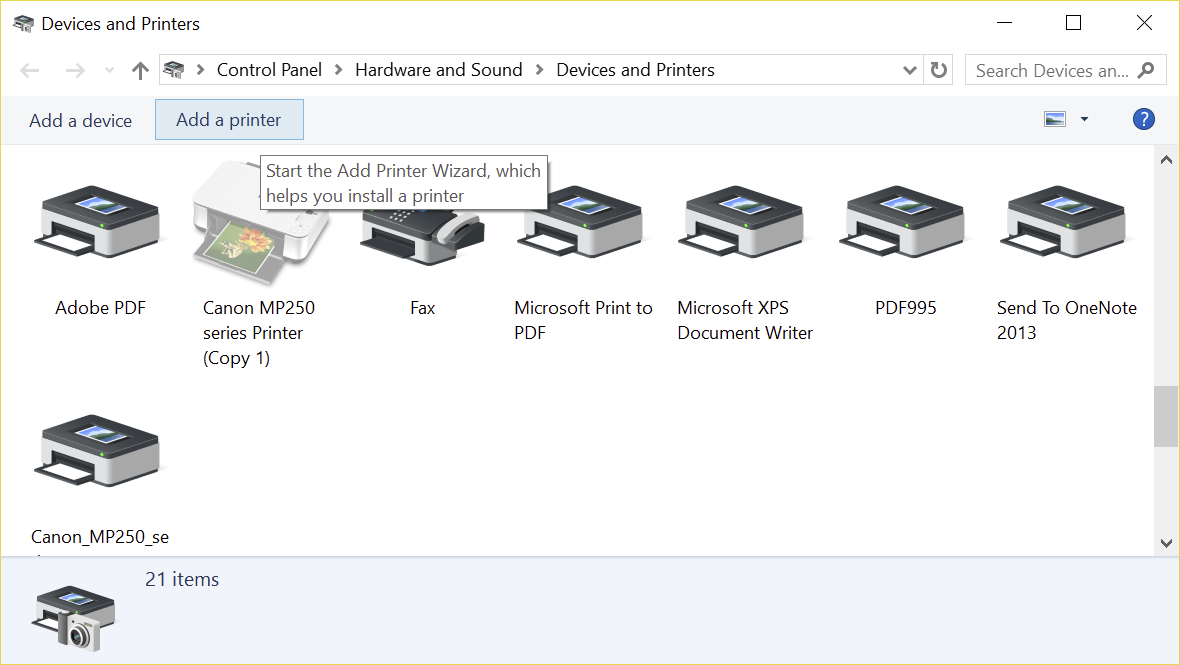
But the printer server won’t last long if it cannot work with my Wife’s Windows 10 laptop, so I followed some instructions on ArchWiki. First I went to Control Panel -> Hardware and Sound -> Devices and Printers, and clicked on Add a printer.
In the next window, you’ll need to select “Select a shared printer by name“, and type the printer name.
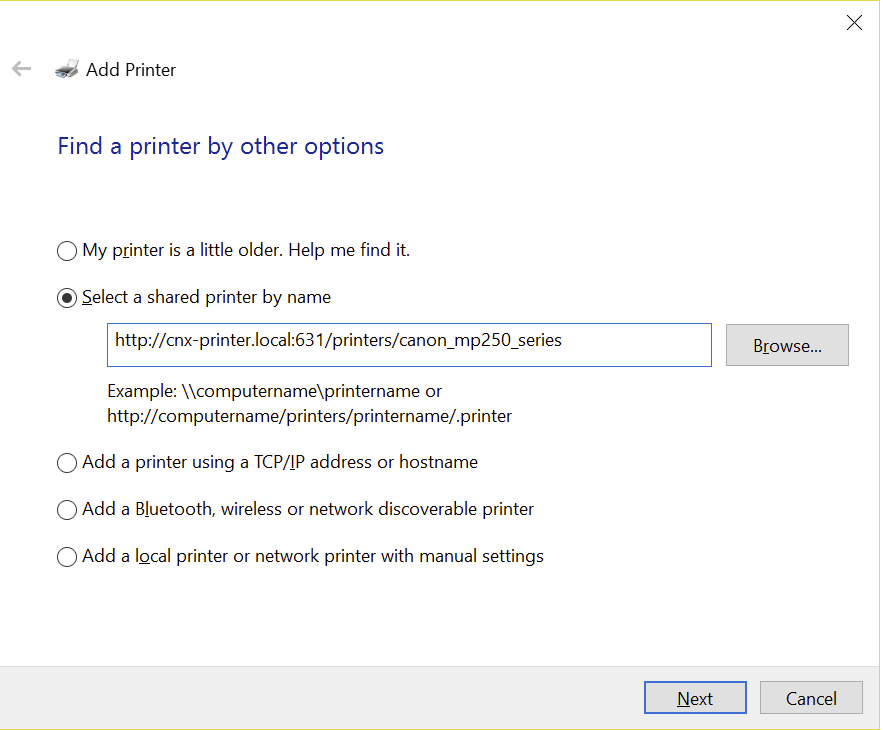
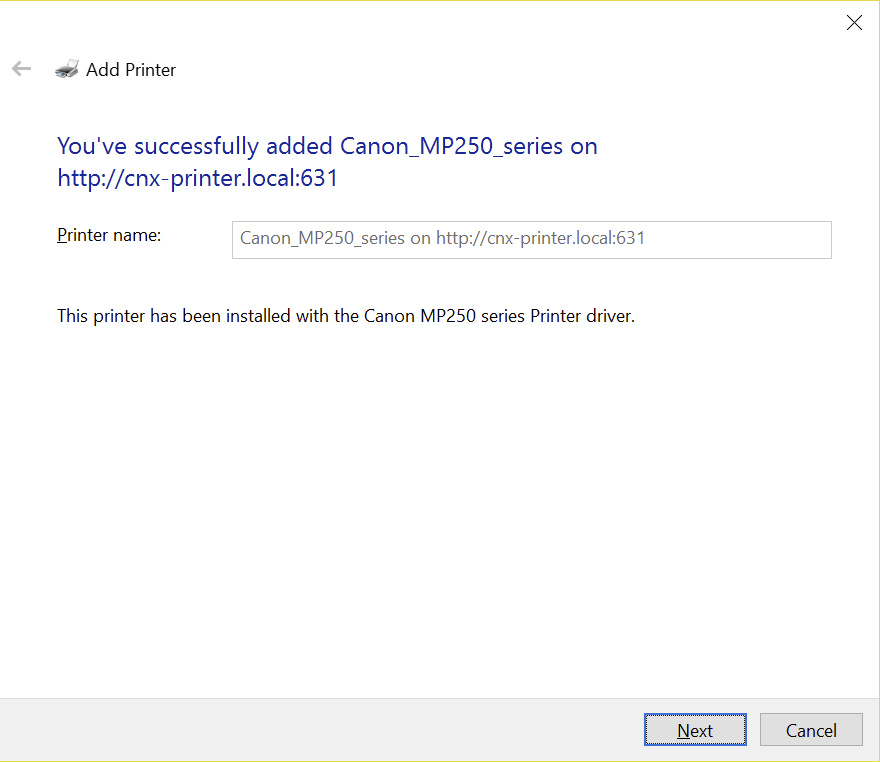
The URL should look like http://<hostname>:631/printers/<printer_name>, where <hostname> is the IP address or hostname, and <printer_name> the printer name shown in CUPS web interface. Once this is done we can click on Next, and you’ll be asked to select Windows drivers for your printer, once it is done you’ll get a confirmation the installation was successful.
The printing server installation went pretty smoothly, and worked with both Linux and Windows clients. But my printer is also a multifunction scanner, so I’d also need to enable scan function too. I adapted instruction @ http://xmodulo.com/usb-network-printer-and-scanner-server-debian.html and SaneDaemonTutorial on Ubuntu.com using SANE. I did manage to make it work, but only once. I guess there may be a permission or systemd issue, and I’ll update the post once I find a solution. In the menatine, I’ll still report what I’ve done below.
Before we try the scanner over the network, we need to make sure it works locally inside the CHIP board. SANE is probably already installed, but to make sure we can install the following packages.
|
1 |
sudo apt install sane sane-utils libsane-extras |
The following command will try to find scanners, and it could find my Canon MP250 series scanner connected via USB:
|
1 2 3 4 5 6 7 8 9 10 11 12 13 14 15 16 17 18 19 |
sudo sane-find-scanner # sane-find-scanner will now attempt to detect your scanner. If the # result is different from what you expected, first make sure your # scanner is powered up and properly connected to your computer. # No SCSI scanners found. If you expected something different, make sure that # you have loaded a kernel SCSI driver for your SCSI adapter. # Also you need support for SCSI Generic (sg) in your operating system. # If using Linux, try "modprobe sg". found USB scanner (vendor=0x04a9 [Canon], product=0x173a [MP250 series]) at libusb:001:002 # Your USB scanner was (probably) detected. It may or may not be supported by # SANE. Try scanimage -L and read the backend's manpage. # Not checking for parallel port scanners. # Most Scanners connected to the parallel port or other proprietary ports # can't be detected by this program. |
Another way to check this out is to use the following scanimage command line:
|
1 2 |
scanimage -L device `pixma:04A9173A_5415AB' is a CANON Canon PIXMA MP250 multi-function peripheral |
We can now try to scan one image:
|
1 |
scanimage -x 100 -y 100 --format=tiff >image.tiff |
The scanning started shortly after, and we’ve got our scanned file:
|
1 2 |
ls -l *.tiff -rw-r--r-- 1 chip chip 1678818 Feb 19 03:13 image.tiff |
So far, so good. SANE is is working…
We can now configure saned (SANE daemon) to be able to access the scanner from the LAN. First we need to create /etc/systemd/system/saned.socket file as root with:
|
1 2 3 4 5 6 7 8 9 10 |
[Unit] Description=saned incoming socket [Socket] ListenStream=6566 Accept=yes MaxConnections=1 [Install] WantedBy=sockets.target |
Please note that this differs from the instructions on Ubuntu as there seem to be an error. The line:
|
1 |
moniker@pc:~$ cat /etc/systemd/system/saned.socket |
does not seem right, and would cause systemdctl to report a “bad message”, and the line at the top are ignored by systemd. I tried to edit the Wiki, but I could not due to a gateway error on the site.
We also need to create a separate file called /etc/systemd/system/[email protected] with:
|
1 2 3 4 5 6 7 8 9 10 11 12 |
[Unit] Description=Scanner Service Requires=saned.socket [Service] ExecStart=/usr/sbin/saned User=saned Group=saned StandardInput=null StandardOutput=syslog StandardError=syslog # Environment=SANE_CONFIG_DIR=/etc/sane.d SANE_DEBUG_DLL=255 |
We als oneed to enable access to computer on the LAN, by editing /etc/sane.d/saned.conf:
|
1 2 |
## Access list 192.168.0.0/24 |
The exact IP address subnet will depend on your own local network configuration. We can now enable saned (so that it starts automatically), and start it as follows:
|
1 2 |
sudo systemctl enable saned.socket sudo systemctl start saned.socket |
We can check the status with:
|
1 2 3 4 5 6 7 8 |
sudo systemctl status saned.socket ● saned.socket - saned incoming socket Loaded: loaded (/etc/systemd/system/saned.socket; enabled) Active: active (listening) since Sun 2017-02-19 05:19:28 UTC; 11min ago Listen: [::]:6566 (Stream) Accepted: 0; Connected: 0 Feb 19 05:19:28 CNX-PRINTER systemd[1]: Listening on saned incoming socket |
So everything appears to be going smoothly. We can now configure clients. Let’s start with a Linux client (my Ubuntu computer) to make sure it work. We can first install xsane, a graphical interface for saned:
|
1 |
sudo apt install xsane |
And then configure sane to connect to our SANE daemon by editing /etc/sane.d/net.conf, and adding the hostname or IP address of our server, and enabling time out:
|
1 2 3 4 5 6 7 8 9 10 11 12 13 14 15 |
# This is the net backend config file. ## net backend options # Timeout for the initial connection to saned. This will prevent the backend # from blocking for several minutes trying to connect to an unresponsive # saned host (network outage, host down, ...). Value in seconds. connect_timeout = 60 ## saned hosts # Each line names a host to attach to. # If you list "localhost" then your backends can be accessed either # directly or through the net backend. Going through the net backend # may be necessary to access devices that need special privileges. # localhost CNX-PRINTER.local |
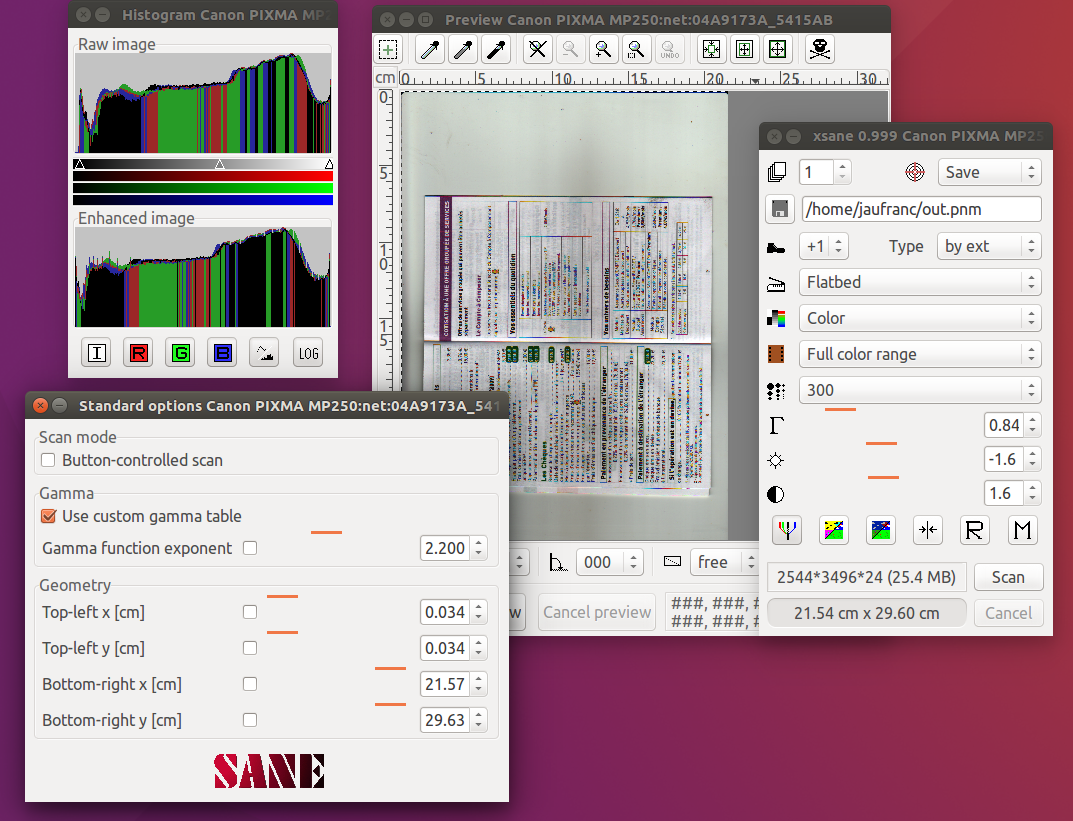
Time to start xsane from the command line or dash for some scanning, except it did not work for me with the window below showing up each time after a few seconds.
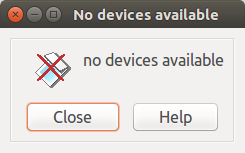
So I spent a few hours studying about this problem, reading articles online, capturing packets with Wireshark, and trying the same thing on a Windows client with SaneWinDS. I could not find any solution in any articles, but I could see packets exchanged between the server and client, and SanWinDS could connect the CHIP board SANE daemon, but would not find any device/scanner. I could not find anything relevant in /var/log. or dmesg either, so I tried to mess up with the config files, and changed [email protected] to use User=chip instead of User=saned, and success! I could start xsane, and scan a document.
So I rebooted, the board to see what would happen, and sure enough it went back to the “no devices available” window. I tried to change that back to User=saned, and reboot, and then try again with User=chip, but I had no luck in all of my subsequent attempts, and ran out of time for the day… The solution is probably close, and I’ll update the post once/if I found out what the problem is.

Jean-Luc started CNX Software in 2010 as a part-time endeavor, before quitting his job as a software engineering manager, and starting to write daily news, and reviews full time later in 2011.
Support CNX Software! Donate via cryptocurrencies, become a Patron on Patreon, or purchase goods on Amazon or Aliexpress


