
Onion Omega2 LEDE (OpenWrt fork) WiFi board is powered by Mediatek MT7688 MIPS SoC, targets IoT projects, and sells for as low as $5. There are actually two versions: Omega2 with 64MB RAM, 16MB flash, and Omega2+ with 128MB RAM, 32MB flash and a micro SD slot. Onion sent me the latter for review, together with an expansion dock that allows powering up the board though USB , and adds a USB host port, an RGB LED, buttons, and access to GPIO via a female header. In this quick start guide, I’ll start by taking some unboxing pictures, and then report my experience following the documentation to configure the board, blink the RGB LED, and control a LED on a breadboard using a GPIO from the header.
Onion Omega2+ Unboxing
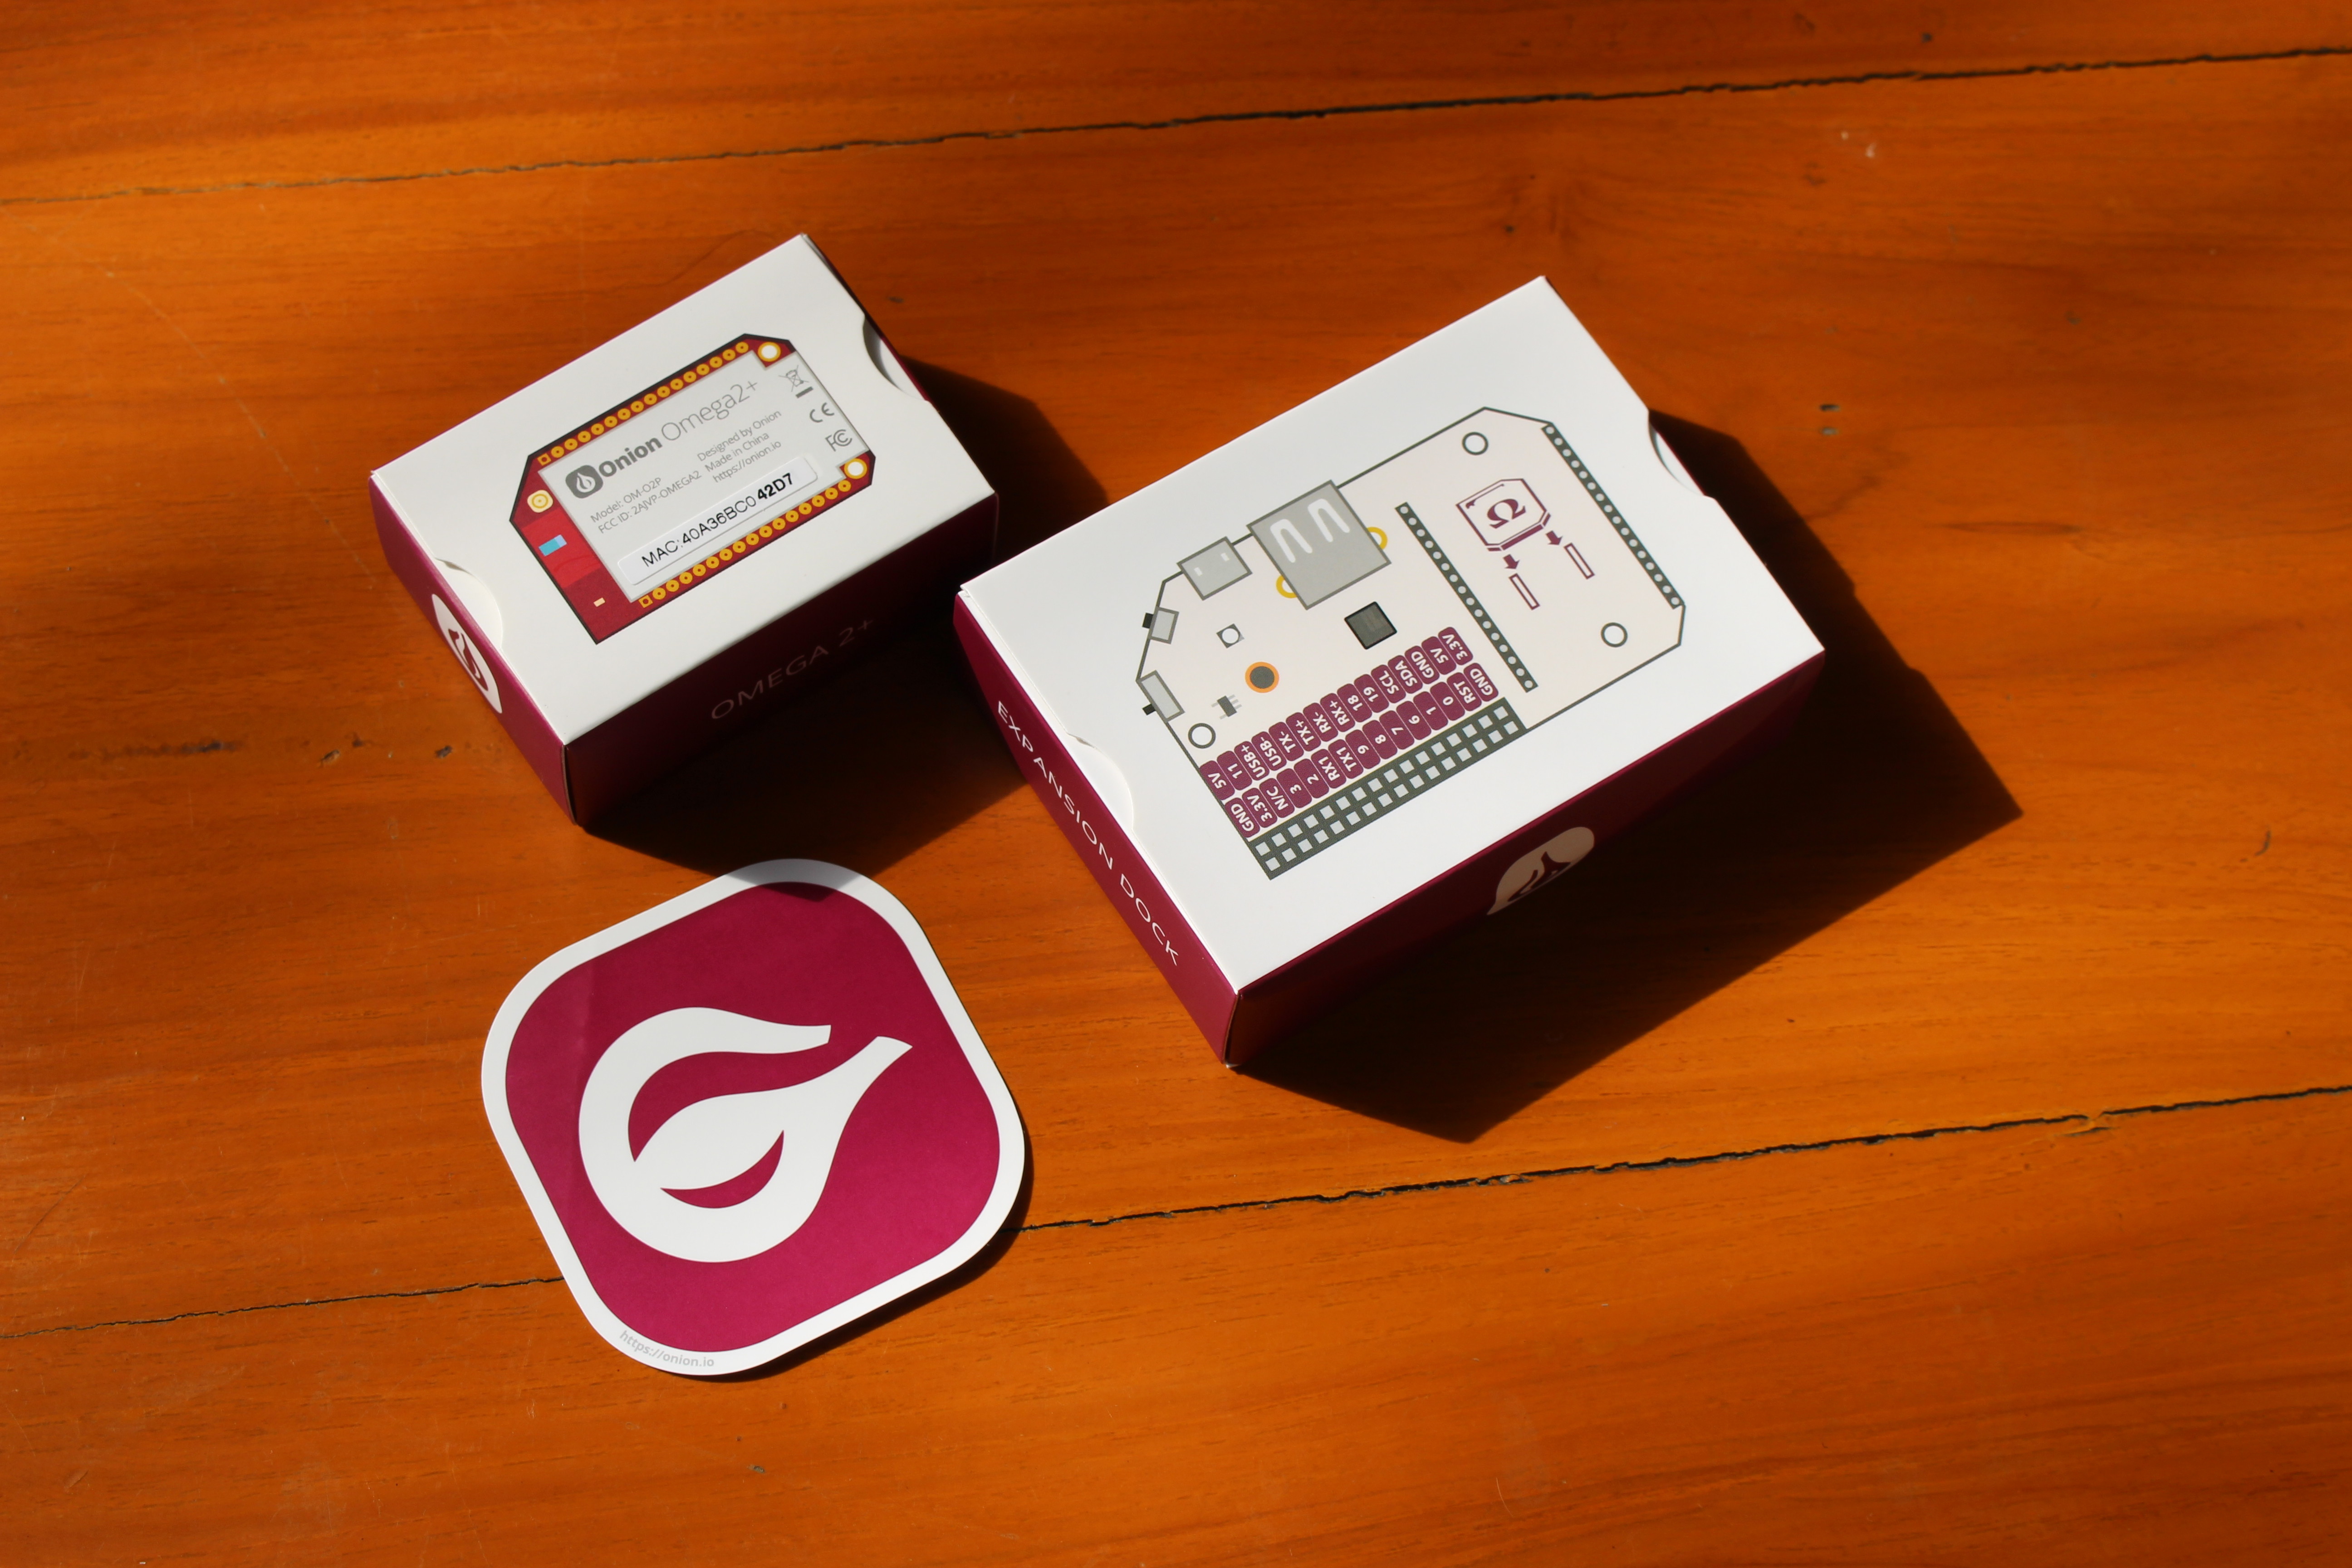
I received the two boards in their respective package, and which are both stored in anti-static bags.
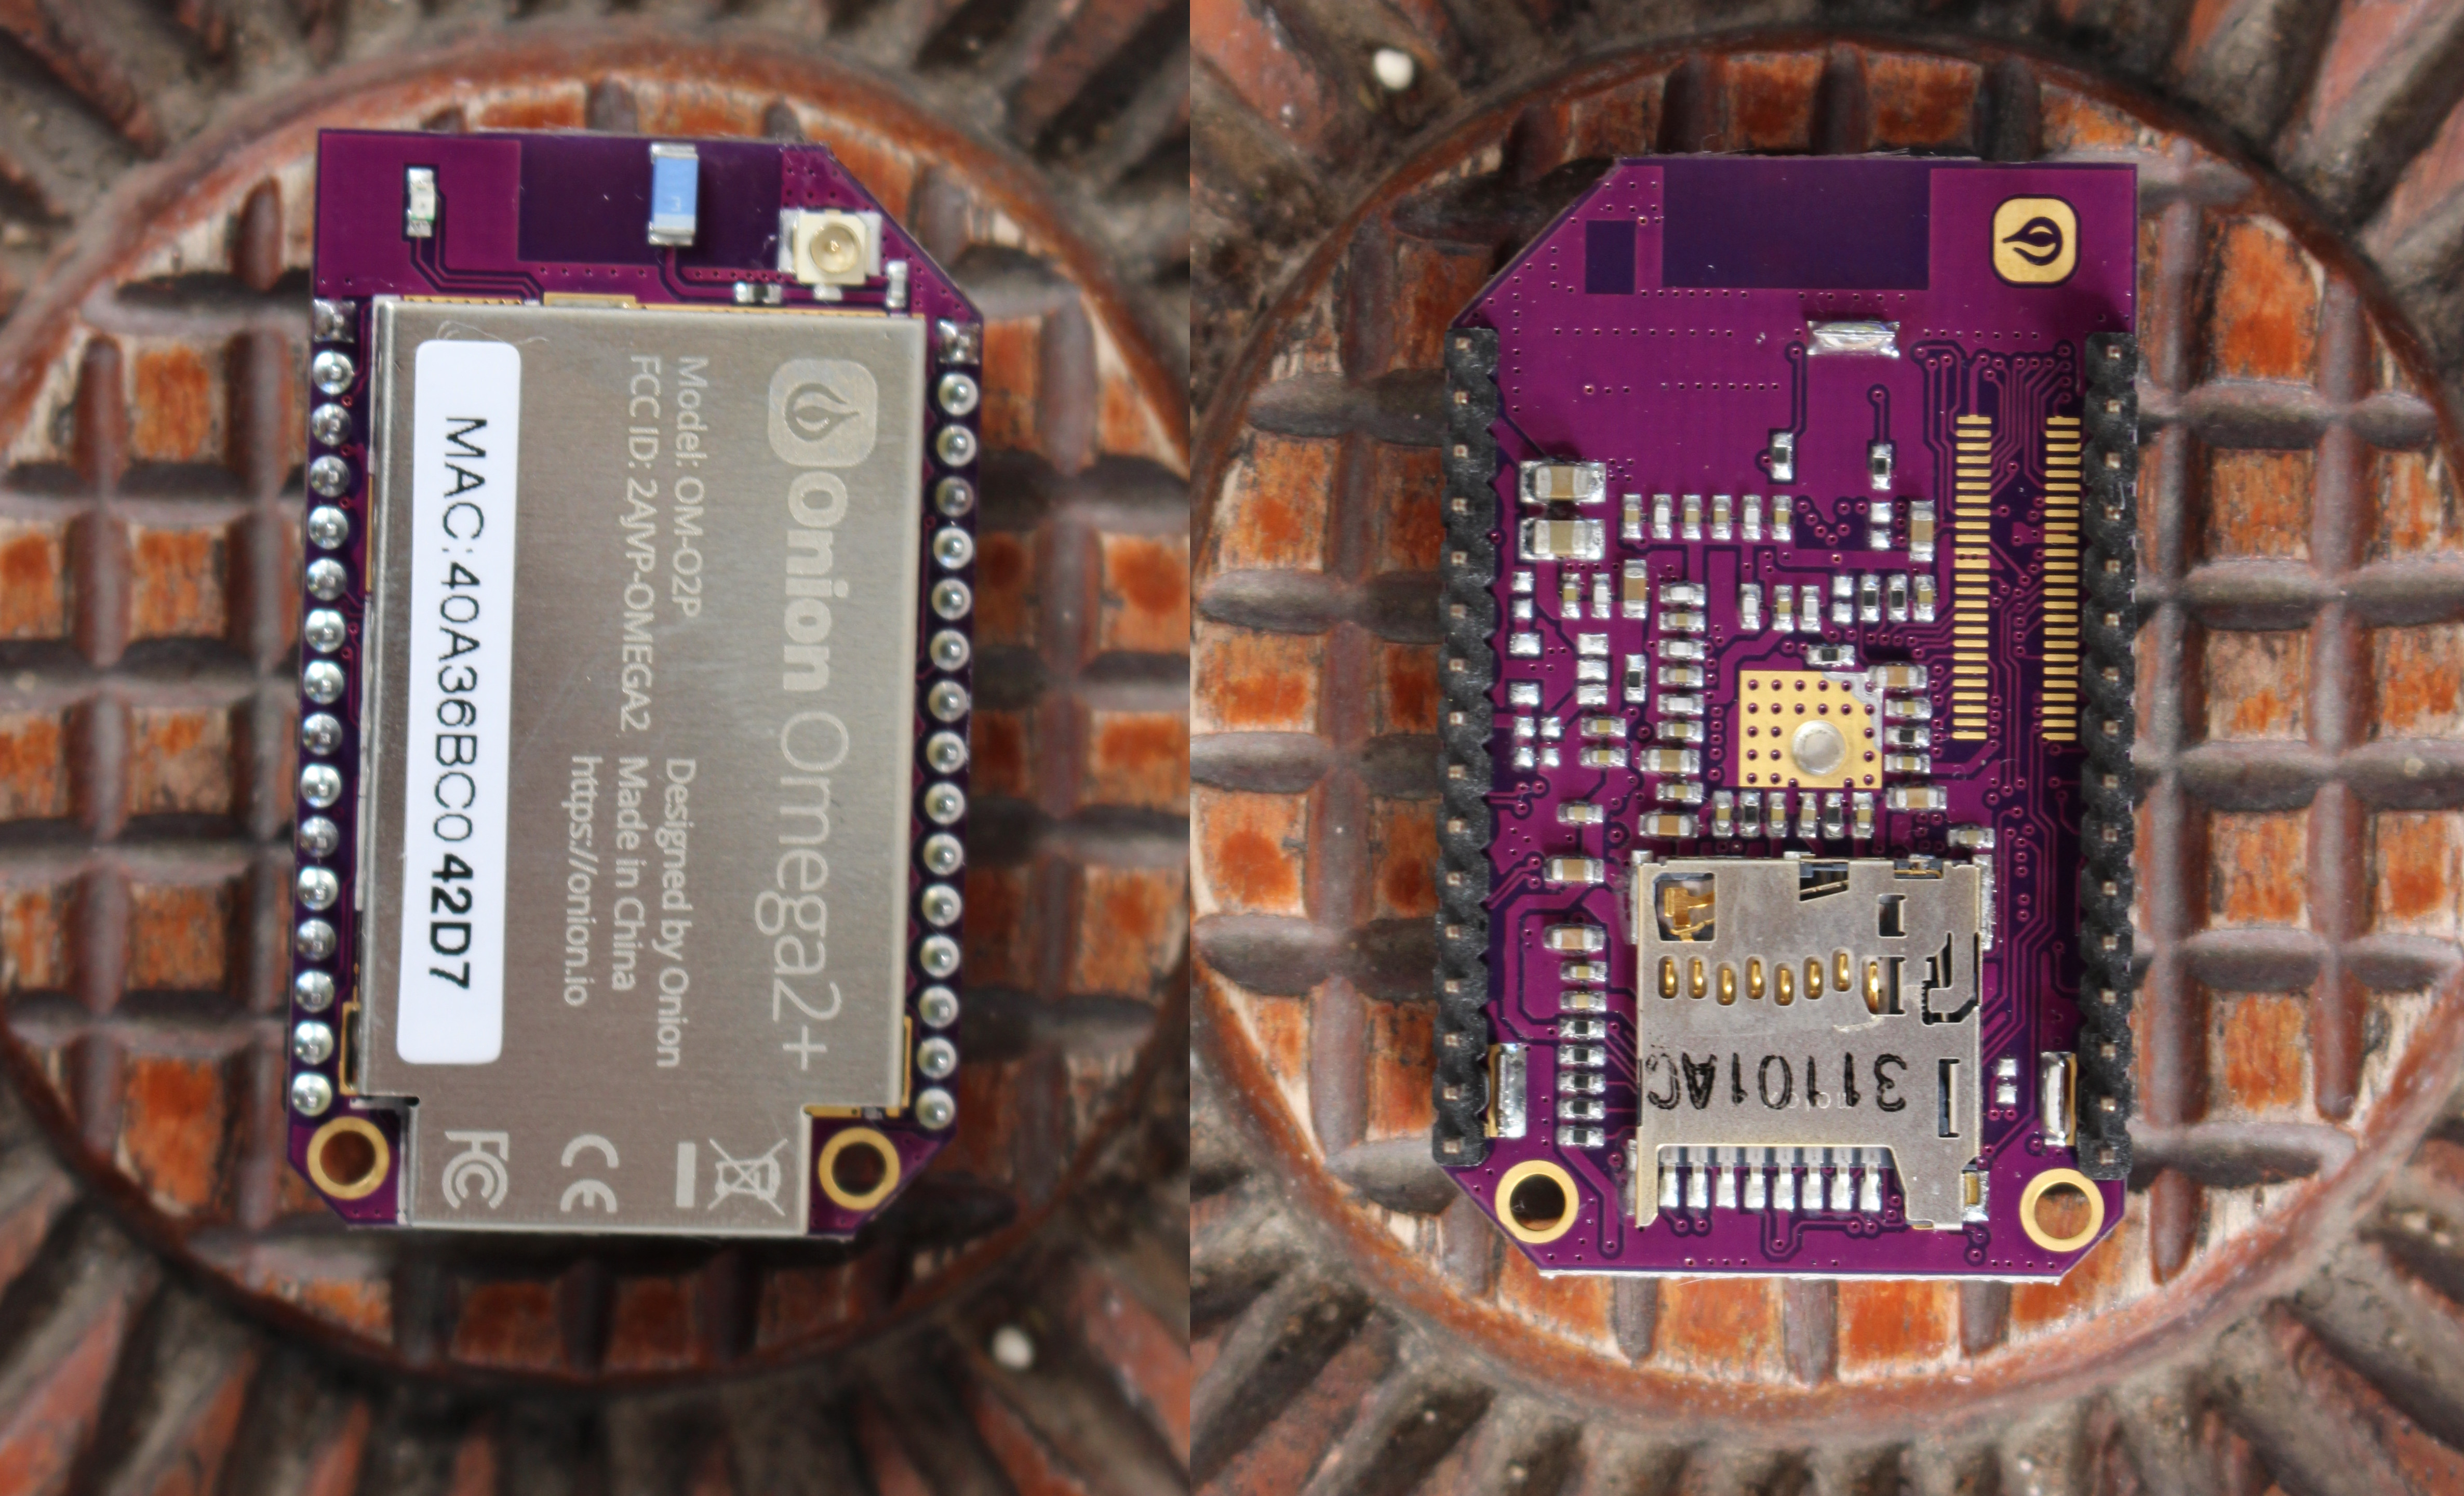
Let’s check Onion Omega2+ board first. The top includes a chip antenna and an u.FL connector for an external antenna, as well as the main components covered by a shield with some info like FCC ID, and the MAC address with the last four digits (hexits?) in bold since they are used to access the board. The bottom of the board are two rows of headers, and a micro SD card slot. There’s also a footprint for another header or connector, but I could not find out the details.
Next up is the dock. We have a 2x 15-pin female header with clear marking for the pins that include power signals, GPIOs, I2C, UART, and USB.
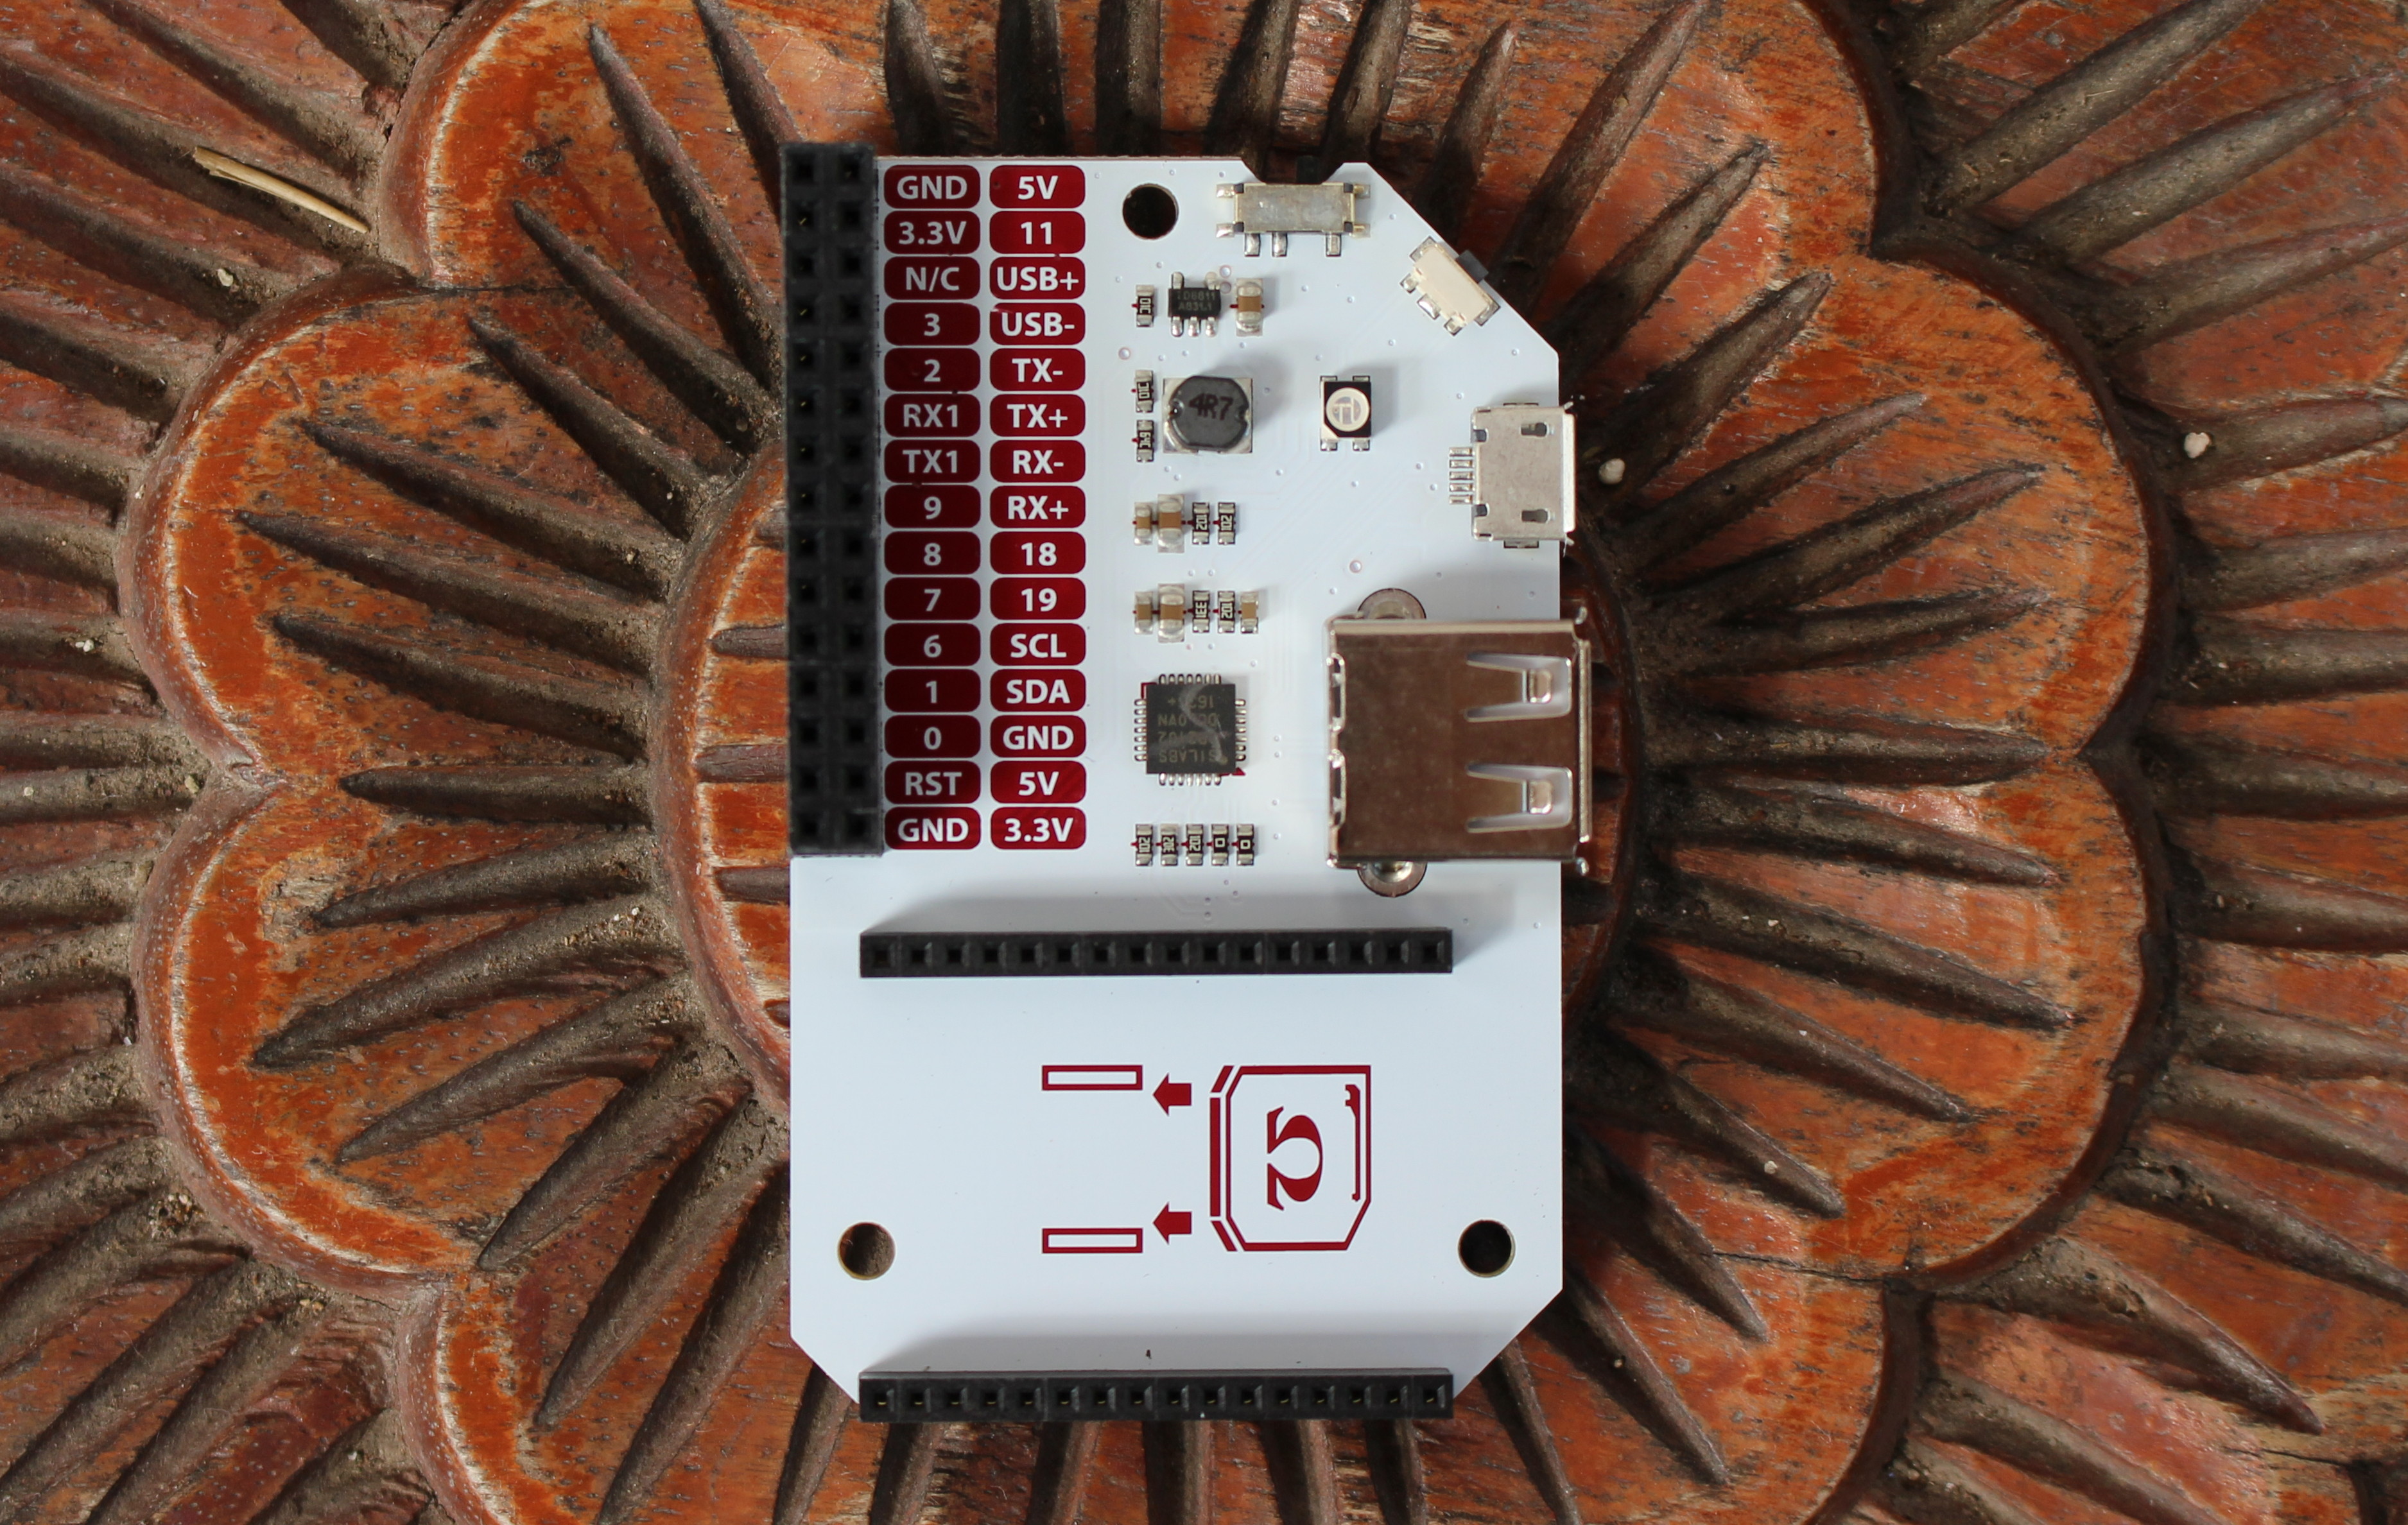
The button on the top is for power, the one at 45 angle is the reset button, and we also have a micro USB port for power, a USB port for storage, an RGB LED, and the header for Onion Omega2 board.
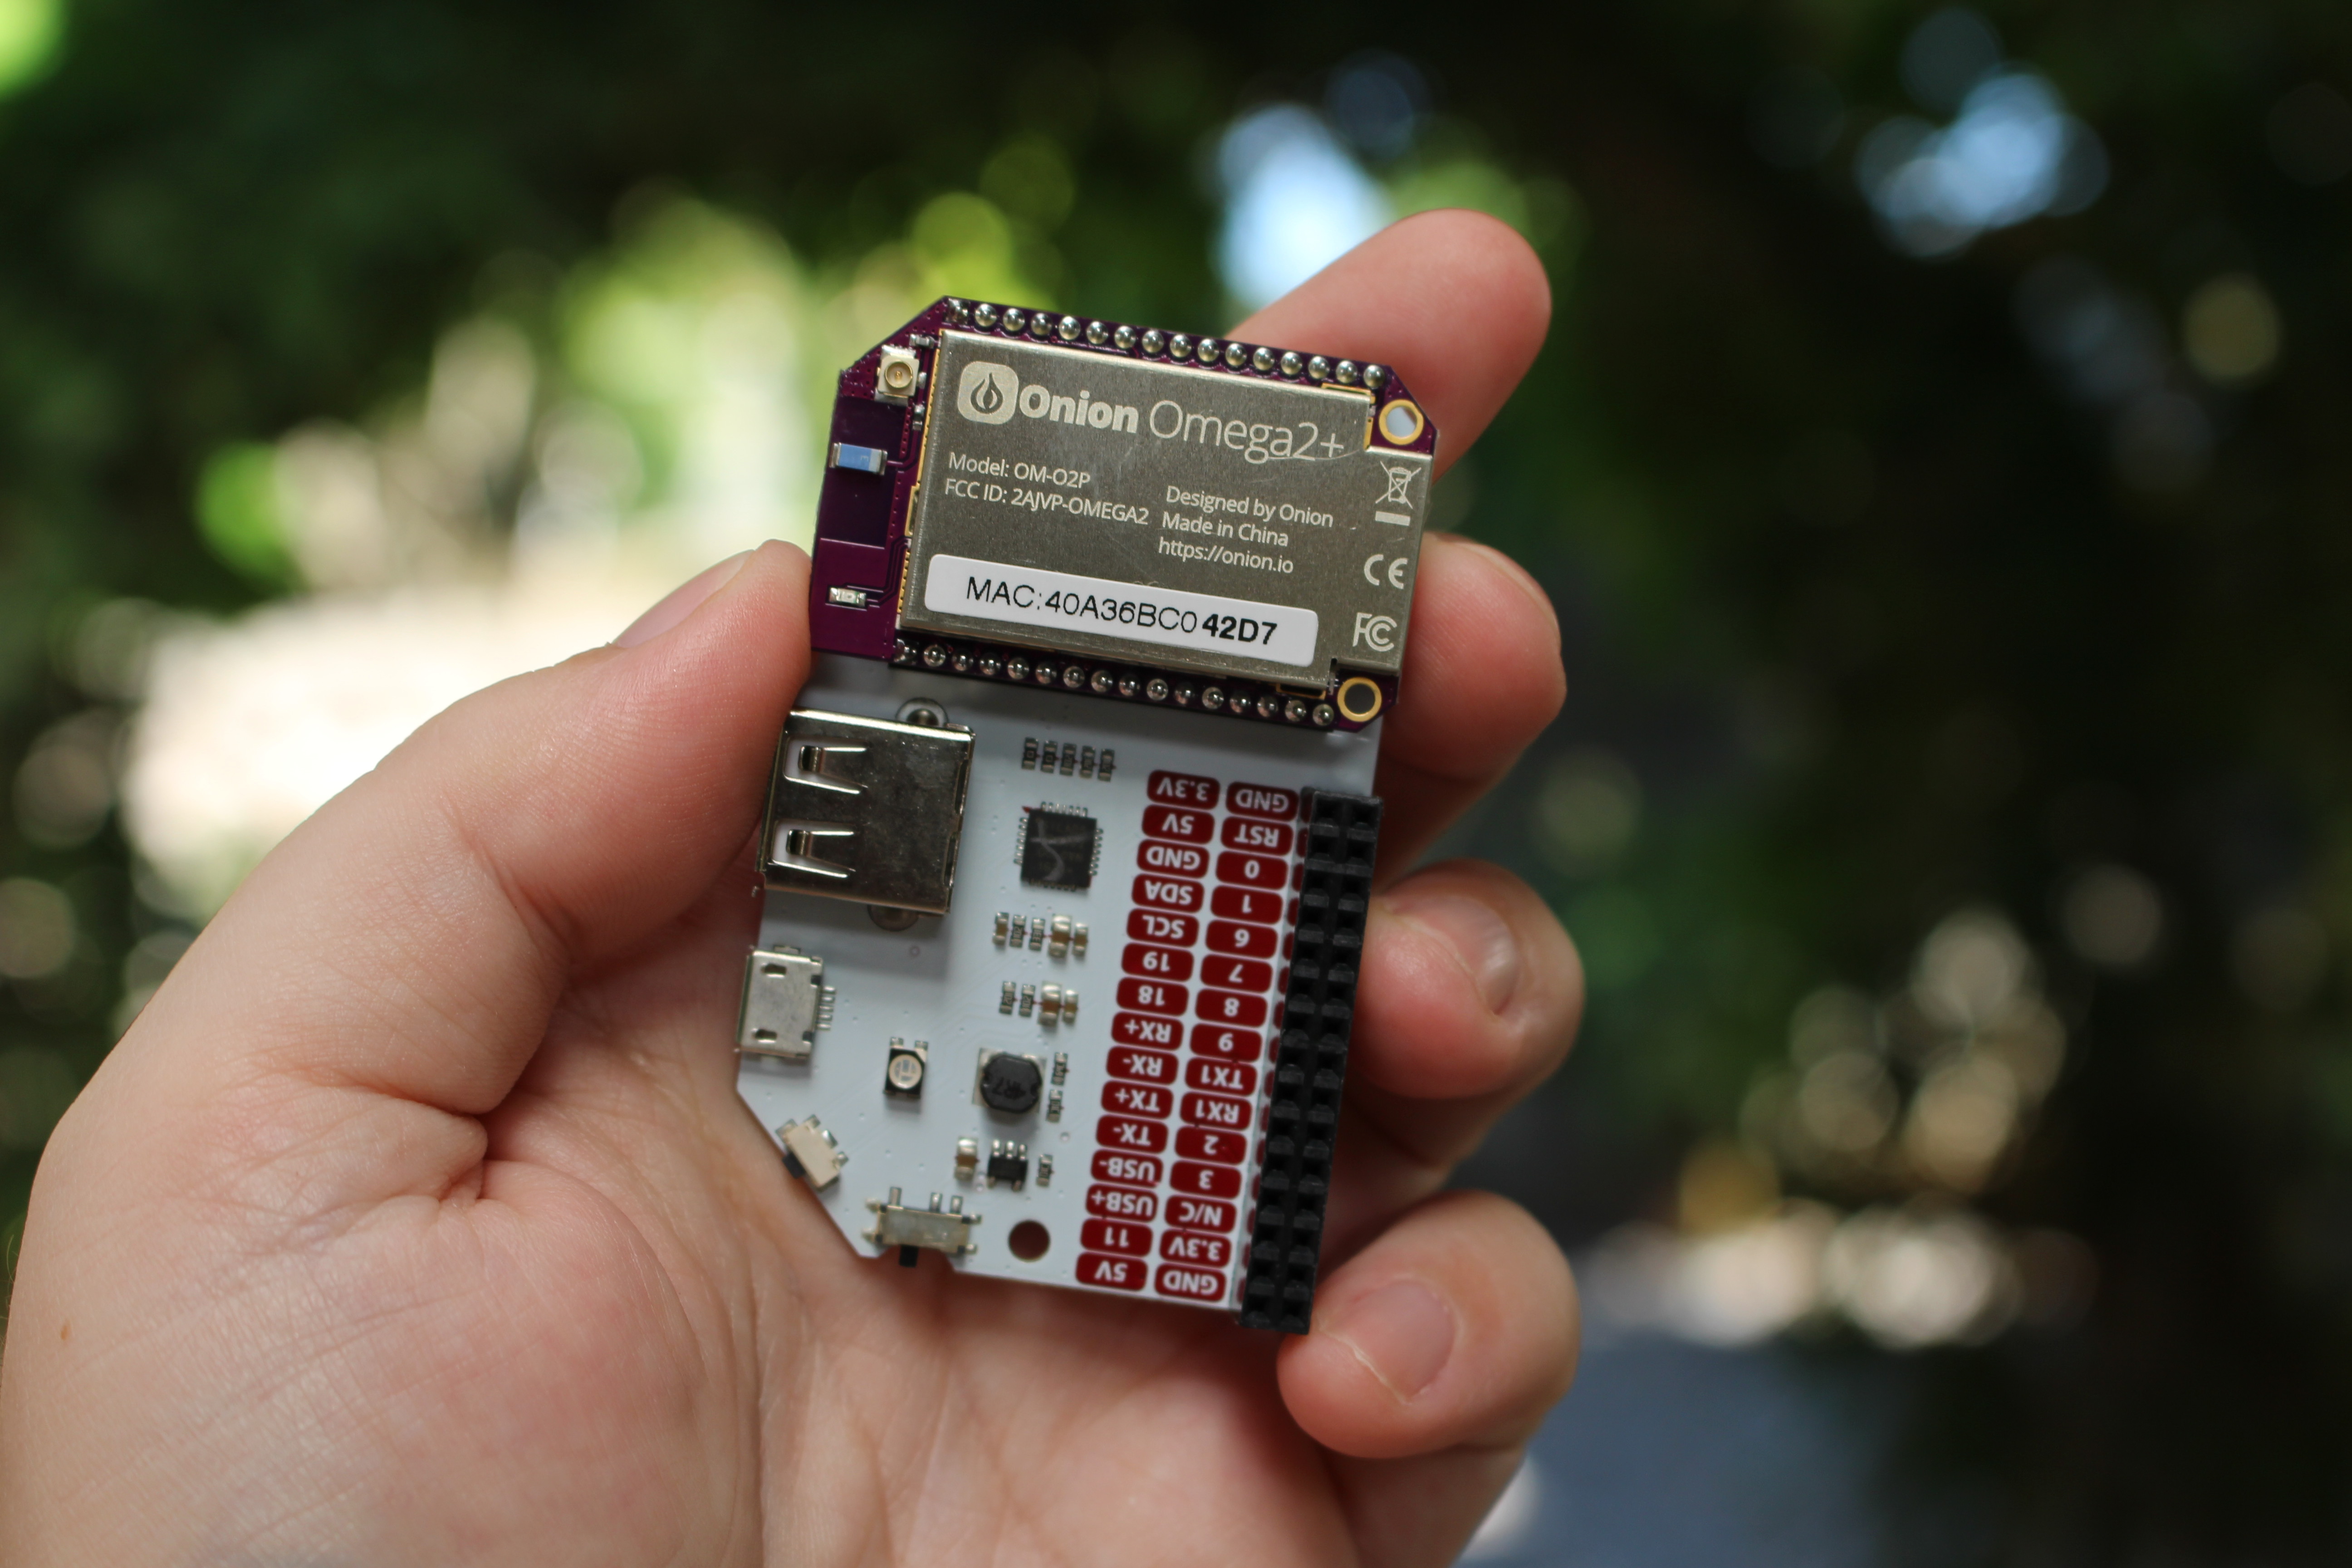
Plugging Omega2 into the dock is very easy, and the only thing you have to check is that it is inserted correctly.
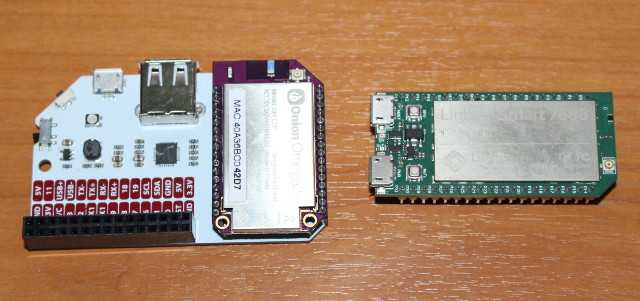 Onion Omega2+ is not my first Mediatek MT7688 board, as I’ve reviewed LinkIt Smart 7688 too, and took side-by-side picture of both boards for comparison. Omega2+ is smaller, but LinkIt Smart board already include a micro USB port for power.
Initial Setup for Onion Omega2 and Expansion Dock
I normally test the documentation as much as I test the board, and after a web search, I ended up on that Getting Started page. However, it was for Onion Omega, the first version of the board introduced in 2015, and while the instructions are similar, they are not quite the same. Finally, I found the actual Omega2 Wiki, and could successful complete the setup with some efforts.
I’ll be using a computer running Ubuntu 16.04 to access the board, but it also works with Windows with Bonjour Service, and Mac OS X.
The Zeroconf services is needed to play with the board unless you access the board directly with its IP, but it’s normally already installed in Linux distriutions, so we are good to go. First we need to connect a micro USB to USB cable to a power source like the USB port of your computer, and turn on the board with the power switch.
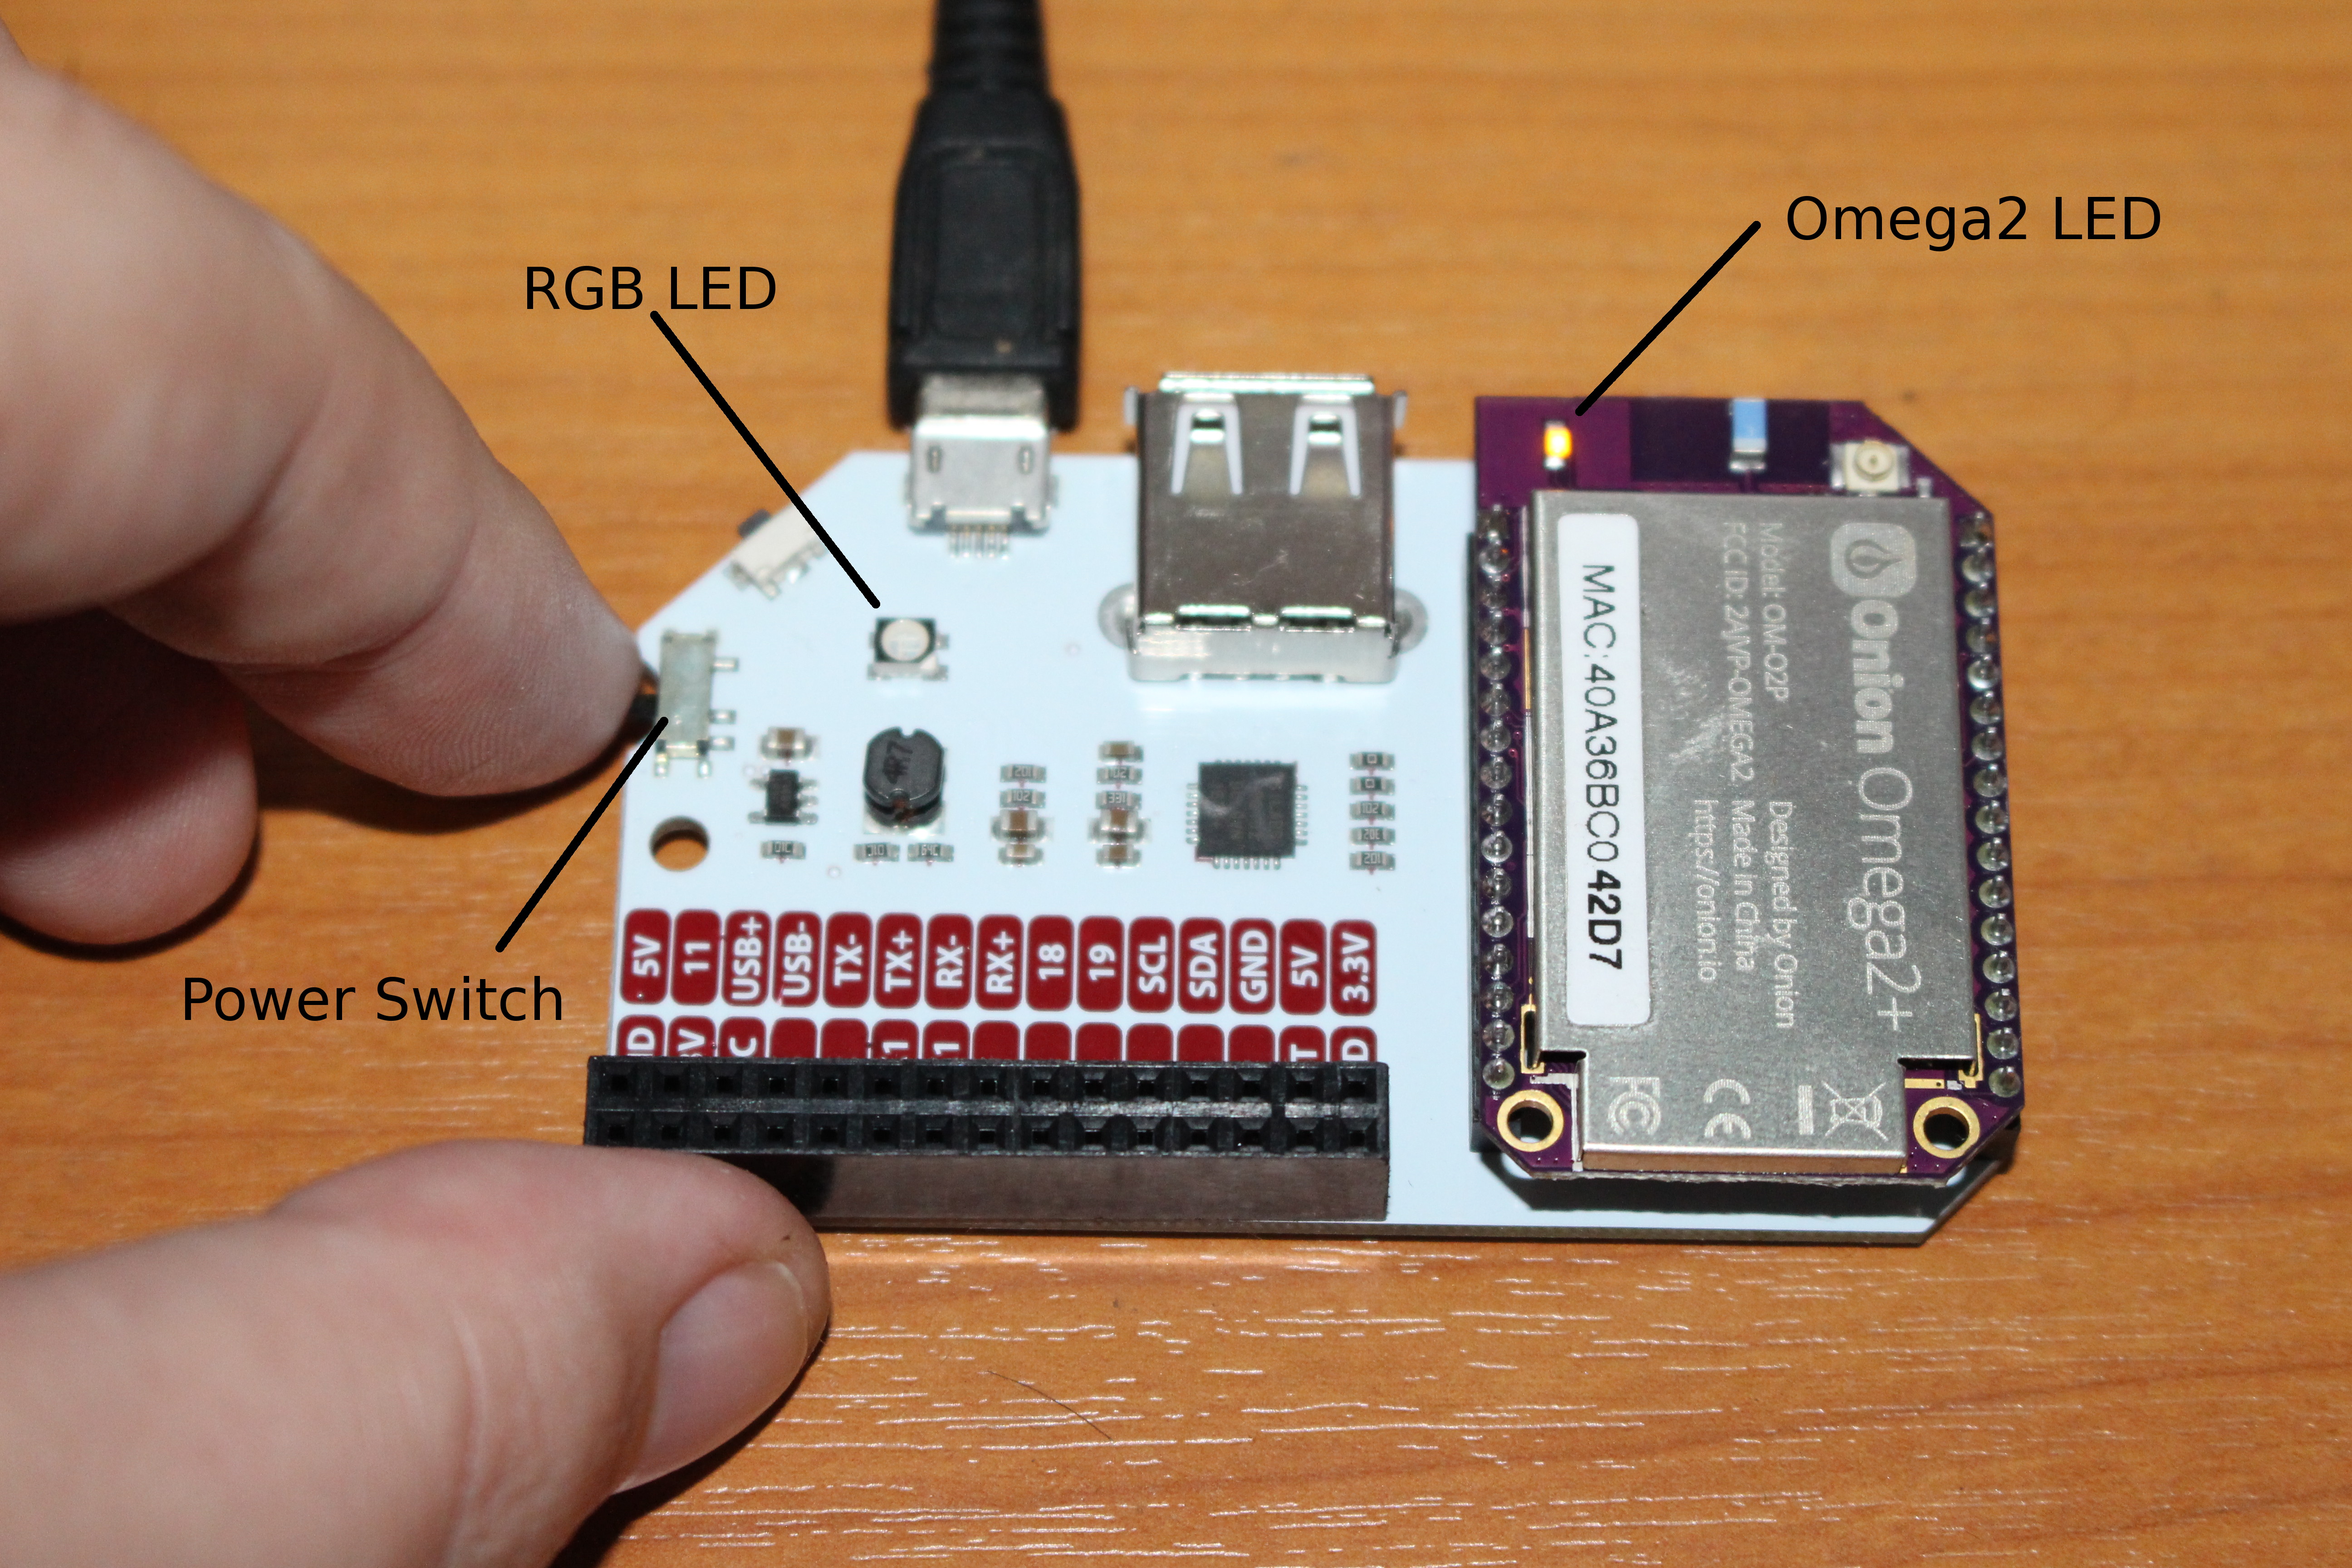
At first both the RGB LED on the dock and Omega2+ LED will turn on for a short time, after which the RGB LED will turn off, and Omega2 LED will blink for a few seconds, and once the LED stops blinking and remains solid the boot is done.
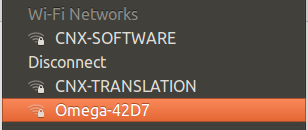
You should then see an new “Omega-XXXX” access point in your WiFi networks, where XXXX is the last digits of your MAC address shown on bold on the board. We now need to connect to the access point using password: 12345678
Omega2 Web Configuration
One it’s done, open a web browser and go ti http://192.168.3.1 or http://omega-XXXX.local/ to access Omega2 Setup Wizard.
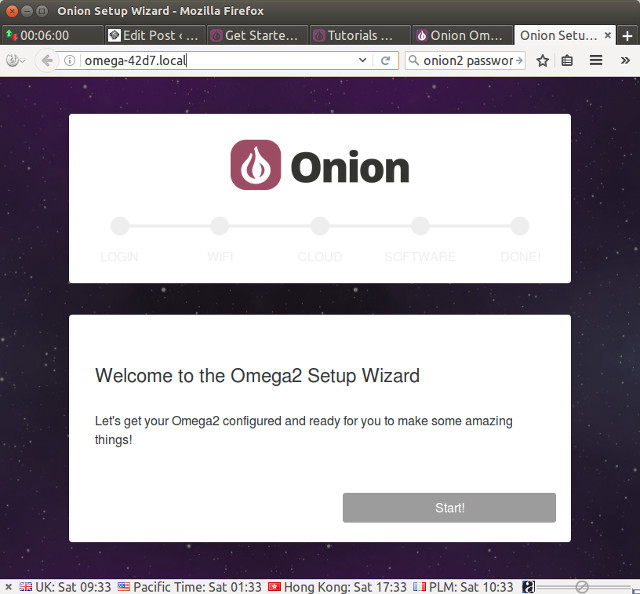
Click Start to login with the default credentials (username: root ; password:onioneer), and the next page will let you connect the board to your WiFi router.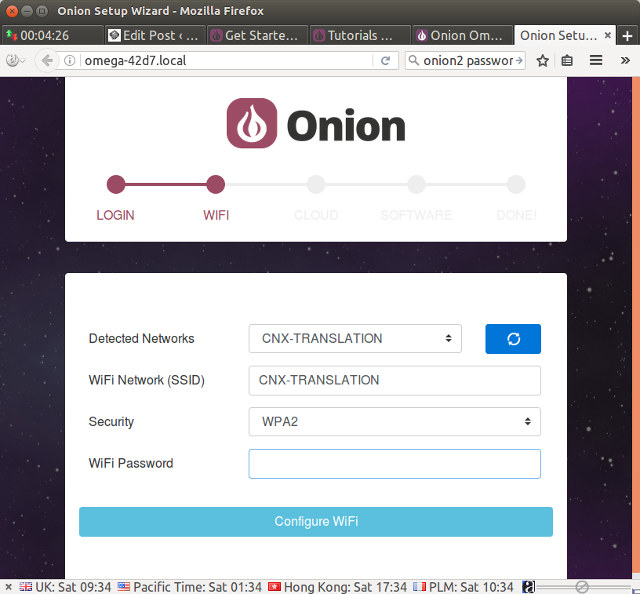
Selection you ESSID, input you WiFi password. and clikc on “Configure WiFi“. 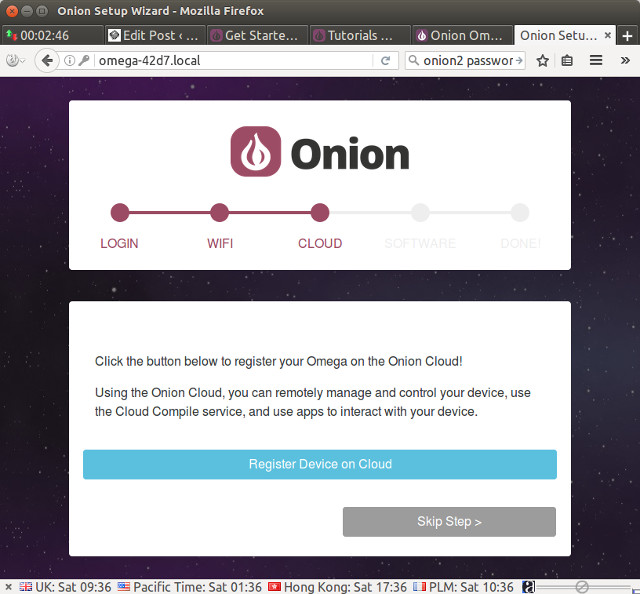
The wizard offers you to register your board to the cloud, but this is completely optional, and you could simply select Skip Step to go to the next step (firmware update). But I tried to registered the device to the cloud for this review.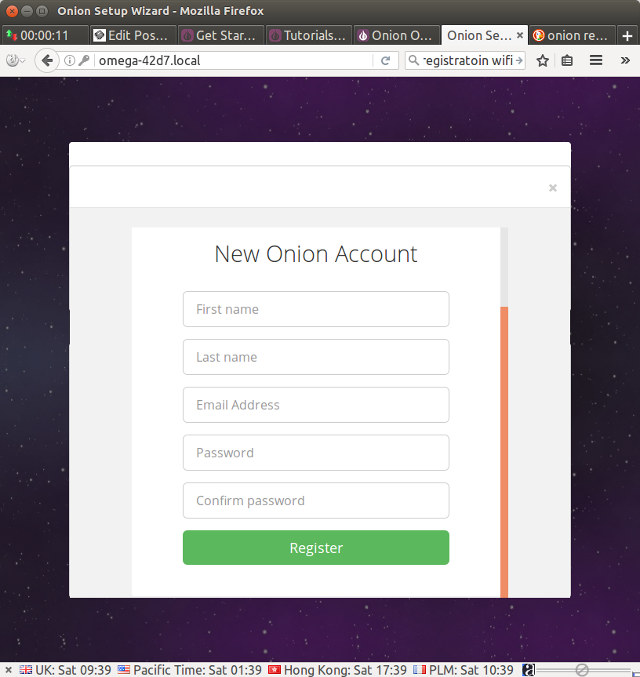 You’ll need to provide your name, an email address and a password to register an account first.
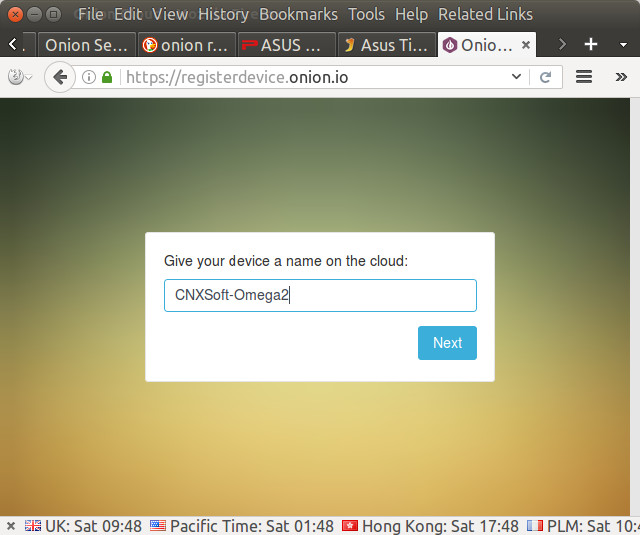 You’ll then be asked for a device name and a description to confirm the registration.
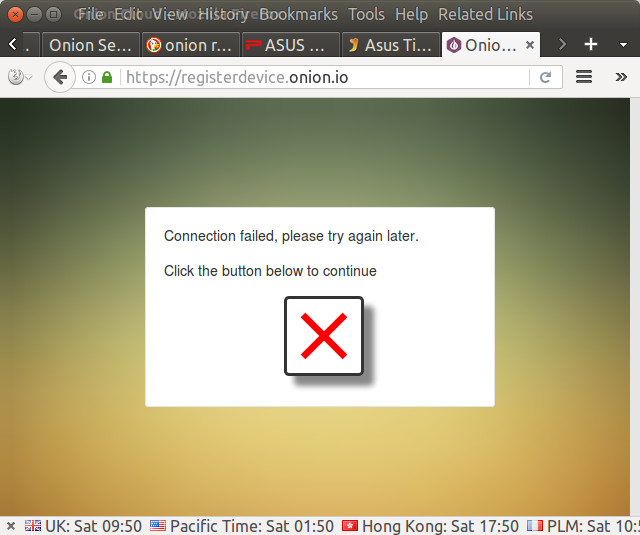 Sadly this step failed and I got the window above. Clicking on the red cross button did nothing. If I login to the cloud service, I can see the board listed, but detected as offline. I’m not the only one to have this issue, and Onion developers are looking into it.
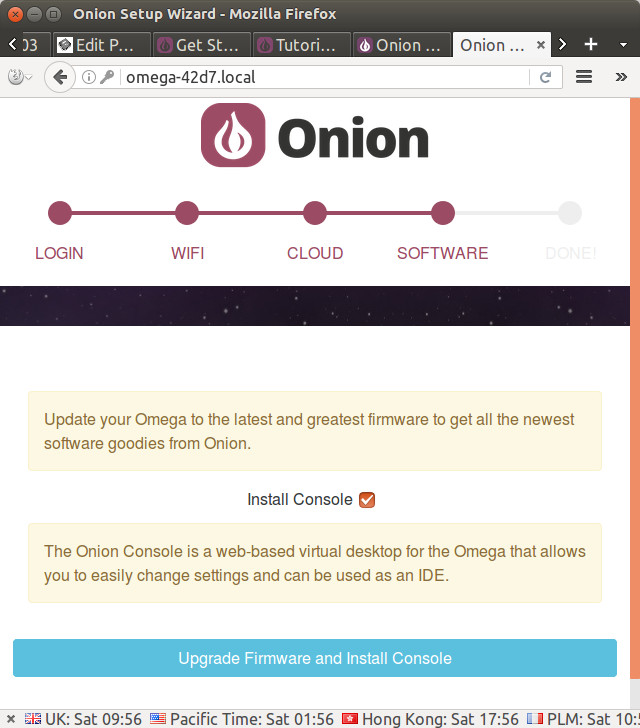 So instead I went to the next step to upgrade the firmware and install Console web-based virtual desktop.
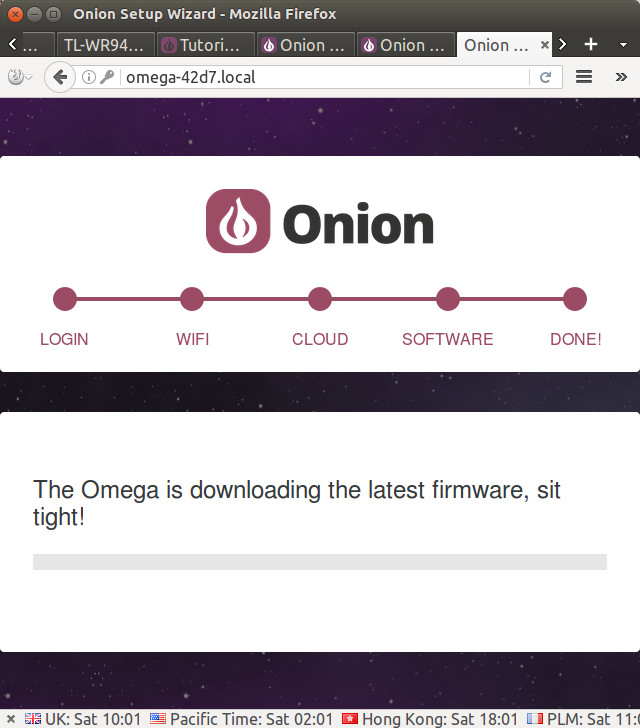 This also failed as the progress bar did not move at all, and I waited for around 20 minutes. I could also see my router’s DHCP server gave an IP address to the board, so it should have been able to connect to the Internet.
Omega2 Command Line Configuration
So I used to backup configuration method, using the command line as explained in the documentation. You just need to SSH the board as root with the same password as in the web configuration (onioneer):
|
1 2 3 4 5 6 7 8 9 10 11 12 13 14 15 16 17 18 |
ssh root@omega-42d7.local The authenticity of host 'omega-42d7.local (192.168.0.113)' can't be established. RSA key fingerprint is SHA256:xxxx Are you sure you want to continue connecting (yes/no)? yes Warning: Permanently added 'omega-42d7.local' (RSA) to the list of known hosts. BusyBox v1.25.1 () built-in shell (ash) ____ _ ____ / __ \___ (_)__ ___ / __ \__ _ ___ ___ ____ _ / /_/ / _ \/ / _ \/ _ \ / /_/ / ' \/ -_) _ `/ _ `/ \____/_//_/_/\___/_//_/ \____/_/_/_/\__/\_, /\_,_/ W H A T W I L L Y O U I N V E N T ? /___/ ----------------------------------------------------- Ω-ware: 0.1.5 b130 ----------------------------------------------------- |
Note Ω-ware firmware version is 0.1.5 b130.
wifisetup allows you to scan the network, and connect the board to your router:
|
1 2 3 4 5 6 7 8 9 10 11 12 13 14 15 16 17 18 19 20 21 |
root@Omega-42D7:~# wifisetup Onion Omega Wifi Setup Select from the following: 1) Scan for Wifi networks 2) Type network info q) Exit Selection: 1 Scanning for wifi networks... Select Wifi network: 1) CNX-TRANSLATION 2) CNX-SOFTWARE Selection: 1 Network: CNX-TRANSLATION Authentication type: WPA2PSK Enter password: xxxxxxxxx > Restarting wifimanager for changes to take effect |
Good. Firmware update failed in the web setup wizard, but we can retry it with oupgrade command line:
|
1 2 3 4 5 6 7 8 9 10 11 12 13 14 15 16 17 18 19 20 21 22 23 |
root@Omega-42D7:~# oupgrade > Device Firmware Version: 0.1.5 b130 > Checking latest version online... > Repo Firmware Version: 0.1.7 b139 > Comparing version numbers > New firmware version available, need to upgrade device firmware > Downloading new firmware ... /usr/bin/oupgrade: local: line 377: not in a function --2017-01-14 10:16:17-- http://repo.onion.io/omega2/images/omega2p-v0.1.7-b139.bin Resolving repo.onion.io... 52.89.44.24, 54.149.140.66 Connecting to repo.onion.io|52.89.44.24|:80... connected. HTTP request sent, awaiting response... 200 OK Length: 7078055 (6.8M) [application/octet-stream] Saving to: '/tmp/omega2p-v0.1.7-b139.bin' /tmp/omega2p-v0.1.7 100%[===================>] 6.75M 1.02MB/s in 9.6s 2017-01-14 10:16:27 (722 KB/s) - '/tmp/omega2p-v0.1.7-b139.bin' saved [7078055/7078055] > Starting firmware upgrade.... Saving config files... killall: watchdog: no process killed Sending TERM to remaining processes ... uhttpd device-client onion-helper udhcpc avahi-daemon mountd ntpd udhcpc |
The firmware could be downloaded, and it looked like the system rebooted as I lost access to SSH terminal. The LED was still on for a while after it happened, then the LED went off (forever), at least longer than the 15 seconds listed in the documentation, and in that case they explain you need to power cycle the board. I used the power switch on the expansion dock to do so.
The board LED blinked for a pretty long time (maybe 2 minutes), but eventually it stopped and remained solid, and I could login to the board:
|
1 2 3 4 5 6 7 8 9 10 11 |
BusyBox v1.25.1 () built-in shell (ash) ____ _ ____ / __ \___ (_)__ ___ / __ \__ _ ___ ___ ____ _ / /_/ / _ \/ / _ \/ _ \ / /_/ / ' \/ -_) _ `/ _ `/ \____/_//_/_/\___/_//_/ \____/_/_/_/\__/\_, /\_,_/ W H A T W I L L Y O U I N V E N T ? /___/ ----------------------------------------------------- Ω-ware: 0.1.7 b139 ----------------------------------------------------- root@Omega-42D7:~# |
The firmware was updated to version 0.1.7 b139, so all good even though the whole setup did not go 100% smoothly. In case something goes really wrong and you can’t access the board at all, you could try to do a Factory Restore by pressing and holding the reset button for 10 seconds then releasing it.
Omega2 LEDE System Info
Since we’re done with the configuration, let’s quickly check some system info:
|
1 2 3 4 5 6 7 8 9 10 11 12 13 14 15 16 17 18 19 20 21 22 23 24 25 26 27 28 29 30 31 32 33 |
root@Omega-42D7:~# uname -a Linux Omega-42D7 4.4.39 #0 Thu Dec 29 17:07:01 2016 mips GNU/Linux root@Omega-42D7:~# df -h Filesystem Size Used Available Use% Mounted on /dev/root 5.3M 5.3M 0 100% /rom tmpfs 61.3M 92.0K 61.3M 0% /tmp /dev/mtdblock6 25.1M 760.0K 24.4M 3% /overlay overlayfs:/overlay 25.1M 760.0K 24.4M 3% / tmpfs 512.0K 0 512.0K 0% /dev root@Omega-42D7:~# free -h total used free shared buffers cached Mem: 125644 28728 96916 92 3272 9656 -/+ buffers/cache: 15800 109844 Swap: 0 0 0 root@Omega-42D7:~# cat /proc/cpuinfo system type : MediaTek MT7688 ver:1 eco:2 machine : Onion Omega2+ processor : 0 cpu model : MIPS 24KEc V5.5 BogoMIPS : 385.84 wait instruction : yes microsecond timers : yes tlb_entries : 32 extra interrupt vector : yes hardware watchpoint : yes, count: 4, address/irw mask: [0x0ffc, 0x0ffc, 0x0ffb, 0x0ffb] isa : mips1 mips2 mips32r1 mips32r2 ASEs implemented : mips16 dsp shadow register sets : 1 kscratch registers : 0 package : 0 core : 0 VCED exceptions : not available VCEI exceptions : not available |
So we have a relatively recent kernel (Linux 4.4), 24.4MB space available to the user, 125664 KB total memory, and a MIPS 24KEc processor…
Controlling Omega2’s Dock RGB LED (via PWM)
We can start playing with the GPIO on the board starting with the RGB LED on the dock that should be connected to pin 15, 16 and 17. The documentation explains expled sample can be used for this and we can see the R, G, B hexadecimal values. I want to show red color only, and I set blue and green to zero:
|
1 2 3 4 5 |
root@Omega-42D7:~# expled 0xF20000 Setting LEDs to: F20000 Duty: 6 100 100 Segmentation fault Segmentation fault |
Oops, segfault. Let’s try something else like a pinkish color:
|
1 2 3 4 |
root@Omega-42D7:~# expled 0xF21133 Setting LEDs to: F21133 Duty: 6 94 80 root@Omega-42D7:~# |
It runs, but the RGB LED remains off. It’s not an hardware problem since the RGB LED turns on at boot time. expled is actually a bash script that can be found in /usr/bin/expled and calls “fast-gpio“program which access GPIOs directly without using sysfs. Maybe it’s another firmware issue.
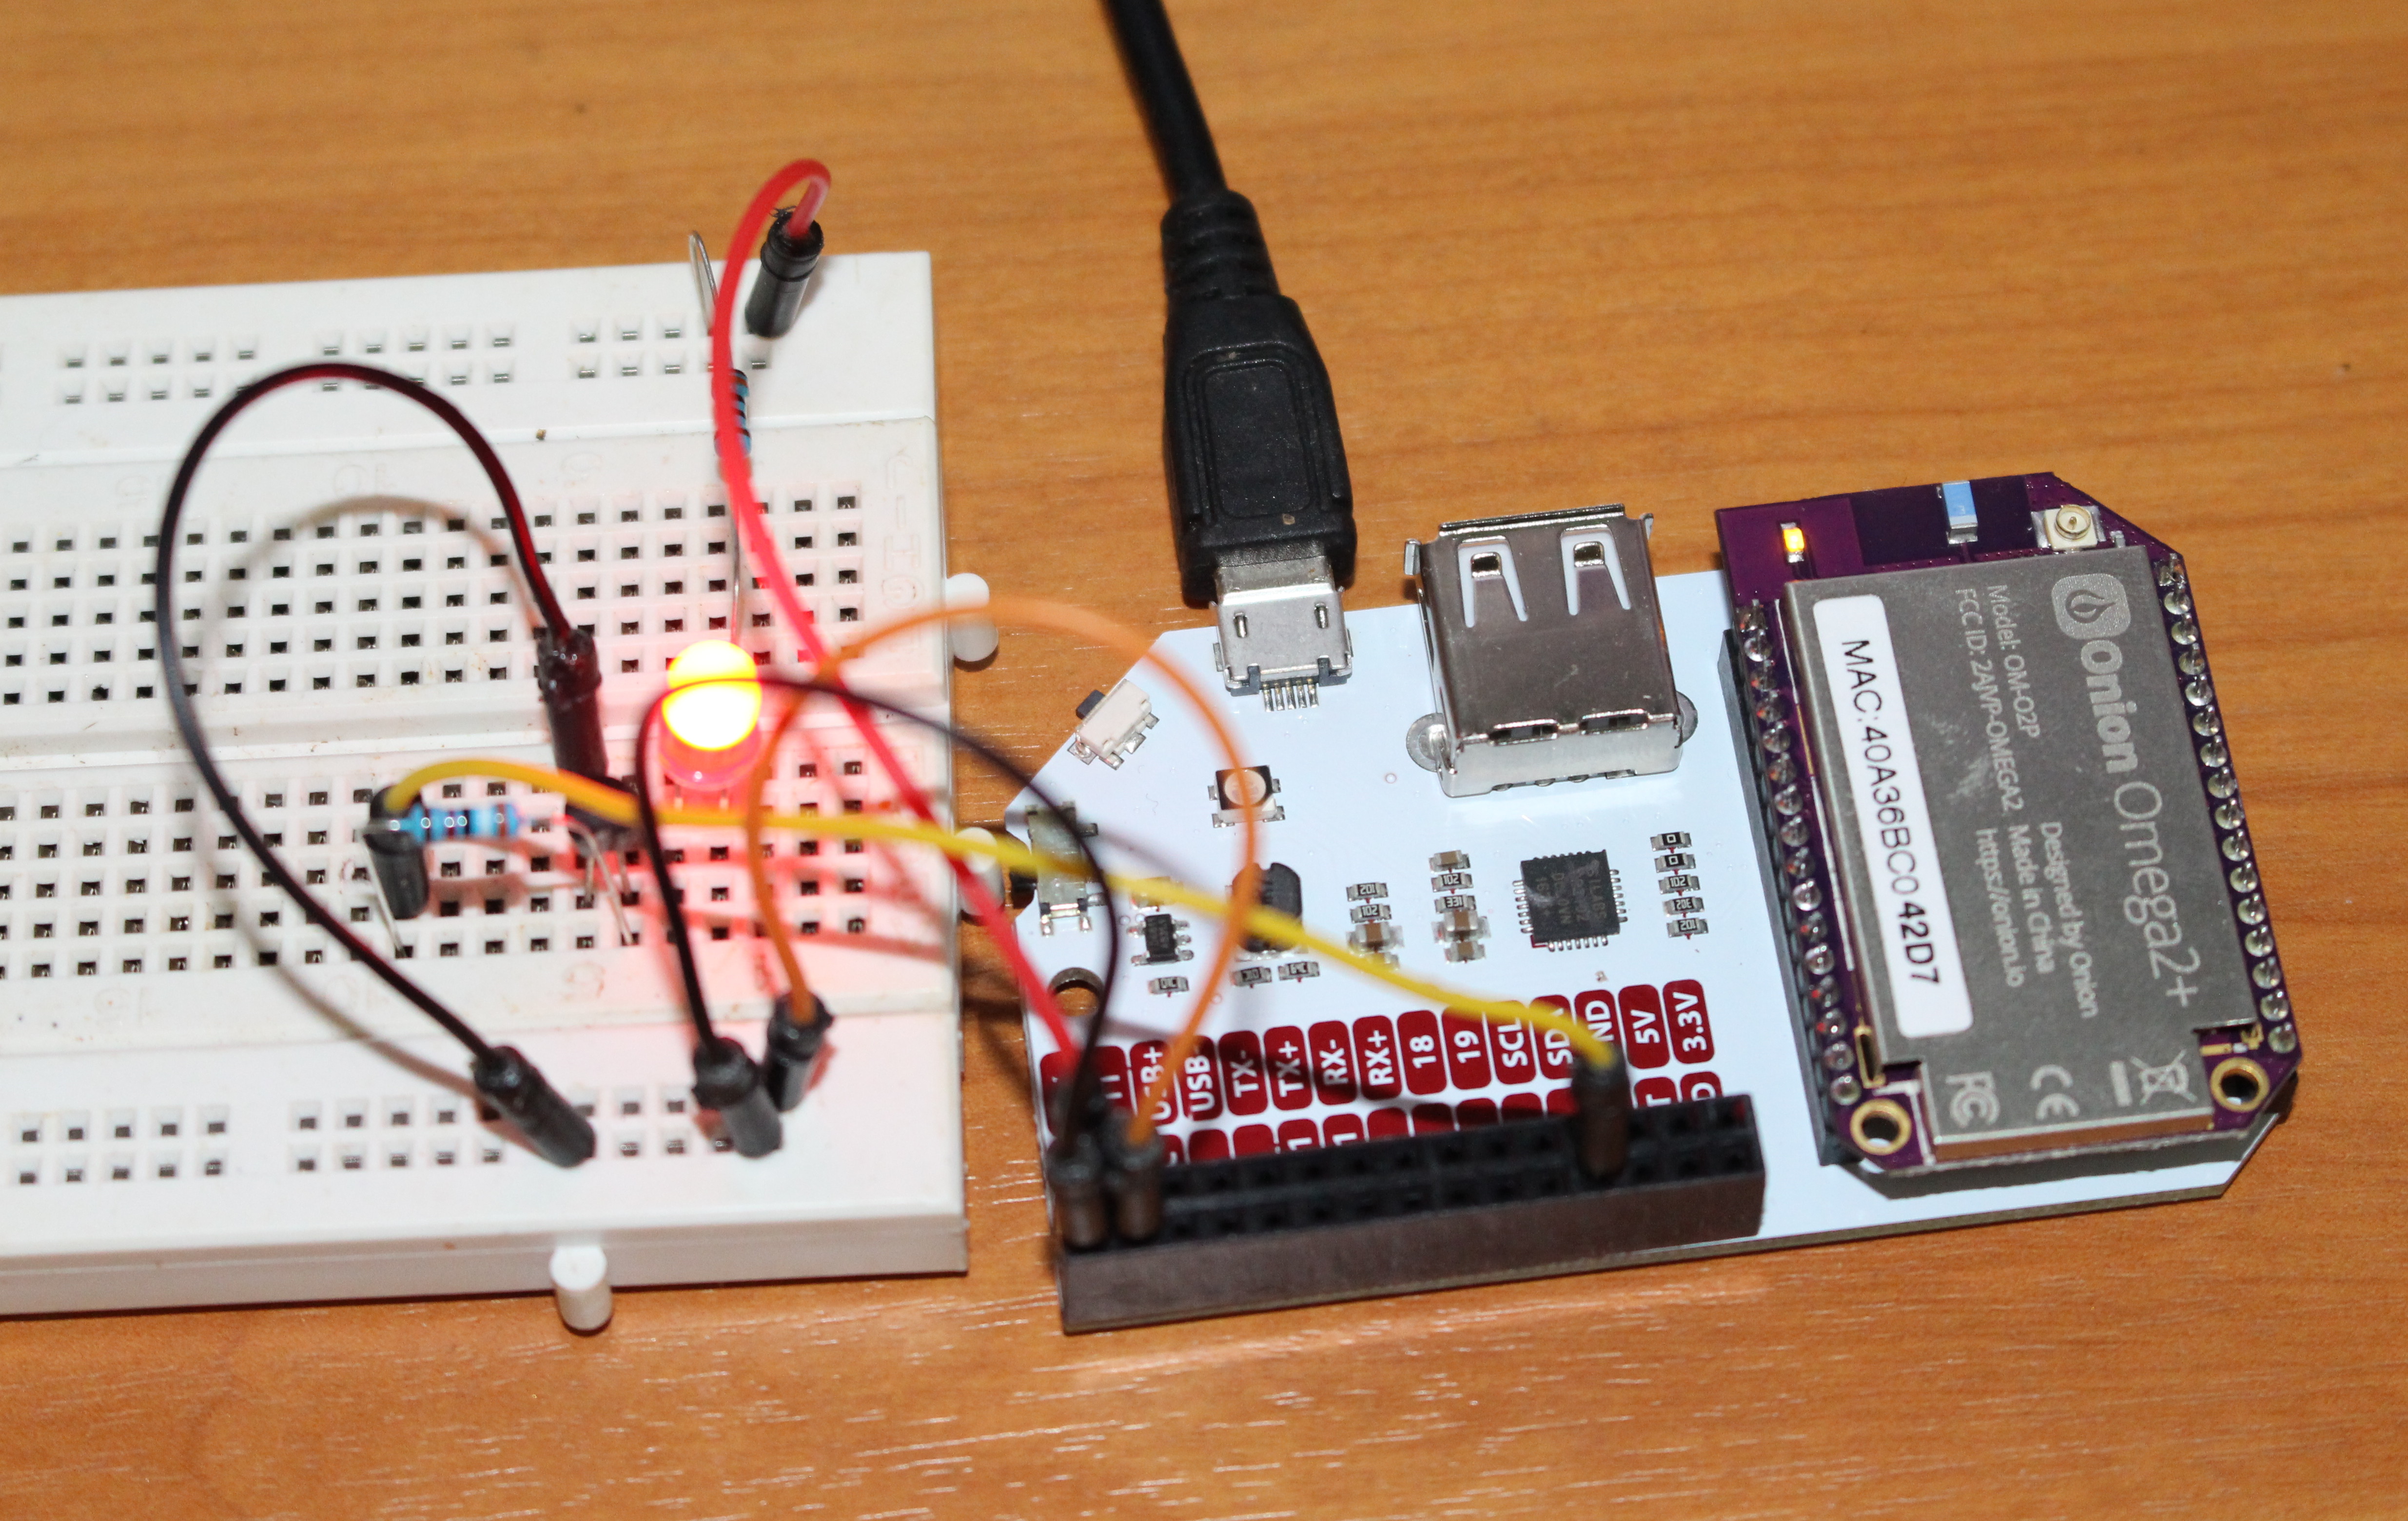
Controlling Omega2 GPIOs – LED example
In order to play with the expansion header, I connected a 5V LED to a breadboard together with two resistors and a transistor (for 3.3 to 5V conversion), and connected it to pin 1 on the header.
We’ve already seen fast-gpio tools in expled script, but I used another GPIO tools for the LED, namely gpioctl that relies on sysfs.
We first need to set the GPIO pin as an output pin using the dirout command (dirin would set it as an input):
|
1 2 |
root@Omega-42D7:~# gpioctl dirout 1 Using gpio pin 1 |
We can now turn the LED on by setting GPIO 1 to HIGH with dirout-high option:
|
1 2 3 4 5 |
root@Omega-42D7:~# gpioctl dirout-high 1 Using gpio pin 1. root@Omega-42D7:~# gpioctl get 1 Using gpio pin 1. Pin 1 is HIGH |
The get command above will check the value of the pin. The LED did turn on as it should, and we can turn it off with dirout-low option:
|
1 2 |
root@Omega-42D7:~# gpioctl dirout-low 1 Using gpio pin 1. |
Success.
If you want to use multiplexed pin with I2C, SPI, UART, PWM, I2S… you’ll need to check out omega2-ctrl program. I have not tried it for this guide to keep it short.
Onion Omega2 and BreadBoards
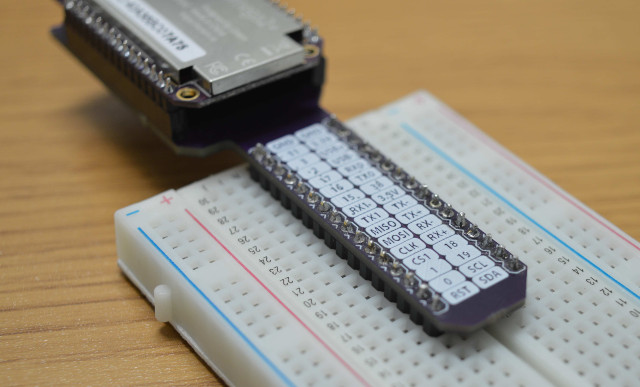
Many similar small IoT board are designed to fit on a breadboard, but Onion Omega2 board’s header pins are using 2 mm pitch, not 2.5 mm pitch, so they can’t be used with a breadboard directly. Instead, you’d have run wires from the board to the breadboard or purchase a BreadBoard Dock as pictured below.
 If you do not have a dock, or breadboard expansion board, you can still power the Omega2 module/board using a 3.3V power source for example with a regulator such as LD1117, or something like YwRobot MB102 breadboard power supply.
If you are interested in getting a board, you may have to wait as while Omega Expansion Dock sells for $14.99 on Onion store, Omega2 boards are not listed yet. For reference, Omega2 board went for $5, and Omega2+ board for $9 on Kickstarter. [Update: While the Kickstarter campaign is now finished, you can still get on Indiegogo for the same price, and that includes shipping].

Jean-Luc started CNX Software in 2010 as a part-time endeavor, before quitting his job as a software engineering manager, and starting to write daily news, and reviews full time later in 2011.
Support CNX Software! Donate via cryptocurrencies, become a Patron on Patreon, or purchase goods on Amazon or Aliexpress


