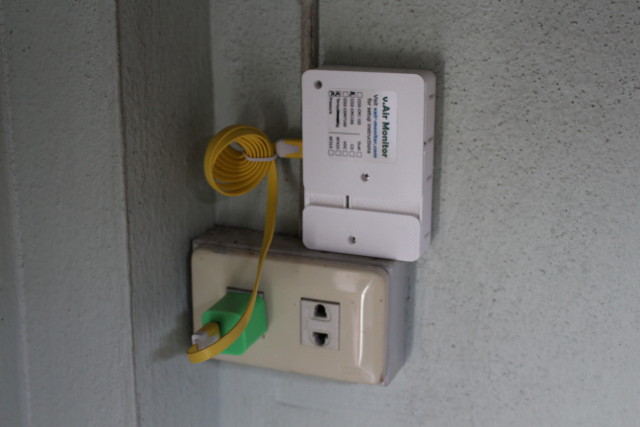
I’ve already checked out vThings CO2 Monitor hardware and we’ve seen it’s based on ESPrino ESP8266 board, and my model includes CM1106 CO2 sensor and BMP180 temperature and pressure sensor. I’ve now installed it in my kitchen, about 3 to 4 meters from the gas stove, and getting data to ThingSpeak.
The door and window of my kitchen are open all day, and the wall have ventilation holes. That’s important for CM1106 sensor since it auto calibrates every 3 days in clear air. If you plan to use such sensor in a closed environment, you should buy Vthings with CM1102 CO2 sensor that costs more, but does not require calibration.
Since all WiFi systems I’ve just so far starting AP mode for configuration, I first looked for an access point, but… nothing… Then I decided to read the documentation (might be useful at times), and the monitor is actually configured via a Chrome (desktop only) add-on through USB. There are three types of devices made by vair-monitor, and I first used vThings Configuration Utility add-on, but eventually found out I had to use vThings – Dual Beam Configuration Utility.
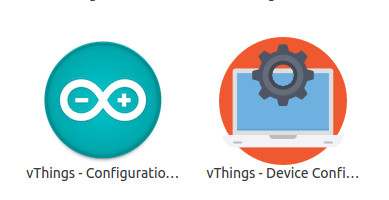
I used Ubuntu (Linux), but if you are using a Windows or Mac computer, you’ll need to install drivers first. Once you’ve connected the monitor through USB and started “vThings- Device Configuration Tool” the following windows should be shown.
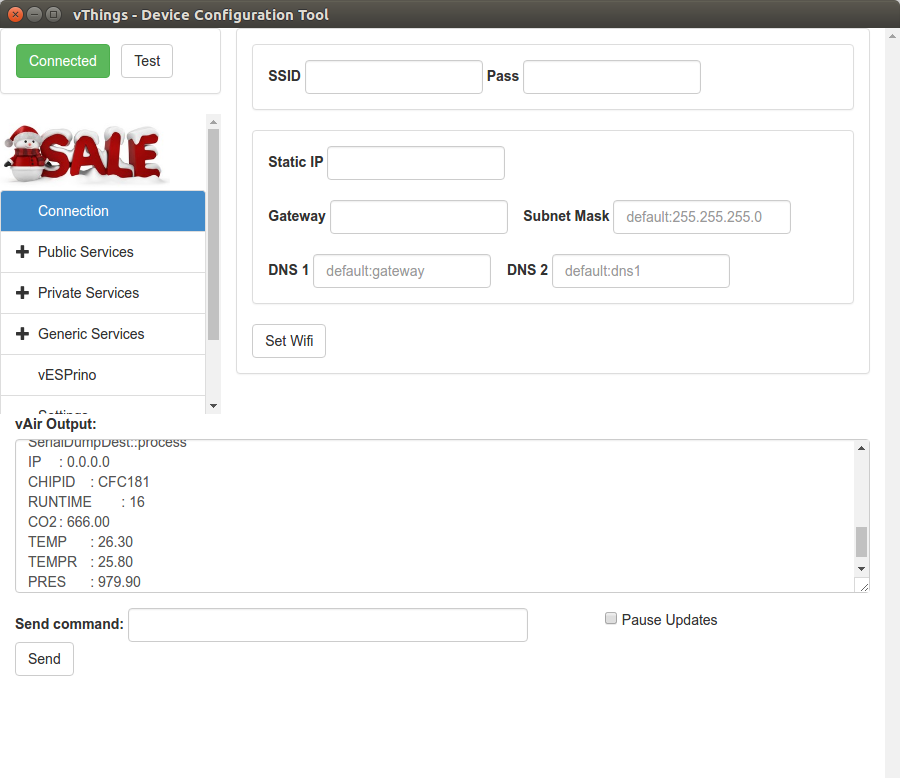
The fist thing to do is to connect the monitor to your WiFi router by entering its SSID and password, and click on Set WiFi.
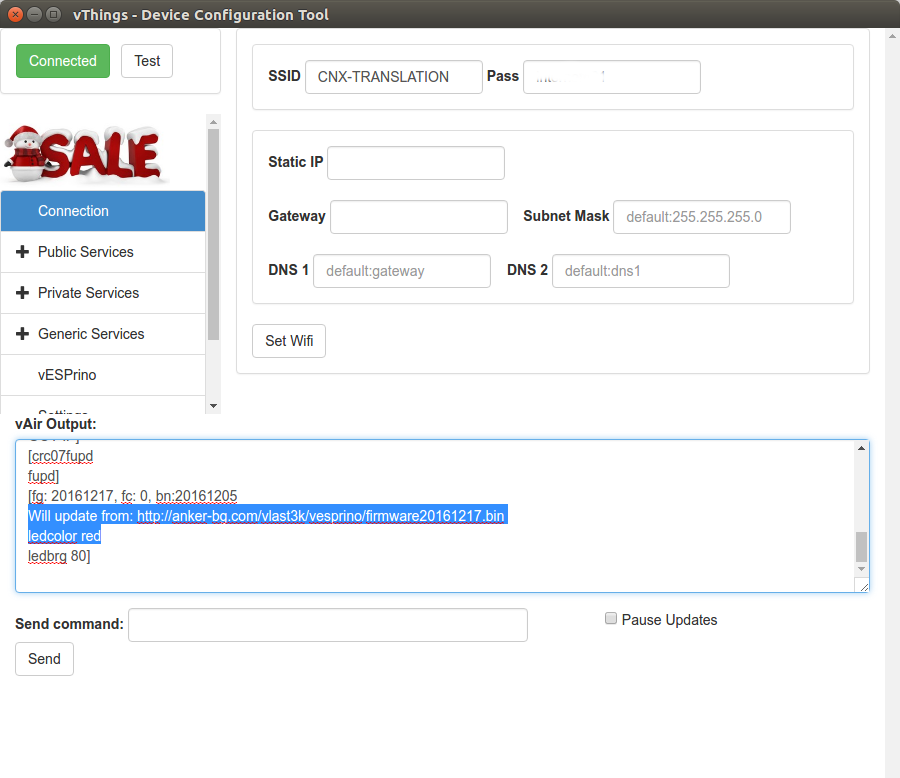
It should connect to your router, and the first time updated the firmware automatically. Wait a couple of minutes for it to complete, and you can go to the next step to configure one or more of the following Public, Private or Generic services:
| Public | Private | Generic |
| BeeBottle | DomoticGa | HTTP |
| Blynk.cc | DomoticZ | MQTT |
| dweet.io | FHEM | RF 433/315 |
| EmonCMS | Homeseer | |
| ThingSpeak | HomeAssistant | |
| UbiDots | JeeDom | |
| OpenHAB | ||
| Pimatic |
I decided to go with ThingSpeak since I got familiar with it while writing Sonoff POW tutorial.
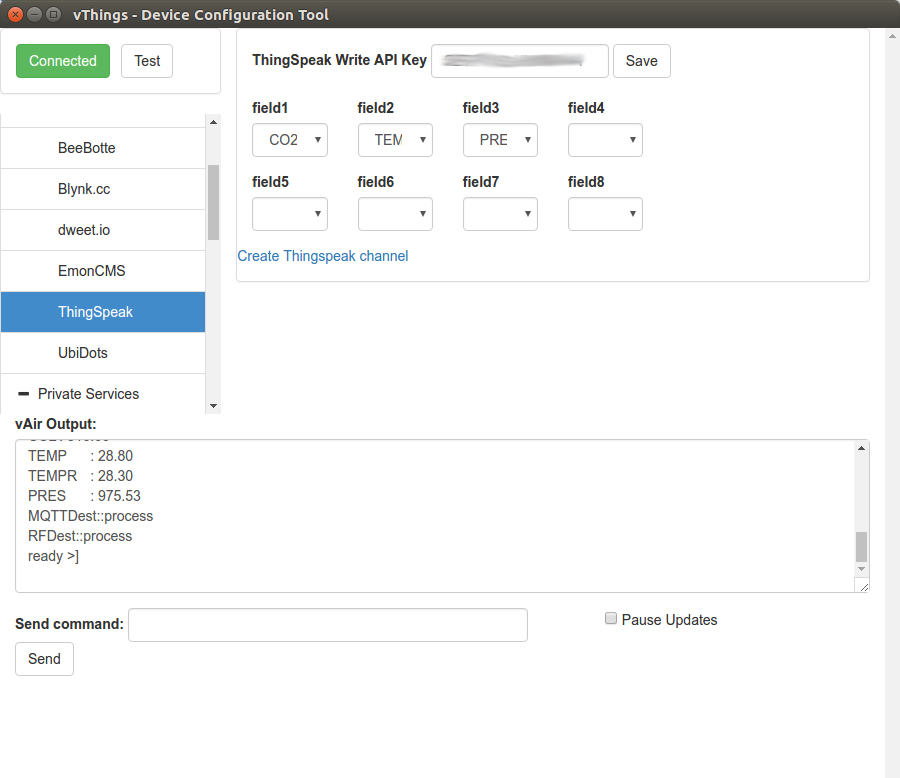
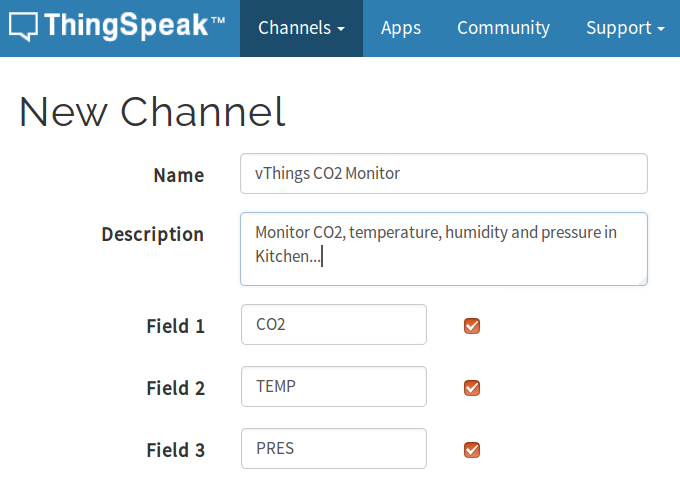
Select the data provided by the sensors inside your vthings Co2 monitor, in my case CO2 levels, temperature, and pressure, and nothing else, or connection will fail, as I found out when I used 4 default fields including humidity, and ThingSpeak was not updated at all. You’ll also need ThingSpeak API write key, that you can get my create a channel on ThingSpeak.com as shown below.
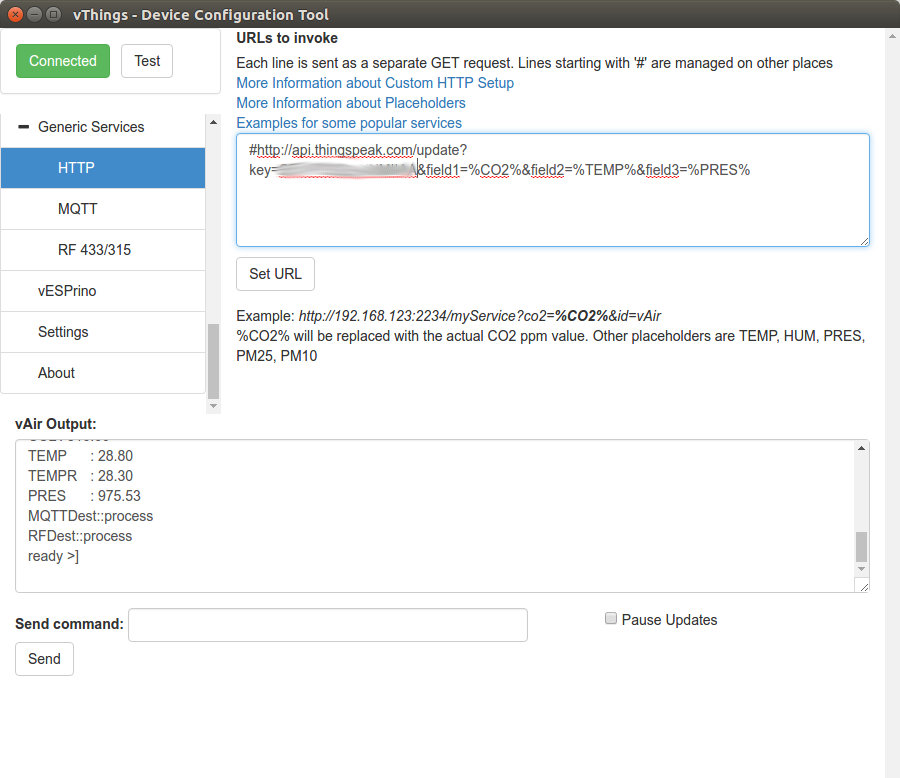
Once the channels is create on ThingSpeak website, and you’ve added the API write key in vThings Device Configuration Tool, you could go to Generic Services->HTTP and notice an HTTP request has been created, so if you have installed ThingSpeak locally, you could change api.thingspeak.com to your own IP address.
By default the data will be updated every 120 seconds, but you can change that in Settings->Update Interval. Once configuration is done, you can unplug it from your PC, and connected to the location you want to monitor. vThings Device Configuration Tool requires a USB connection to find the device, it can not find it over WiFi, so if you want to change configuration, you’ll need to connect it back to your computer. There’s a function to (auto)start a webserver in vESPrino, but it did not seem to work for me.
After a few hours or minutes depending on your update internal you should get some nice charts on ThingSpeak with CO2 levels, temperature and pressure, or other data based on the sensors you’ve selected while purchasing the hardware.
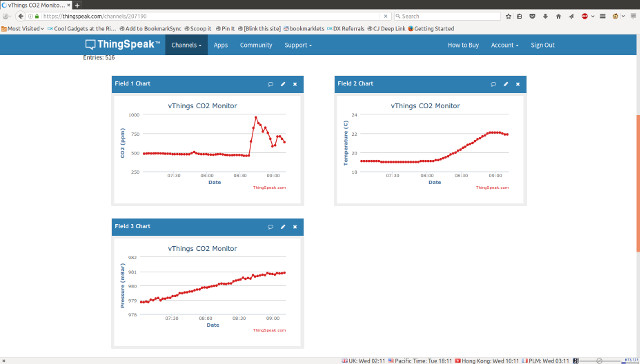
The channel is public if you are interested/curious in seeing the data. ThingSpeak will show 60 samples (2 hours in my case) by default, but let’s see what happened over the last 12 hours with CO2 levels.
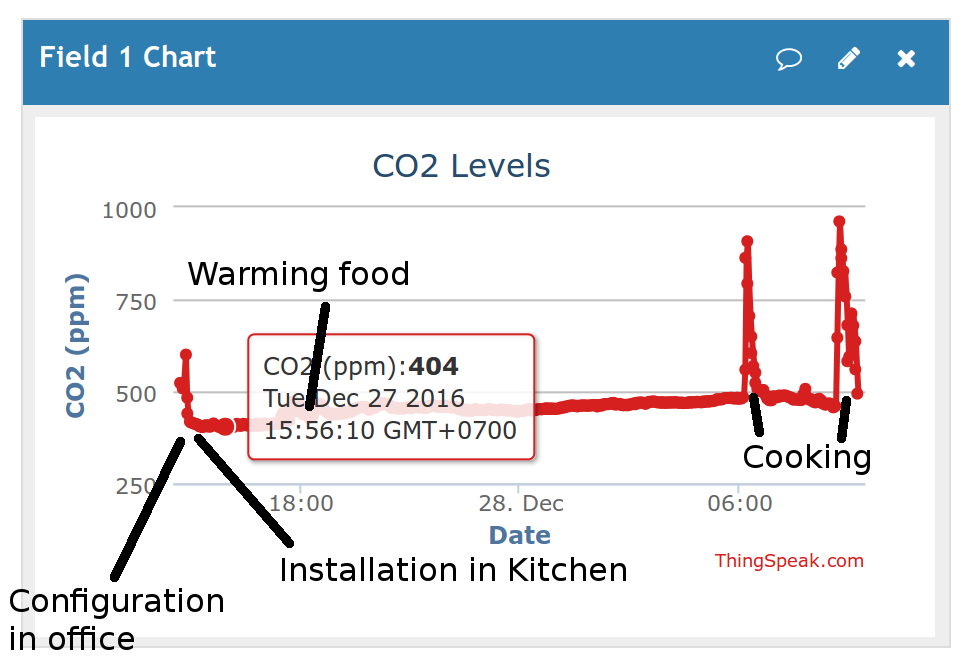
The CO2 levels started at about 500 to 600 ppm while I did the configuration in my office (windows closed), and dropped to around 404 ppm once I installed in the kitchen. That value correspond roughly to the current CO2 ppm value in the atmosphere (in Hawaii). Three times around 18h00 people warmed food and CO2 jumped to around 500 ppm. During the night, CO2 levels slowly increased to 480 ppm, likely because of the plants cycle (producing oxygen during the day, and carbon dioxide during the night). This morning CO2 levels spiked at around 900 ppm when cooking right after 6am and 8am.
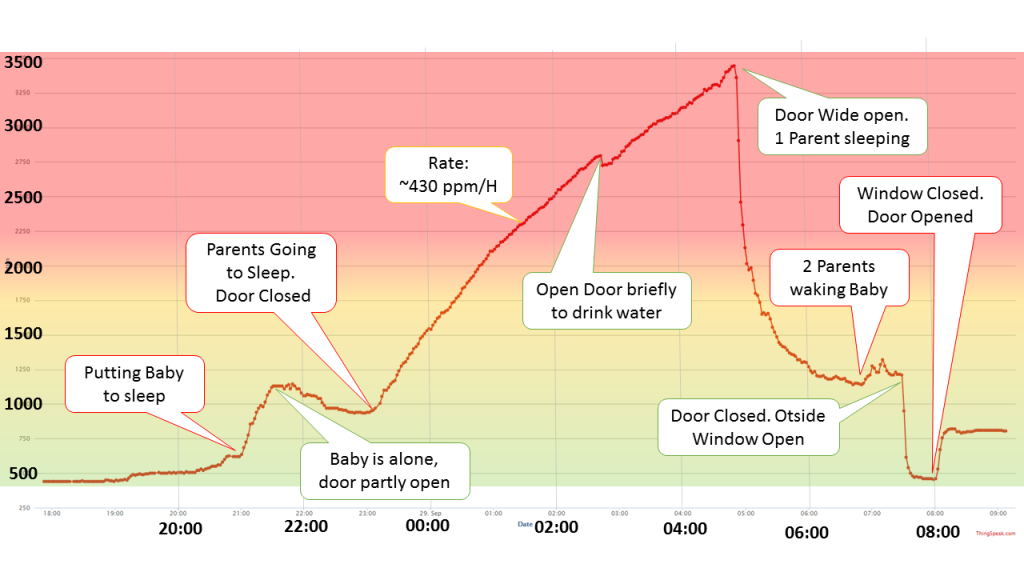
That’s all fun, but is there a real benefit to measuring CO2 levels in your house? In the kitchen I could probably trigger an alert over 1,500 ppm in which case it may mean something is burning, but smoke detectors are much cheaper and better suited to the task. Vladimir Savchenko, vThings developer, found a study claiming that high CO2 levels may decrease creative thinking and lead to bad sleep, so he used vThings CO2 monitor in his bedroom and discovered CO2 levels reached close to 4,000 ppm, and that just open the door or window would greatly reduce the concentration of the gas.
 vThings CO2 monitor does not only monitor CO2 levels as we’ve seen above, as temperature, humidity, and/or pressure sensor can be included in the case, as well as a PM2.5 & PM10 laser dust sensor.
vThings CO2 Monitor v3 is sold for 60 Euros with CM1106 CO2 sensor, and more if you use a better CO2 sensor, or add extra environmental sensors. 135 Euros would get you a top of line monitor with a laser dust sensor, CDM7160 CO2 sensor, temperature and humidity sensor, and RF connectivity.

Jean-Luc started CNX Software in 2010 as a part-time endeavor, before quitting his job as a software engineering manager, and starting to write daily news, and reviews full time later in 2011.
Support CNX Software! Donate via cryptocurrencies, become a Patron on Patreon, or purchase goods on Amazon or Aliexpress


