
Sonoff TH16 is a WiFi relay device powered by Espressif ESP8266 WiSoC, able to handle a load up to 16A (3500Watts @ 220V), and including a jack for sensors. The company recently sent me a sample together with Sonoff AM2301 temperature and humidity sensor, and Sonoff POW power meter device, and in the first part of my Sonoff review I checked out the hardware for all three items. In the second part, I’ll report my experience with Sonoff TH16 and the temperature sensor with a practical example, as I’ve installed it to control a groundwater pump.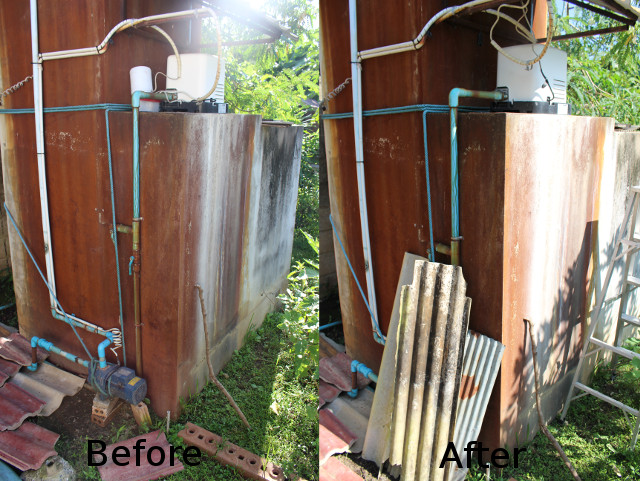
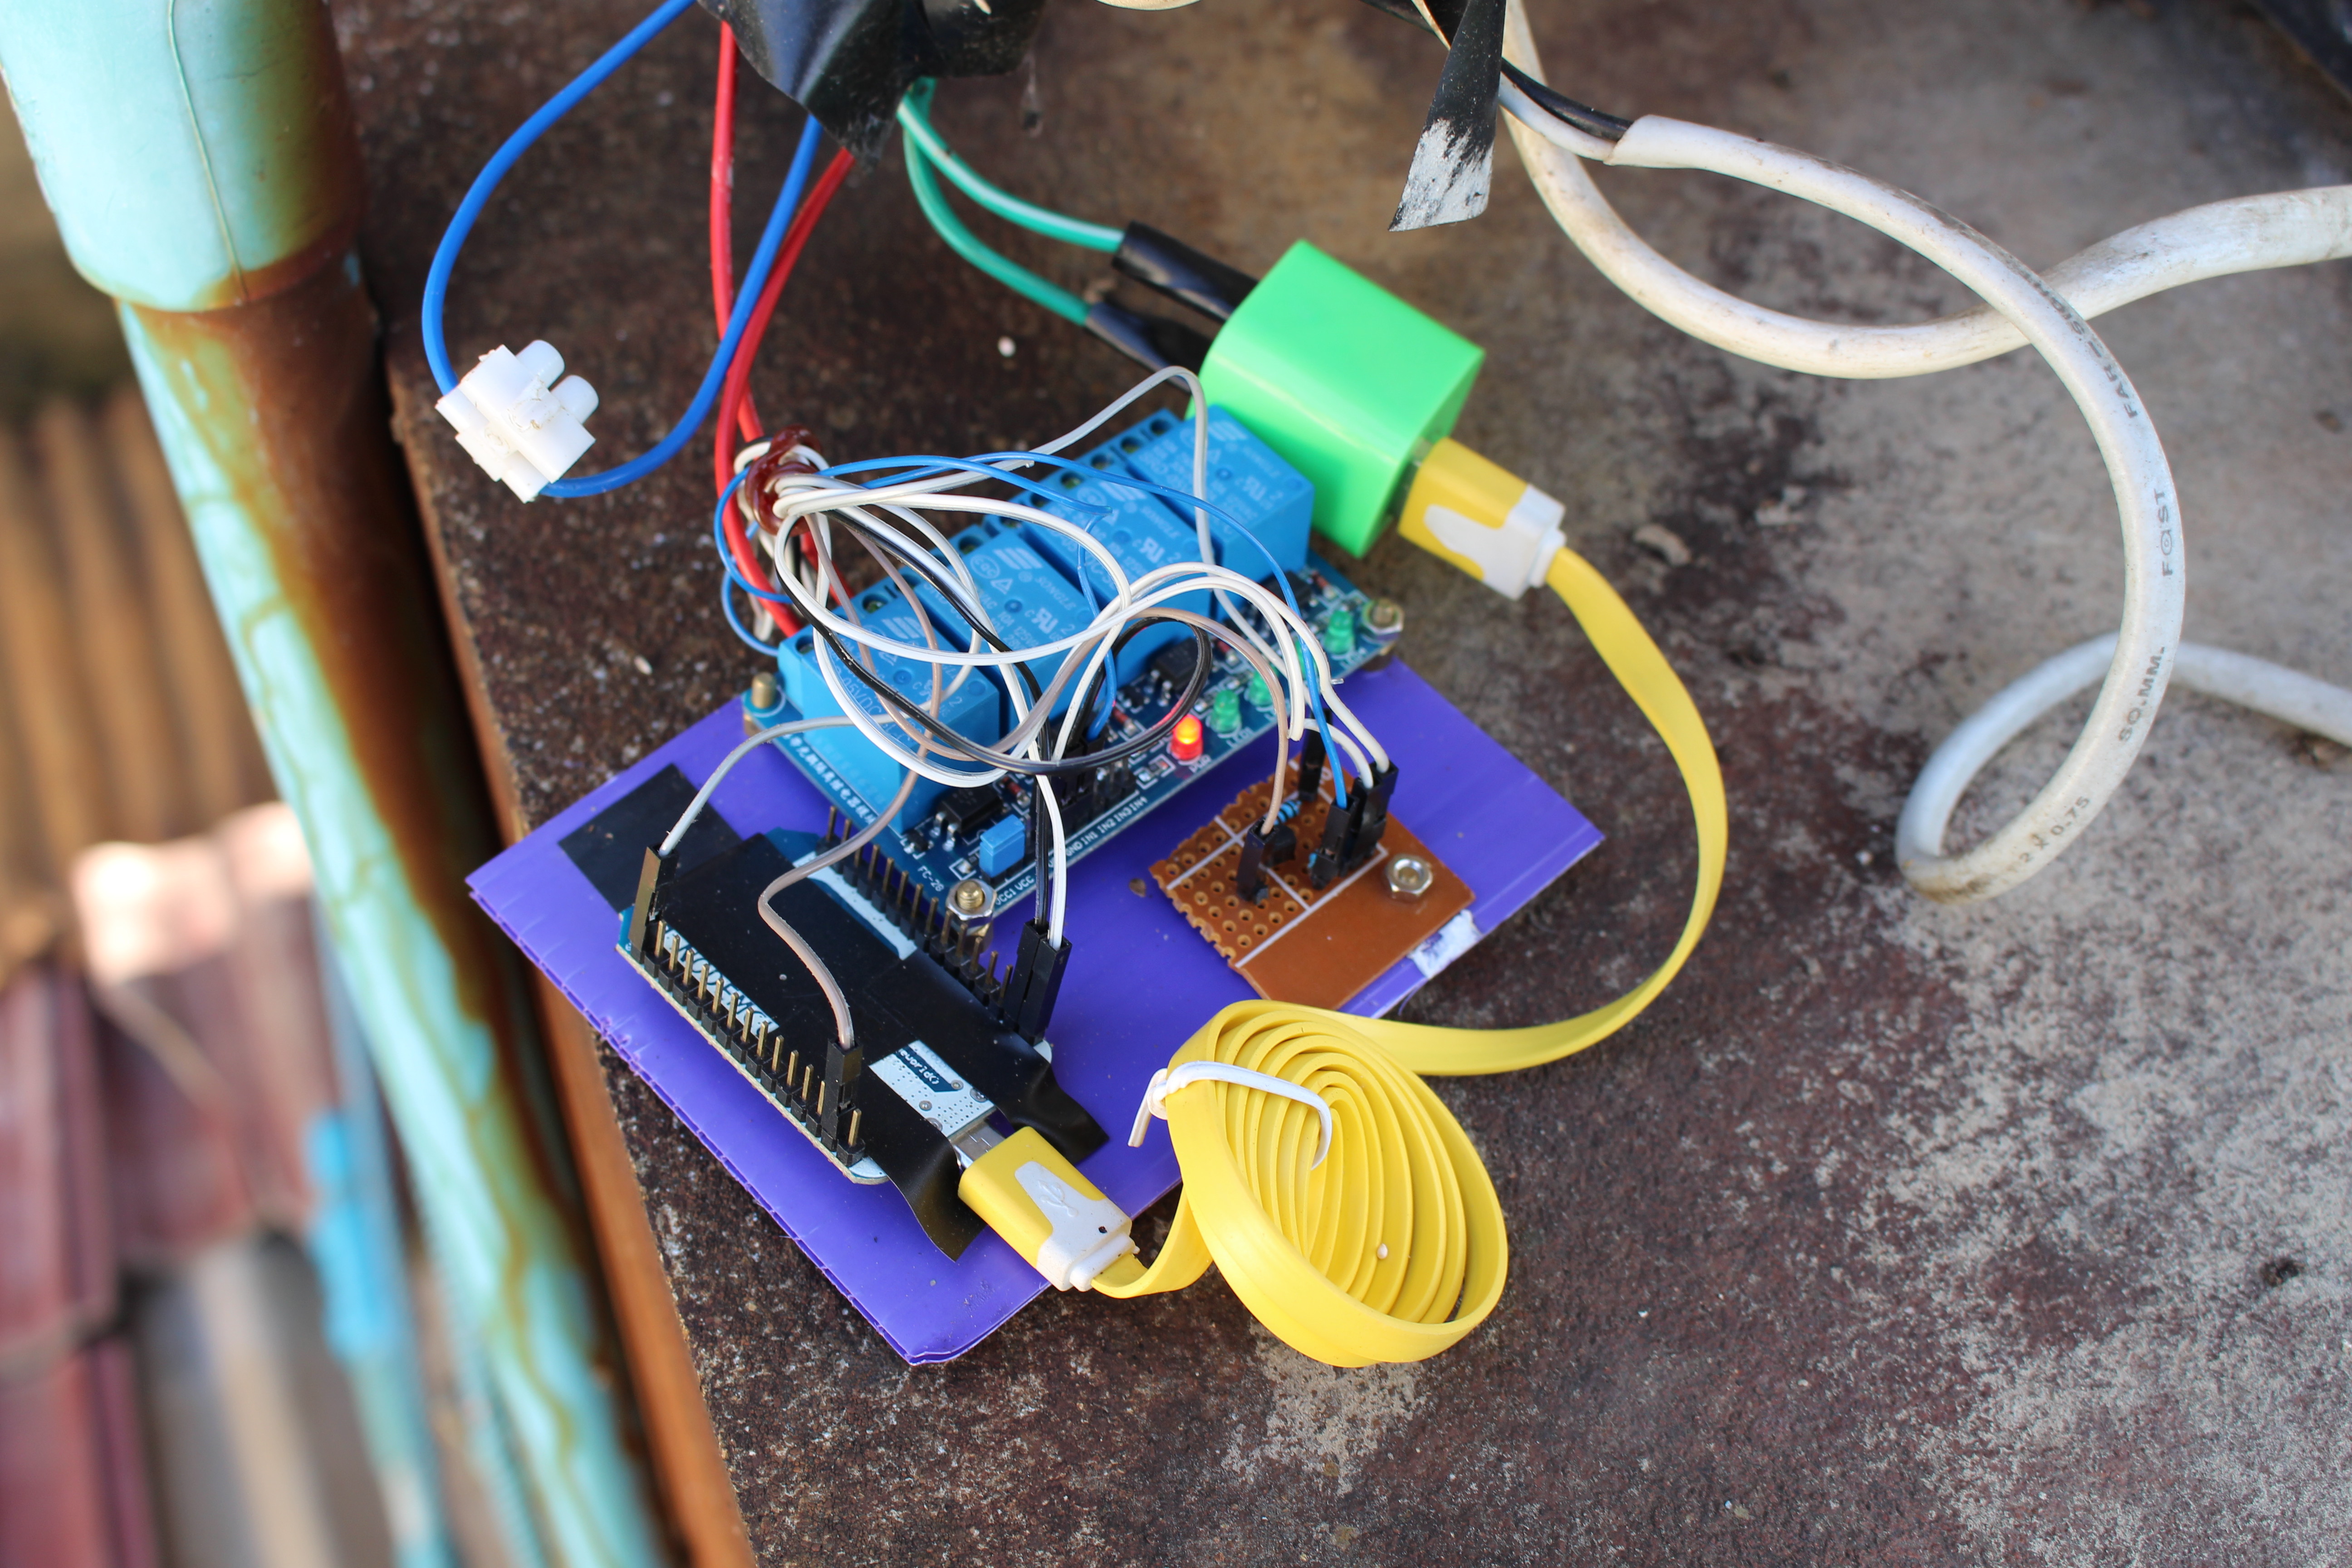
What you see above is a picture of my house water tank with two pumps, the white one keep the pressure in the taps and is always on, and the blue one pumps the water from the ground and is the one I’m going to control. Over the last year or so, I’ve tried two other solutions with SimpleLink self-powered power switch and later a NodeMCU board running NodeMCU firmware and a simple web page to control a relay. The first solution worked as long as the white pump did not start, but if it did the ensuing voltage drop may turn the switch off. The second solution shown below was quickly hacked together and worked fine for many months, but if the WiFi connection was lost, I had to restart NodeMCU board by turning off and on the circuit breaker for the pumps.
As you’ll see from the “Before” side of the first picture, I also kept everything in a plastic box, and using Sonoff TH16 cleaned things up a bit.
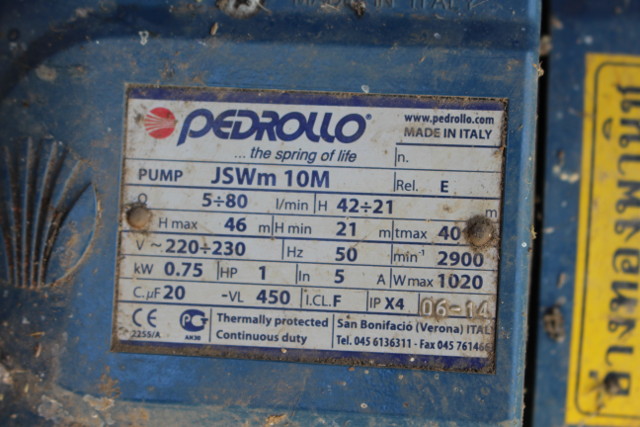 First let’s make sure the pump parameters are not out of the specs of Sonoff TH16, and there’s indeed no issue as the pump Wmax is 1020W, and it operates at 220 to 230 V AC. Sonoff TH10 & TH16 relays have three outputs and inputs with the ground/earth pins (E), neutral pins (N), and live pins (L) clearly marked once you open the cover.
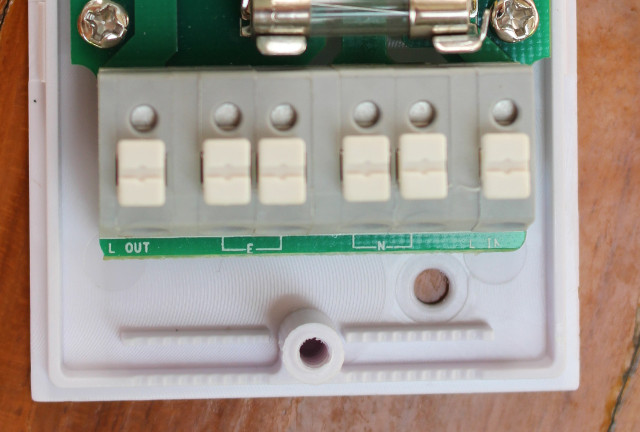 When you connect a two prong plug into a wall socket, you don’t normally have to care with side you plug it in since we are dealing with alternative current, but for safety reasons it might be a good thing to connect the 110V or 220V live wire into the live IN terminal.
 One good way to find out the live wire is to put it on your tongue and if it tickles you’ve found the right one. NO! Don’t do it… We are dealing with high voltage here, and electrical shock may kill you, so take precautions, and make sure electricity is off before doing any cabling.
Having said that you’ll still need to check the live wire when the power is up, and you can do it with an electric tester pen as the one shown below.
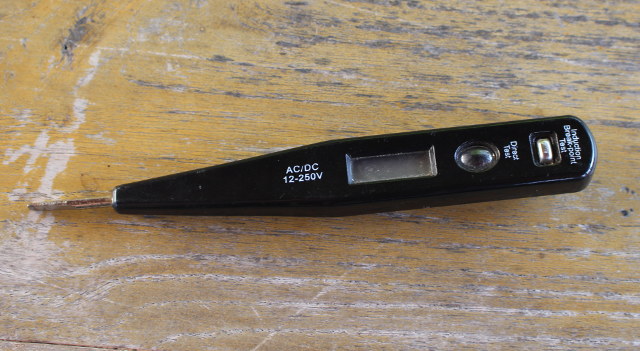
Just make sure you are very careful doing so, and my model has an LED which will lit with the Live wire, but not the neutral one. It turns out the black wire is the neutral one, and the white/grey one is the live one as it should be.
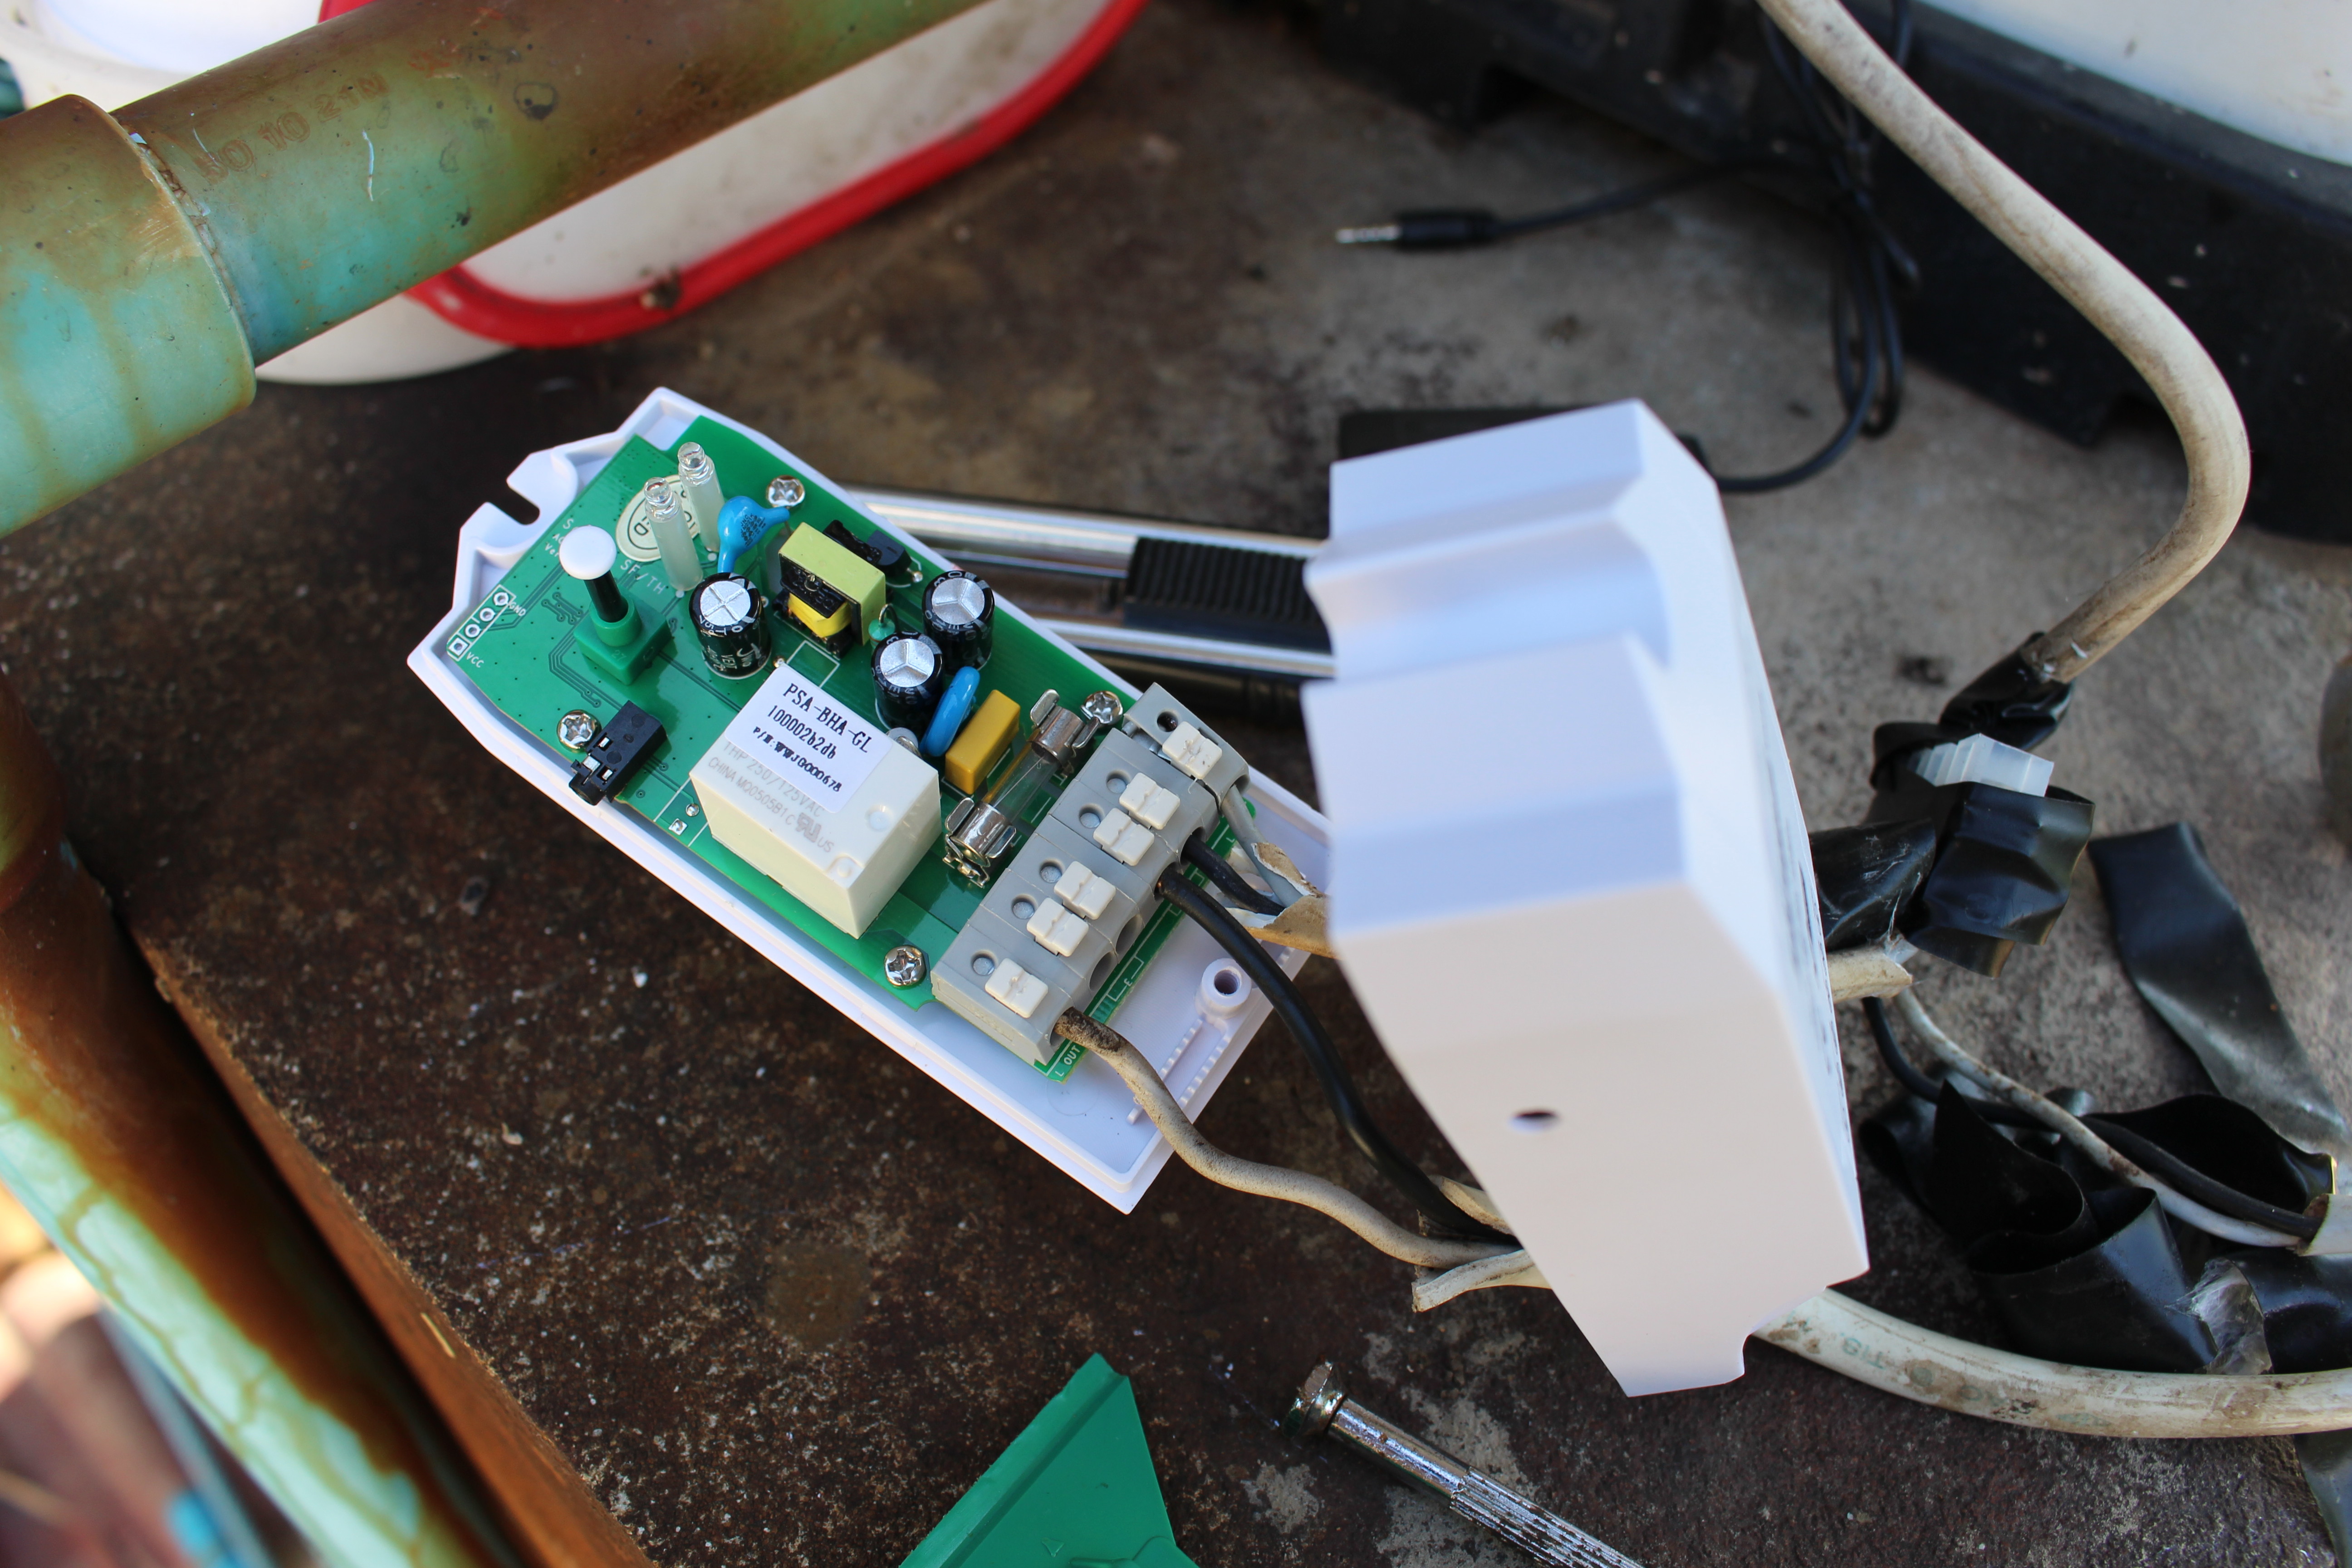
Then I tried to connect the mains live and neutral cables to L IN and N IN terminals, and do the same for the pump cables. You need to push the button on the terminals don’t but they are quite hard to push, and if only remove the small cover, the live IN and OUT terminal are quite hard to reach. I worked on a ladder, so it complicated slightly the task, but as you can see on the picture above, I managed to dislocate L IN terminal… After that I realize I forgot to pass the cable through the hole in the case, so I pushed hard to remove it, and everything came apart.
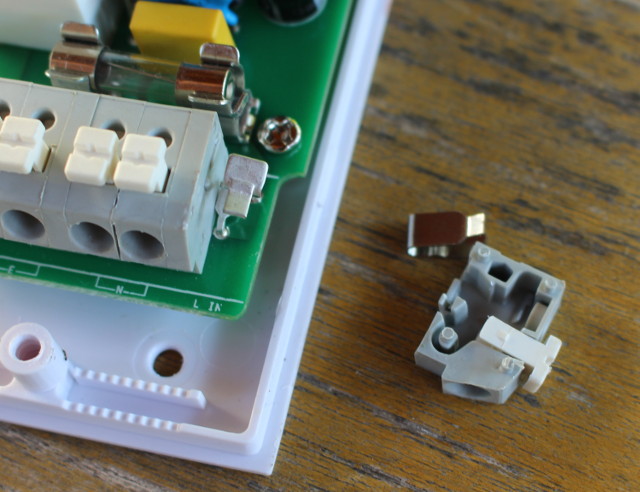 It took me a while to find out how to reassemble it, as I first try to place the metal bit inside the tiny plastic terminal, before I realised I had to insert it in the soldered metal bit first as shown below.
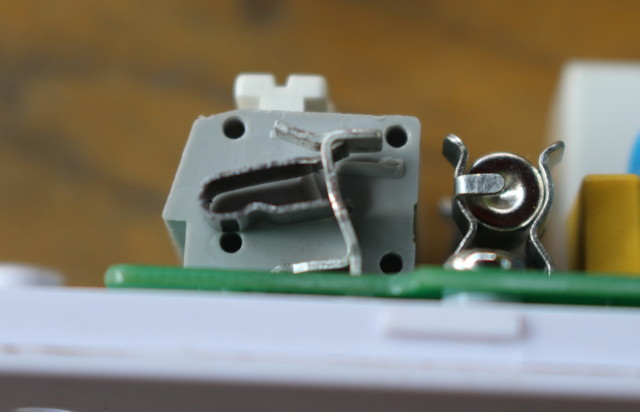 I then pushed the plastic bit back, and added the white button on top, and could finally complete cabling successfully.
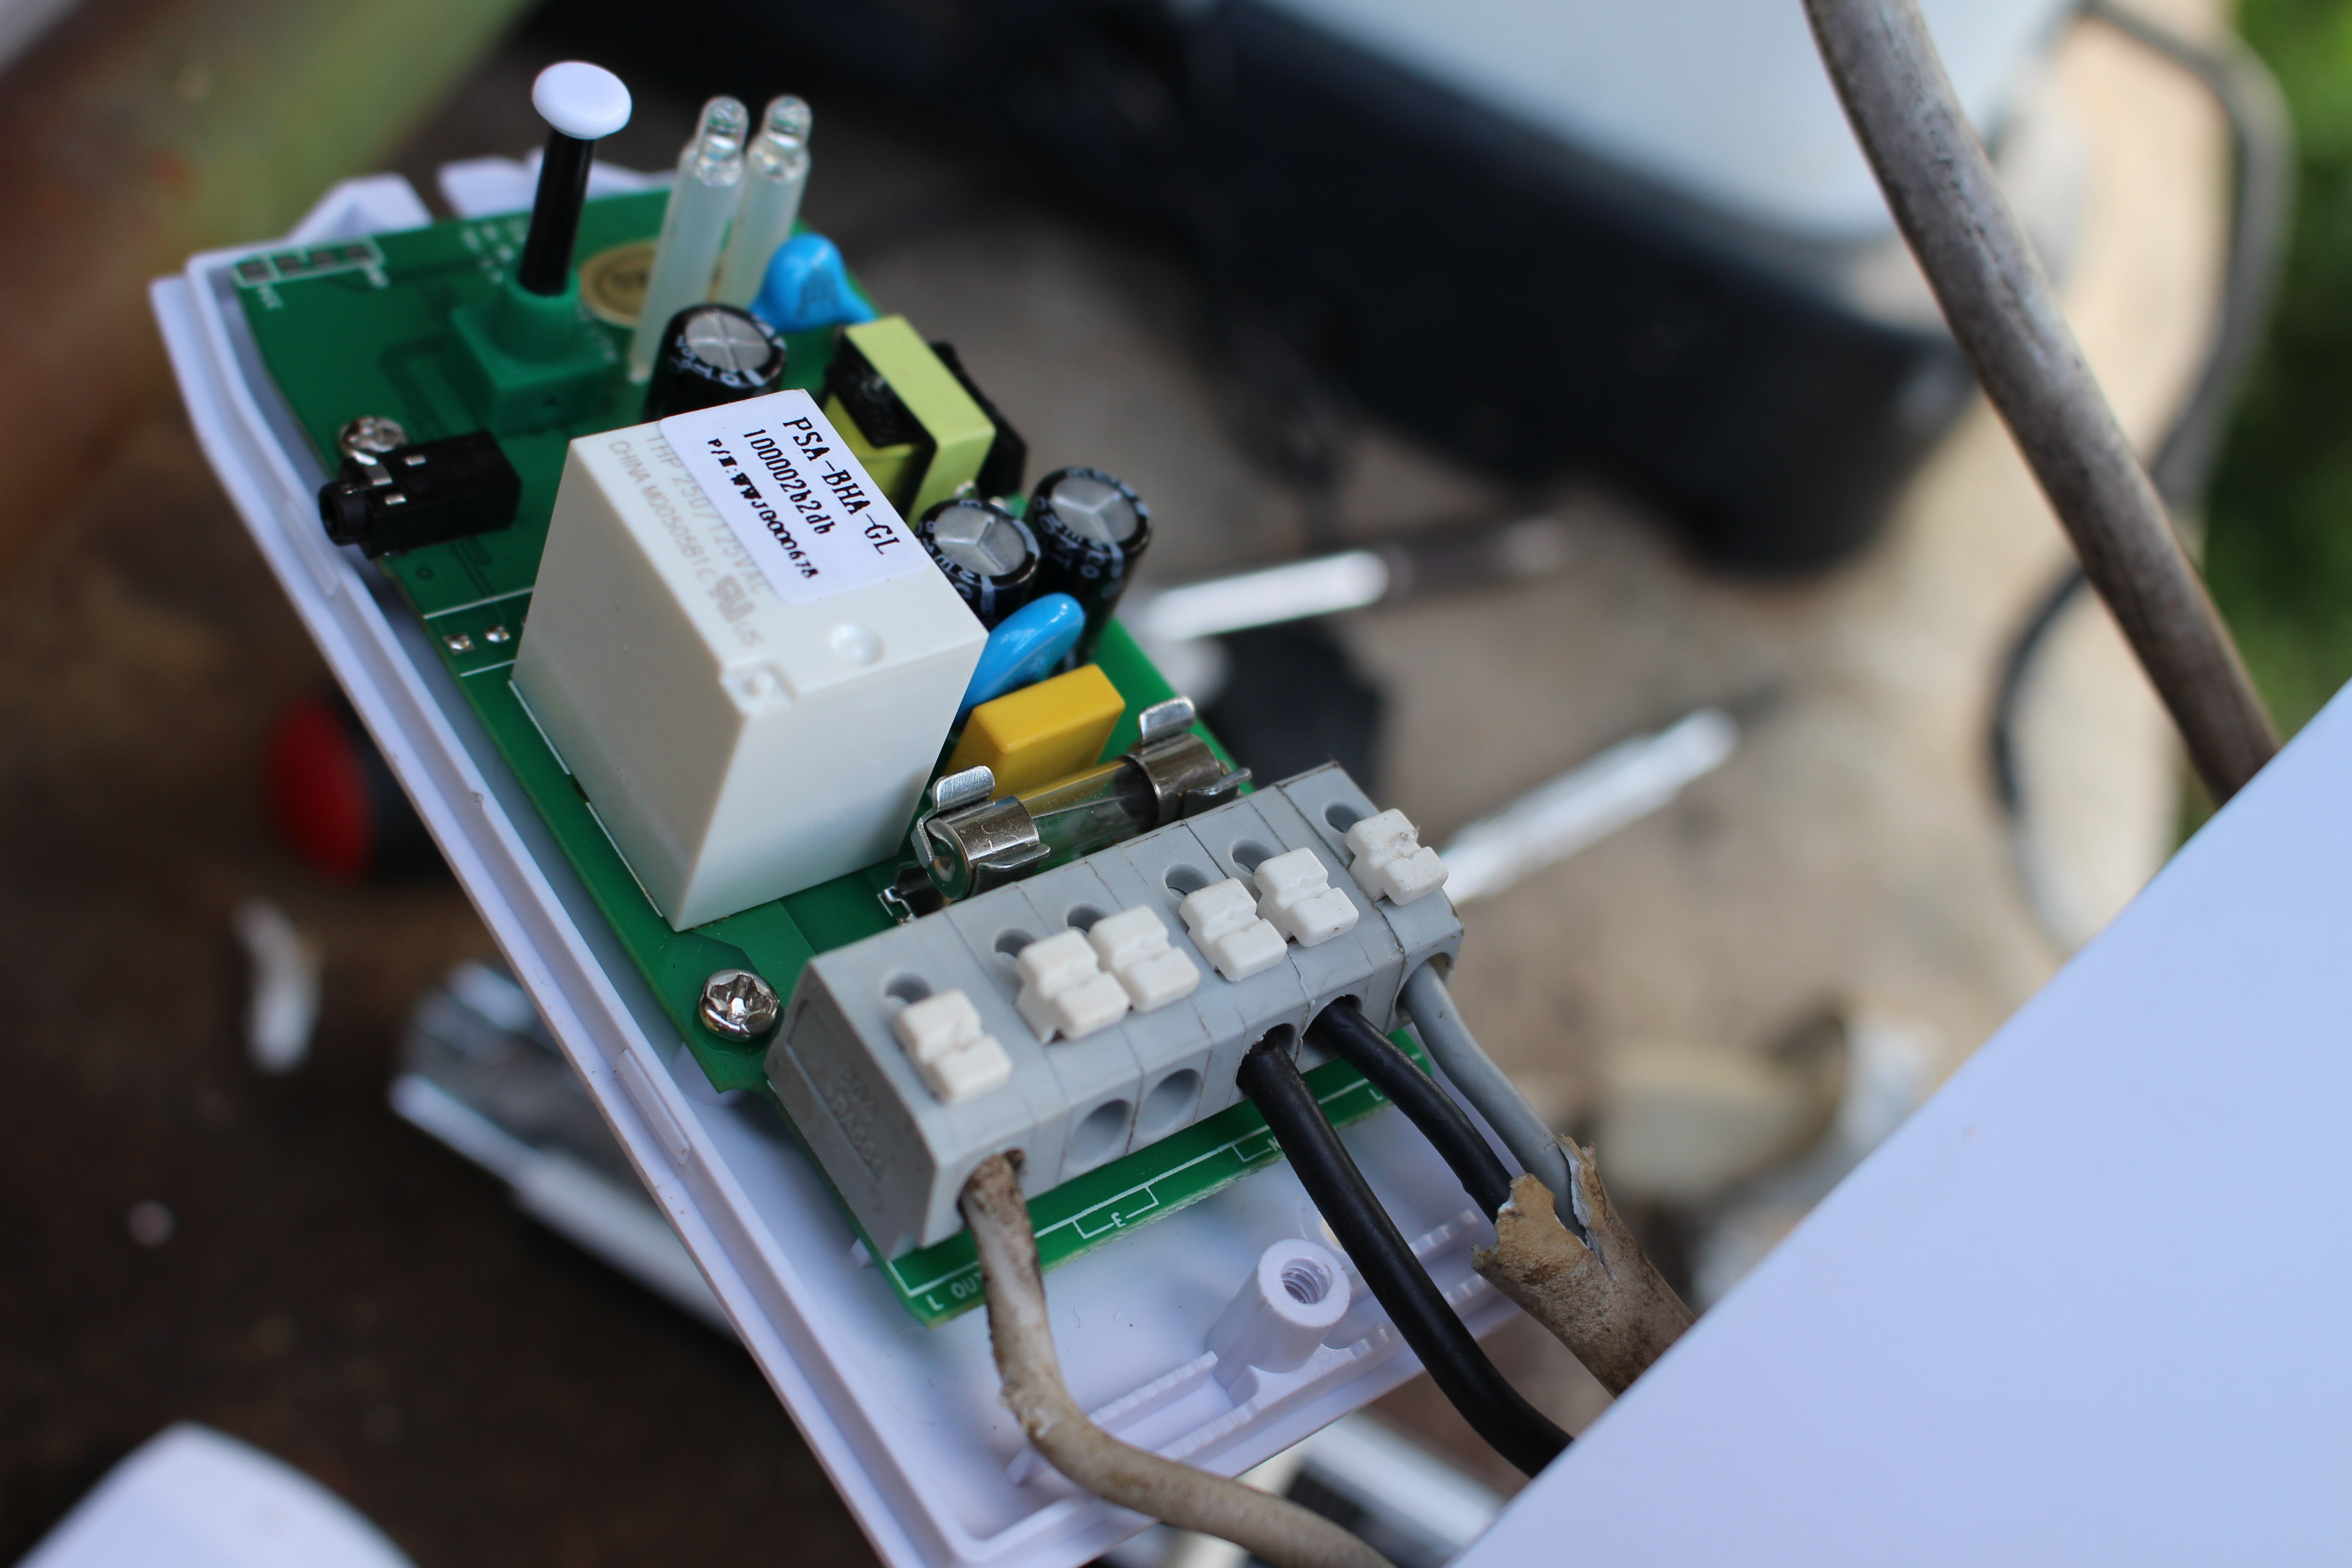
The last steps were to clip back the top part of the case, and screw the small cover on, which nicely pushed the rather hard wires in place.
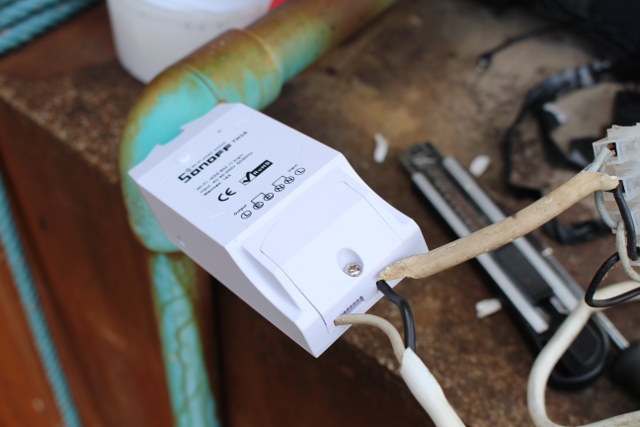
I completed the hardware setup by attaching Sonoff TH16 to the armature of the pump roof, and connected the temperature and humidity sensor and placing it as further as possible from the roof since it can get hot in summer.
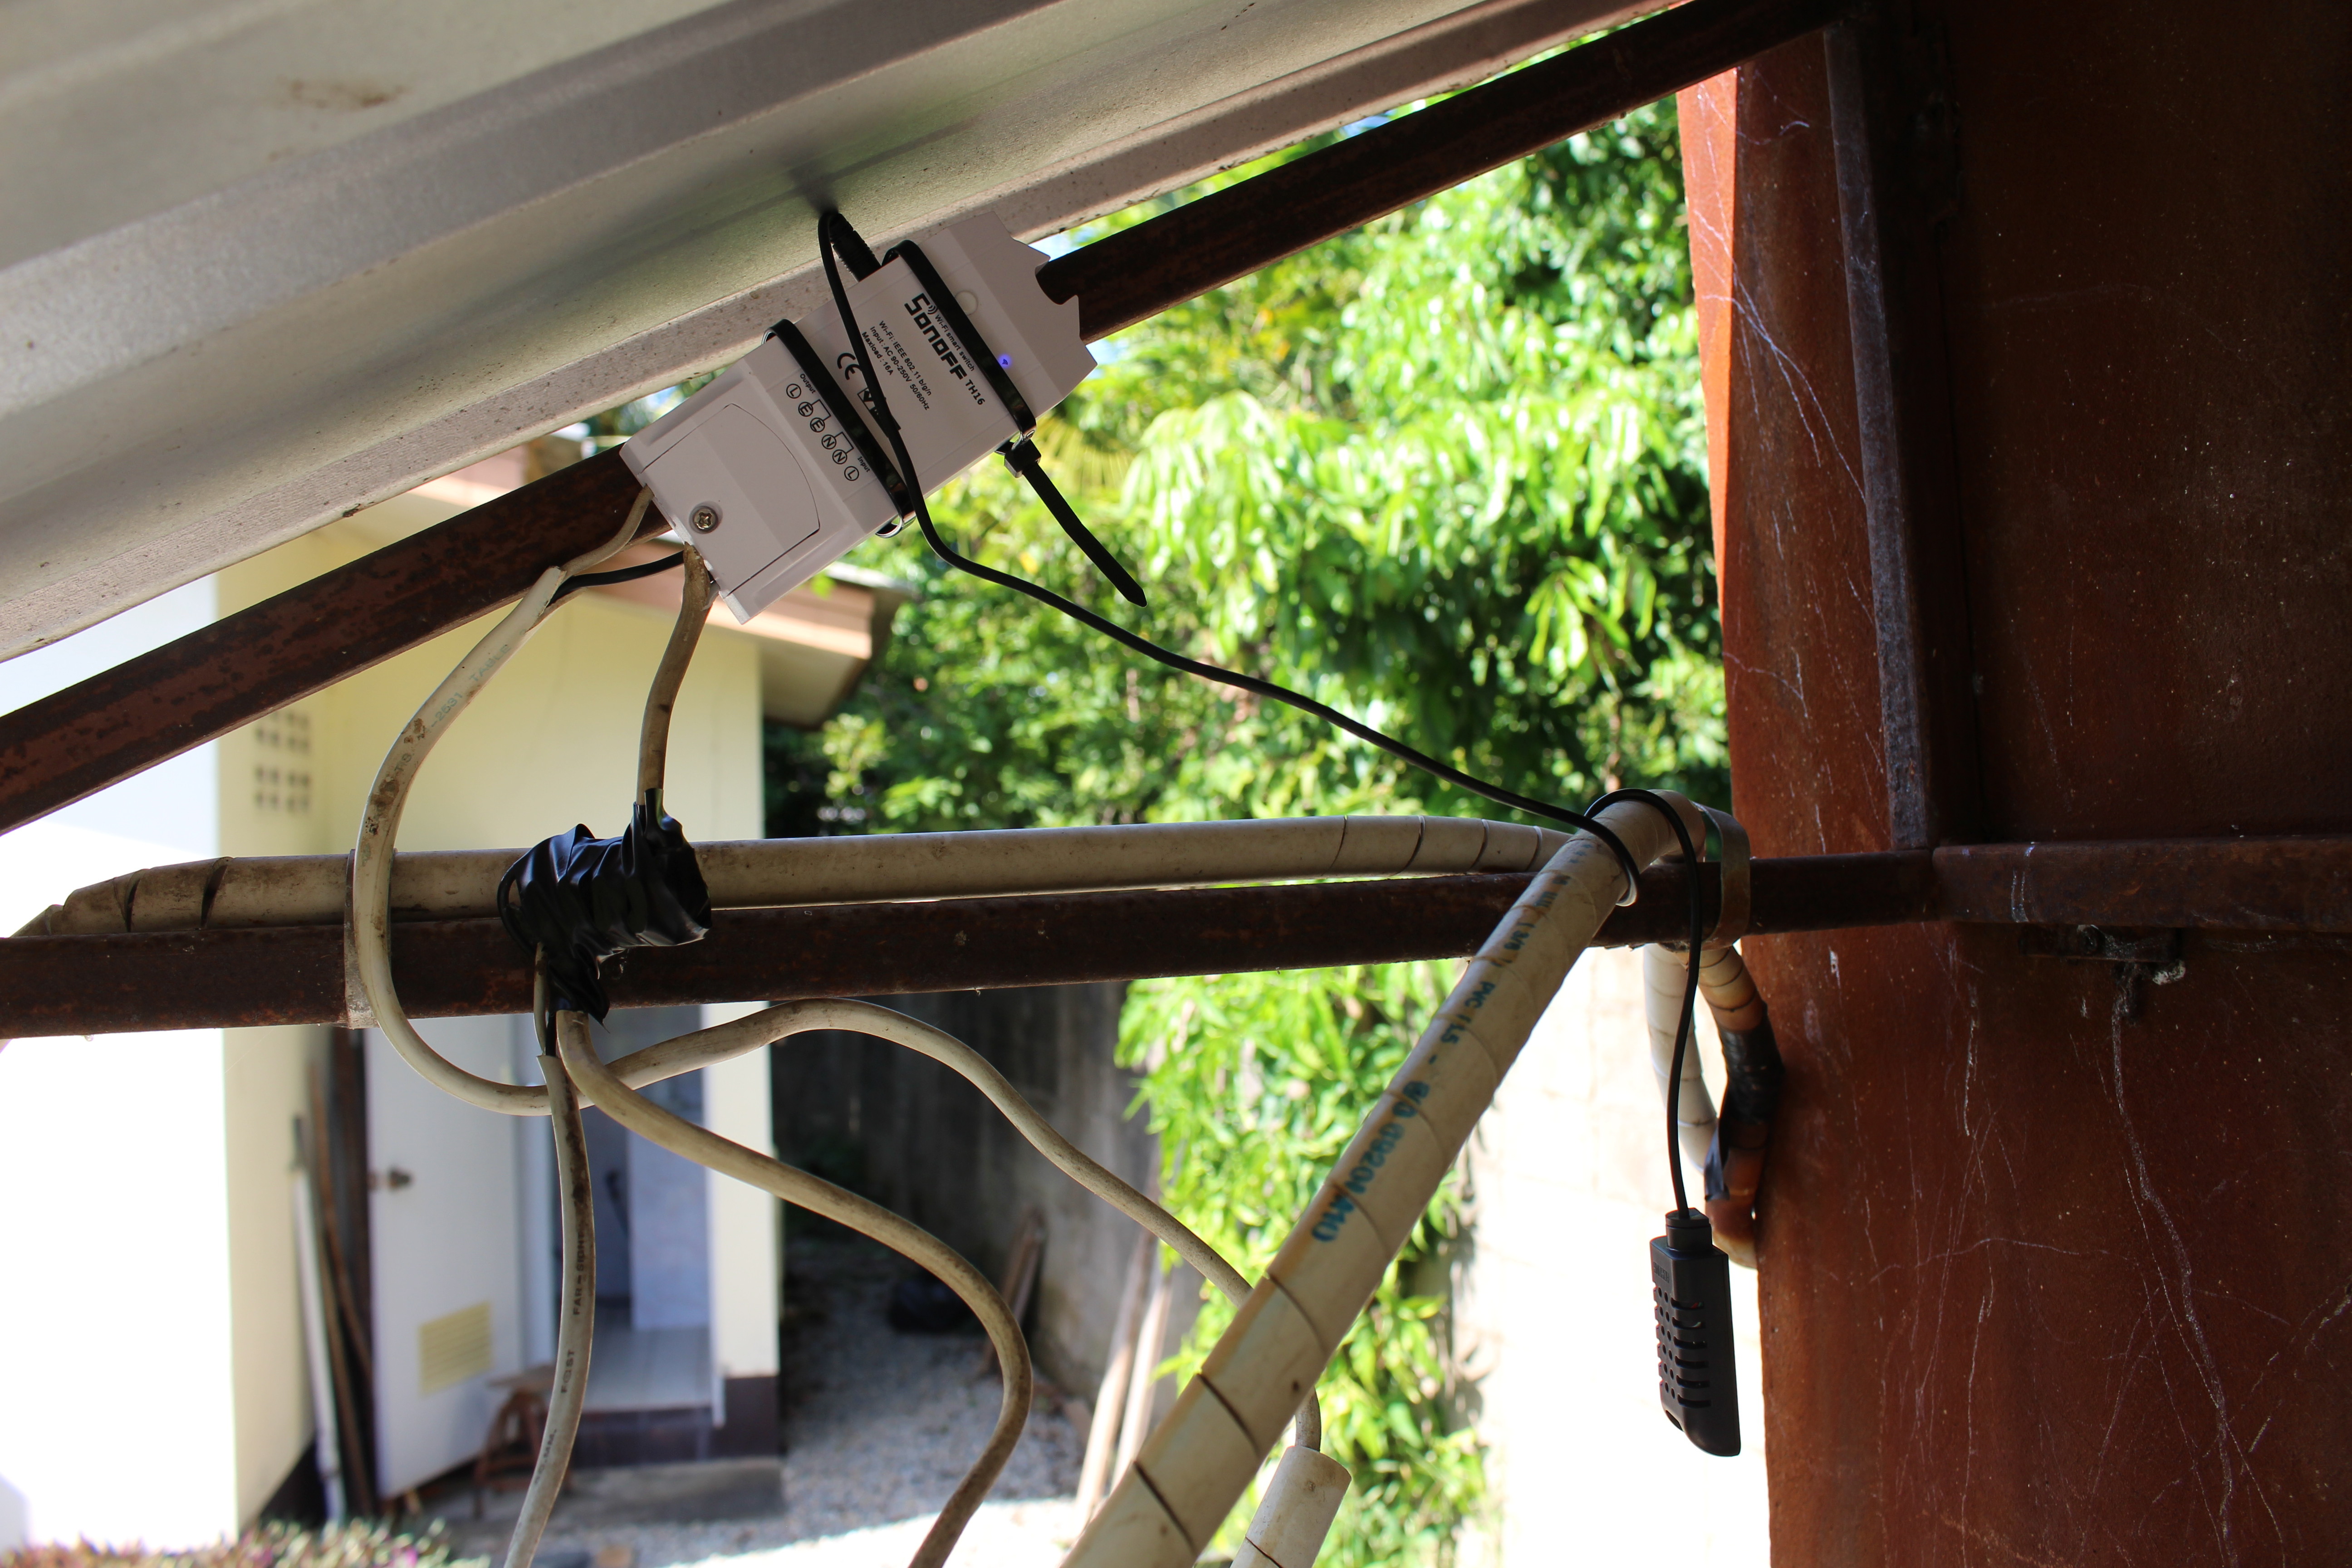
The hardware setup took me about one hour mostly due to hard buttons, and average quality terminals.
Then I switched to software setup. I first tried to download the apk using the QR Core on the package (coolkit.apk), but the connection to the to server was unstable, and had to repeat the download again… unsuccessfully. So instead I went directly to Google Play to download eWelink app. I should have done that first, as the installation worked beautifully. Then I basically followed the instructions, which started with registration.
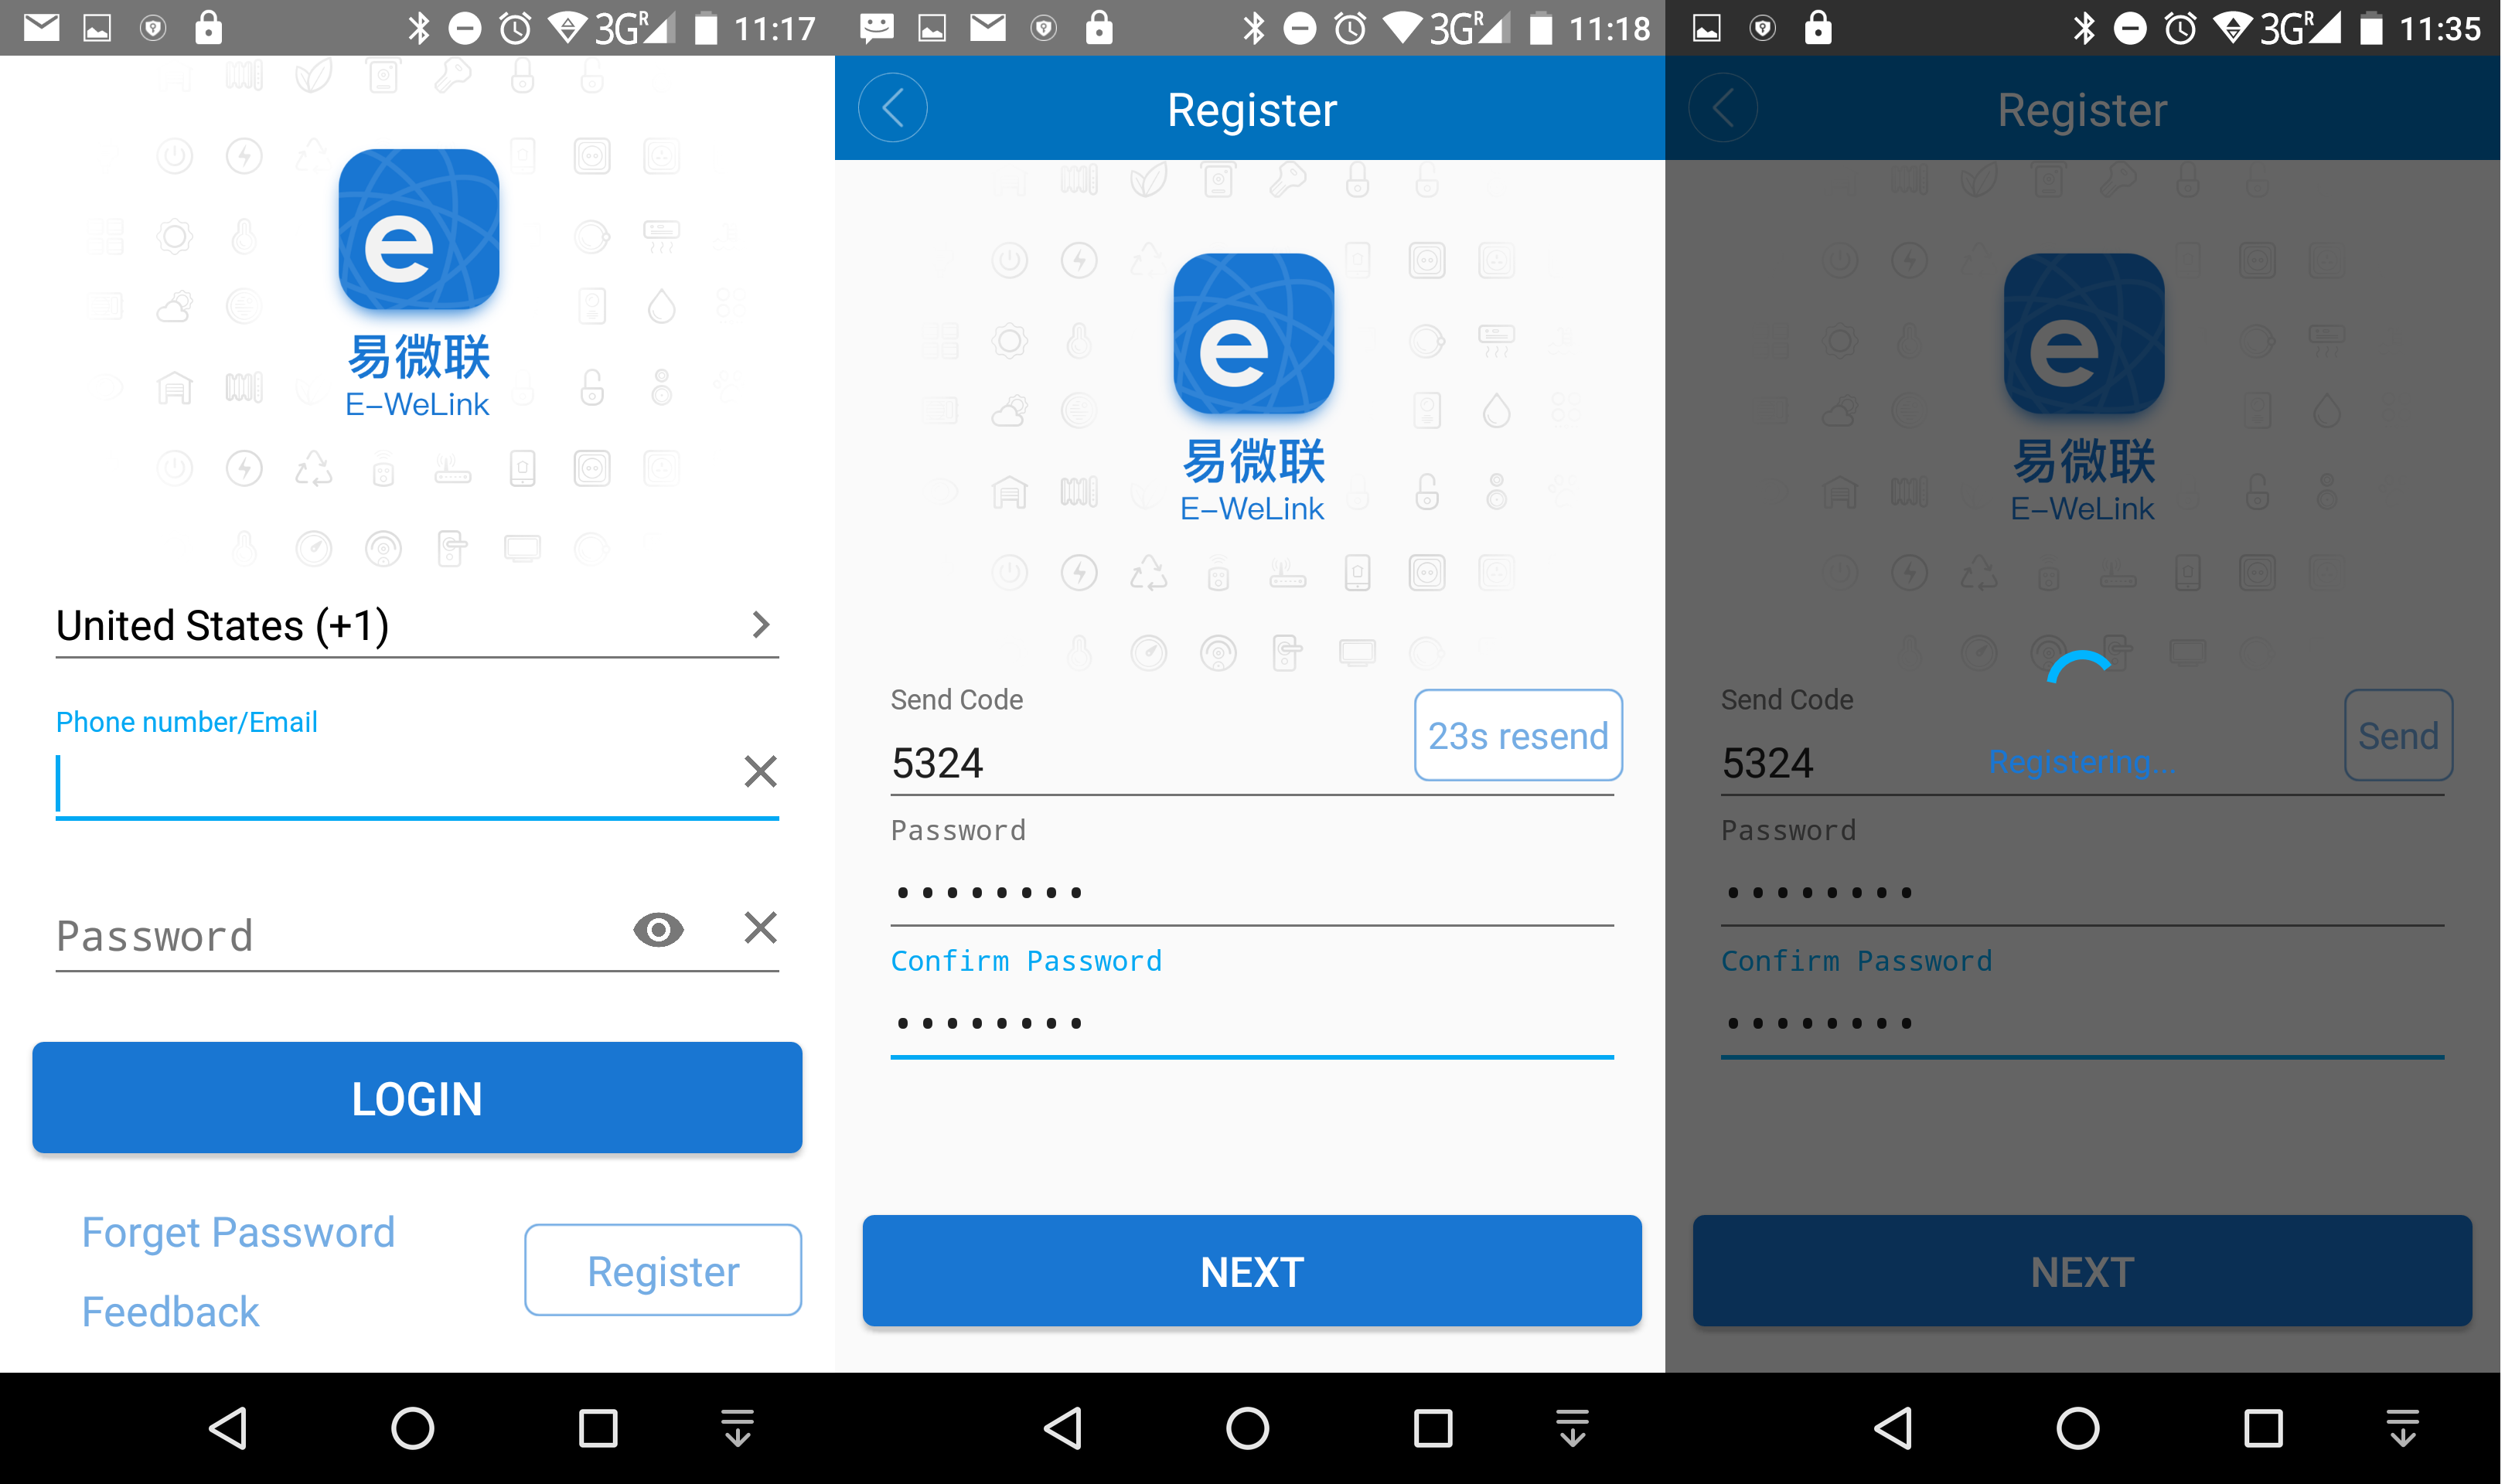
The login Window shows “Phone number/Email”, but once you click on Register, you’re only option is to input your mobile phone number. If you don’t like it, you can always install your own firmware on Sonoff TH16 instead. Once you’ve entered your phone number, you’ll be sent a 4-digit code for registration, and be asked to input your password. I did that, and since it took a while, I left the phone unattended for a while, and as you can see from the screenshots above I started at 11:18, but at 11:35 it was still trying to register, so I stopped that, and tried again with the same code, but no luck. So I repeated the task again with a new SMS code, and I could finally registered. At this point, you’ll get the an device window with a “+” sign to add a new device.
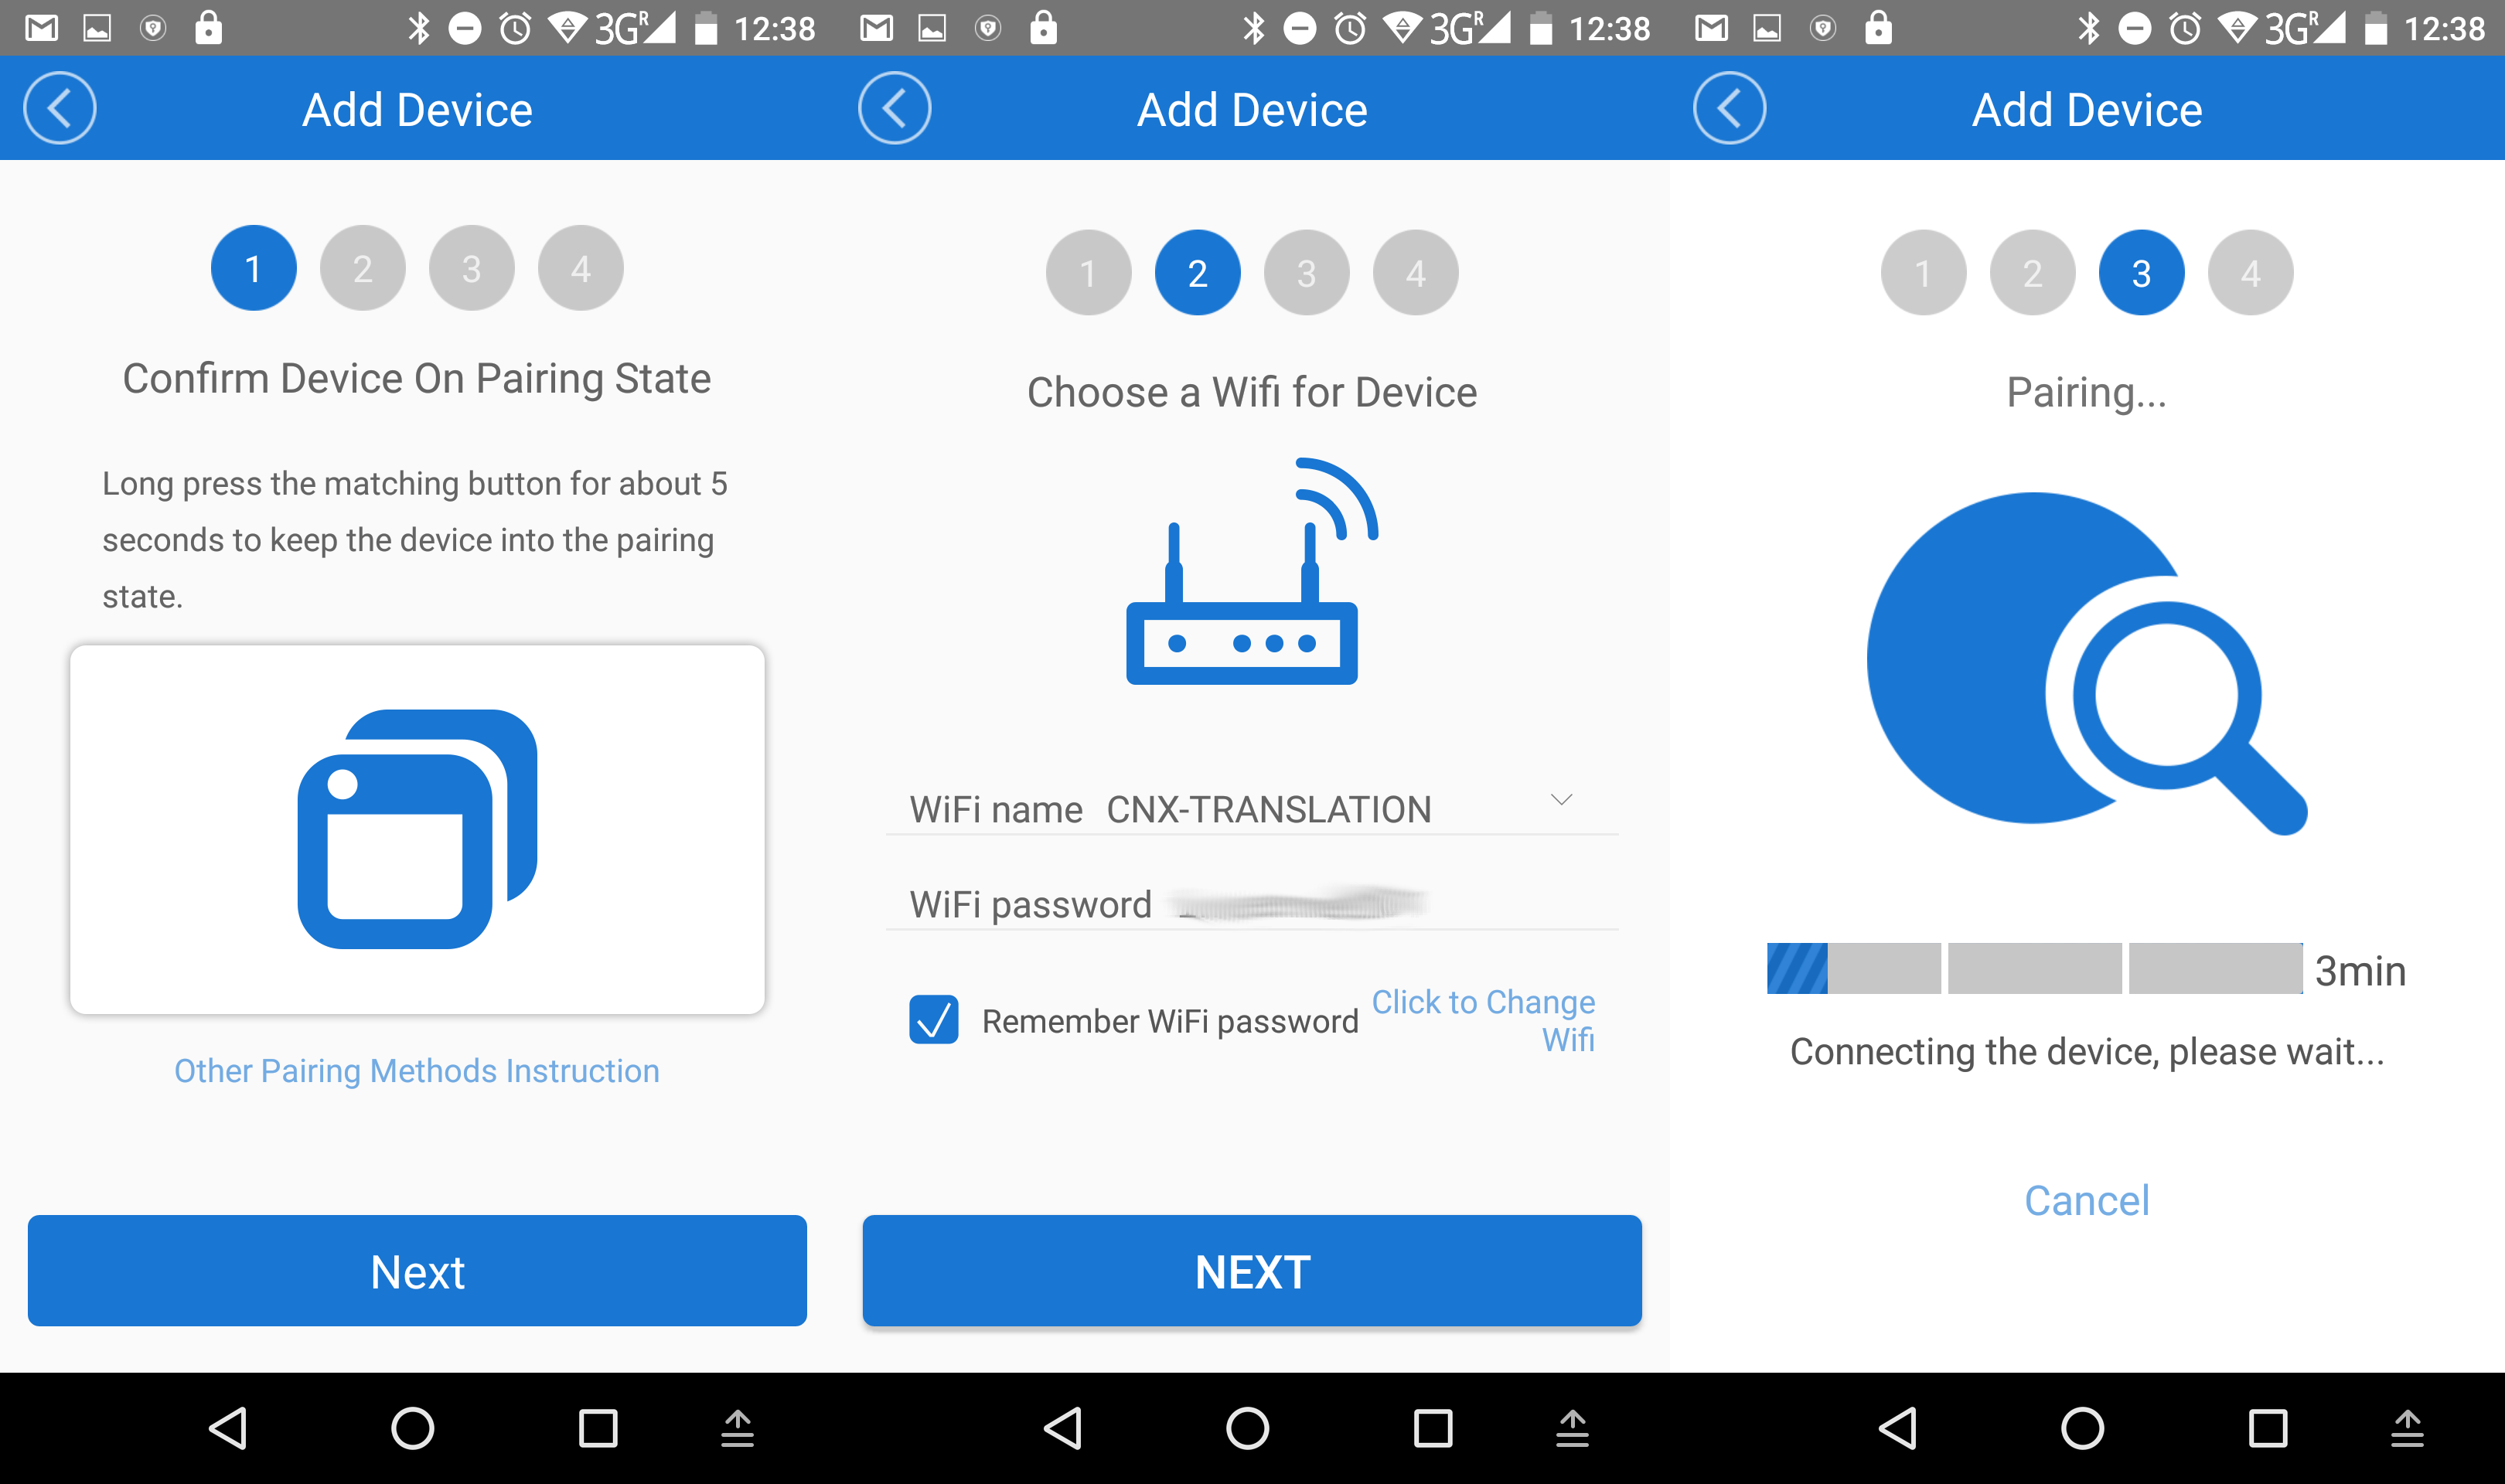
I did that and for the first step I had to climb back on my ladder to press the button on Sonoff TH16 relay for about 5 seconds, and check the LED was blinking regularly to make sure it was in pairing mode. The LED is not particularly bright so outdoor it’s not that easy to check. Anyway, after several attempts I managed, and click Next, inputted my WiFi router password, and after two or three attempts at pairing, I could finally successfully add the device which I named “Water Pump”.
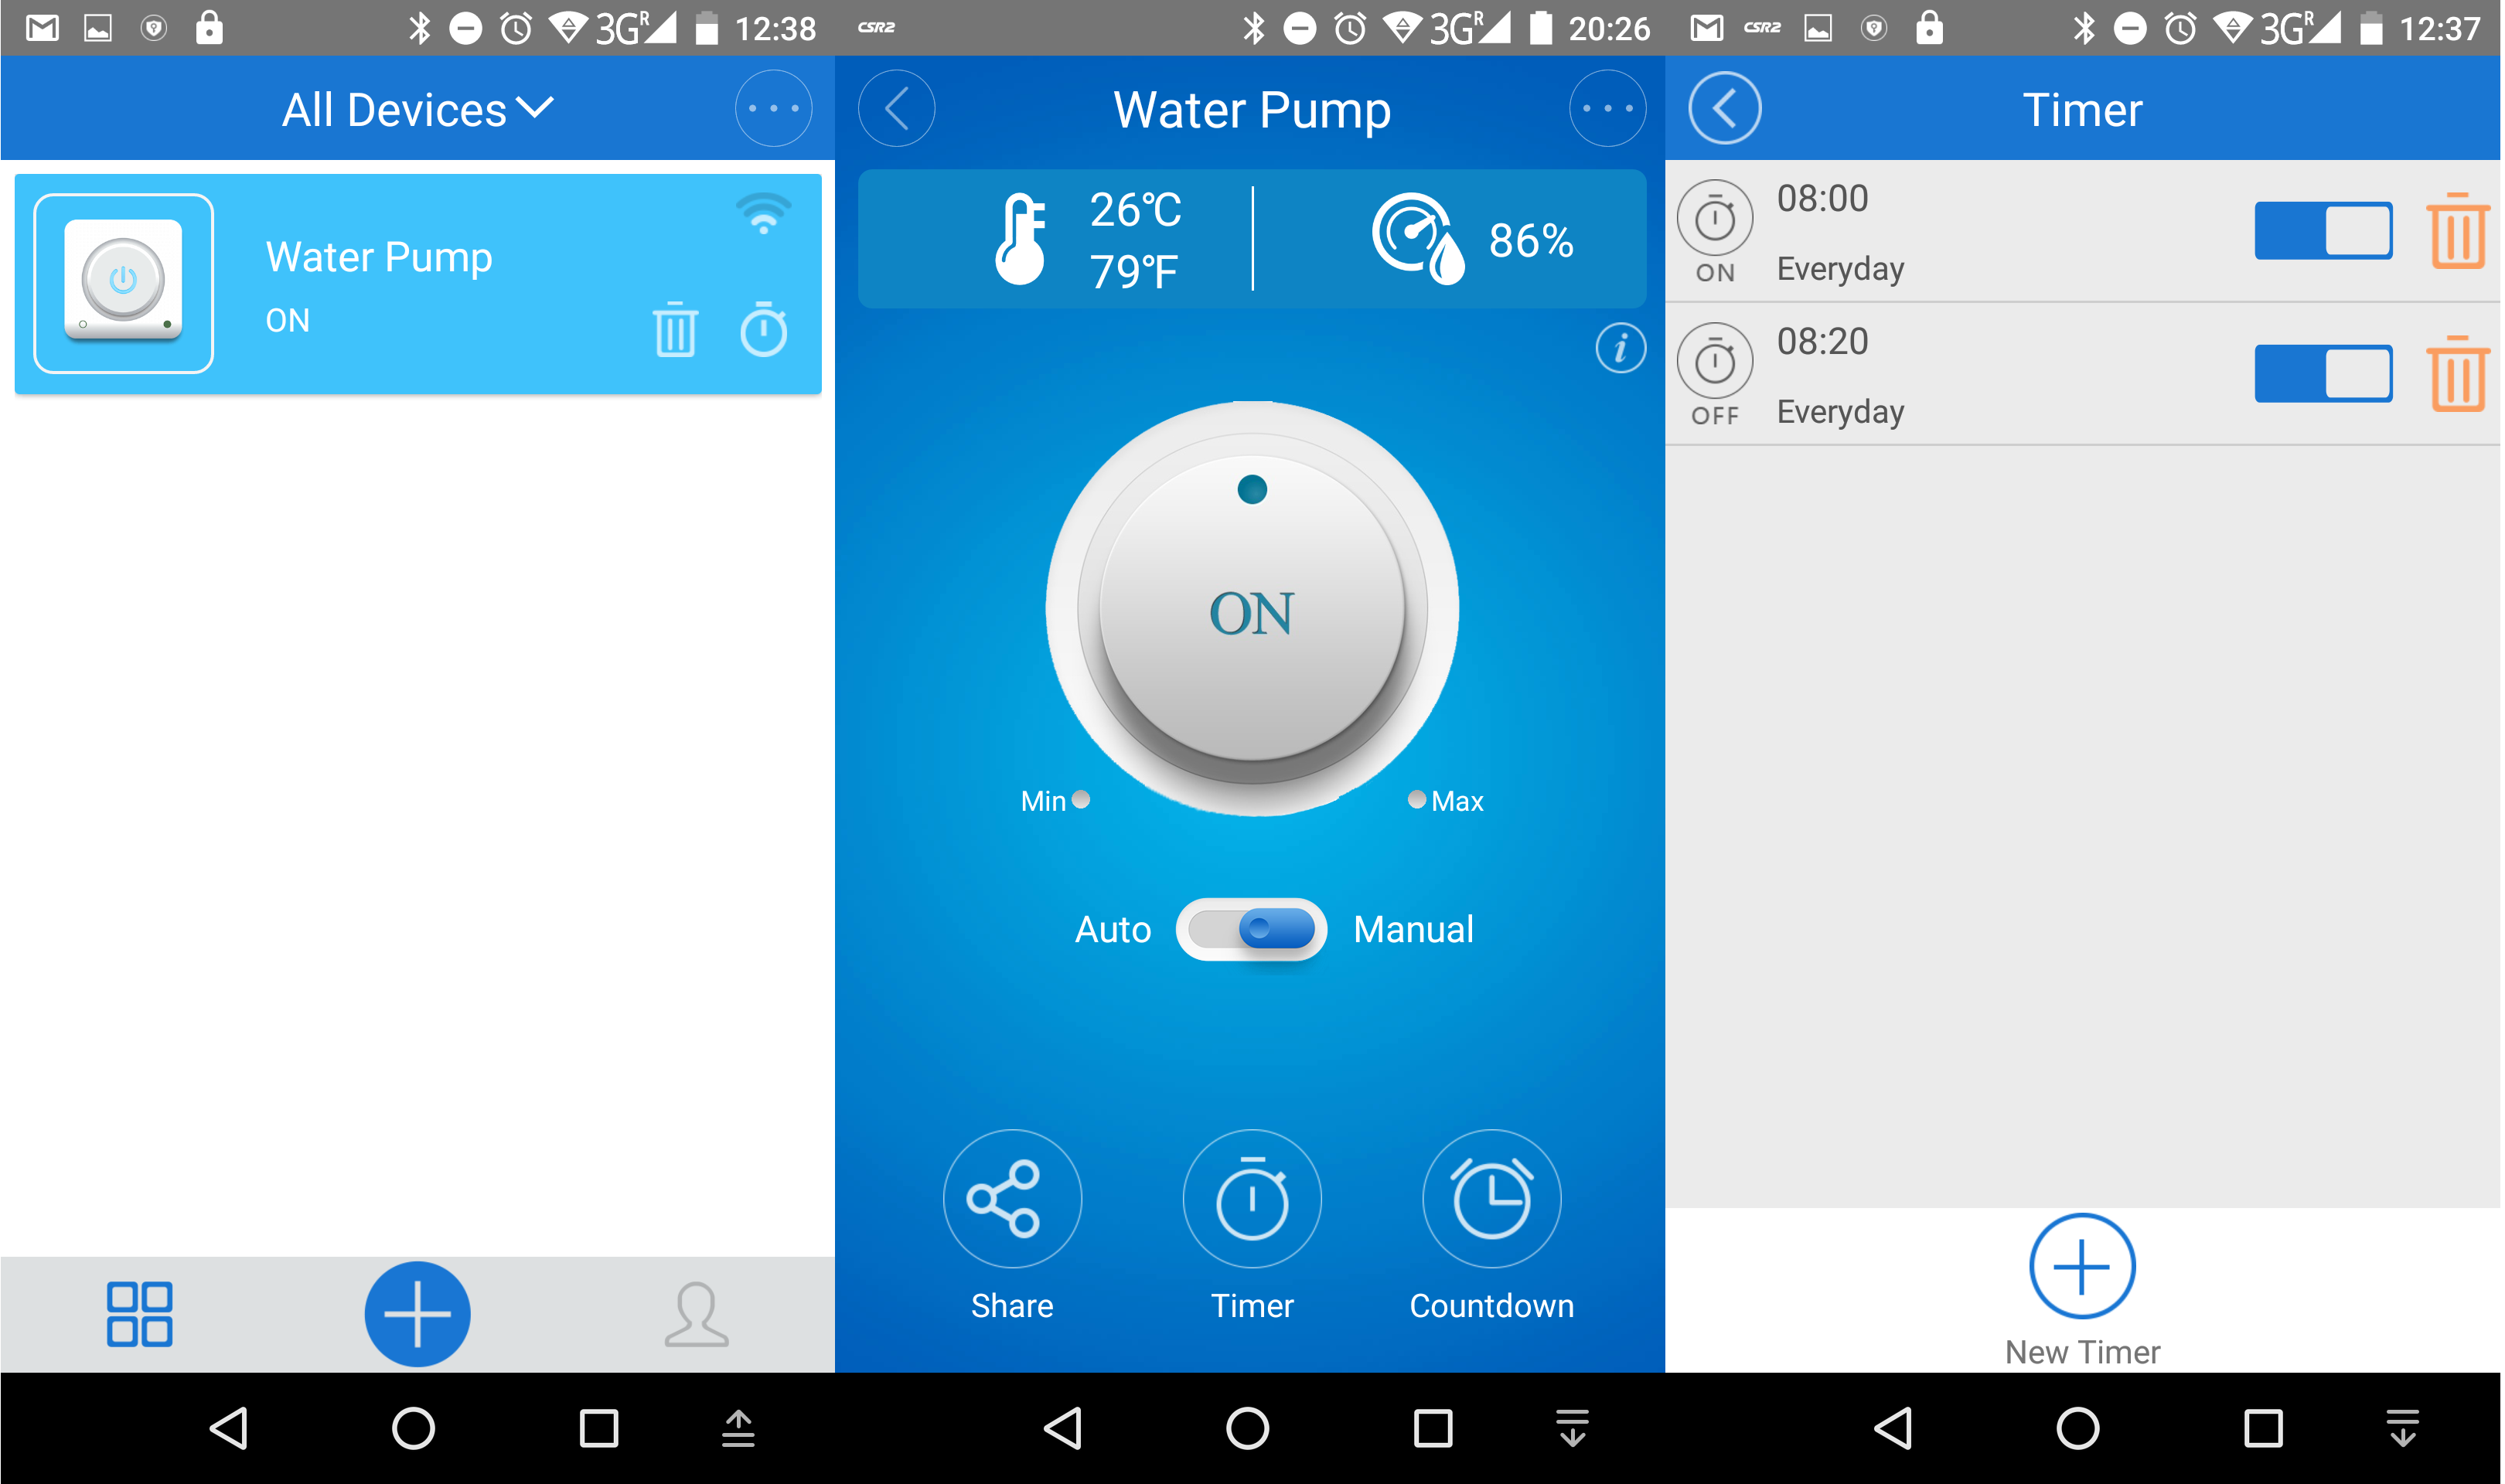
It will show in the device window, and you can control the relay from there tap on the on/off button. You can also tap on the other part of “Water Pump” zone to enter a more detailed menu showing the temperature and humidity (if you’ve connected the sensor), as well as auto and manual modes, a share mode to let other smartphone control the relay (it worked well), as well as timer and countdown mode. Our water usage is pretty regular, so I’ve set a 20 minute timer starting everyday at 8:00 and stopping at 8:20. The water pump itself can be configured to work automatically based on the water tank level, but other people in the house don’t like that since it’s not always reliable, which explains why I’m using a WiFi relay.
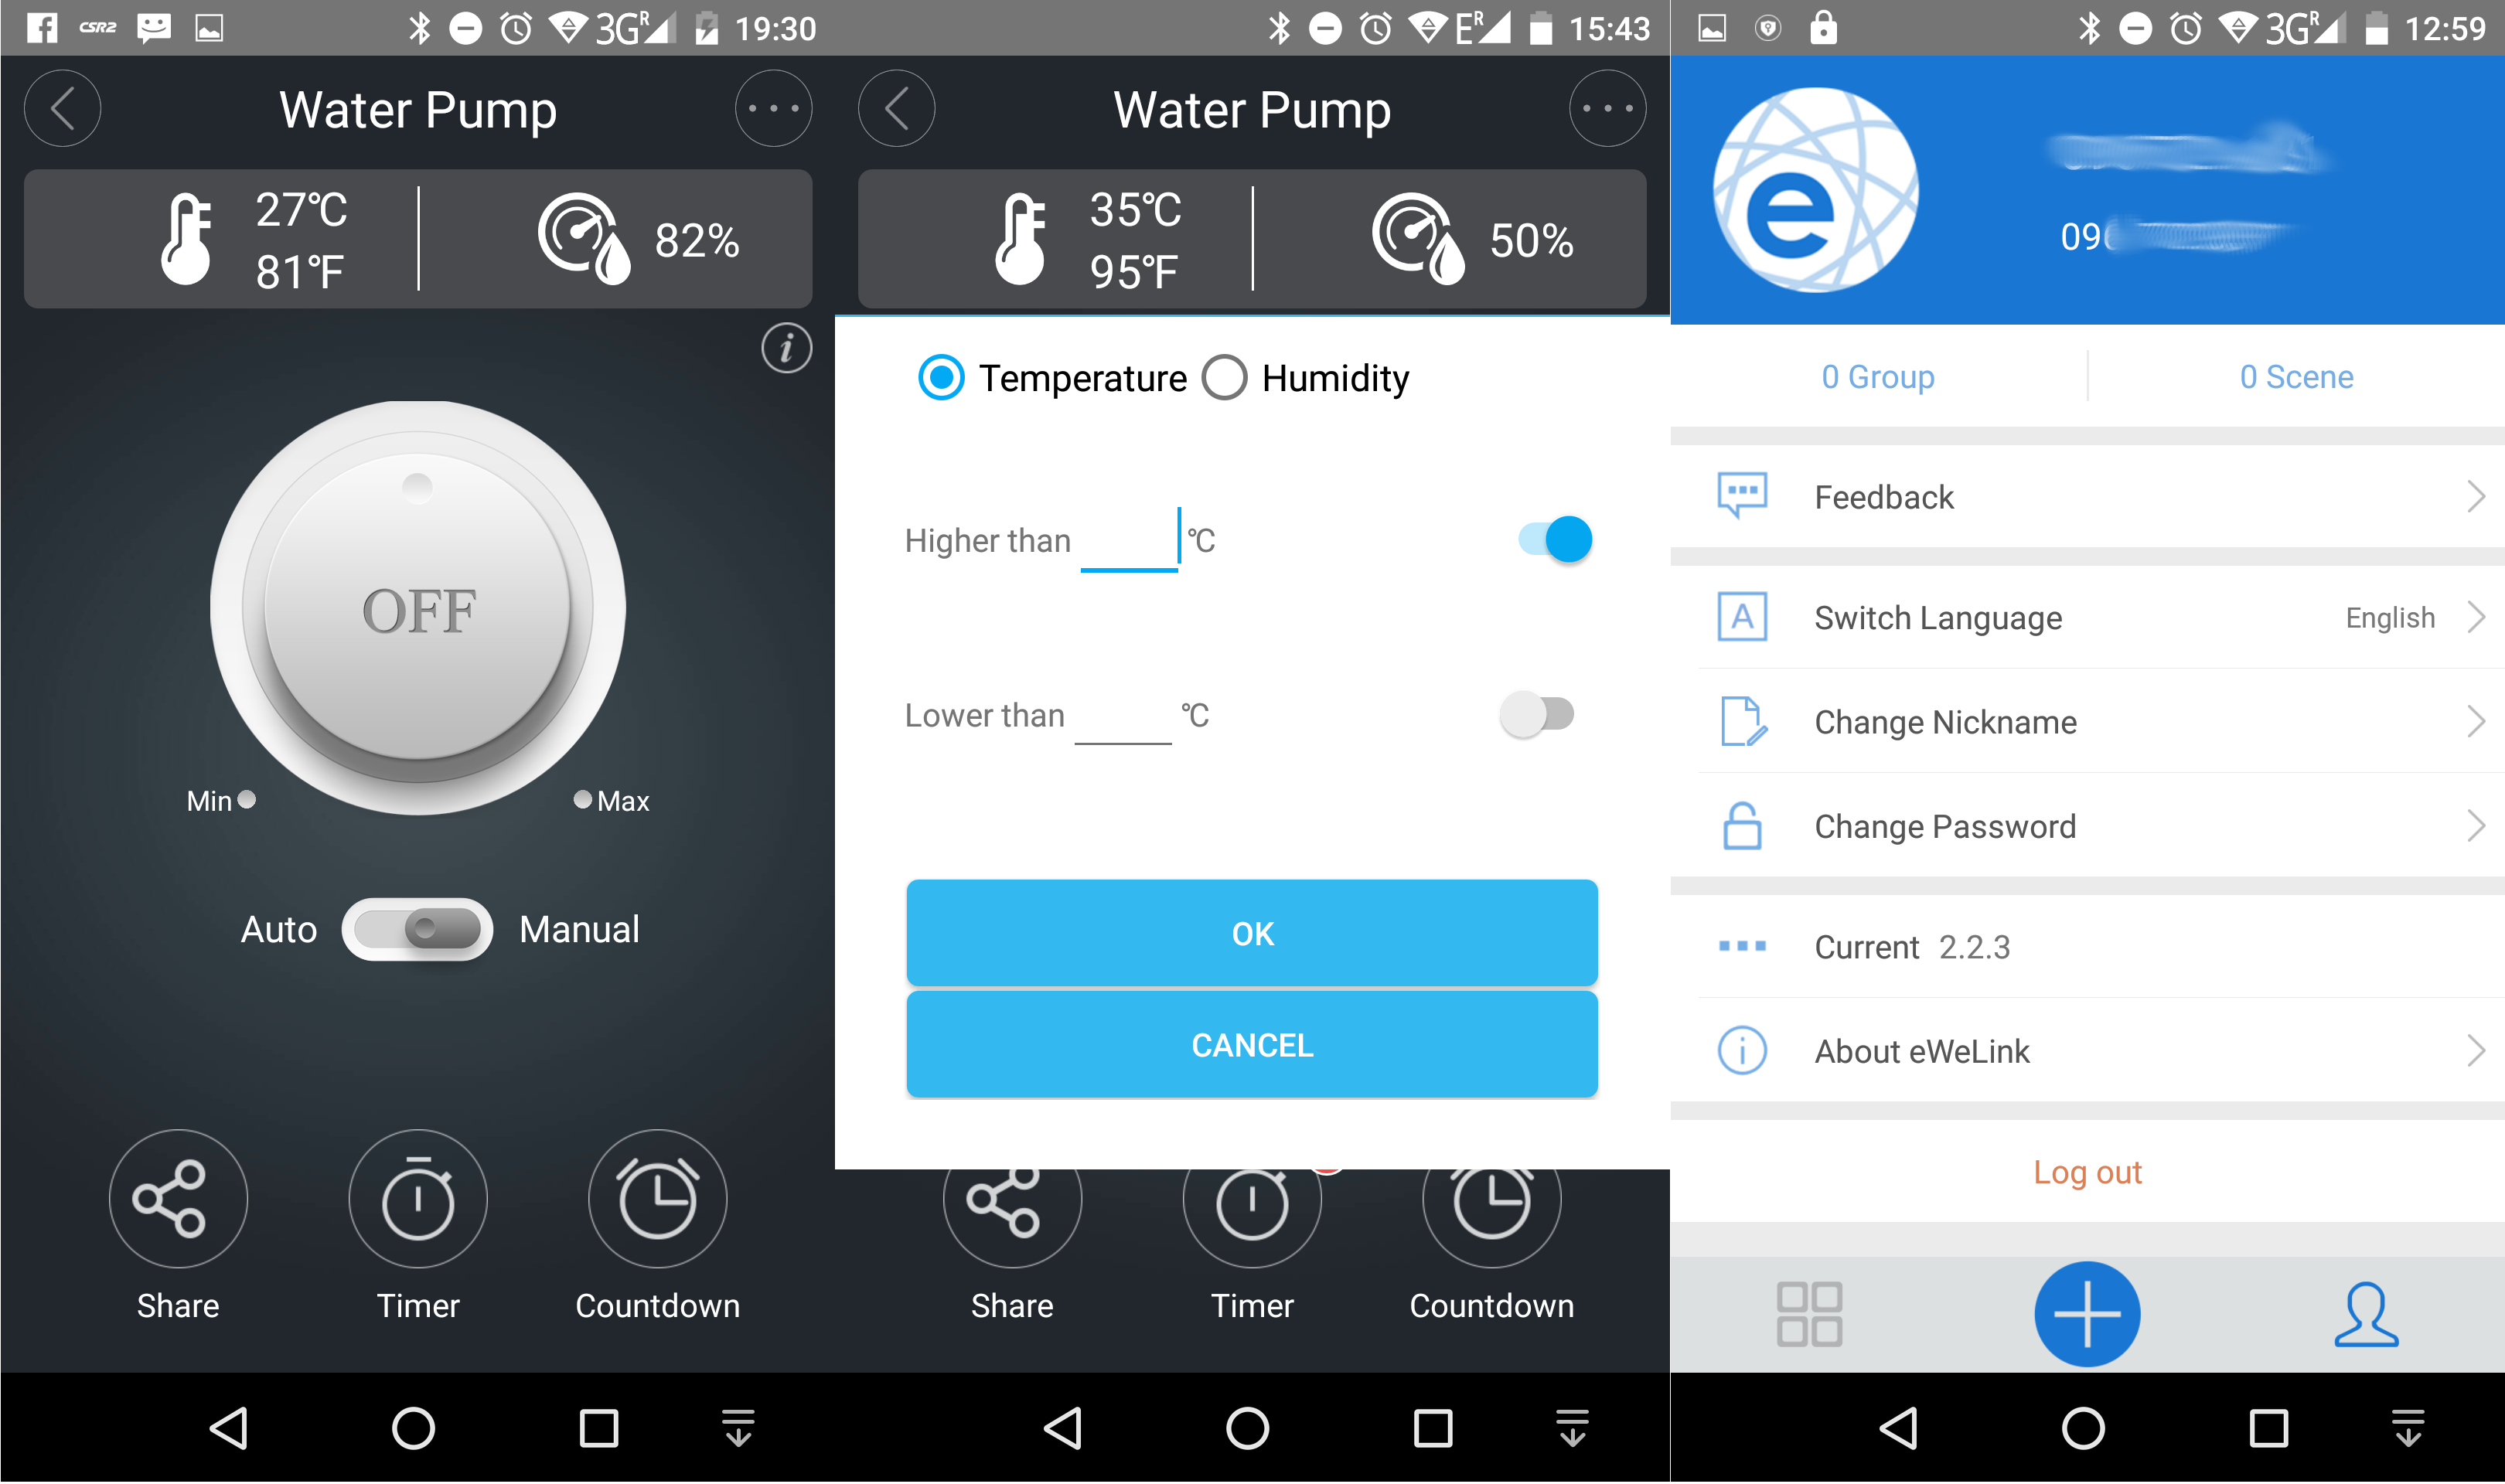
The temperature and humidity values were realistic and regularly updated. Auto mode allows you to set temperature and/or humidity thresholds to turn on or off the relay, and the Profile section of the app will allow you to send feedback, switching language, check the app version (updated twice from Google Play in one week).
I’ve been using the system for around a week and it works well in normal conditions. If I turn off my broadband provider’s modem, I won’t be able to turn on or off the relay manually even when WiFi is enabled, but the good news is that the timers are local, so even If I disable both Internet and WiFi, the relay turns on and off at the scheduled time. This obviously only works if the relay already got its time from the Internet earlier since there’s no RTC. I’ve also tried to turn on and off the relay out of my home, using my neighbour WiFi and I could control the relay from the Internet. It might not be so useful for a pump, but if you forgot to turn the lights off it’s a very convenient features. So while the setup itself did not go very smoothly, the relay has done its job well so far.
I’ve scanned the relay to check open TCP ports.
|
1 2 3 4 5 6 7 8 9 |
sudo nmap -F 192.168.0.108 Starting Nmap 7.01 ( https://nmap.org ) at 2016-11-13 19:24 ICT Nmap scan report for 192.168.0.108 (192.168.0.108) Host is up (0.017s latency). Not shown: 99 closed ports PORT STATE SERVICE 80/tcp open http MAC Address: 60:01:94:07:06:DD (Unknown) |
TCP port 800 (http) is open, but when I access it directly I don’t get anything, and capturing packets on my phone show some binary payload. I’ve not spend time on it, because there’s probably very little value in reverse-engineering the protocol, simply because of the 4-pin to flash your own firmware. Since it’s based on ESP8266 you could flash Arduino or NodeMCU firmware and write your own web interface, or instead try some home automation firmware like ESPeasy or ESPurna. Just don’t do it while connected to the mains, and instead power the board through the USB to TTL debug board needed for programming. ESPurna has been designed specifically for Sonoff devices, and I can see it supports Sonoff POW, which I have yet to review, so I’ll probably test it in the third part of the review to monitor power consumption of my office.
Sonoff TH16 and AM2301 sensors can be purchased for $8.60 and $4.0 respectively on Sonoff TH page. Shipping is not included, but only adds a few dollars with registered airmail shipping, and a bit more for EMS or DHL Express shipping.

Jean-Luc started CNX Software in 2010 as a part-time endeavor, before quitting his job as a software engineering manager, and starting to write daily news, and reviews full time later in 2011.
Support CNX Software! Donate via cryptocurrencies, become a Patron on Patreon, or purchase goods on Amazon or Aliexpress


