Last month I showcased what I called “Allo Sparky Audio Kit” with a DAC board (Piano), an amplifier board (Volt), and usually hard to find reclocker and capacitance multiplier boards (Kali & CM), all connected to Allo Sparky ARM Linux development board powered by Actions Semi S500 quad core Cortex A9 processor, and running Ubuntu 12.04. In the first post, I just described the boards, and showed how to assemble the kit, but now that I have received the user’s manual, it turns out the kit is actually called “Vana Player” and the provided Ubuntu firmware image runs Max2Play Browser based system that’s also available for Raspberry Pi and ODROID boards.
Before starting the kit, you’ll need to connect speakers to Piano DAC board and/or Kali board, as well as a 19.5V power source such as a laptop power supply to connect to the CM board. I connected some USB powered speakers to the headphone jack of Piano board, and one 5 ohm speaker to Volt amplifier board which I had left from a speaker set. You’d normally want to use two speakers for the Volt board, but that will do for testing. I tried four different laptop power supplies, but none of the jack would fit, so finally I change the plug from a Sony Laptop power power supply. Finally I connected an Ethernet cable, and a USB hard drive.
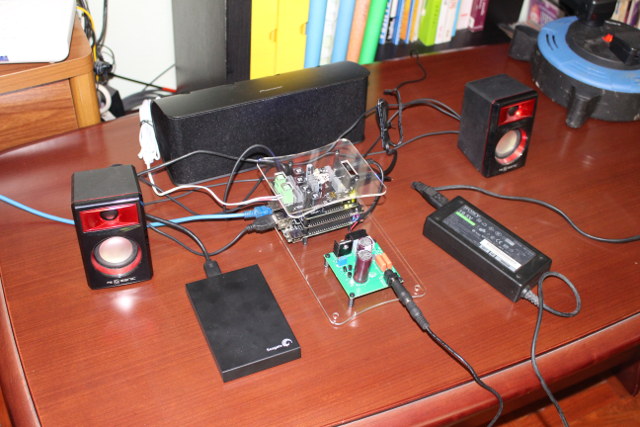
The user manual recommends to connect the 5V power supply provided with the kit, before turning on the 19V power source, and do the reverse while powering it off (turn 19V off first, then 5V). If your kit includes Kali reclocker board, it’s also very important not to connect 5V to Sparky board, but only to Kali board.
Now that the board is started you can find the IP address with an IP scanner software or your router DHCP list. In my router, the kit is detected as pcm5122:
| pcm5122 | 00-17-F7-01-00-FD | 192.168.0.111 | 00:57:43 |
While running arp-scan in my Ubuntu computer looks up the manufacturer (CEM Solutions Pvt) from the MAC address suffix (00:17:f7):
|
1 2 3 4 5 6 7 8 9 10 11 12 13 14 |
sudo arp-scan --localnet Interface: eth0, datalink type: EN10MB (Ethernet) Starting arp-scan 1.8.1 with 256 hosts (http://www.nta-monitor.com/tools/arp-scan/) 192.168.0.1 94:0c:6d:e6:5b:10 TP-LINK Technologies Co.,Ltd. 192.168.0.107 74:da:38:54:de:25 (Unknown) 192.168.0.111 00:17:f7:01:00:fd CEM Solutions Pvt Ltd 192.168.0.109 1c:67:58:2c:72:a5 (Unknown) 192.168.0.199 18:fe:34:f5:2e:3f (Unknown) 192.168.0.105 e4:f8:ef:15:d9:e1 (Unknown) 192.168.0.110 10:66:75:78:37:f5 (Unknown) 192.168.0.108 80:d0:9b:06:ab:c8 (Unknown) 8 packets received by filter, 0 packets dropped by kernel Ending arp-scan 1.8.1: 256 hosts scanned in 1.550 seconds (165.16 hosts/sec). 8 responded |
Now that we have the IP address, let’s open a web browser and access Max2Play web interface.
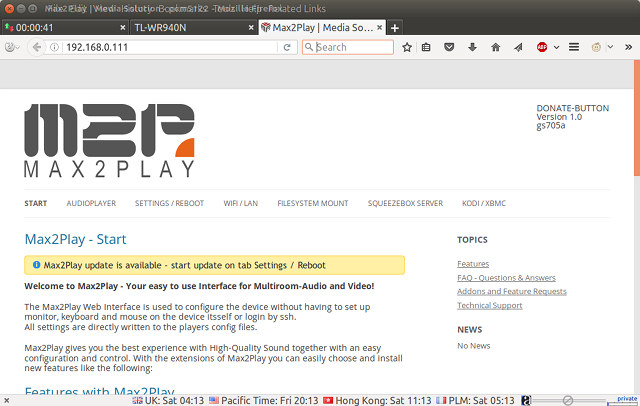
It’s telling me an update is available, so I went to Settings / Reboot tab, and successfully upgraded it from version 1.0 to version 2.36.
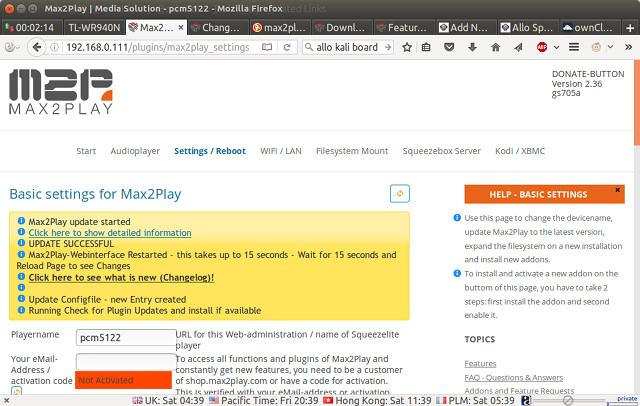
Two players are installed: Squeezelite working with Logitech Media Server (now Squeezebox Server) and Shairport for Airplay support, with both players set to auto start. You can access the settings for each in Audioplayer tab in the web interface.
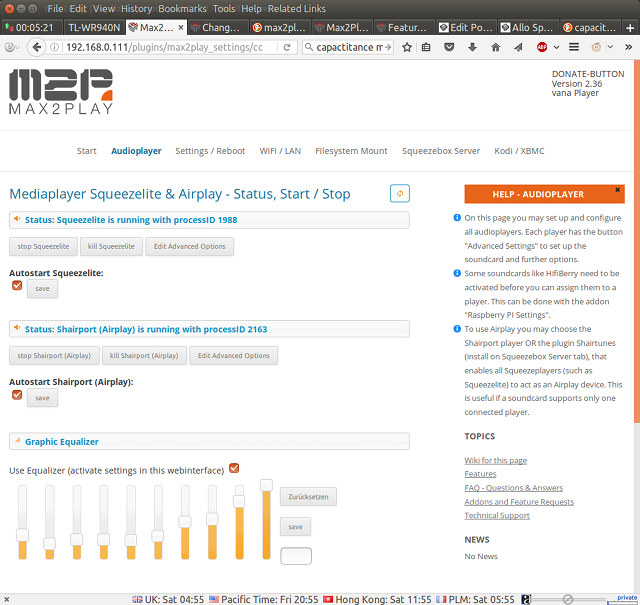
I have not changed anything but you can disable autostart, set advanced options, and enable/disable the Graphics Equalizer.
SqueezeLite will communicate with SqueezeBox Server, which can be configure in the tab of the same name.
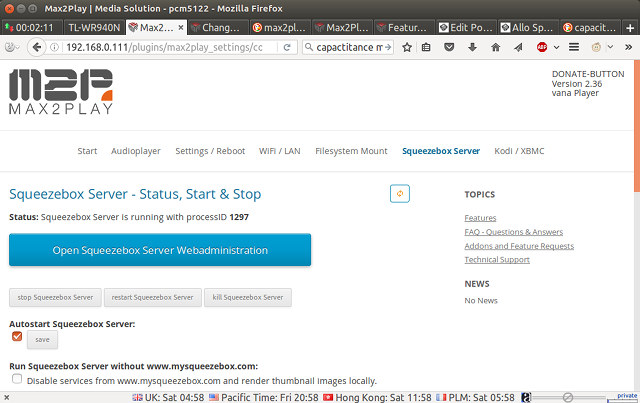
You can also install plugins in that menu such as ShairTunes / ShairTunes2 (Airplay), and Google Music. But again, I have not changed anything in that section.
Vana Player is also powerful enough to act as a video player when connected to a TV via its HDMI port, so you can enjoy both high quality audio and video. That’s what the Kodi/XBMC tab is for, as it will allow you to configure Kodi, for example to decide whether you want to start it automatically.
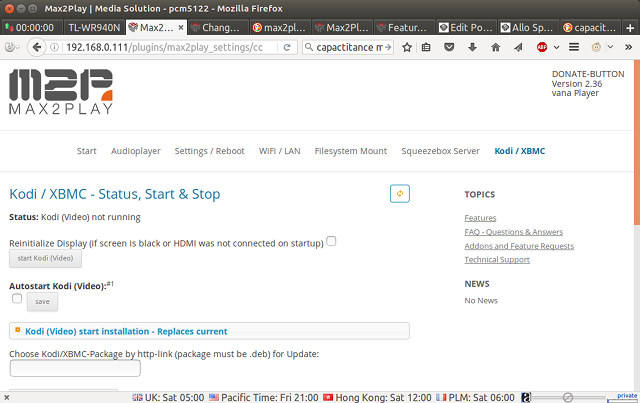
This can also work as a headless Kodi installation using Kore Android app, but I’ll get into more details a little later.
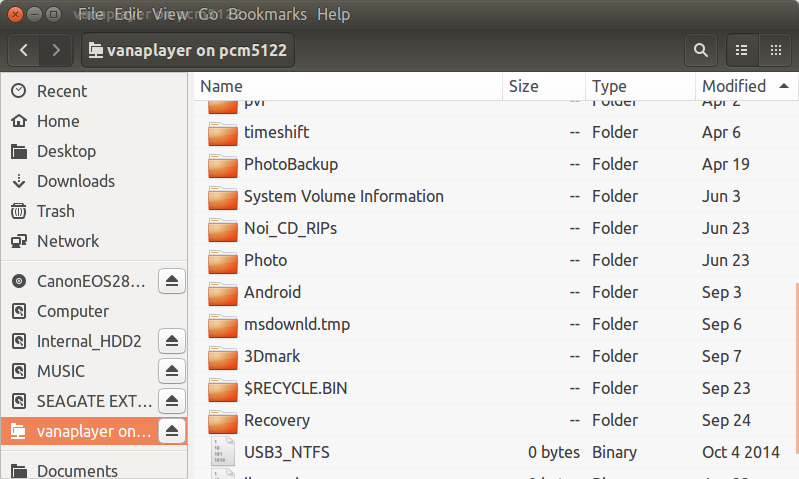
The most important part of the interface at first is the Filesystem Mount tab, where you’ll be able to mount network shares (NFS/SAMBA) on other devices, or your USB storage partitions, as well as use Vana Player as a SAMBA server. If you copied your file on the SD card, you don’t need to do anything here.
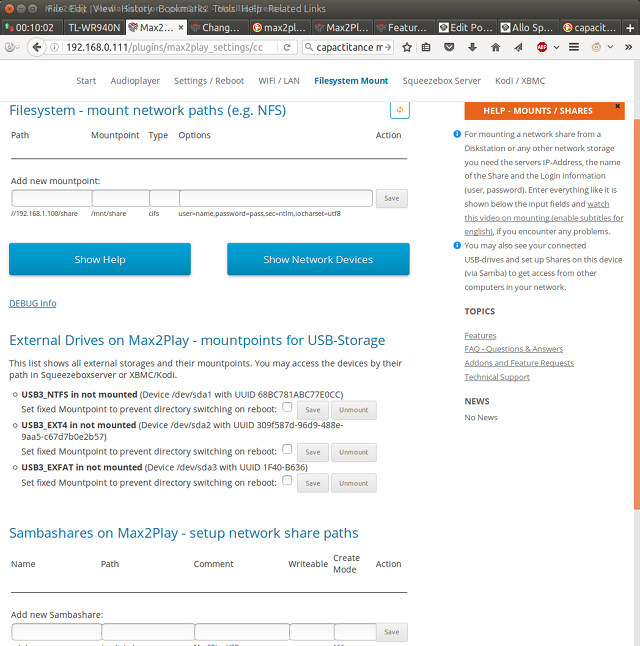
Three out of four partitions of my USB hard drive are detected, the only exception being the BTRFS partition, however none of them would mount from the web interface. I could however mount them manually using ssh (username/password: pi/pi):
|
1 2 |
sudo mount -t ntfs /dev/sda1 /media/usb1/ sudo: unable to resolve host pcm5122 |
So I set “Set fixed Mountpoint to prevent directory switching on reboot” and clicked “Save”, but the “resolve host pcm5122” error still caused the web interface to believe mounting did not work:
sudo: unable to resolve host pcm5122 [mntent]: line 3 in /etc/fstab is bad [mntent]: line 5 in /etc/fstab is bad [mntent]: line 7 in /etc/fstab is bad [mntent]: line 9 in /etc/fstab is bad [mntent]: line 11 in /etc/fstab is bad; rest of file ignored
Mountpoint NOT added! Please refer to the description below!
So restarted the board, and the NTFS partition was mounted automatically. Restarting the board is not straightforward however, as the Reboot option in “Settings / Reboot” never worked for me. It does restart the board, but never fully boots it. So I turned off 19V power, turned off 5V power, and then back on 5V, and 19V to be able to boot successfully. Maybe some programmable power strip would be useful here.
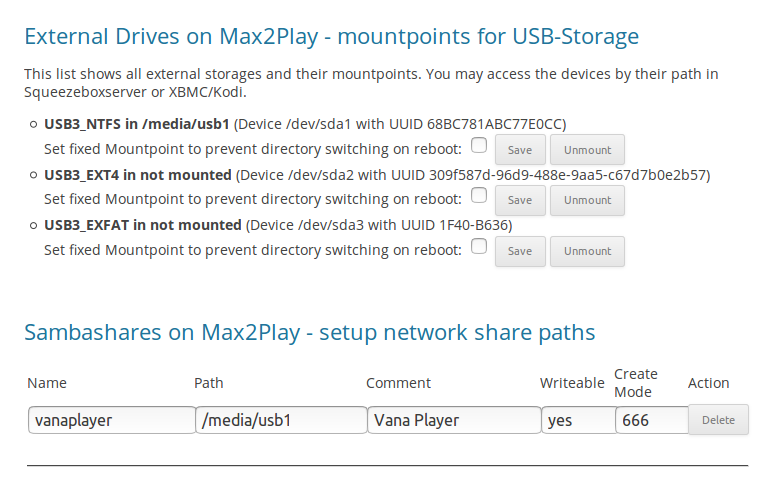 I also created “vanaplayer” SAMBA share, and could access from my Ubuntu computer after settings a password for the SAMBA share for user “root” (fixed username).
Finally, you can configure networking for Ethernet or WiFi in WiFi / LAN tab. However, the first time you’ll need to connect Ethernet even if you want to use WiFi through an USB WiFi dongle.
So now we should be ready to play some audio files. To do so, go to SqueezeBox Server tab, and click on “Open Squeezebox Server Webadministration” button, which should open a new video with “Logitech Media Server” (LMS).
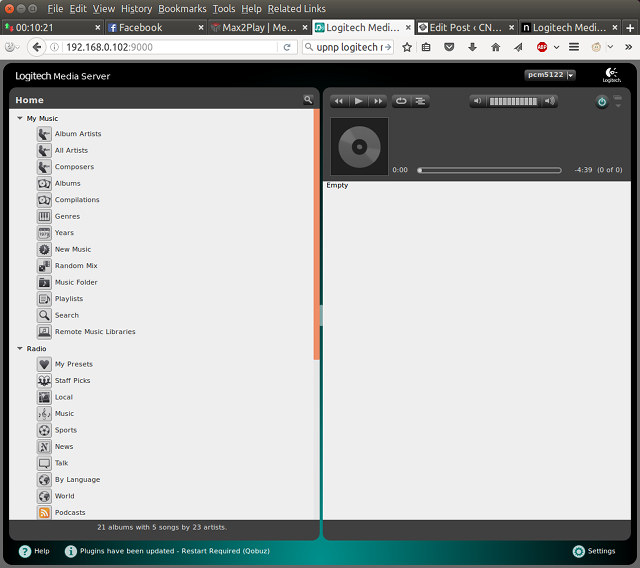
If you are using external USB or network storage for your music, you’ll want to click on Settings on the bottom right corner in order to add your Media Folders, in my case /media/usb1/Music/music, and optionally edit the playlist folder.
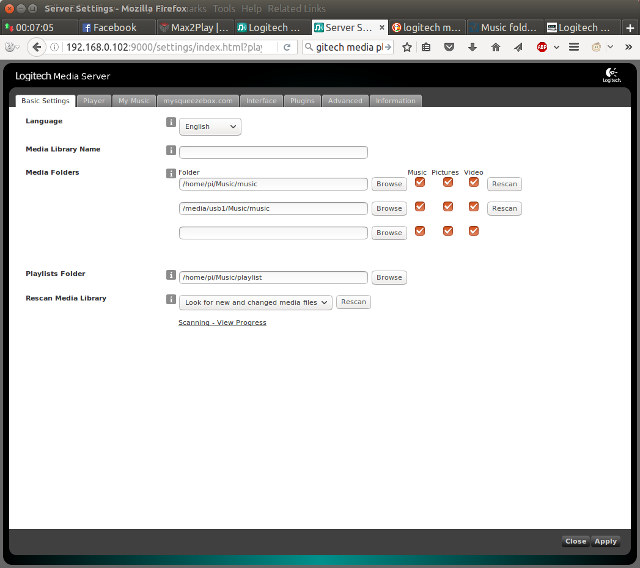
Click on Apply and Close, and then you’ll be able to able play your music, add files to the playlist, and adjust the volume and other settings such as repeat and shuffle from the web interface.
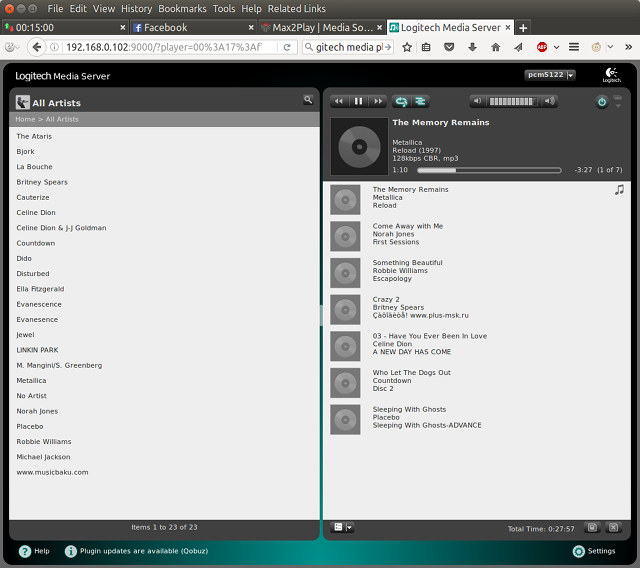
Audio plays via speakers connected to both Piano DAC board and VOLT amplifier, and the audio quality seemed pretty good considering the speakers I used. I also set the volume in LMS to the maximum, but it was not that loud. Maybe there’s another way to increase the volume, but I did not find it. I also played a FLAC audio file (24-bit/192 KHz) successfully.
Another source of audio can be found in the Radio part of LMS, I managed to do so easily, although one of the radio stations would not start at all. Probably a network issue, as others worked just fine.
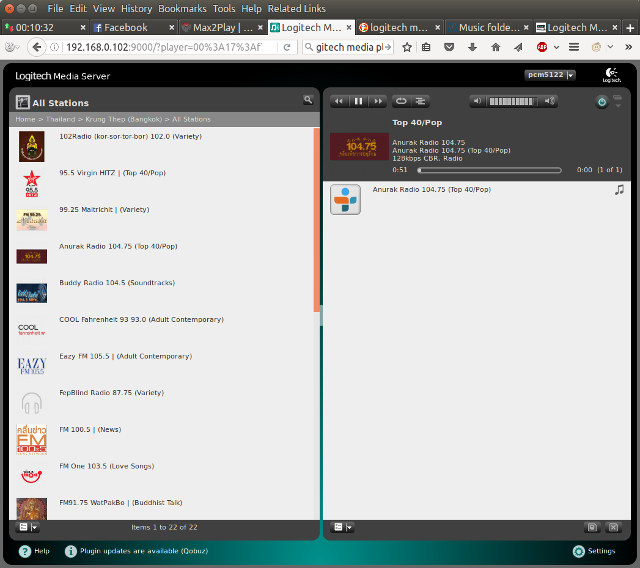
Vana player manual also mention the use of Qobuz plugin, but I did not try since it requires subscription.
The final way to play music using LMS is DLNA/UPnP, and I could confirm the UPnP/DLNA plugin was installed and running on port 5000:
|
1 2 3 4 5 6 7 8 9 10 11 12 13 14 15 16 17 18 19 |
sudo nmap -sS 192.168.0.102 Starting Nmap 7.01 ( https://nmap.org ) at 2016-10-02 12:19 ICT Nmap scan report for 192.168.0.102 (192.168.0.102) Host is up (0.011s latency). Not shown: 991 closed ports PORT STATE SERVICE 22/tcp open ssh 80/tcp open http 111/tcp open rpcbind 139/tcp open netbios-ssn 445/tcp open microsoft-ds 5000/tcp open upnp 5555/tcp open freeciv 9000/tcp open cslistener 9090/tcp open zeus-admin MAC Address: 00:17:F7:01:00:FD (CEM Solutions Pvt) Nmap done: 1 IP address (1 host up) scanned in 1.77 seconds |
However, for whatever reason, BubbleUPnP nor AirWire apps were able to locate PCM5122 as the media renderer.
I’ll update the post if I manage to make it work.
An another way to use Vana Player is via Kodi Media Center. You’ll need to connect an HDMI display to Sparky board, login using pi / pi credentials, and start Kodi via Max2Play interface. SqueezeLite and Shairport will be stopped, and only restart (if set to autostart) once Kodi is stopped.
If you want to control the player remotely, you’ll need to install Kore app on your smartphone. I started Kodi by going to Max2Ply Interface, selecting Kodi/XBMC tab, and clicking on Start Kodi(video), which will start Kodi 15.0 Isengard on the device.
Now to enable smartphone remote control support, enable Settings → Services → Remote control → Allow programs on other systems to control Kodi and Settings → Services → Webserver → Allow control of Kodi via HTTP to ON to allow you smartphone to send data such as images and summaries to Kodi. Both options were actually already enabled in my system, but I got the error message “remote communication server failed to start” in Kodi, until I manually stopped SqueezeBox Server in Max2Play web interface.The rest of the instructions should work with any other system running Kodi.
Now we can start Kore app, click Next, auto detection will fail, click Next again to setup manual configuration with the IP address and default Kodi settings as shown below.
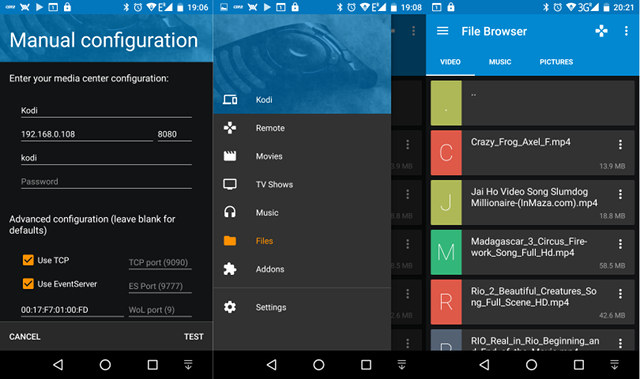 Then we can go to Files to access the video inside Vana Player and start playing them. Once the video is started it does not rely on the smartphone, except if you want to use Kore remote control to stop the video, fast forward, adjust the volume and so on.
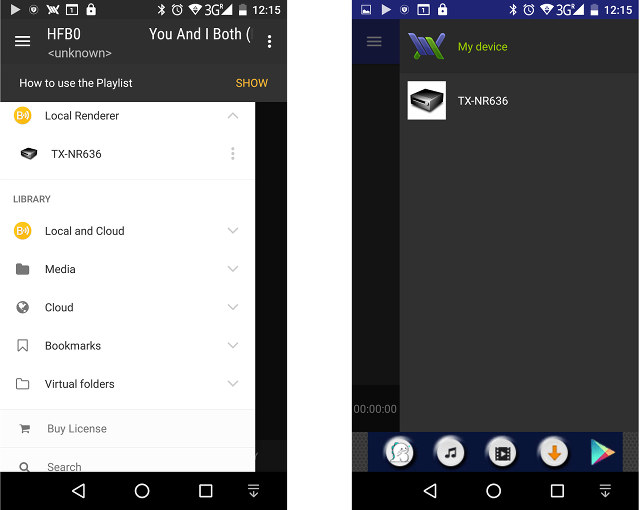
Another way to use Kodi Media Server capabilities is to use a UPnP app such as AirWire or BubbleUPnP, and contrary to my experience with SqueezeBox Server, Kodi(pcm5122) media renderer was probably detected, and I could play a video located on my phone.
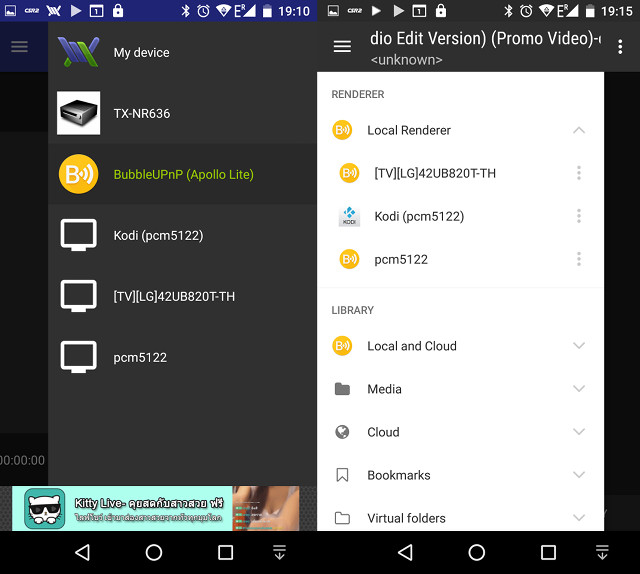
A final way to use the system as explained in the user’s manual is to stream a YouTube video from your smartphone to Vana Player again using UPnP. To do so, start YouTube app, start playing a video, and share it to BubbleUPnP (AirWaire does not support this feature), which will ask to install additional files the first time.
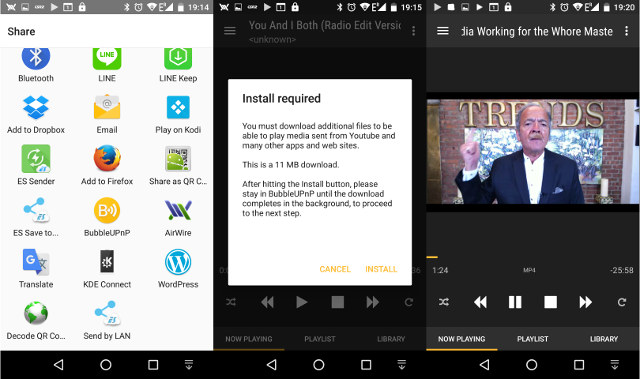
Once it is complete, you’ll be able to stream and control YouTube videos from your smartphone.
I suddenly had a problem while using UPnP apps however, as I lost all audio. I tried to reboot the system, and use SqueezeBox server, but I still did not have any audio. The screenshoot below shows I can run AlsaMixer and atm7059_link audio card is detected.
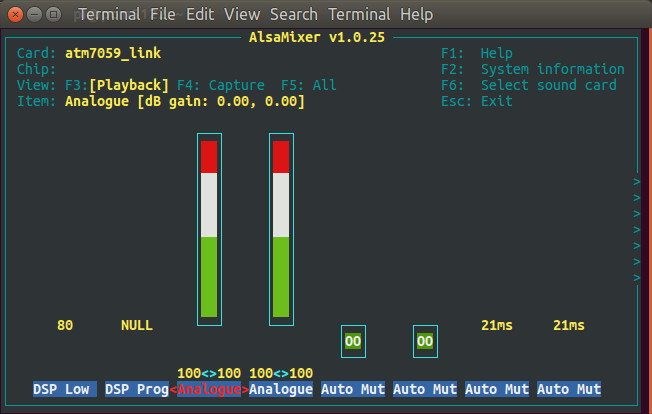 However, if I go to Sound Settings in Ubuntu 12.04, there’s no Output device at all, and Kodi complains /dev/mixer is missing. All boards seem to be OK based on the LEDs, so it must be a software issue, but I have not found a solution yet.
So overall Vana Player is an interesting audio device, but software can be confusing at time, and not always work as expected. I’ve also noted that the network interface may take a long time to be brought up, and sometimes I have restart the device manually to make it work. Some explanation about the many LEDs on the board could be useful to debug potential issue without having to connect the device to a monitor or TV.
Allo website has been updated, and you can now buy all boards on Sparky page. My kit includes Sparky board ($37), Piano DAC board ($27), Piano 2.1 DAC board ($49), VOLT amplifier board ($27), Kali reclocker board ($69), CM board ($15), and some accessories, but you can also directly buy Vana Player kit for $169, as well as other bundles. If you own a Raspberry Pi 2/3 board, the audio add-on boards should also be compatible.

Jean-Luc started CNX Software in 2010 as a part-time endeavor, before quitting his job as a software engineering manager, and starting to write daily news, and reviews full time later in 2011.
Support CNX Software! Donate via cryptocurrencies, become a Patron on Patreon, or purchase goods on Amazon or Aliexpress


