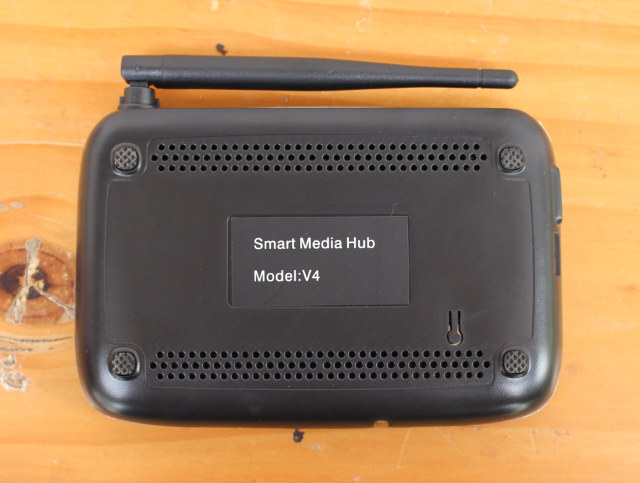
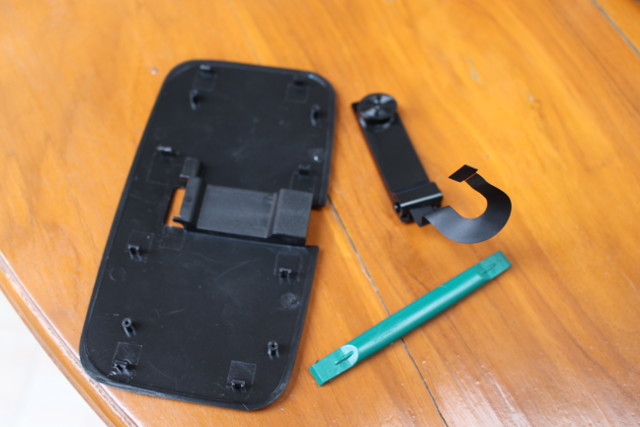
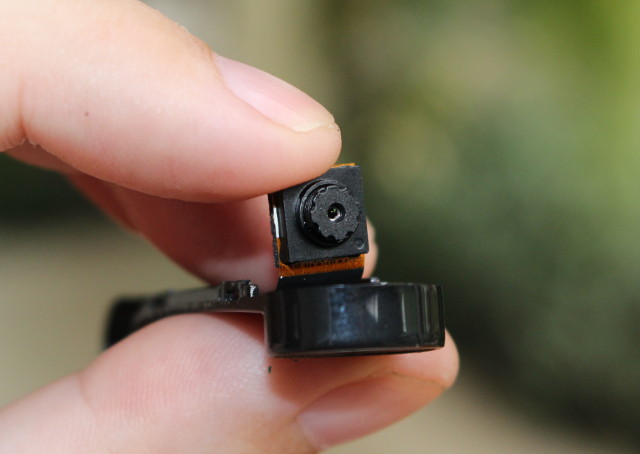
Coowell V4 is one of the rare Android mini PCs with a built-in camera. It is powered by Rockchip RK3368 octa-core processor combined with 2GB RAM and 16GB flash. GearBest asked me whether I wanted to review it, and since I was curious about the camera, I took the offer up. Today, in the first part of the review I’ll start by checking out the device and its accessories, and tear it down to find more about the hardware design, before specifically testing the camera in the second part of the review in a similar way to what I did for HD23 review.
Coowell V4 Unboxing
The device comes in a black retail package with SMART MEDIA HUB text. The only icon that may cause troubles at custom might be the Android logo and text lacking TM.
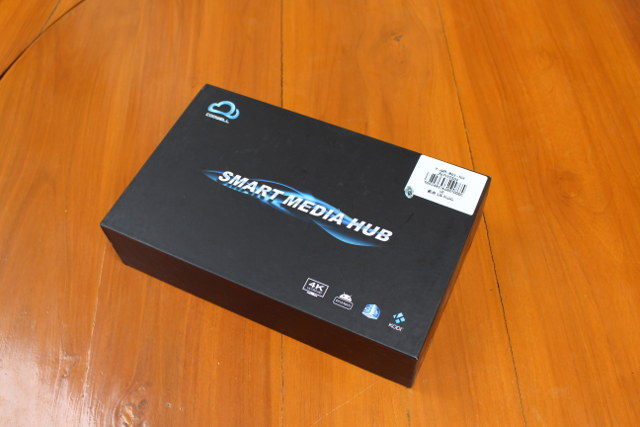
There’s also sticker on the side indicate Model: V4. SO there may be several “Smart Media Hub” models from the company.
The box ships with a 5V/2A power supply, HDMI and AV cables, an IR remote control with IR learning function (5 keys) taking two non-included AAA batteries, and a generic user’s manual in English that does not show or explain anything about the camera.
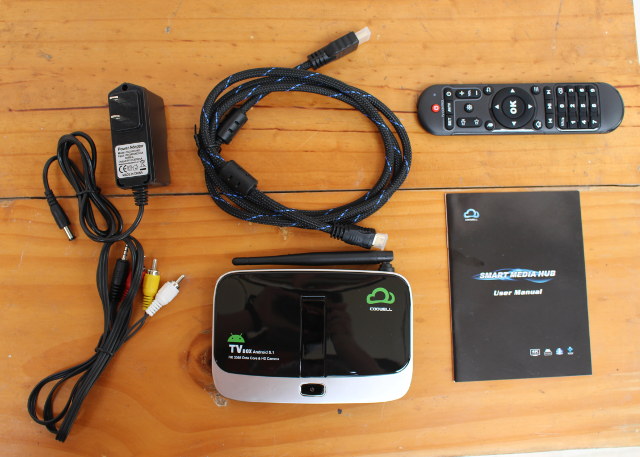
The device itself is fairly small, and fits easily in the hand. We’ve got the retractable camera on the top as well as the power button.

The front panel only has the IR receiver window, one side features a USB 2.0 port and micro SD slot, while most ports can be found in the rear panel: WiFi antenna, one more USB 2.0 host, optical S/PDIF, HDMI 2.0 output, one micro USB OTG port, and the power jack.
Coowell V4 Teardown
In order to open the device, we’ll need to turn it upside down, and we”ll notice both the model name “Smart Media Hub V4” and the recovery switch on the bottom right. But what we are interested in here are the four rubber pads on the corners. We have to take them out, and loosen four screws.
Then use sharp and rigid plastic tool to pop the top cover up.
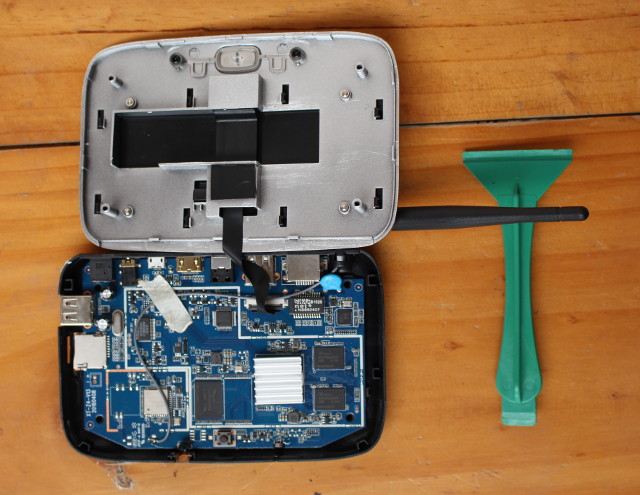 The camera is connected to the main via a MIPI CSI ribbon cable. I’ve lifted the black part of the connector to take the cable out, and have a closer look at the main board first.
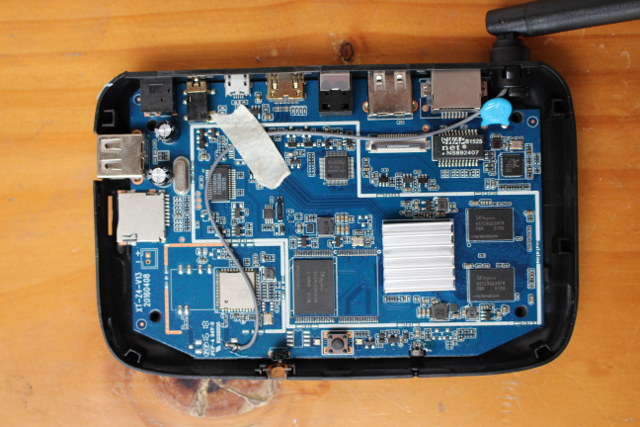 Rockchip RK3368 processor is covered by an heatsink, and connected to a 16GB SKhynix H26M52003EQR eMMC flash and two SKhynix H5TC4G63AFR DDR3L memory (1GB). Networking connectivity is achieved with AP6335 802.11ac and Bluetooth 4.0 module, as well as Realtek RTL8211E GbE transceiver and NS892407 Gigabit Ethernet transformer module. Other ICs include Rockchip RK1000-S audio codec and TV out chip, and Genesys GL852G USB 2.0 hub controller. We’ll find the IR receiver, power button, and a built-in microhone in the bottom of the picture. The board is named XT-Z4-V13.
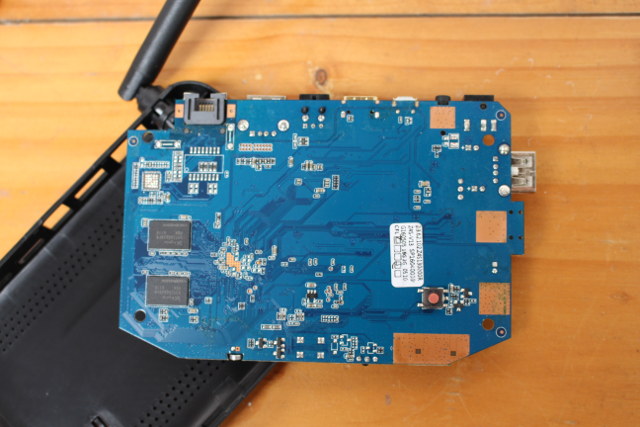
Some clips hold the board in place, but it’s easy to completely take it out of its enclosure. We’ll find two more DDR3L chips on the back of the board bringing the total to 2GB RAM. A sticker also mentions Z4S-V13, and that it is the 16G/2G version.
But let’s go back to the camera on the top cover. We’ll need to loosen four more screws, and push 4 pairs of clips to take out the camera.
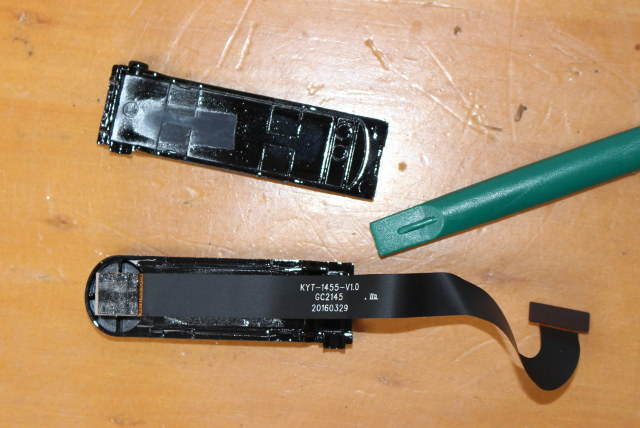
It’s then easy to open it by inserting a tool on the side of the module, which contains a GC2145 2MP image sensor if the markings on the cable are to be trusted.
I’d like to thank GearBest for sending a sample for review, and if you are interested you could considering purchasing Coowell V4 from their online store for $69.99 including shipping. Alternatively the TV box can also be found on Aliexpress for $68 and up.

Jean-Luc started CNX Software in 2010 as a part-time endeavor, before quitting his job as a software engineering manager, and starting to write daily news, and reviews full time later in 2011.
Support CNX Software! Donate via cryptocurrencies, become a Patron on Patreon, or purchase goods on Amazon or Aliexpress


