
Vorke V1 is a Braswell mini PC pre-loaded with Windows 10, powered by an Intel Celeron J3160 quad core with 4GB RAM, 64 GB internal storage, and two important features if you want to use it as a desktop PC: support for internal 2.5″ hard drive, and dual display support via HDMI and VGA ports. GeekBuying sent me a sample for review, and I’ll do a two part review, starting with pictures of the device, and its internal, before publishing the second part testing the performance, stability and features of the mini PC.
Vorke V1 Unboxing
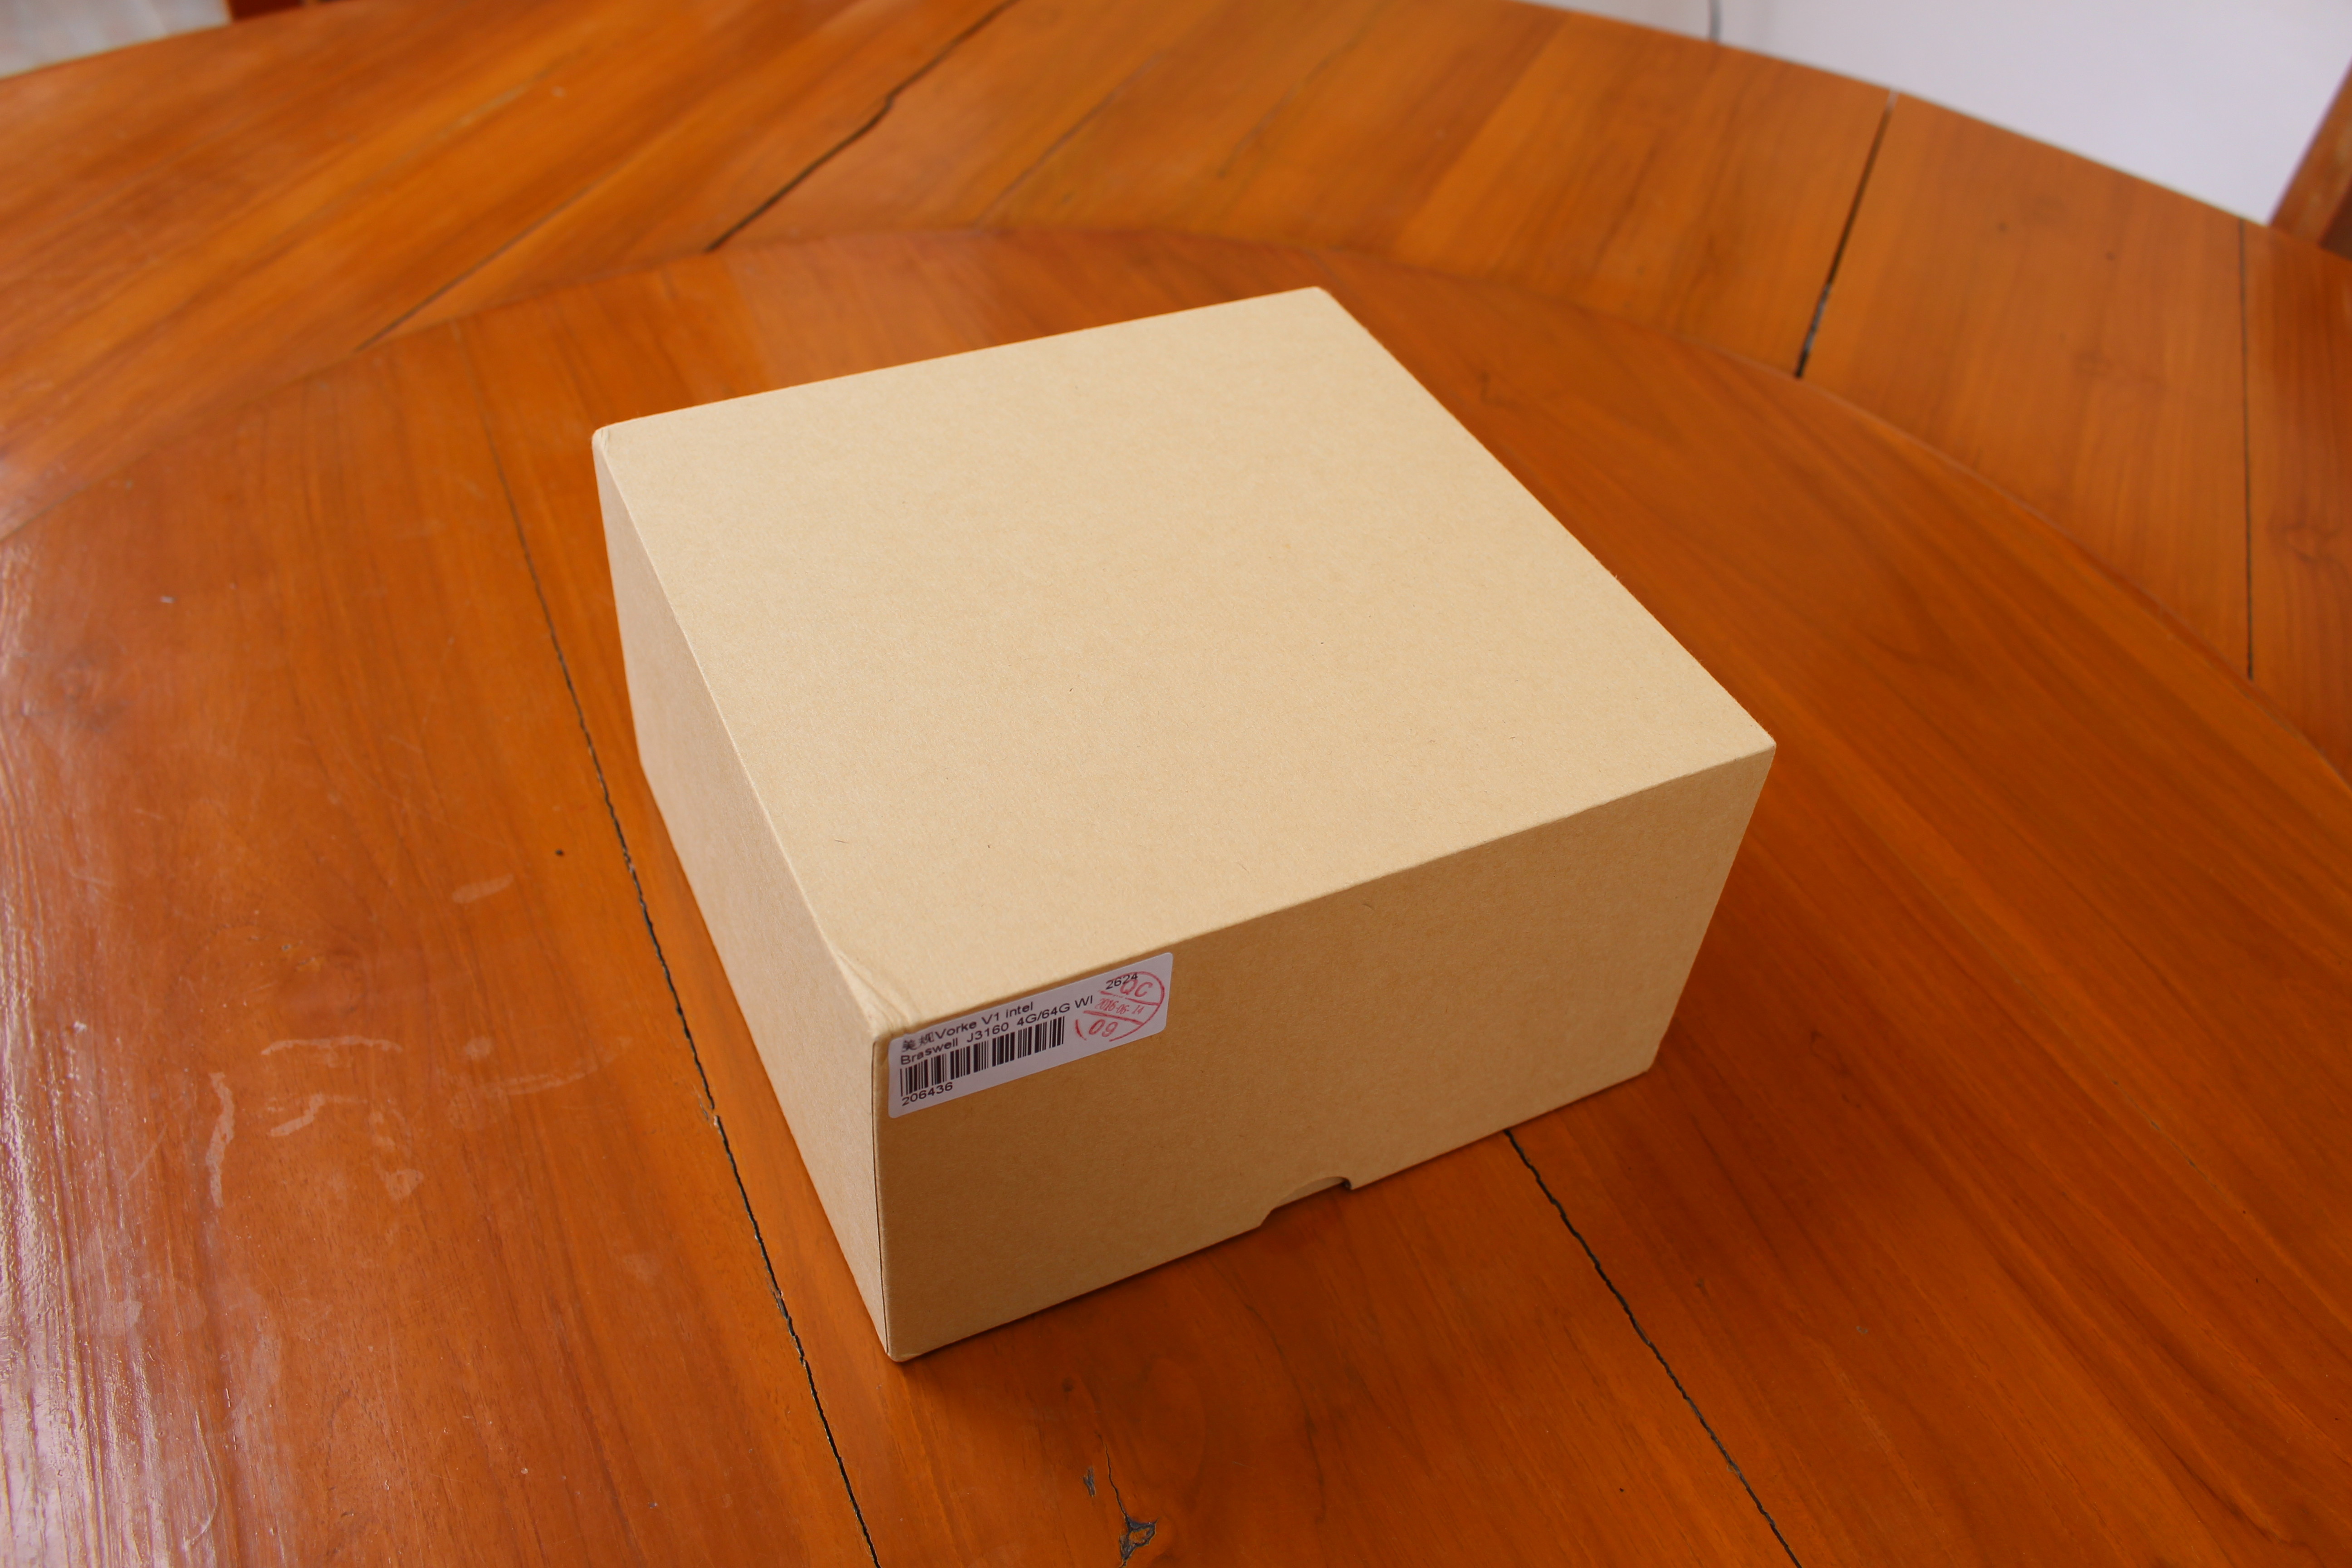
There’s not much to say about the package, as it’s just a bland carton box with a sticker with Vorke V1 name, processor and memory info.
The mini PC ships with a 19V/2.1A power supply and a power cord, as well as a mounting bracket and 5 screws for 2.5″ SATA SSD or HDD.
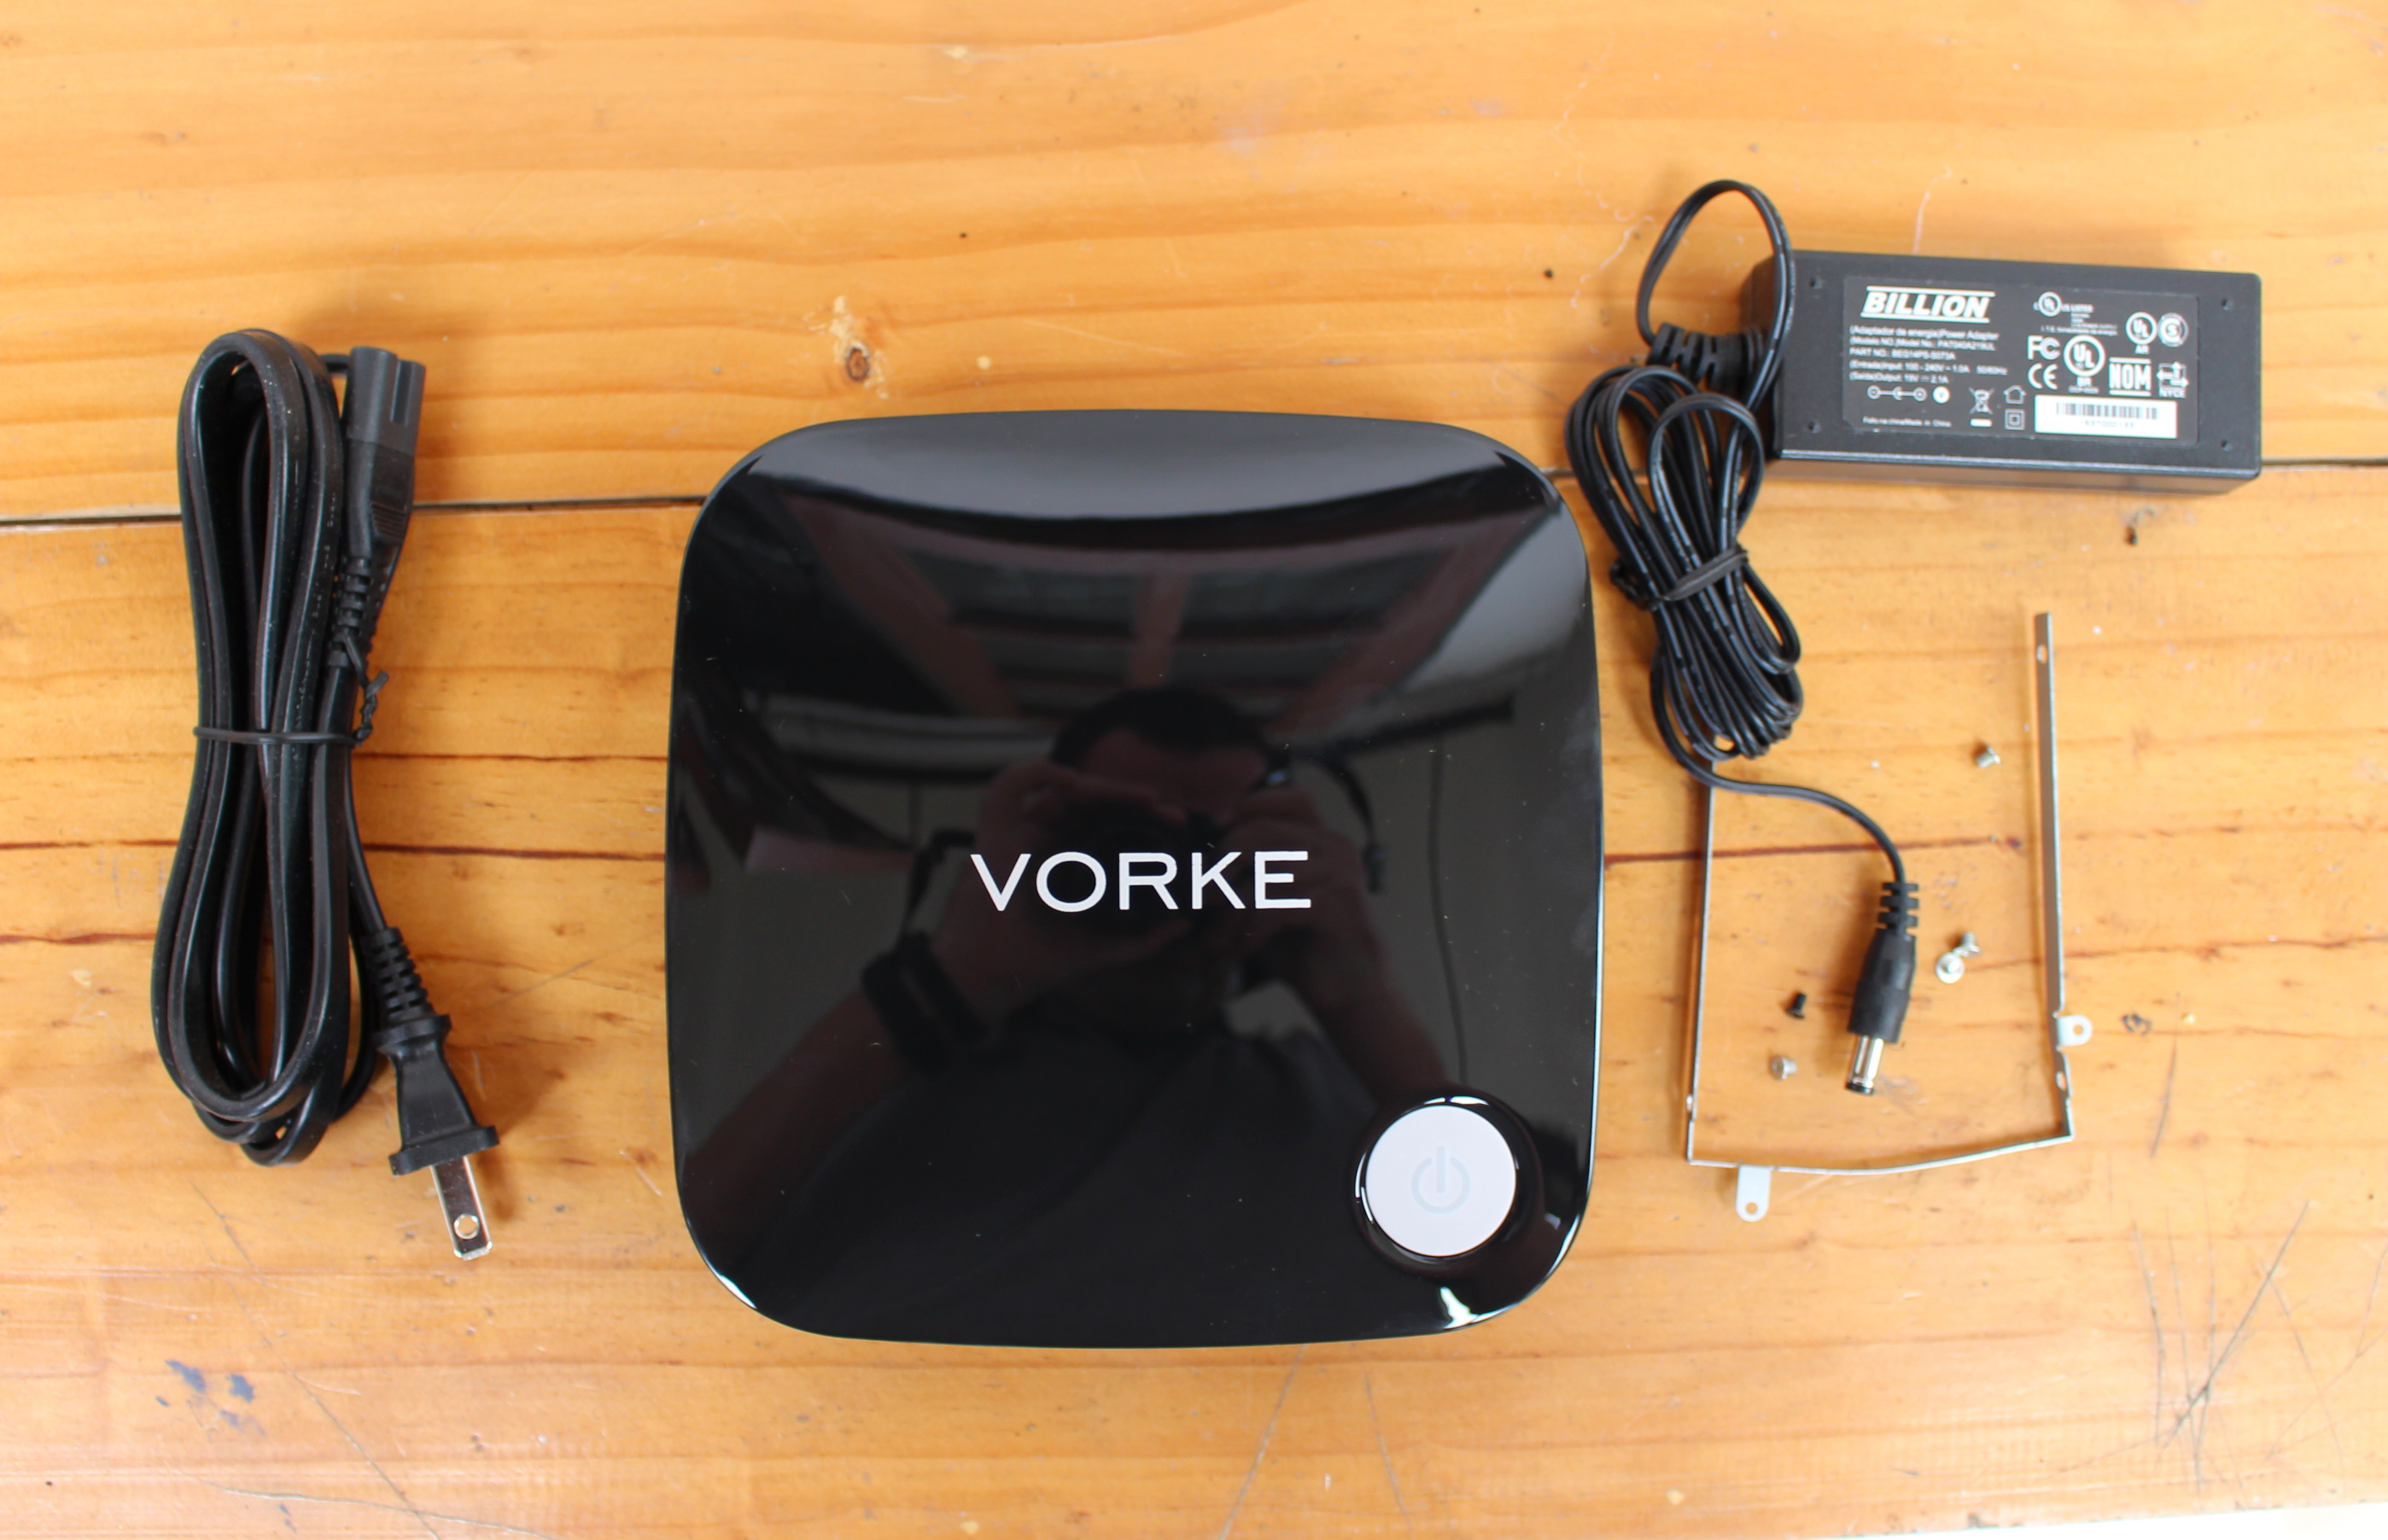
The top cover is quite glossy and features a large power button.
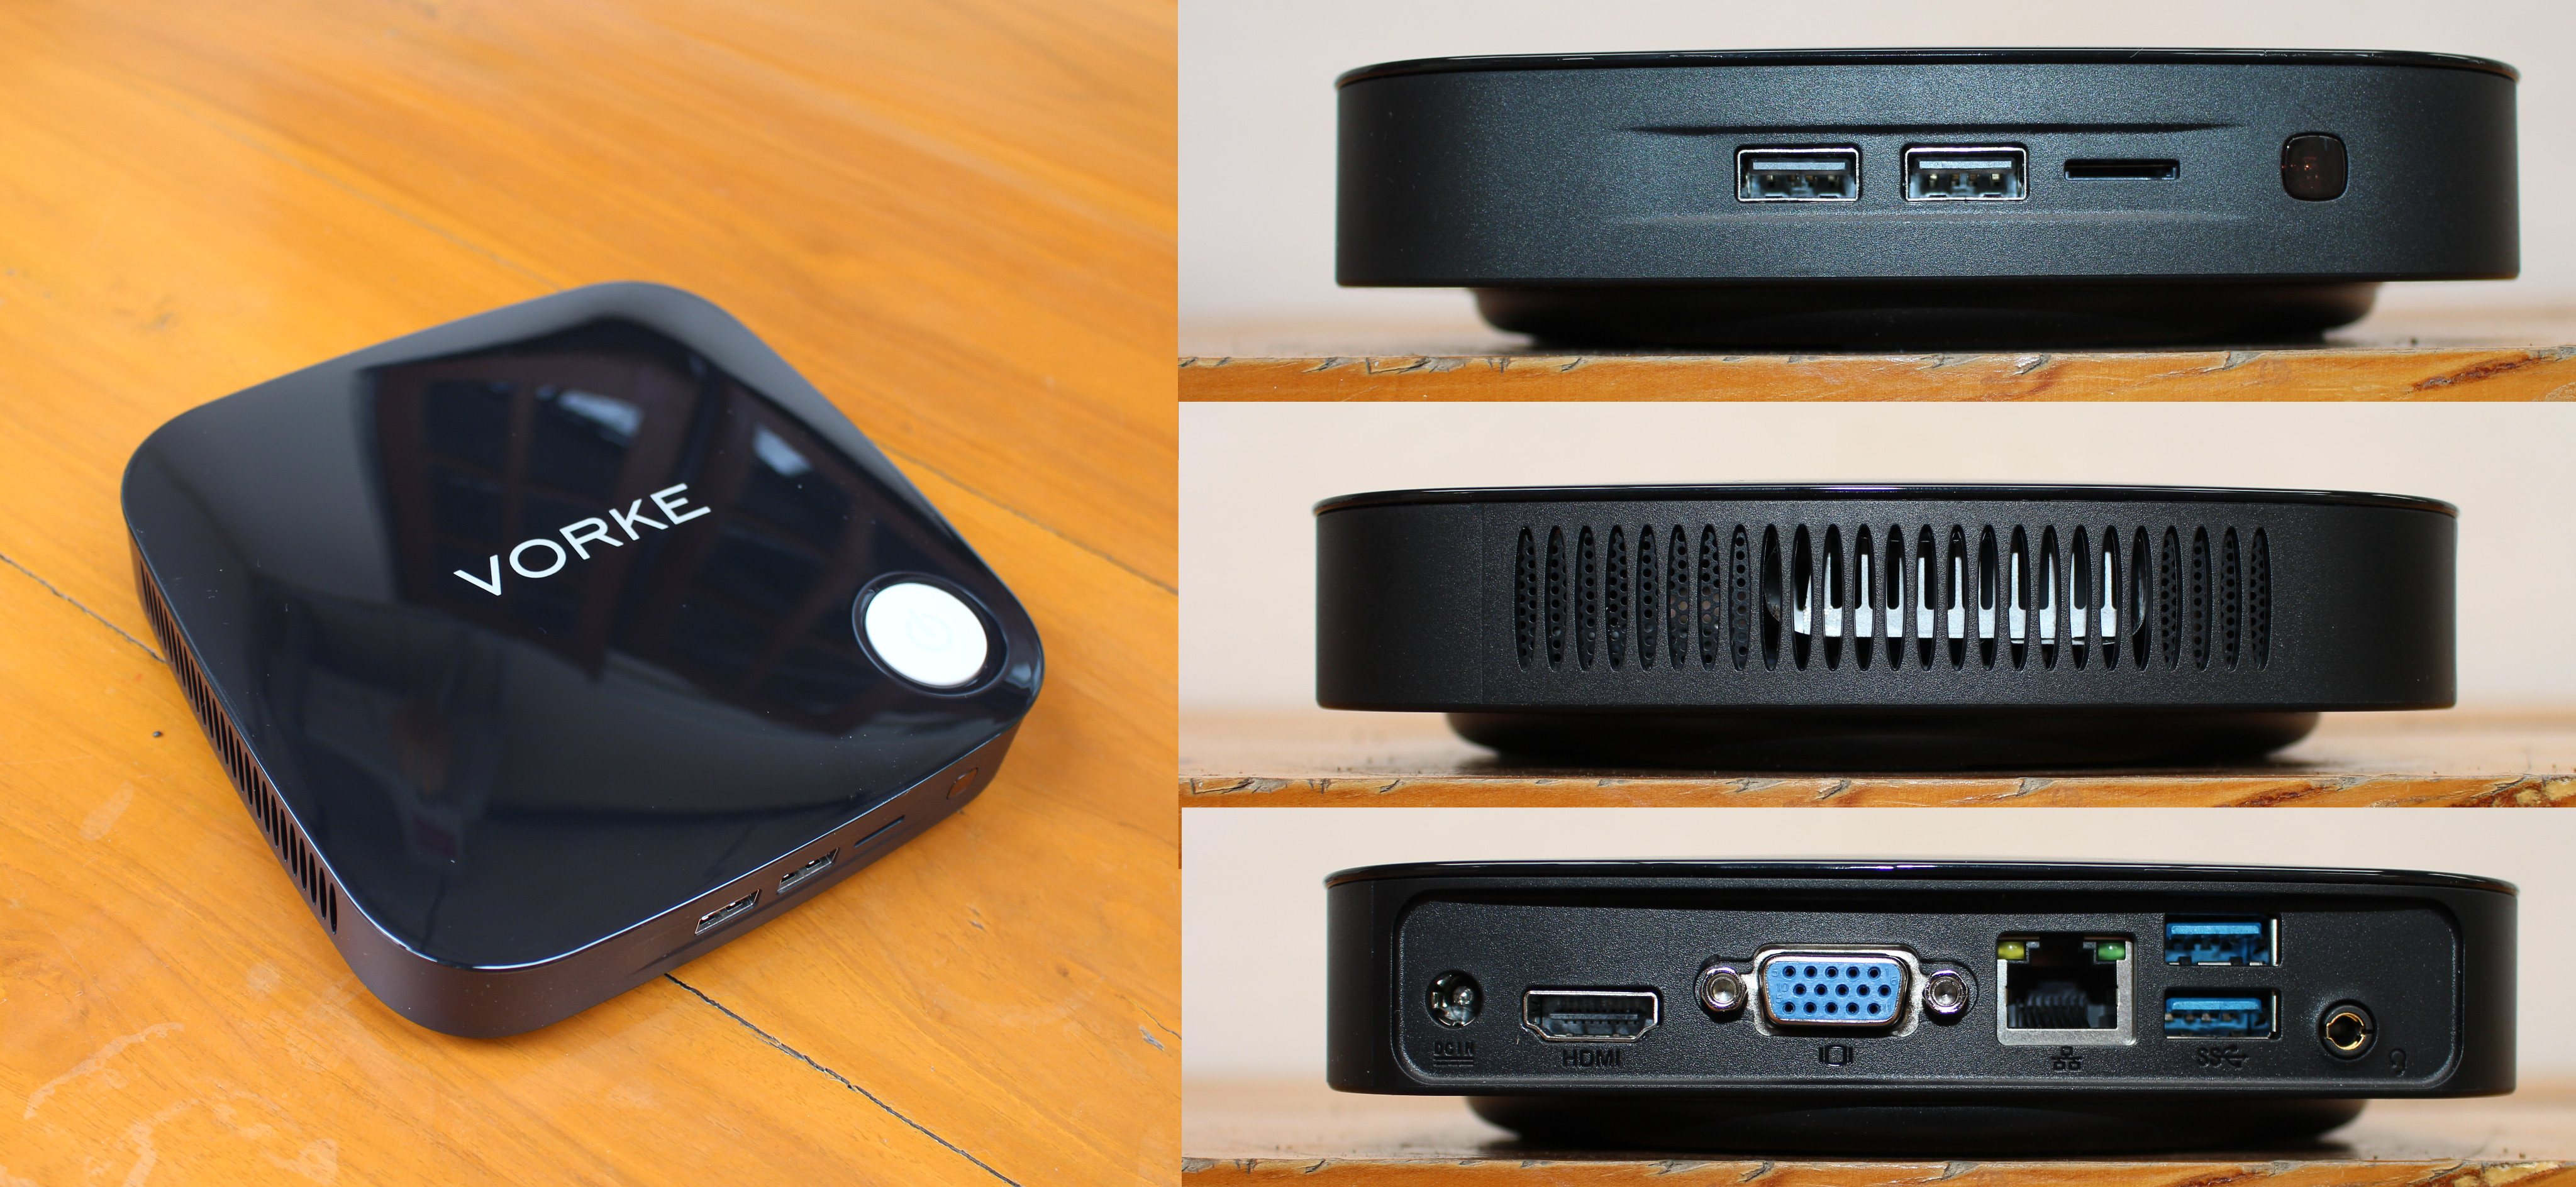
The front panel exposes two USB 2.0 ports, a micro SD slot, and a small window for an infrared receiver, not commonly found on Intel mini PCs. The two side has large ventilation holes, and the rear panel features the power jack, HDMI and VGA output, Gigabit Ethernet, two USB 3.0 ports, and a 3.5mm headphone / Line out jack.
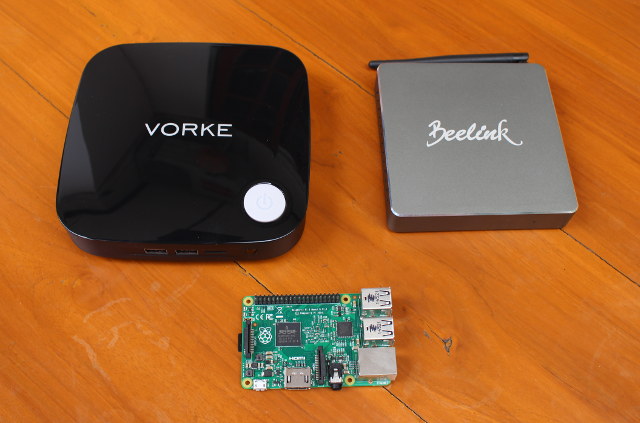 I found Vorke V1 to be larger than most devices I’ve received, so I took a picture with Beelink BT7 and a Raspberry Pi 2 board for comparison.
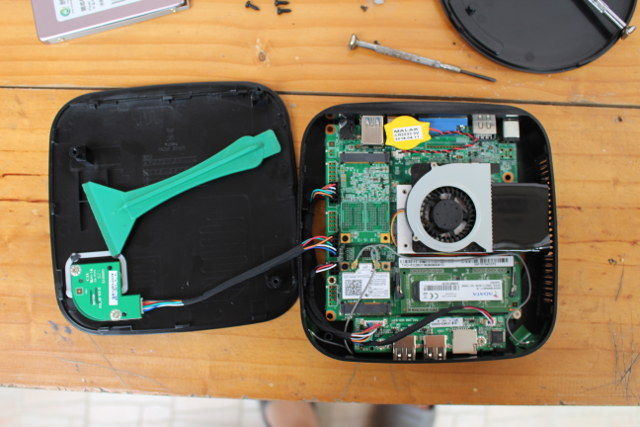
Normally I’d go to the teardown part now, but with Vorke V1 I have one more step to do, as I can install a 2.5″ hard drive or SSD.
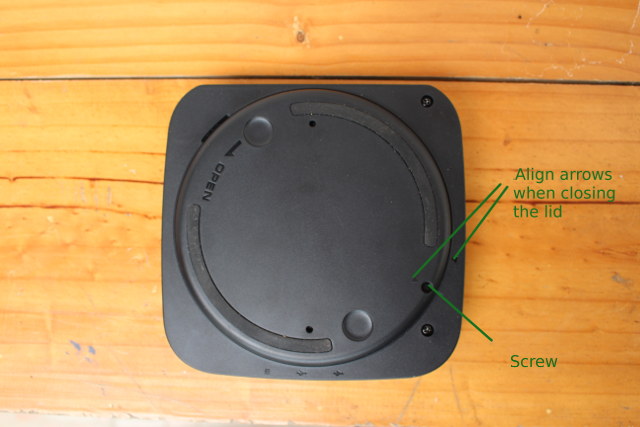 To do so, I had to loosen one screw on the bottom of the case, and turn the lid anti-clockwise to open it.
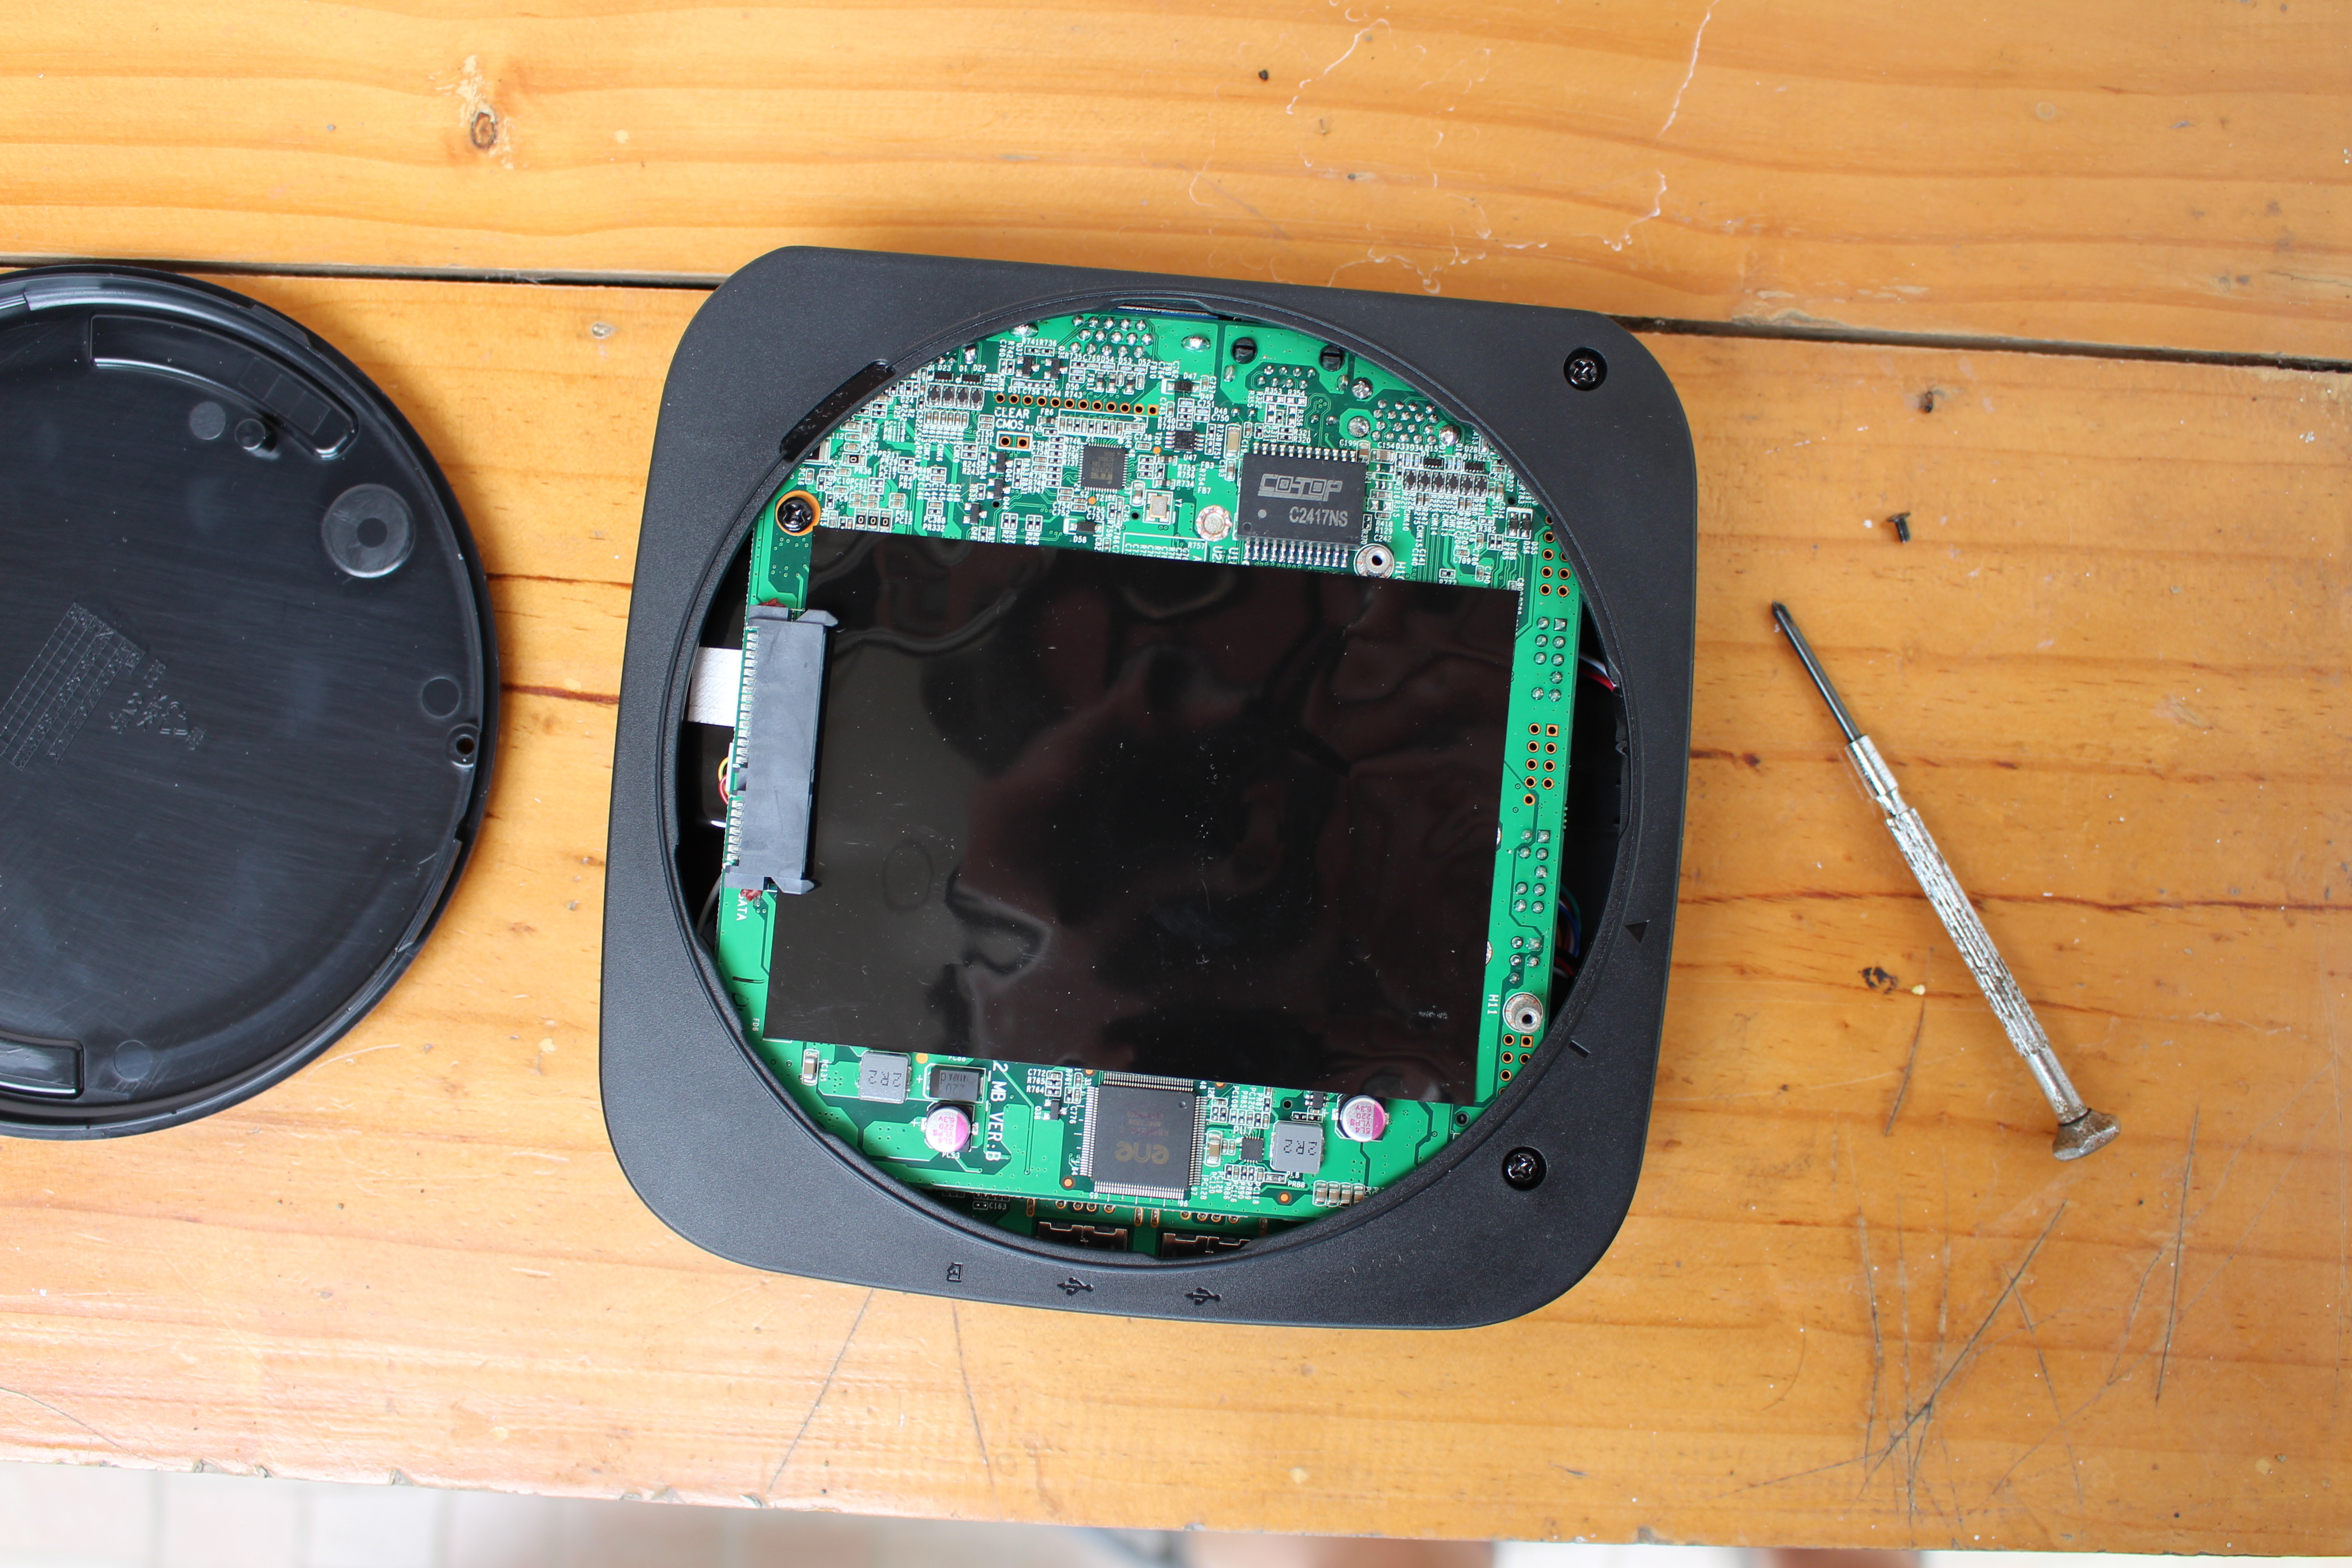
We can see the bottom of the board with a black protection sheet where you are supposed to install the drive. While I’m here, components of interest include CO-TOP C2417NS (probably Gigabit Ethernet magnetics), ITE IT6513FN DisplayPort to VGA controller, and ENE KB9029Q C embedded / keyboard controller with 8051 MCU, 128KB flash.
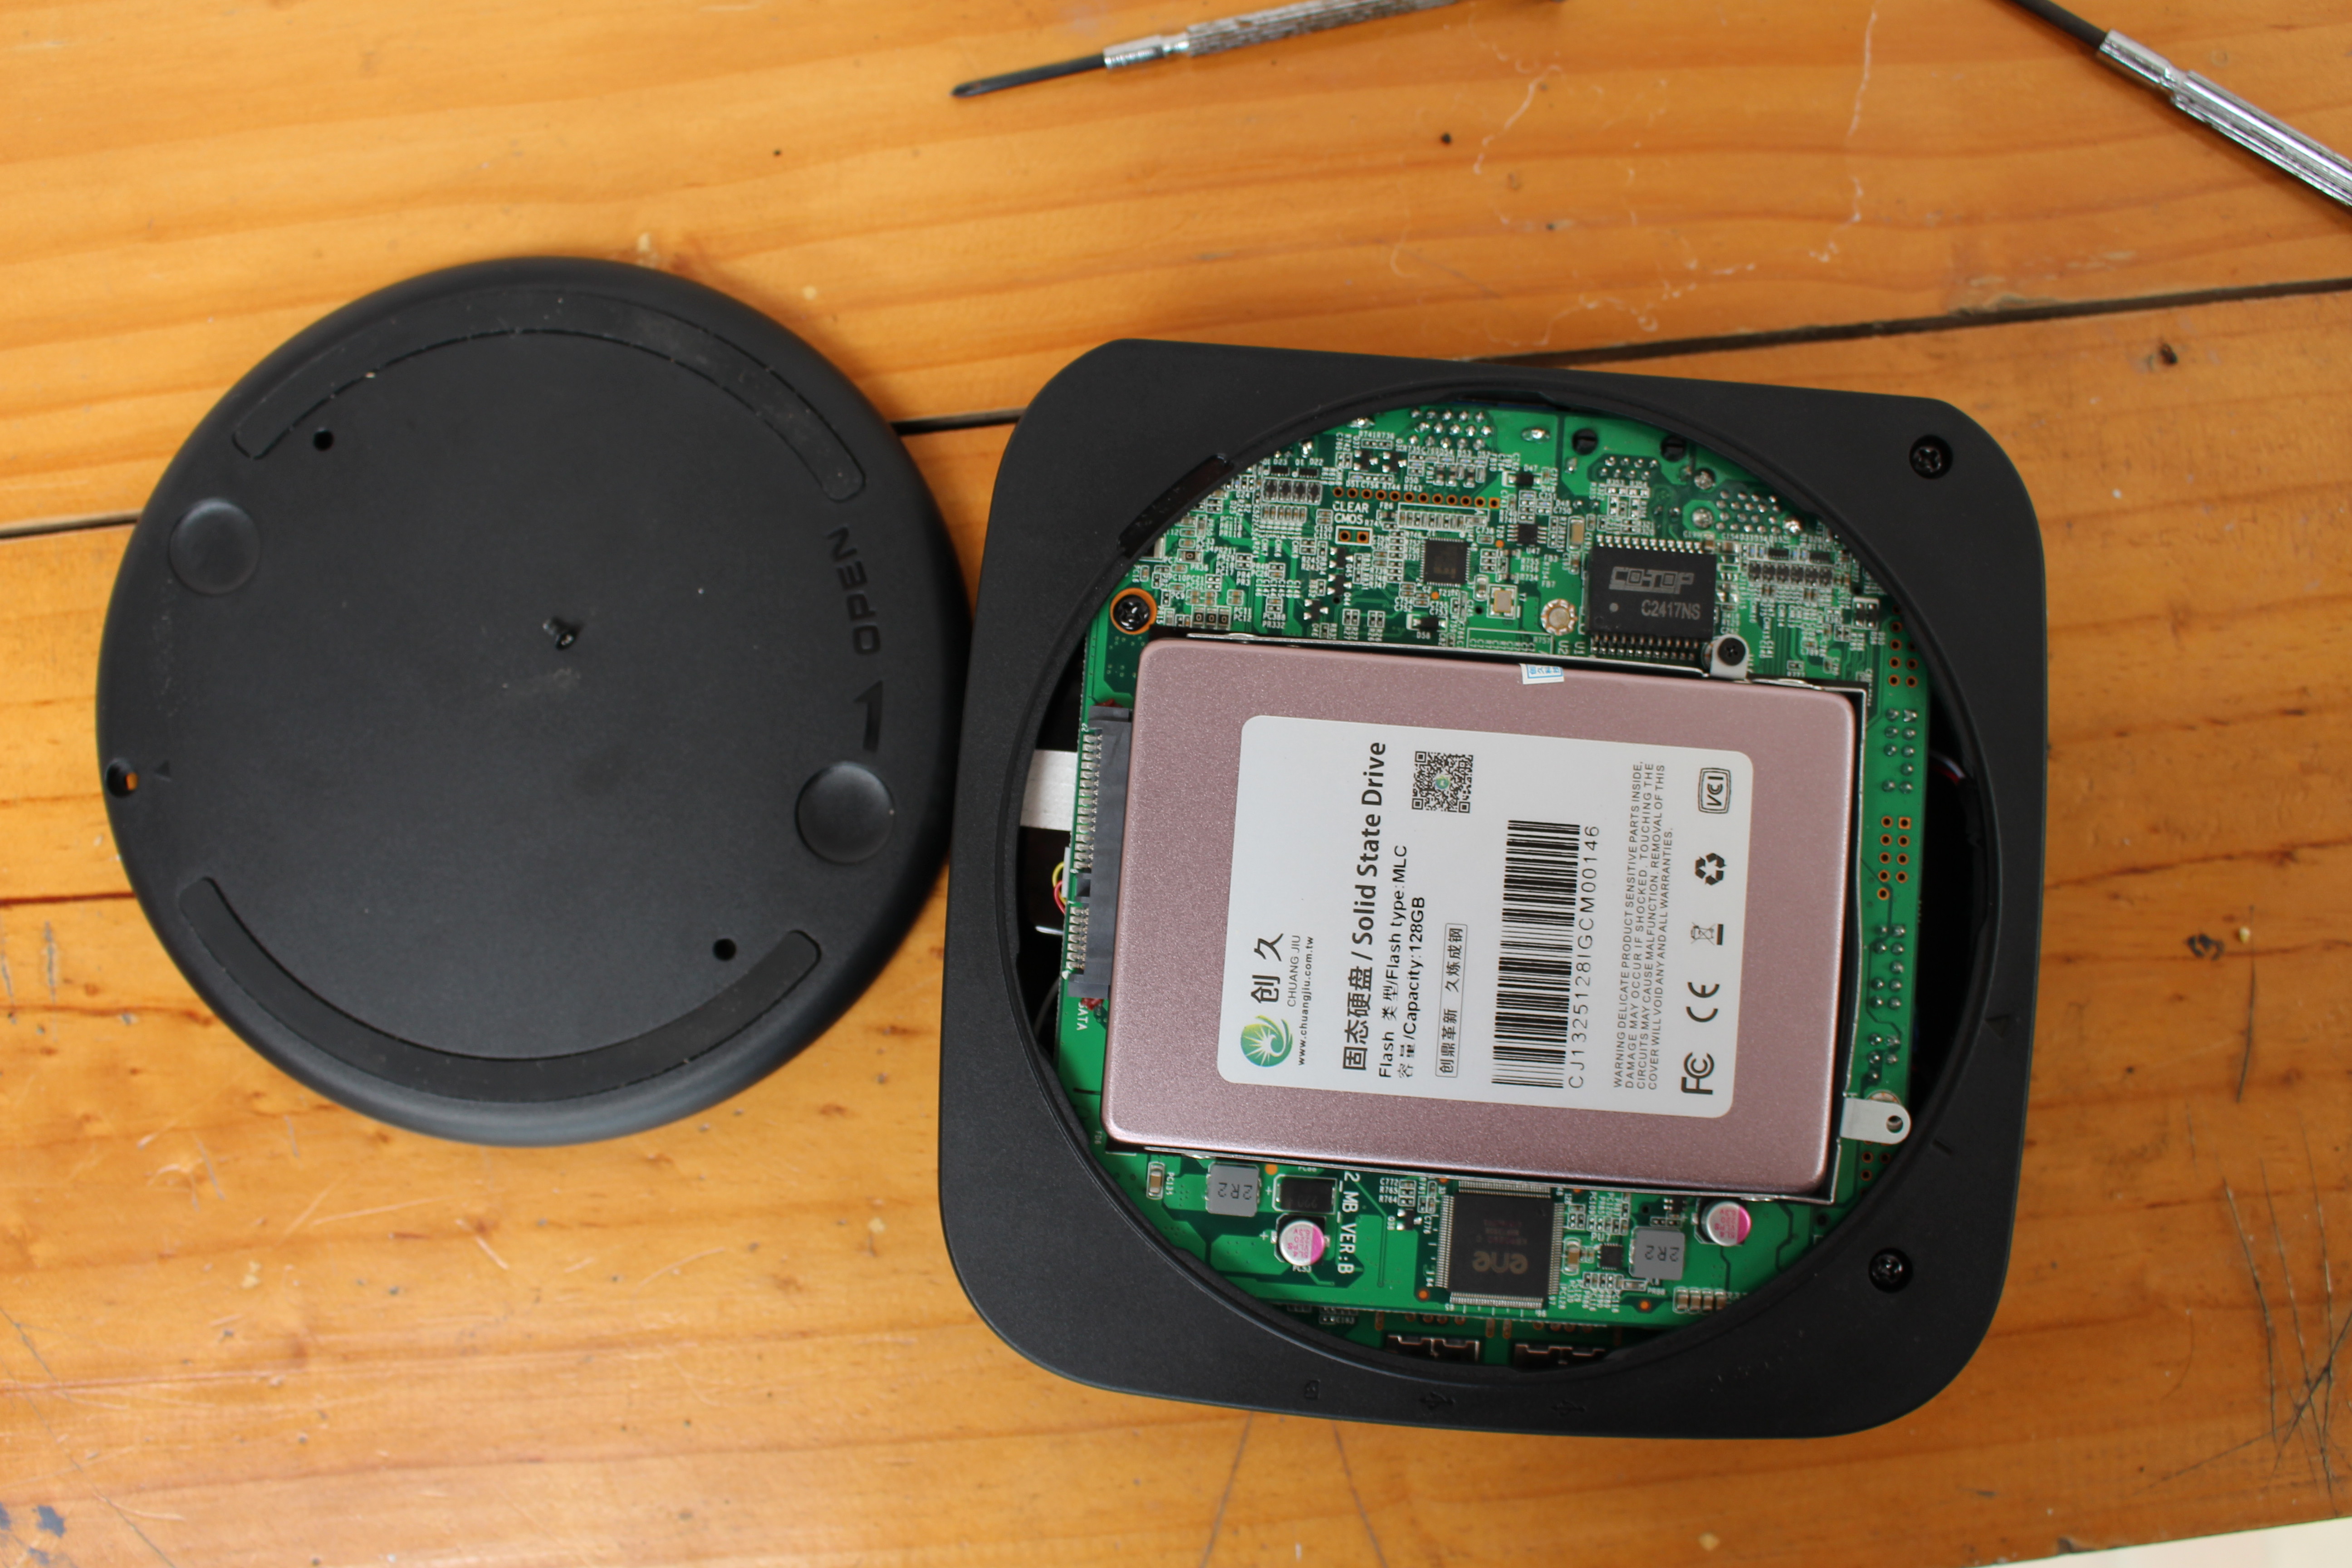
I used a thin 128GB SSD drive first, and the first step is to install the drive inside the mounting bracket with the four screws, before inserting the drive into the SATA interface, and tightening the remaining black screw in the location close to the CO-TOP IC. You can then put back the lid, making sure the two arrows are aligned as shown in the picture of the bottom of the case, before turning it clockwise, and tightening it the screw.
But for the next part of the review, I decided to scavenge a 1TB hard drive from another device, namely a Toshiba MQ01BD100.
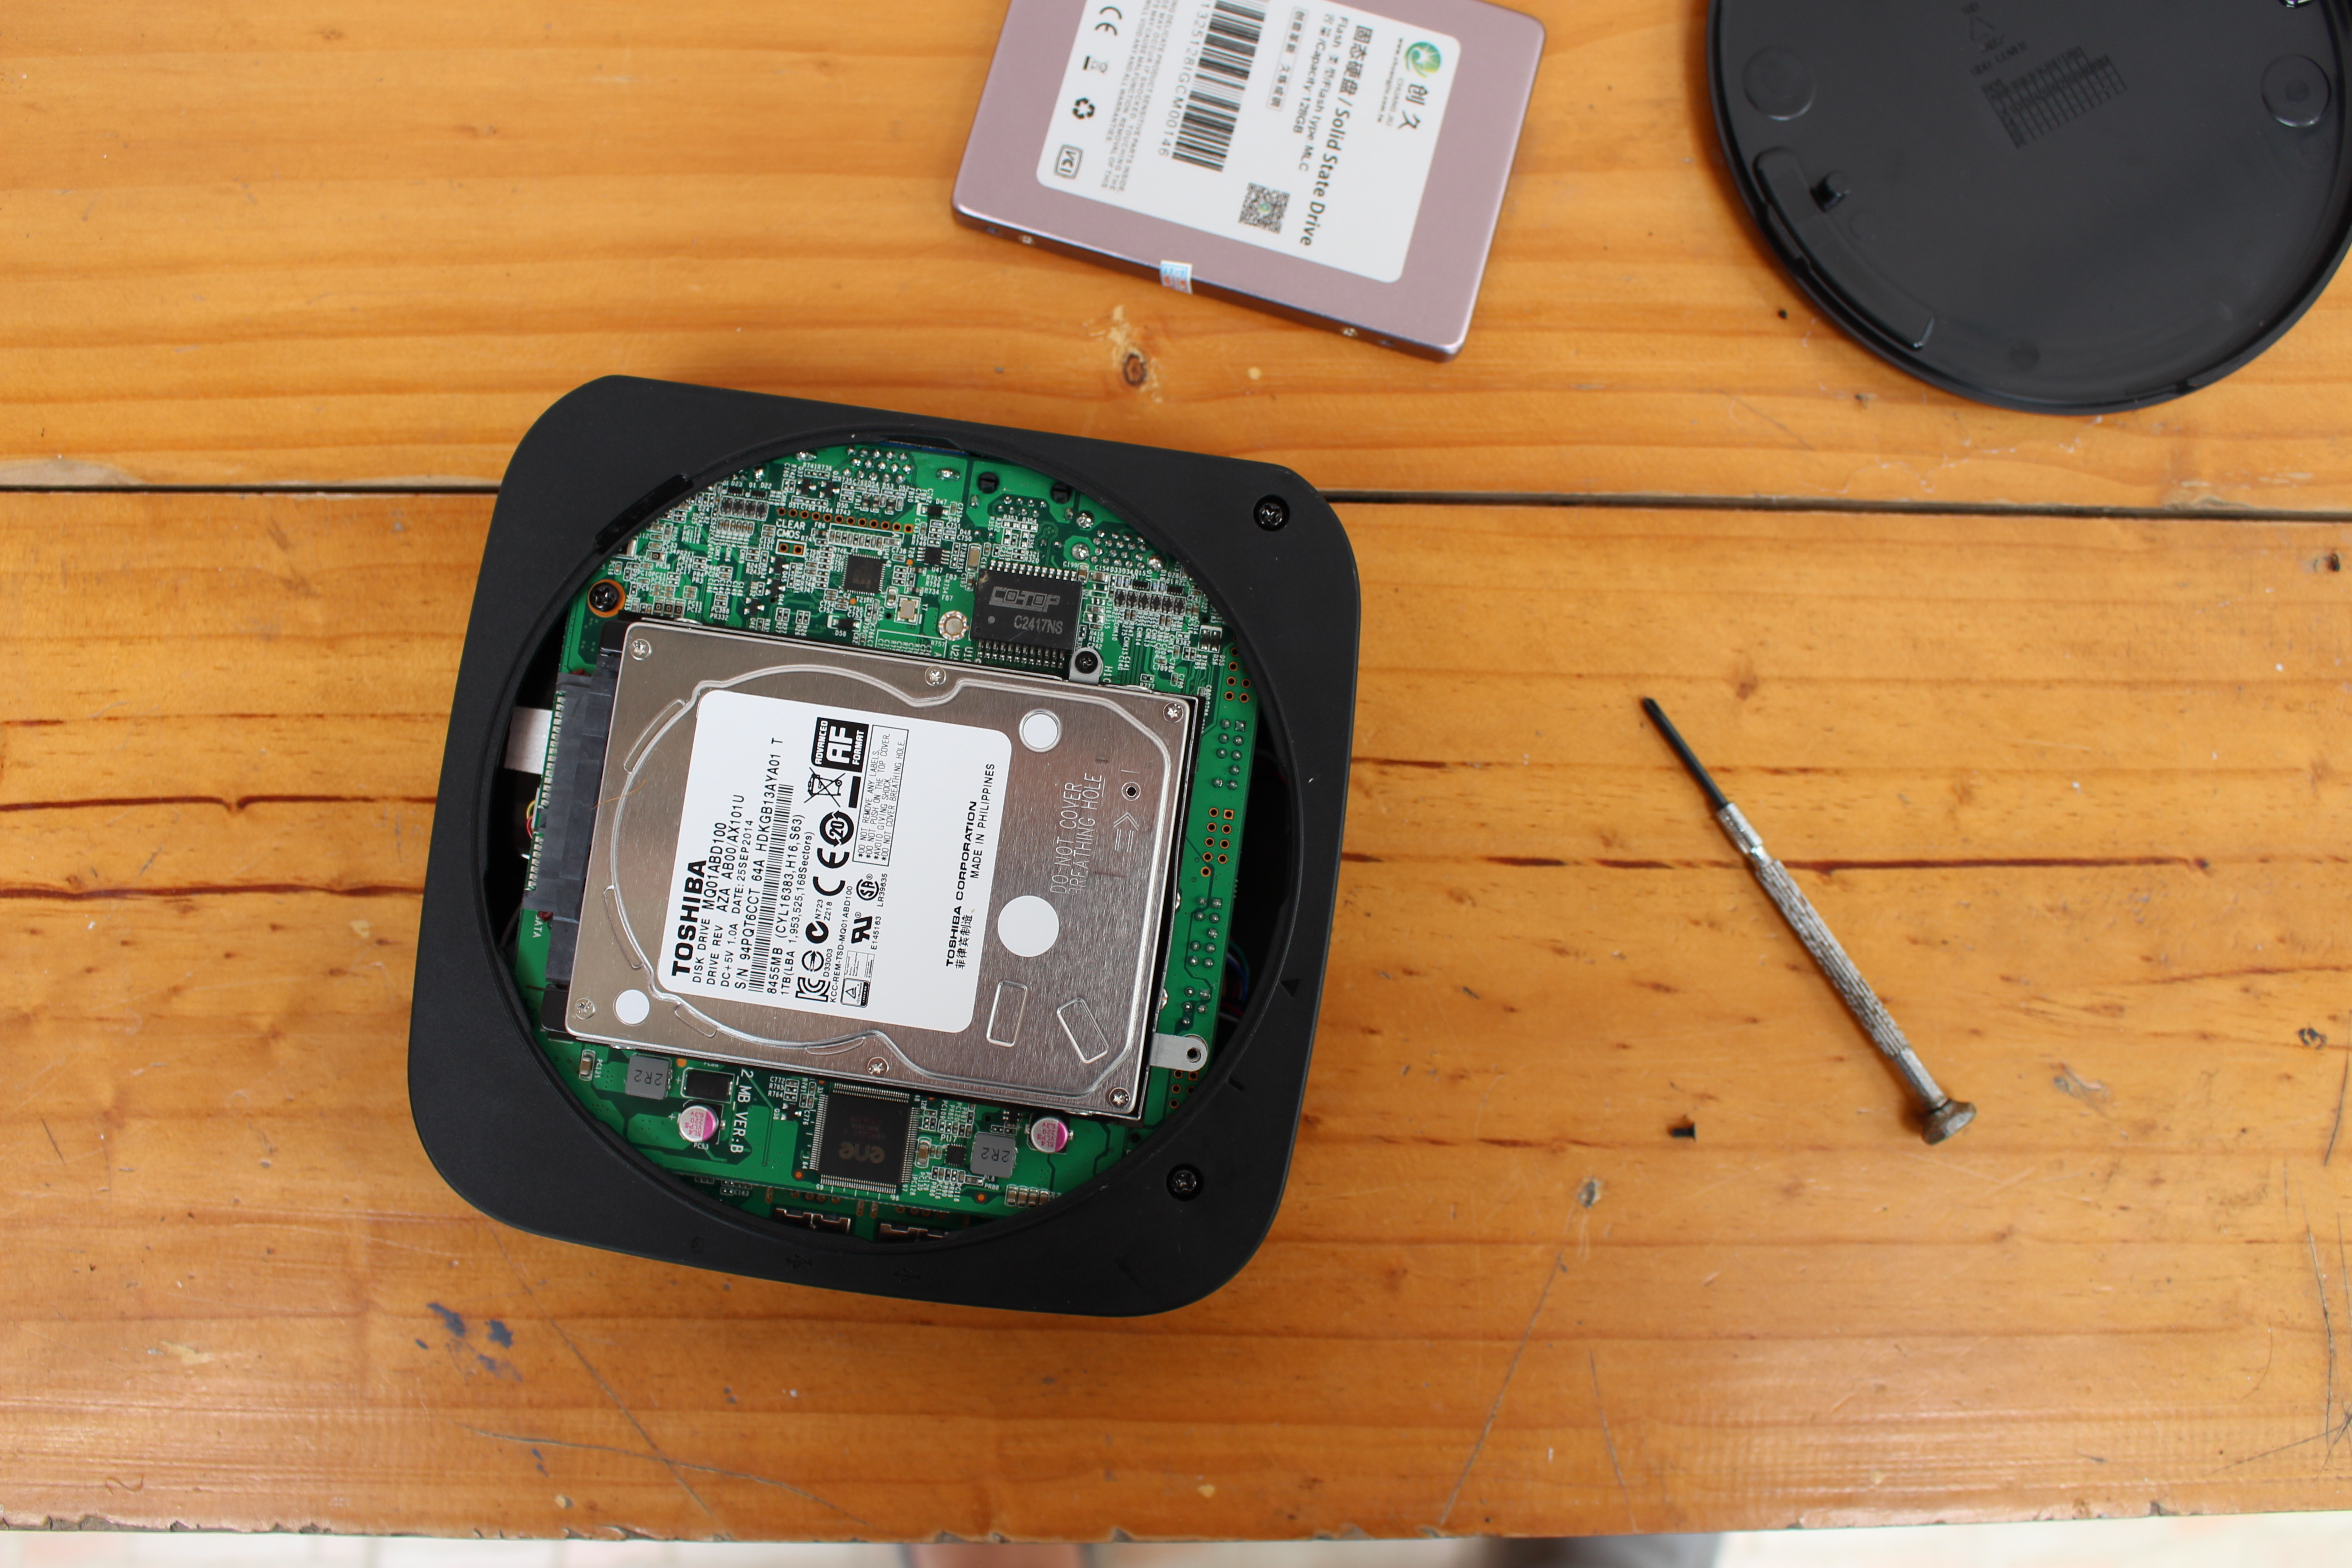
The drive is 9.5mm thick, while the SSD was 7 mm thick, and while I could still close the lid, there was a small gap as shown below. So it might be better to use 7mm drives with Vorke V1.
 That’s just a minor issue, and it should not affect the performance.
Vorke V1 Teardown
In order to access the top of the main board, you’ll first need to remove the bottom cover, loosen three screws, before popping up the top cover with a sharp plastic tool, and working your way around.
 The first thing that came to mind is that this mini PC is modular with removable memory, storage and Wireless module. Let’s check the board in more details.
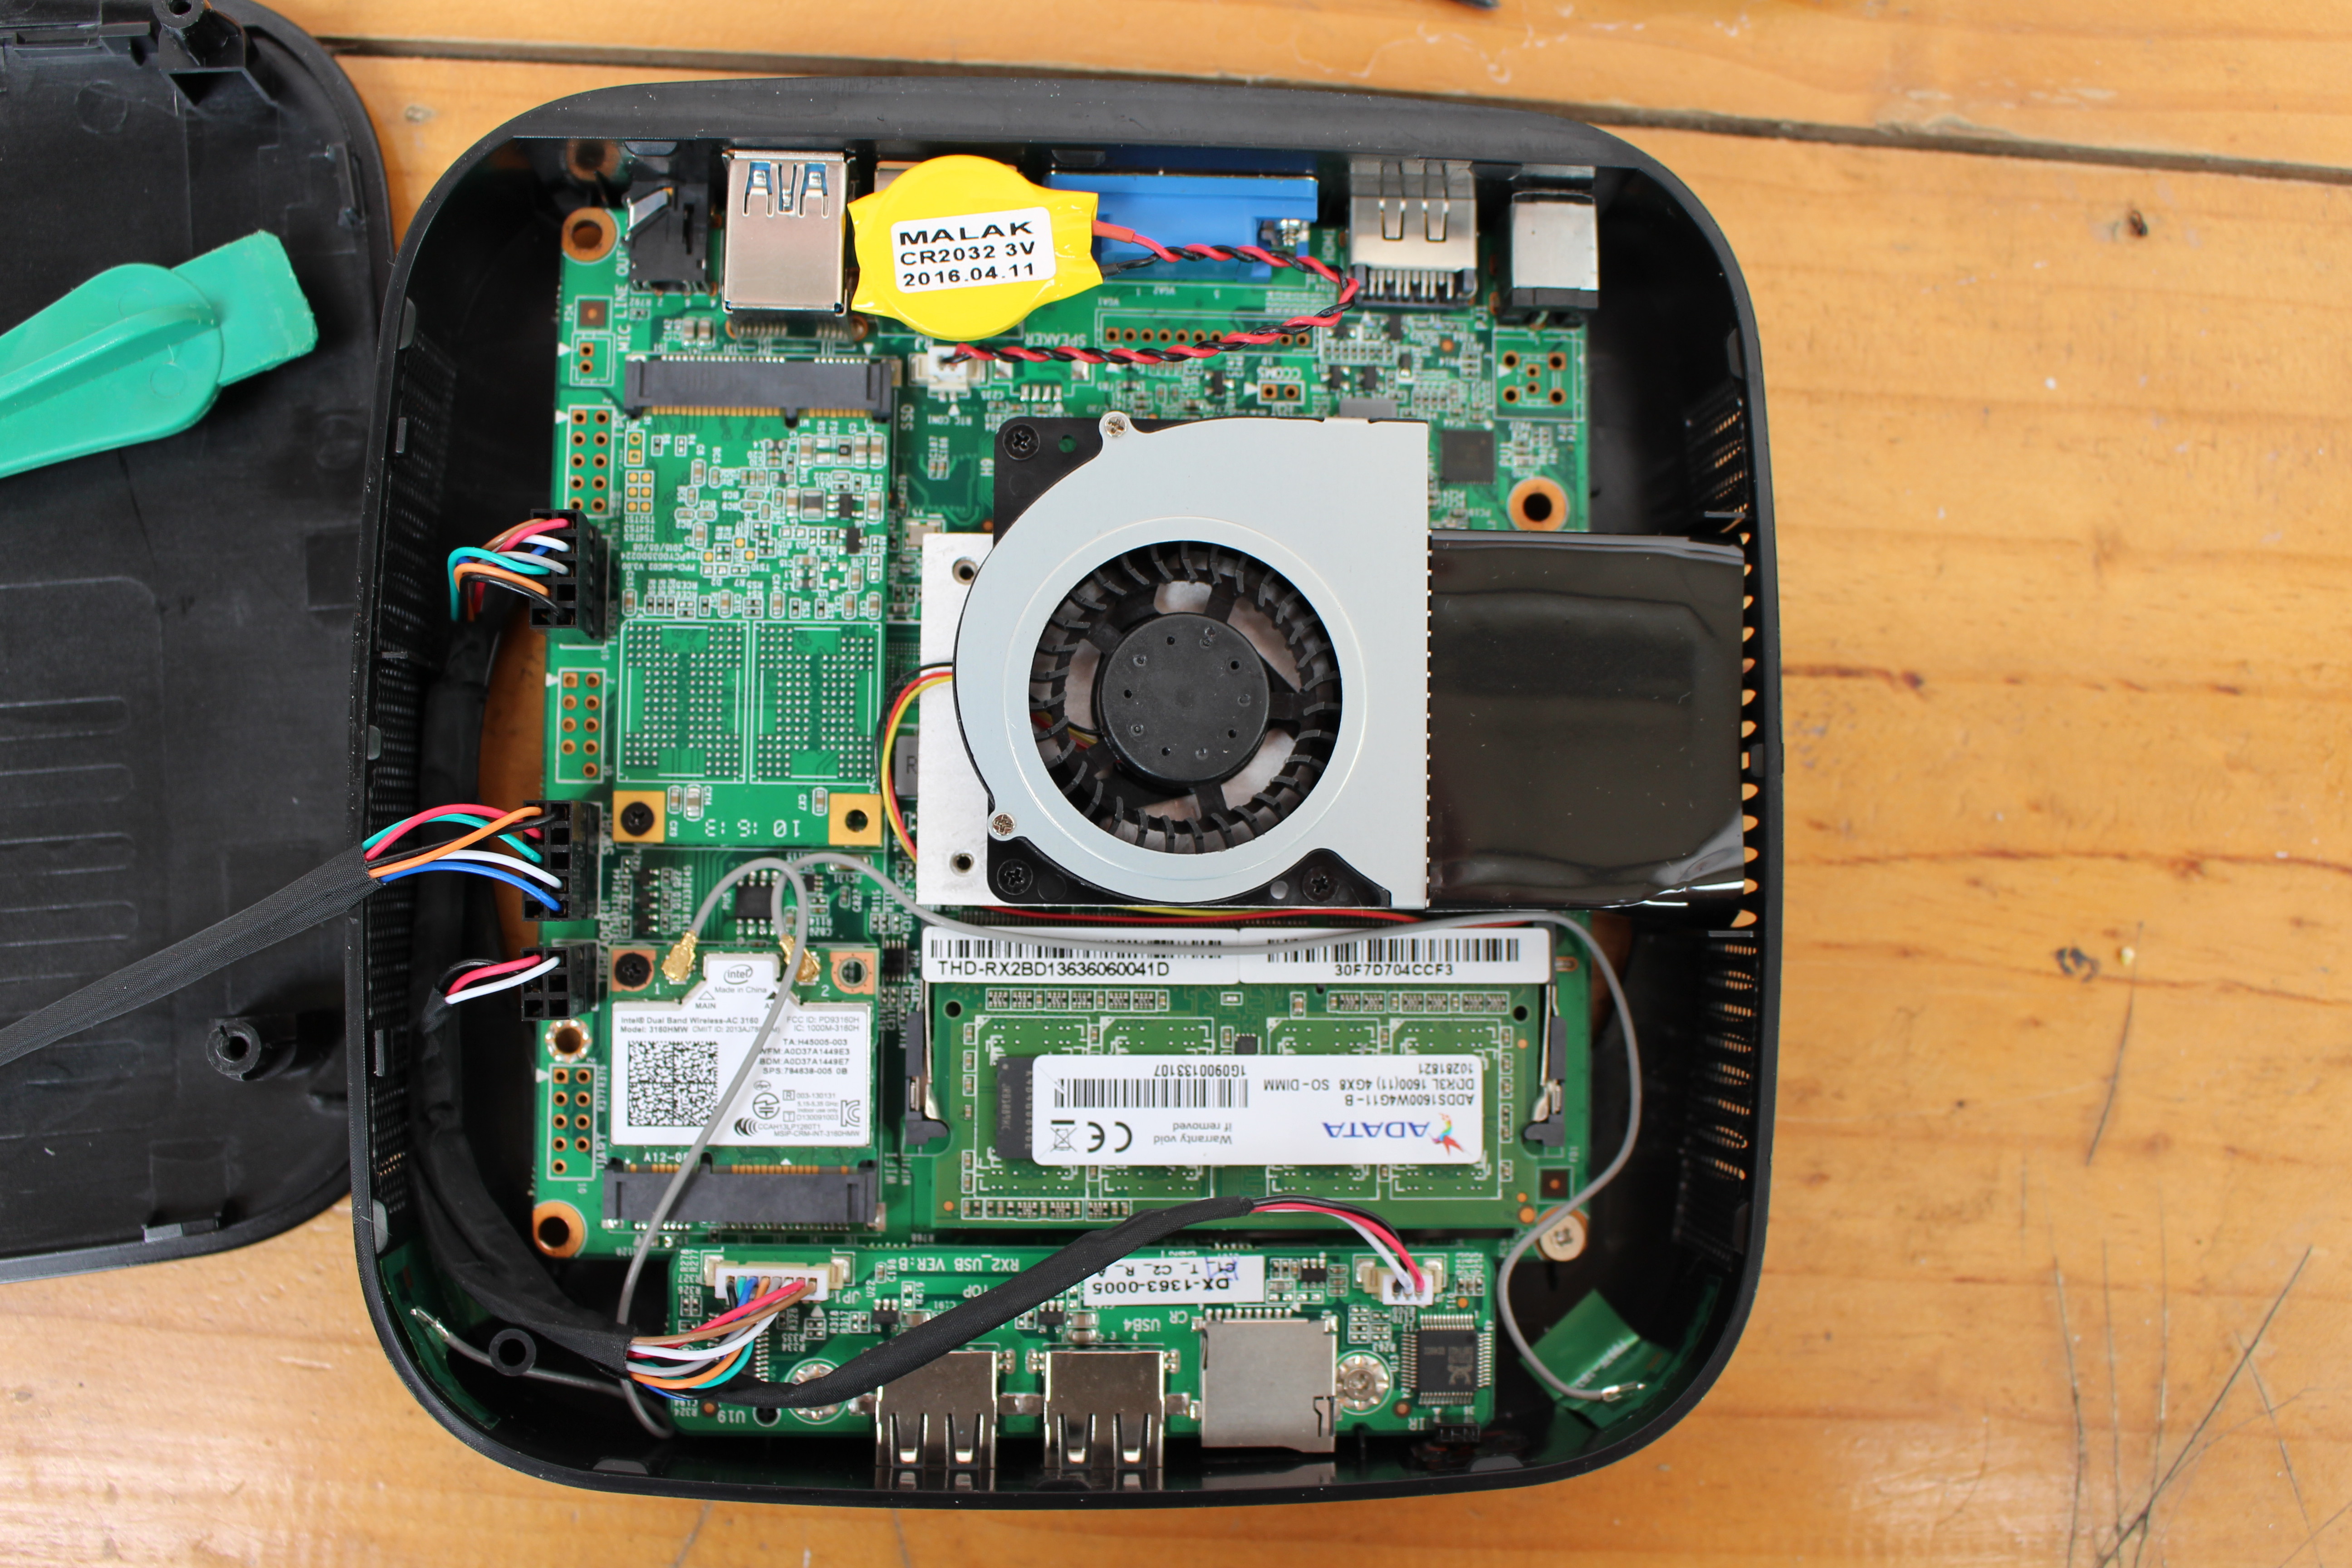
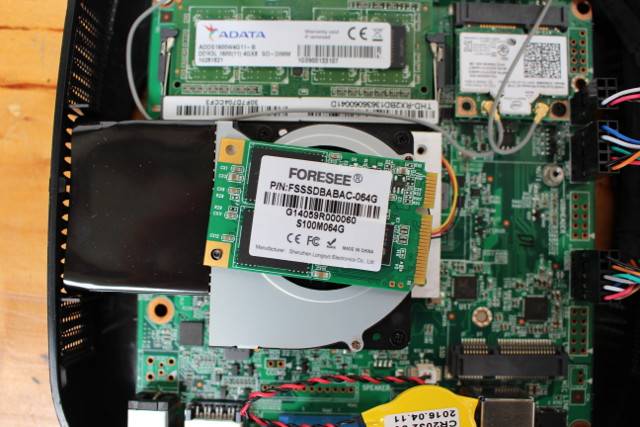
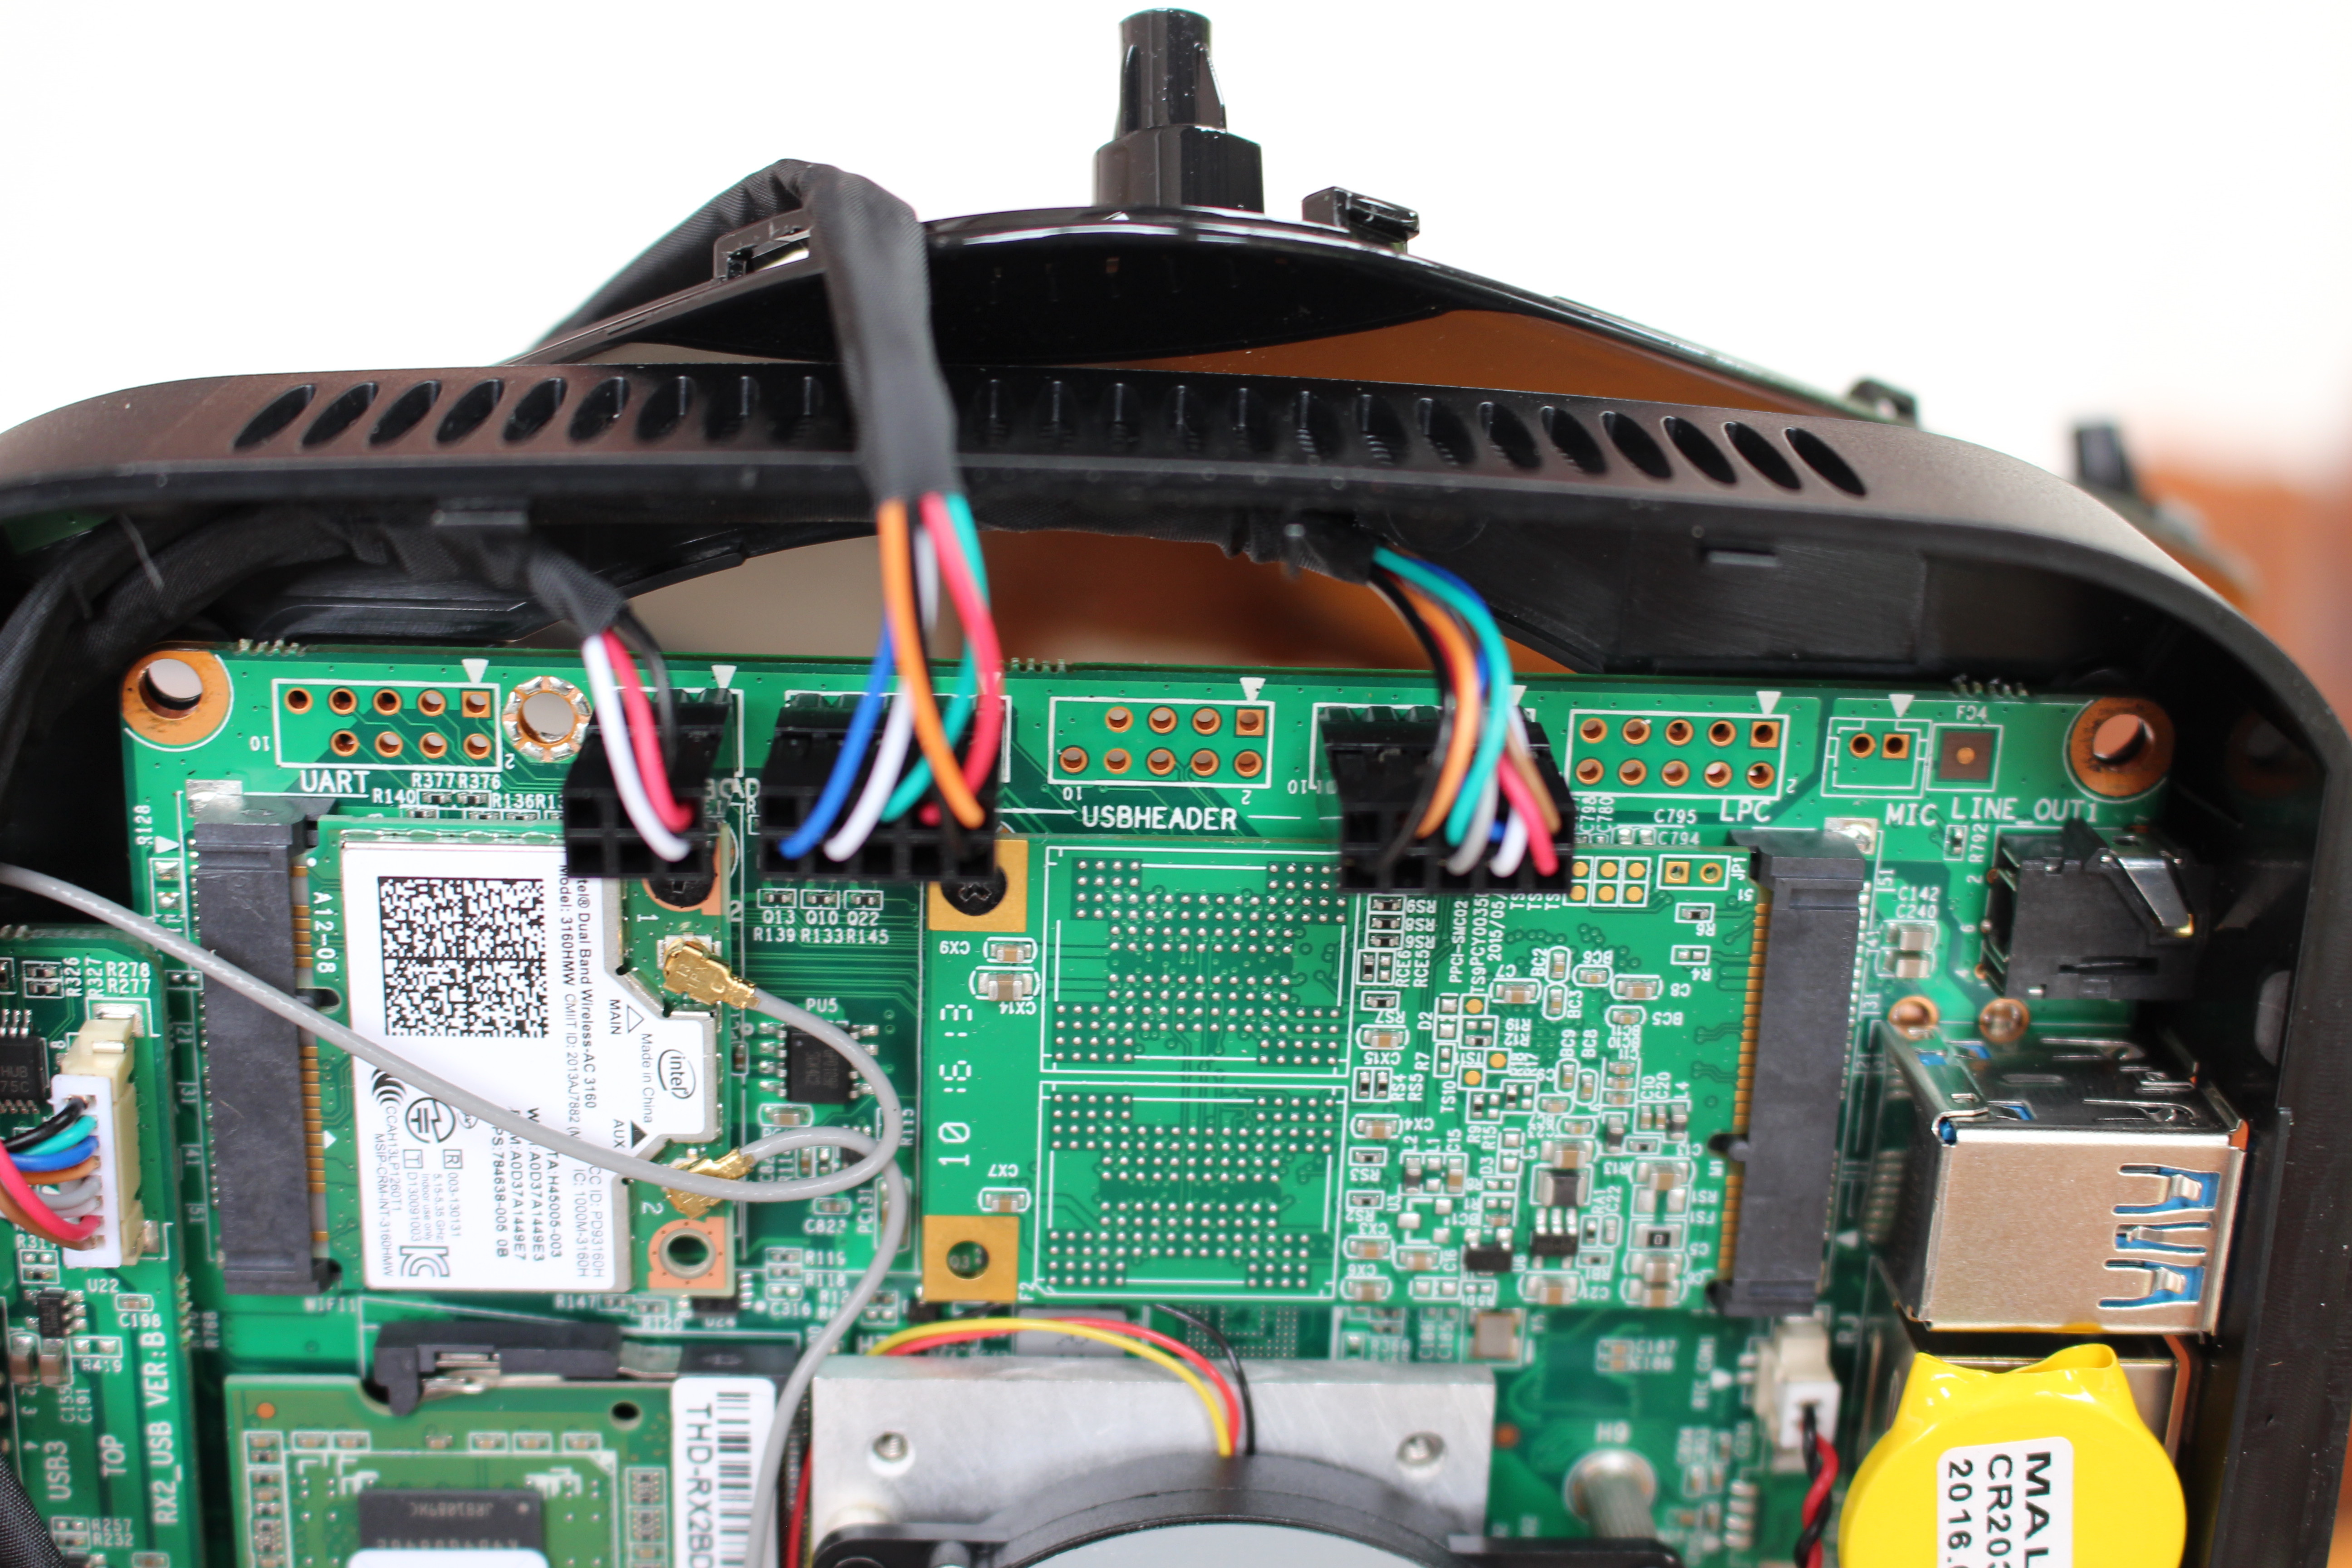
The mainboard takes ADATA ADDS1600W4G11-8 SO-DIMM module with 4GB DDR3L RAM, Intel Dual Band Wireless-AC 3160 module with 802.11 b/g/n/ac WiFi and Bluetooth, and FORESEE FSSSDBABAC-064G mSATA SSD (See pic below). We can also find an RTC battery, Realtek RTL8111GN PCIe Gigabit transceiver, ALC265 audio codec, RT5067A (not sure what it is), and Realtek RTS5159 USB card reader.
 So overall, the system has similar features to an Intel NUC, but a lower price point. The Braswell processor is cooling with a thick metal plate and a fan controller via 3 pins.
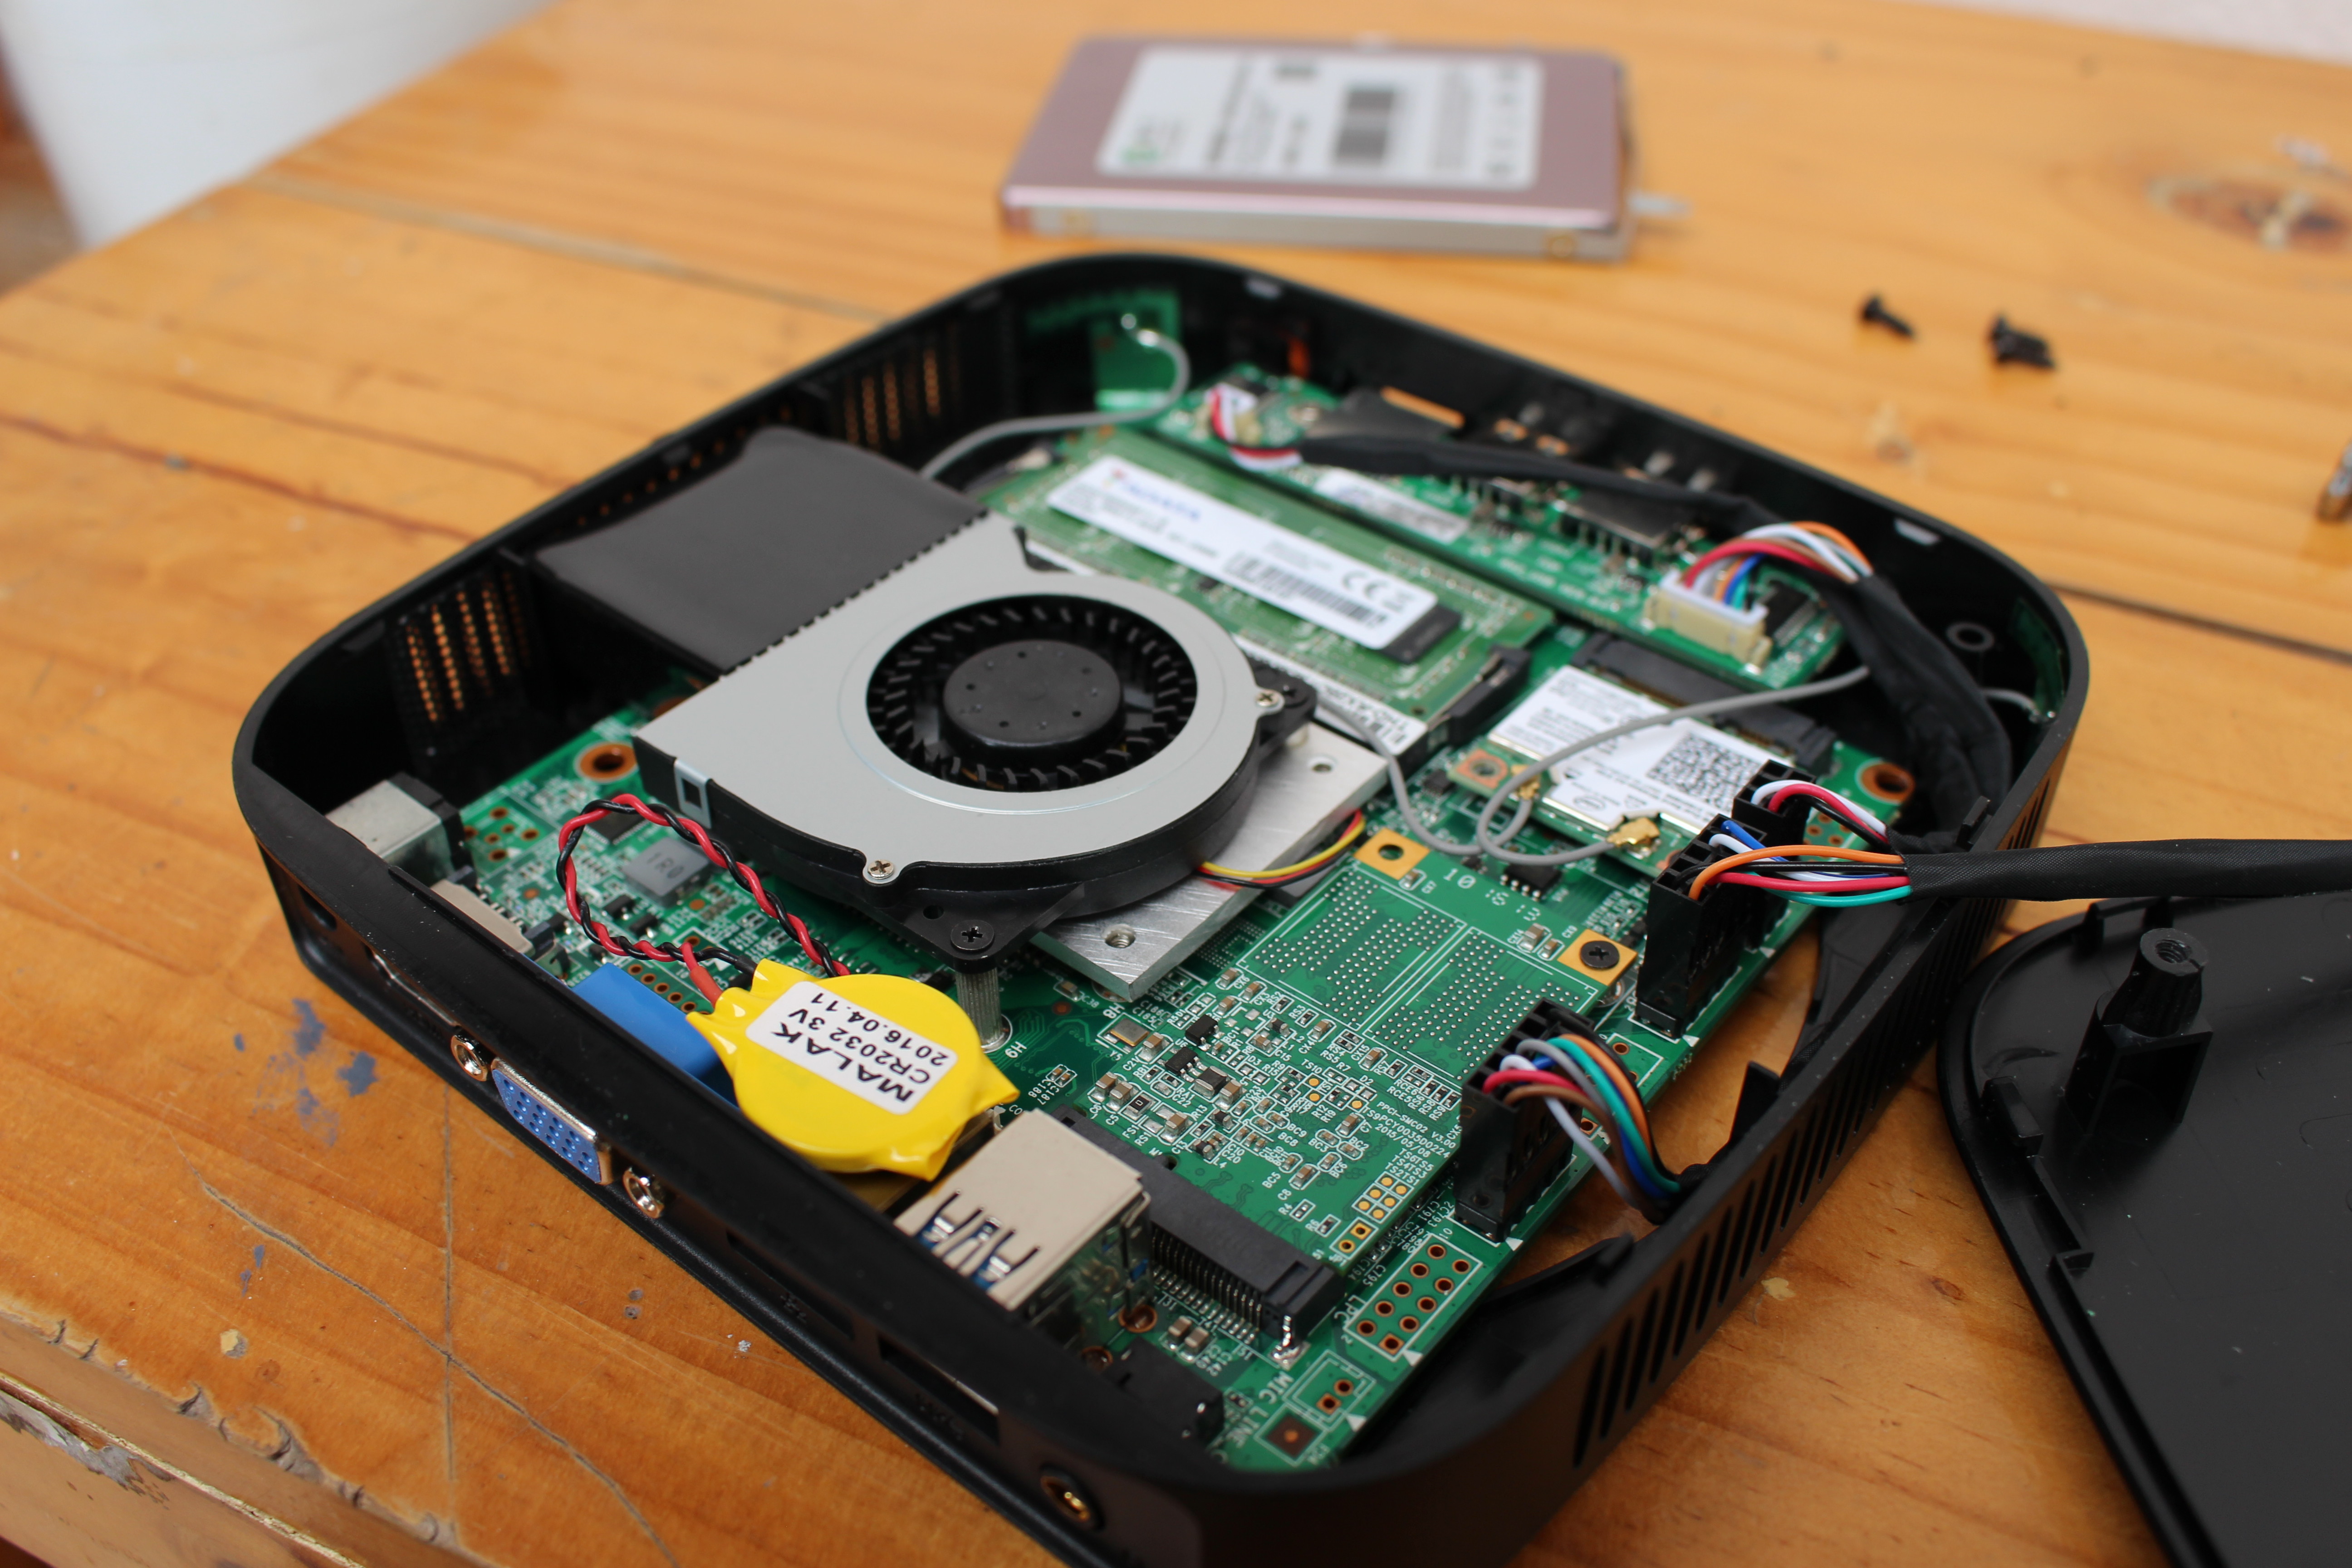
There are also a few unused headers that would allow for some hardware hacking with UART, USB, LPC, and microphone headers.
I found the hardware quite interesting to study, and it’s the most module low cost low power mini PC I’ve reviewed so far, with no soldered memory, storage or wireless module. We’ll have to see how well it performs under load, as apart from the fan and “heatsink” on the processor, not much else has been done for cooling. GeekBuying claims Windows 10 Home is activated in the device, and they also quickly and successfully tested Ubuntu 16.04, so I asked them whether they planned to sell a cheaper version without Windows 10 license, but there only answer was people could install the OS they wanted…
I’d like to thank GeekBuying for provide the device, and they sell it for $199.99 including shipping, but you can get that down $159.99 to with coupon VORKEV1. The only other seller I could find is Banggood where it goes for for $199.

Jean-Luc started CNX Software in 2010 as a part-time endeavor, before quitting his job as a software engineering manager, and starting to write daily news, and reviews full time later in 2011.
Support CNX Software! Donate via cryptocurrencies, become a Patron on Patreon, or purchase goods on Amazon or Aliexpress


