
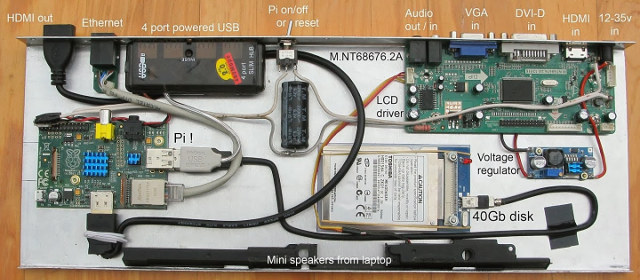
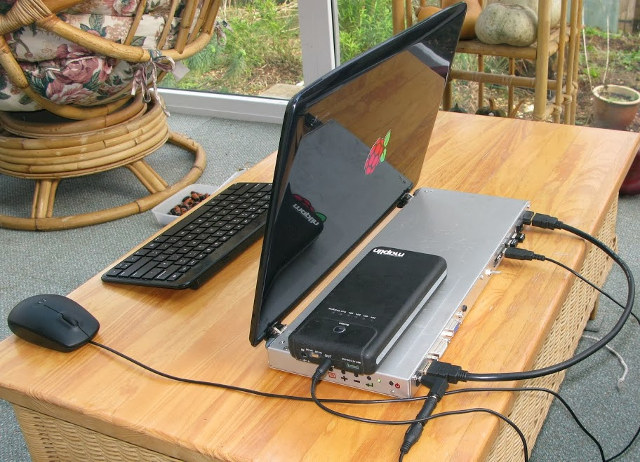
After reading an article on Liliputing about using Raspberry Pi Zero with Motorola Lapdock, I decided to look for clones for the device since Motorola Lapdock is now hard to buy at a decent price, if at all, since the product has been discontinued for a while. I did not find anything similar, but instead I came across M.NT68676.2A LCD driver HDMI kit selling for $37.99 on eBay that allows you to re-use your old laptop screen with any development board or computer that comes with HDMI, DVI, or VGA output.
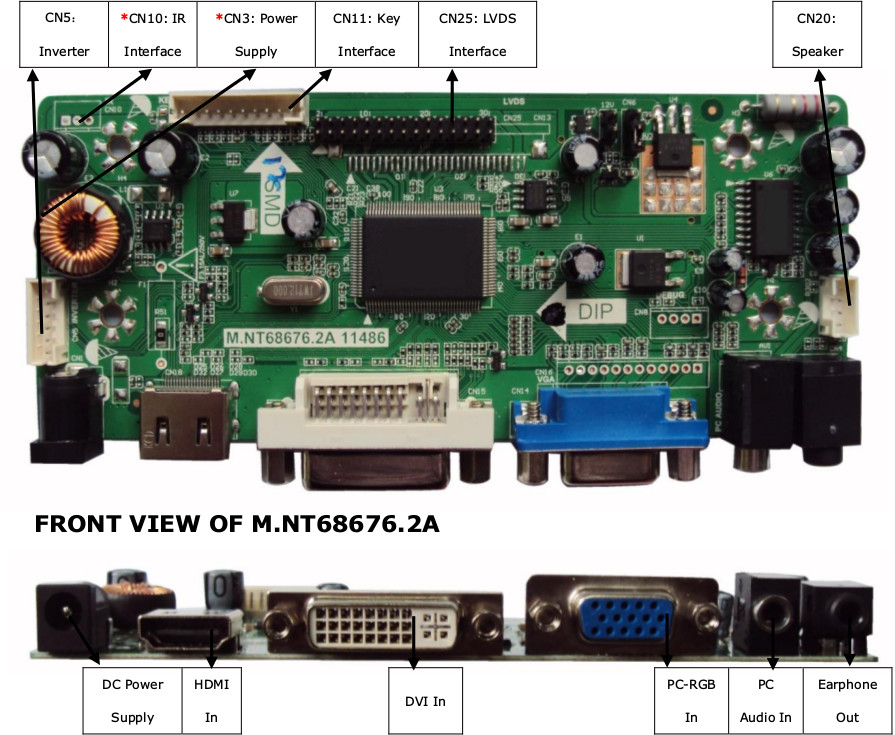
The kit is comprised of a monitor control board (M.NT68676.2A), an “inverter” board which depends on your LCD panel model number, a keypad board, an LVDS cable, and a cable to connect all three boards together.
M.NT68676.2A monitor control board specifications:
- Chipset – NT68676 (UFG)
- Supported Panel – LED/LCD, Single/Dual LVDS (8bit) up to 2048×1152 resolution
- Video Input
- “PC-RGB “, i.e. VGA, up to 2048×1152@60 Hz
- HDMI – 480i, 480p, 576i, 576p, 720p, 1080i, 1080p
- Audio Input – Earphone Input; 0.2 ~ 2.0 V RMS
- Audio Output
- Frequency Response – 100Hz~15KHz @±3dB (1KHz, 0dB reference signal)
- Max Output Power – 2×1W(8Ω) THD+N<10%@1KHz (Power Supply: 12V, Audio Input: 0.5V RMS )
- Power
- Requirements – 12V DC/12V(built-in)/12V,5V(built in)/12V,5V,5VSB(built in)
- To Panel – 3.3V/5V/12V
- Standby Power Consumption < 0.5W(Board Only)
- Keypad – Power, Menu, Volume +/-, and Adjust/Exit
- Dimensions – 139 x 58 x 17 mm
You can get a more complete technical description on the spec sheet (PDF), including each connector’s pinout description, and schematics for IR and keypad board.
The sellers says it “supports most of the LCD panel from 12.1″ to 55″ with a LVDS interface and a resolution lower than 2048X1152, plug&play kit, no need soldering”, but you need to give the LCD Model number, before purchasing the kit, so that they can check they can give you an inverter board that works with your LCD panel. If you scroll down on the eBay page they have a list of known to work panels such as B170PW03 V.9 or LP171WE2-TL01.
Beside the kit, you’ll also need you provide your own HDMI or VGA cable, and power adapter. They also have a kit that include a 12V/4A power adapter for $51.19 in total. It’s clearly a little more challenging than simply using the Lapdock, but that’s an option.
Other sellers and sites are also selling kits, for example Aliexpress, simply look for M.NT68676.2A,. If you think you can manage with the control board only, and somehow already have an inverter board that should work, Banggood sells it for $13.33.
You could also watch a review showing one of the kits used as a monitor for an XBOX.

Jean-Luc started CNX Software in 2010 as a part-time endeavor, before quitting his job as a software engineering manager, and starting to write daily news, and reviews full time later in 2011.
Support CNX Software! Donate via cryptocurrencies, become a Patron on Patreon, or purchase goods on Amazon or Aliexpress


