
Itead Studio launched an Indiegogo campaign earlier this year for their Nextion TFT displays that can be connected to external board such as Arduino or Raspberry Pi via the serial interface, or even a standard computer provided you have a USB to TTL debug board. The campaign was successful with over 1,700 backers, and the company recently sent me two samples for review: a 2.4″ display and a 5″ display. In this post, I’ll look at the boards, and make a small standalone demo with Nextion Editor in Windows.
Nextion NX3224T024 2.4″ Display

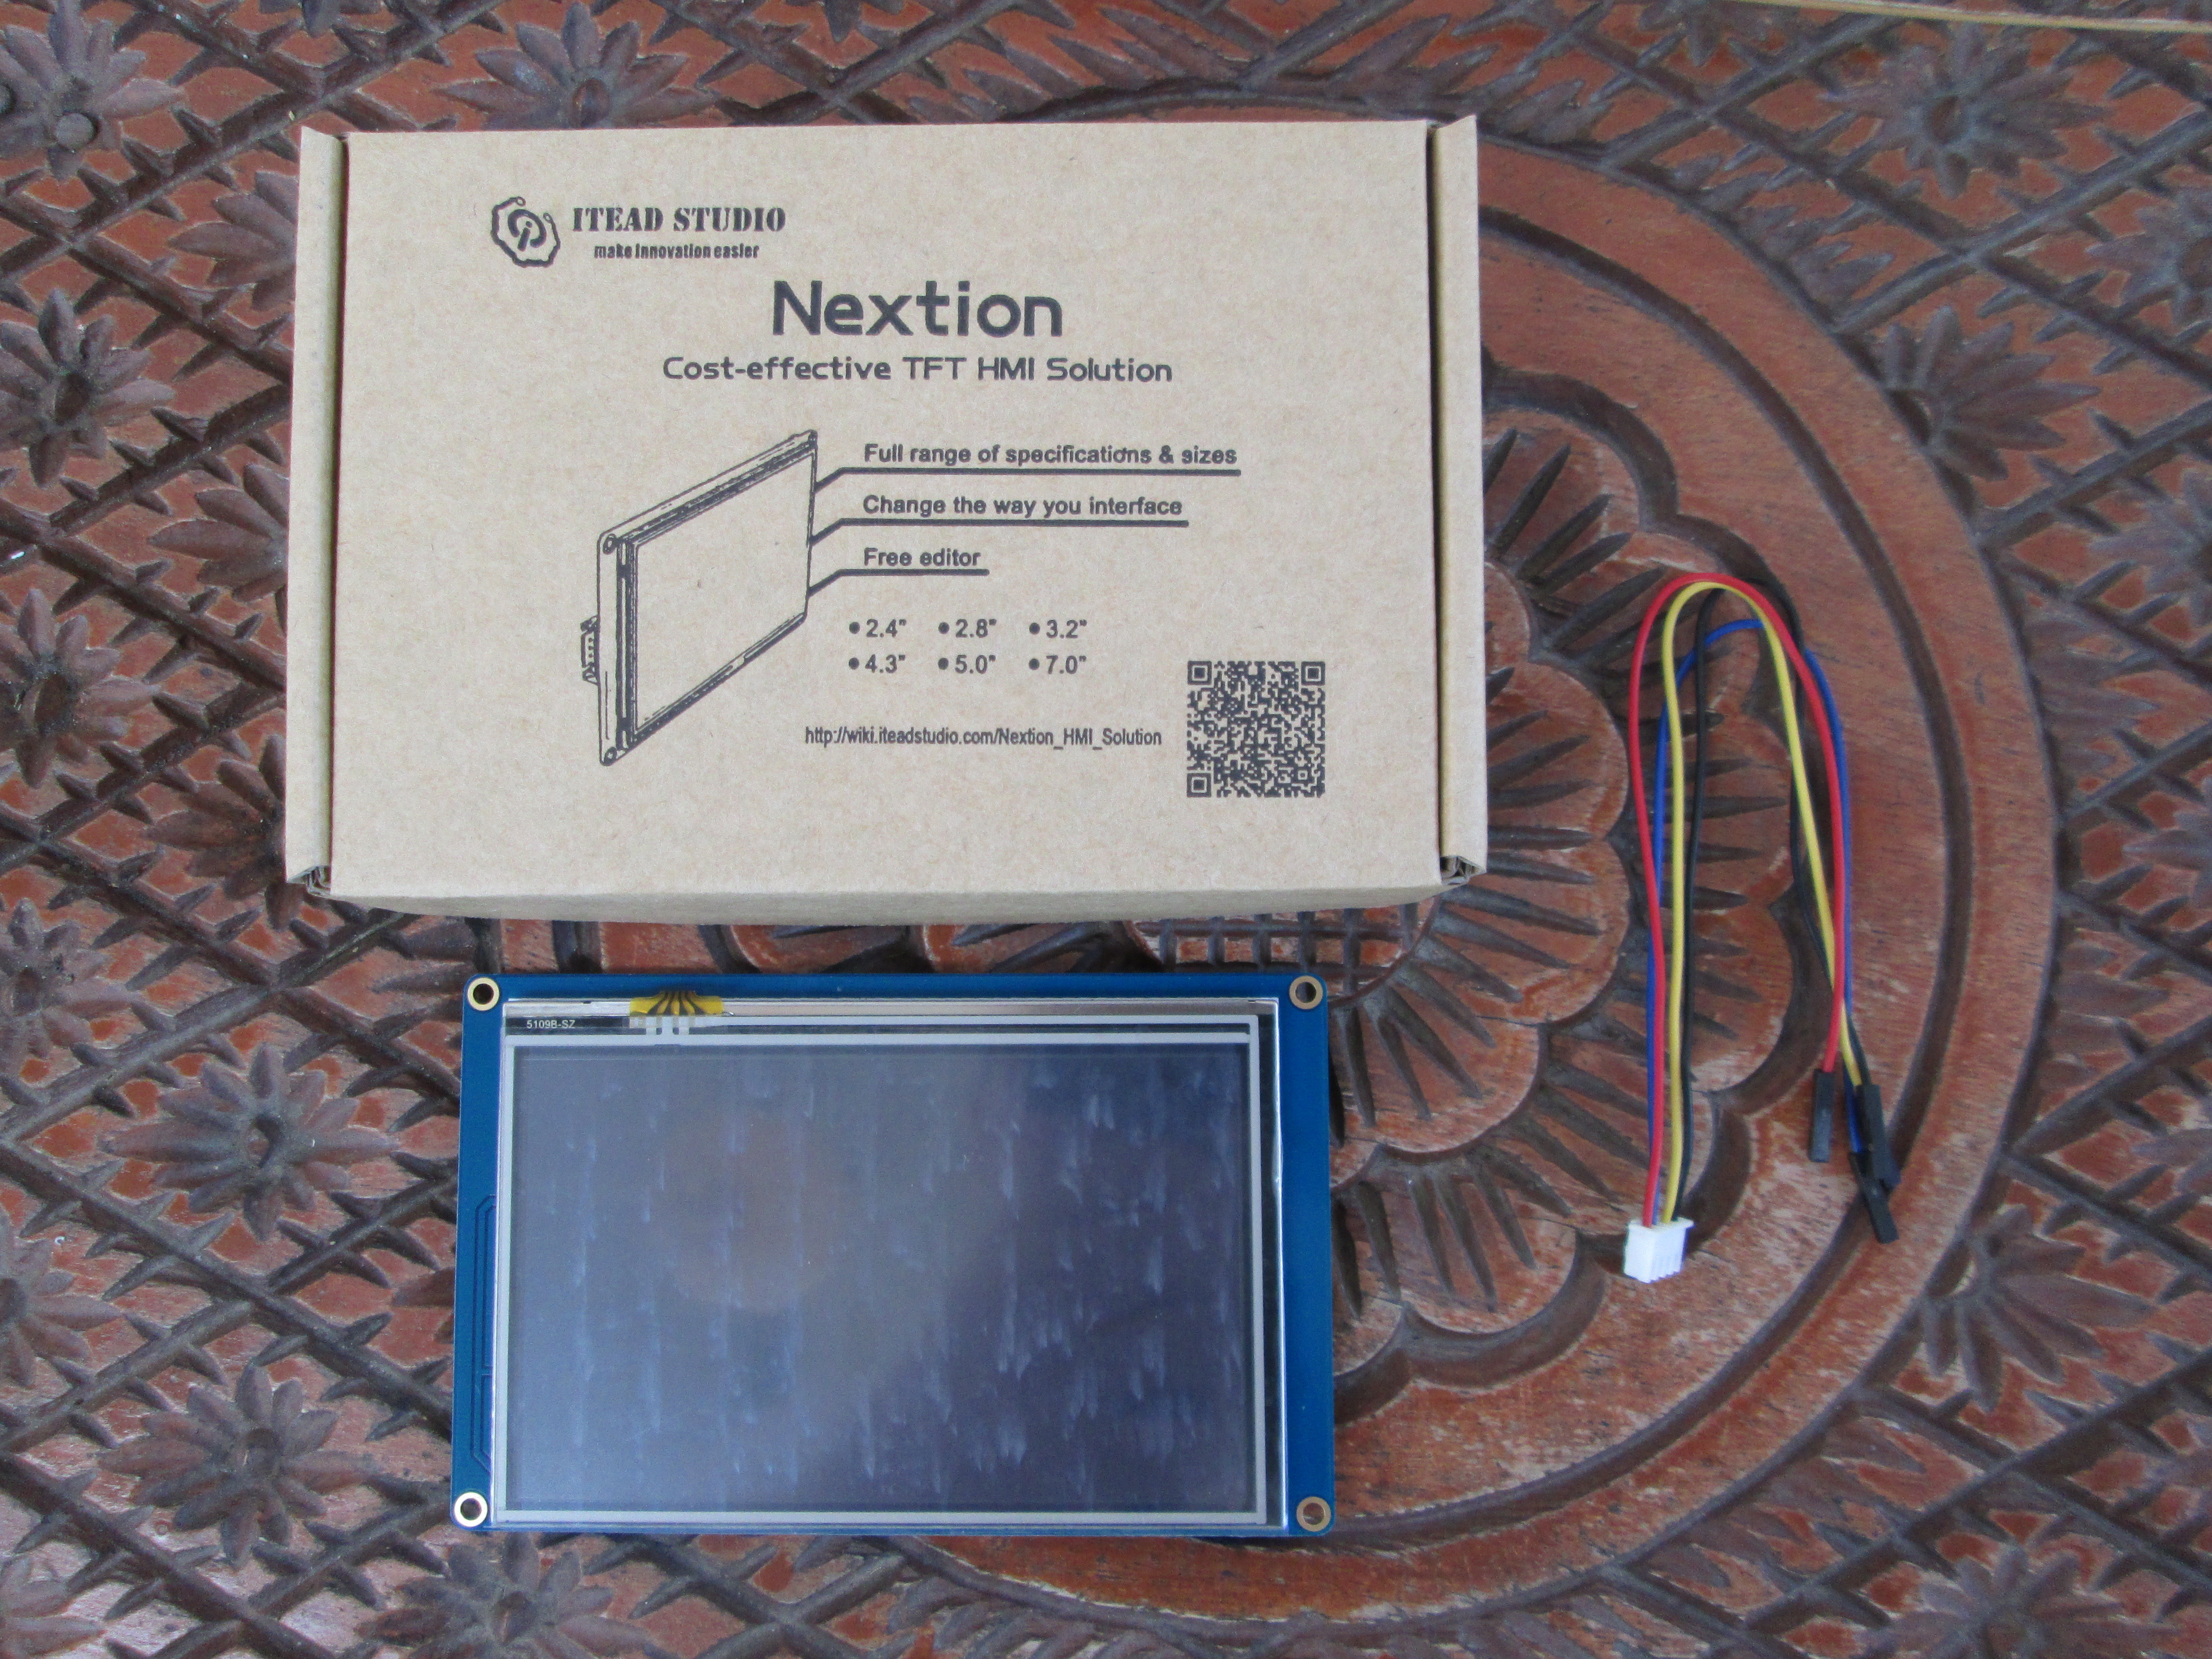
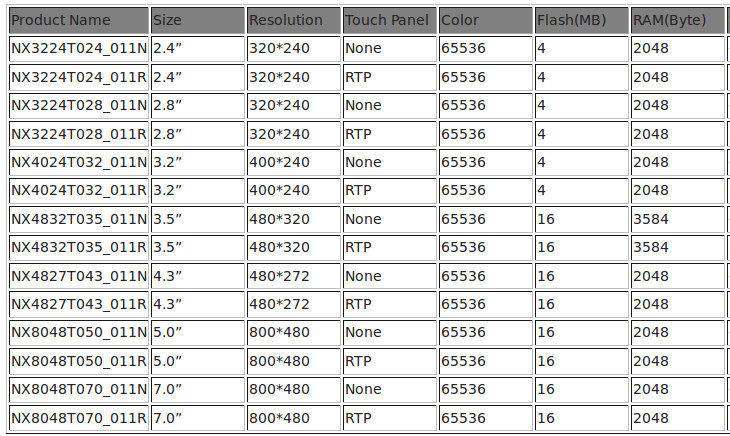
The first item is a 2.4″ TFT display called NX3224T024_011N (non-touch) or NX3224T024_011R (Resistive touch) with 65536 color, 320×240 pixel resolution, LED backlight and up to 200nit brightness. It ships with a cable for the serial connection (5V, Tx, Rx, and GND).

The back of the display features the serial connector, a micro SD used to load the HMI files, and J2 unpopulated connector with 3.3V and GND, and some “test points” the company asked me to ignore. STMicro STM32F03C8T6 ARM Cortex M0 micro-controller, which be called “GPU” on the Wiki, but it is likely mostly used to handle the serial connection, and send data to the display controller since it does not have a display controller itself, as well as interface with the micro SD card. U5 (XPT2046) is the touch sensor, and it will be removed for the non-touch version, which is only available for customized orders in larger quantities.
Nextion NX8048T050 5.0″ Display
The second display I received was NX8048T050_011 5″ display available in no-touch (011N) and resistive touch (011R) version. The display has 800×480 pixel resolution with up to 65K colors, up to 250 nit brightness, and an LED backlight.
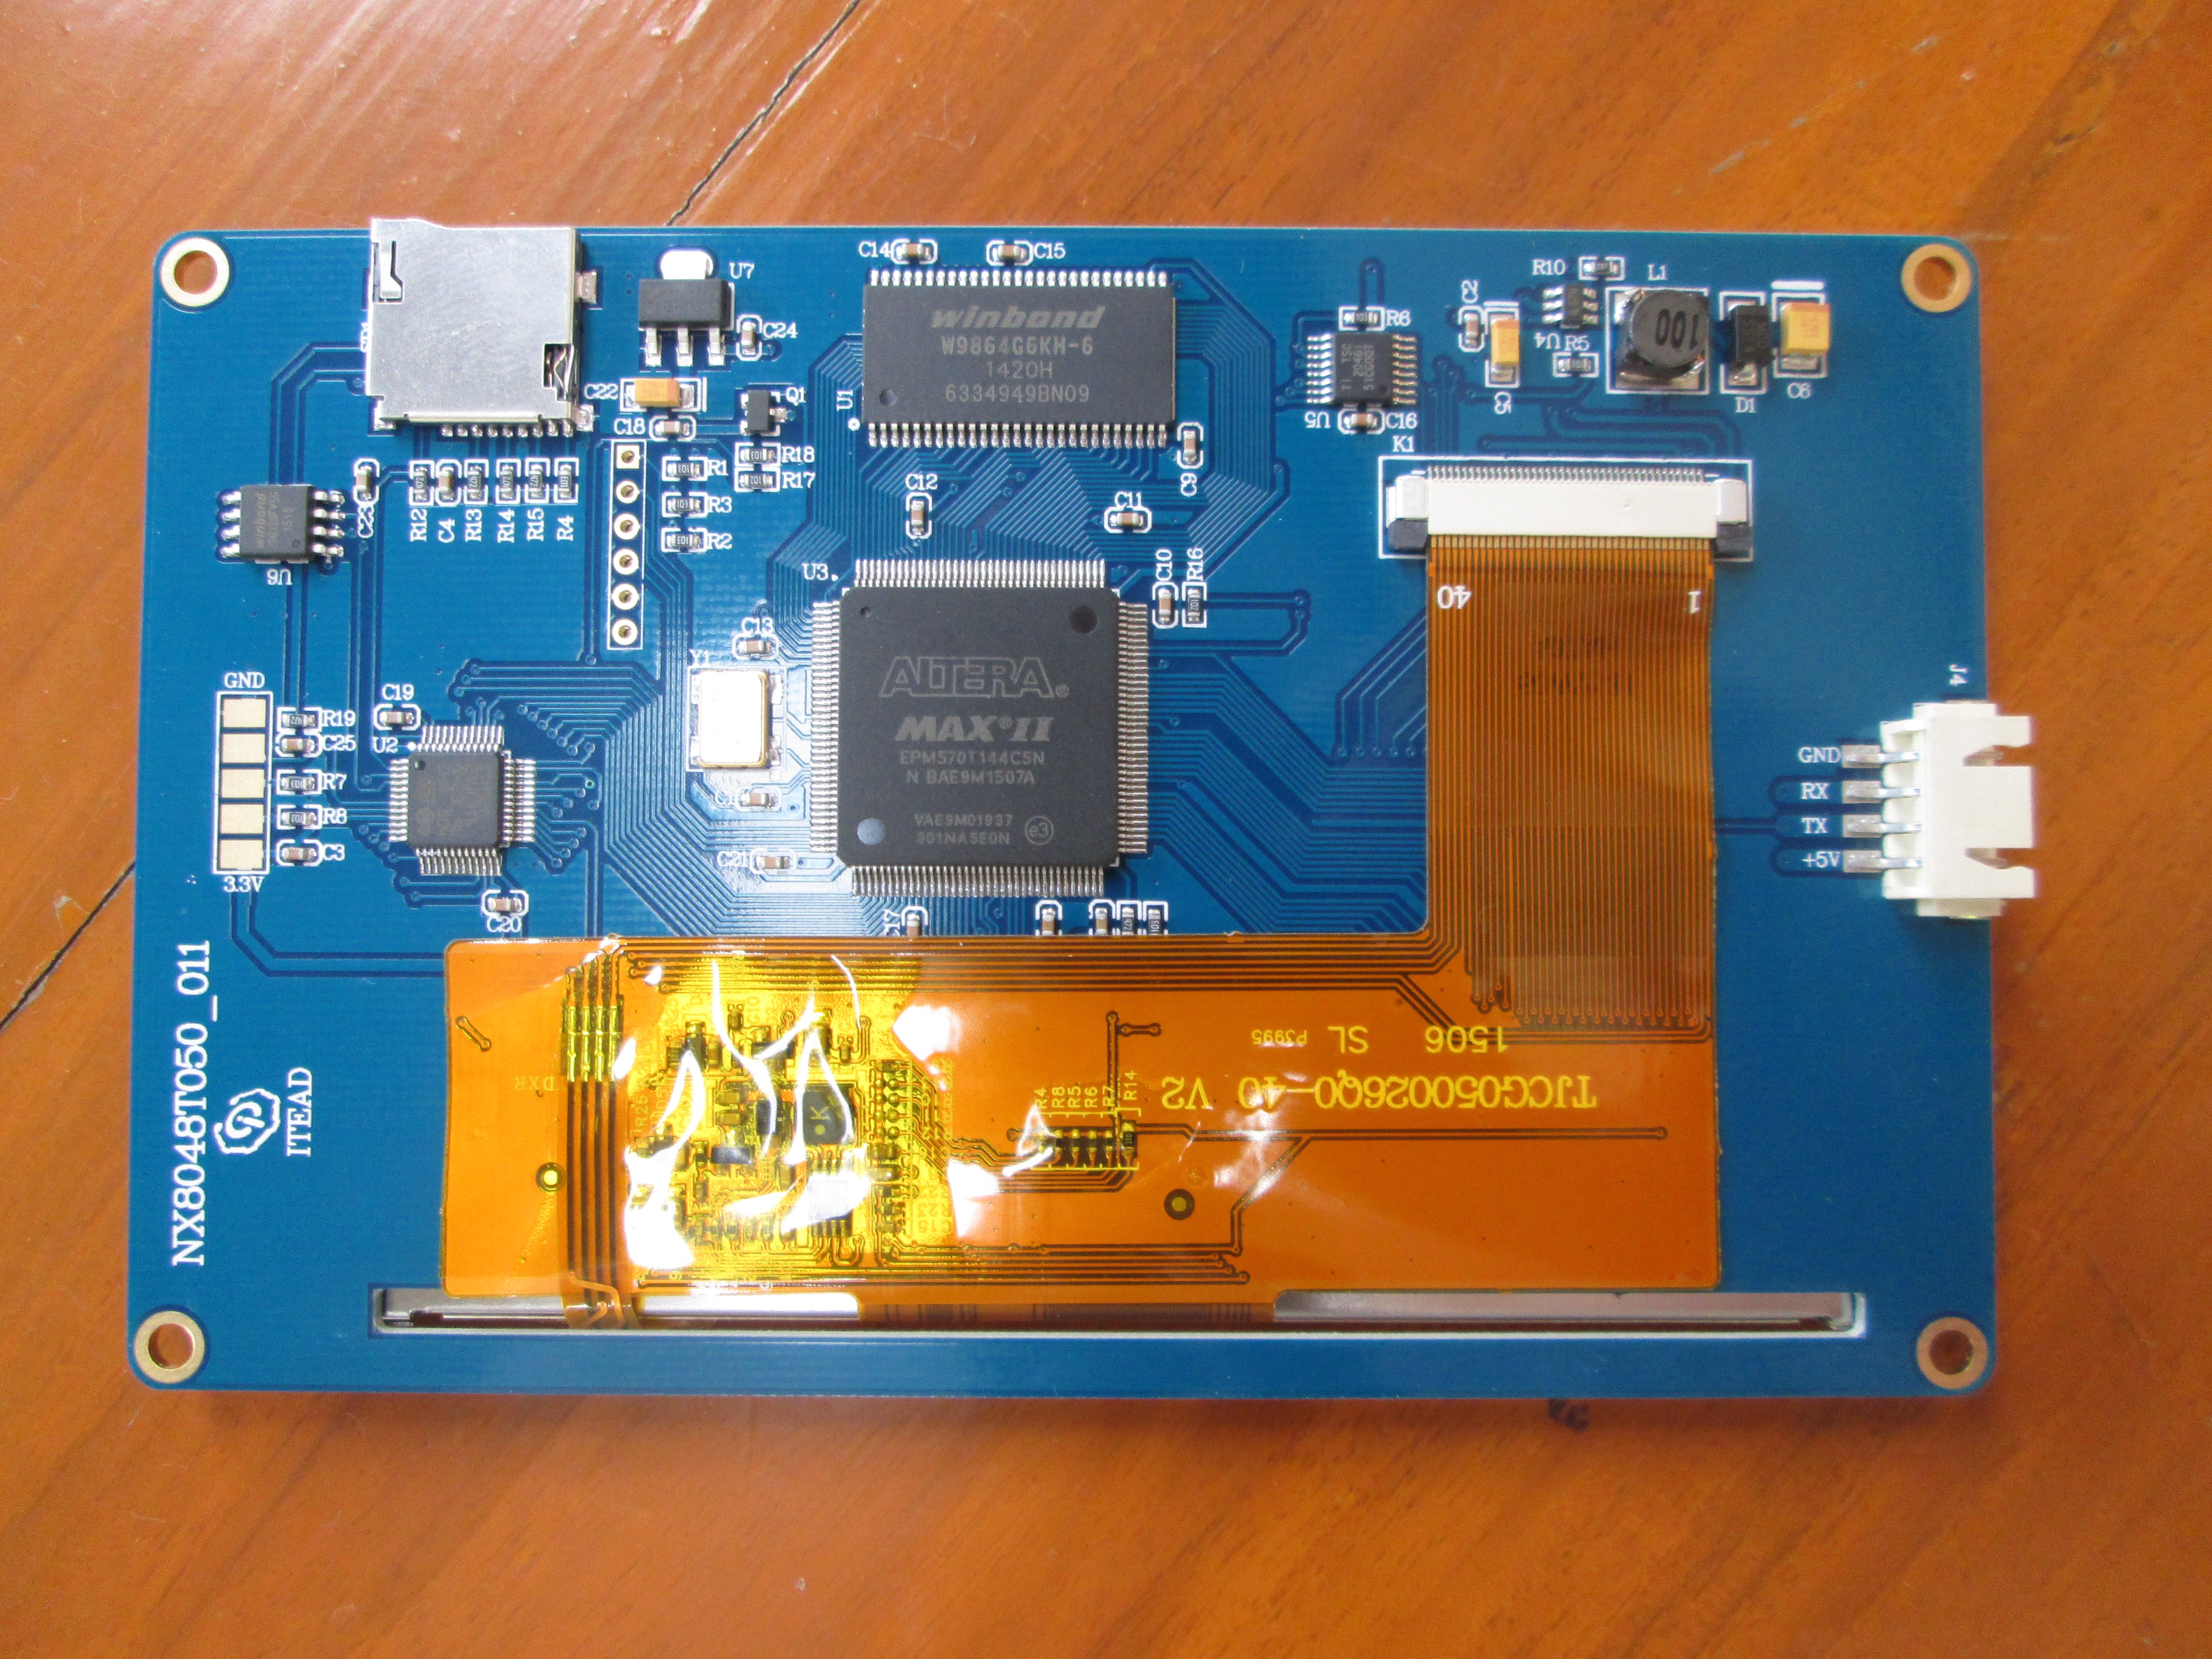
The display’s board has a the same serial connector, micro SD slot and STM32 MCU as the smaller display, but at two extra chip can be seen with Winbond W9864C6KH-6 SDRAM (8MB) used as an “RGB buffer”, and Altera MAX II EPM570T144CSN CPLD used as the RGB driver. Texas Instruments TSC2046I (U5) is the touch sensor, and it will be there if you simply order online, as the company will only provide the non-touch option for large orders.
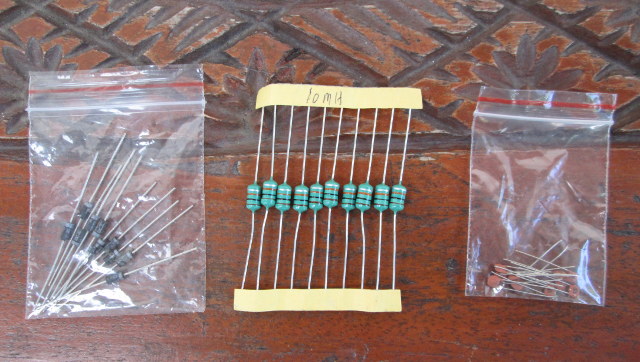
I also received a bunch of components including diodes, inductances, and capacitor, so I was a little confused. Itead Studio explained me it was part of their “Grab Bag” activity which adds some present to randomly selected orders, so those did not need to be used with the displays…
Hello World Tutorial for Nextion TFT Serial Displays
In this first post, I’ll mainly play around with Nextion Editor, and run the display in standalone mode without connection to any other board.
Itead Studio initially said they would focus on the Windows version of their WYSIWYG editor, with Linux and Mac OS planned for later. So far there’s no Linux version, and since the Windows version is being developed around DotNet framework it’s not really promising for multiple OS support.
So I fired up a Virtual machine with Windows 7, downloaded Nextion Editor, and installed the program (Nextion Editor 0.3) without issues.
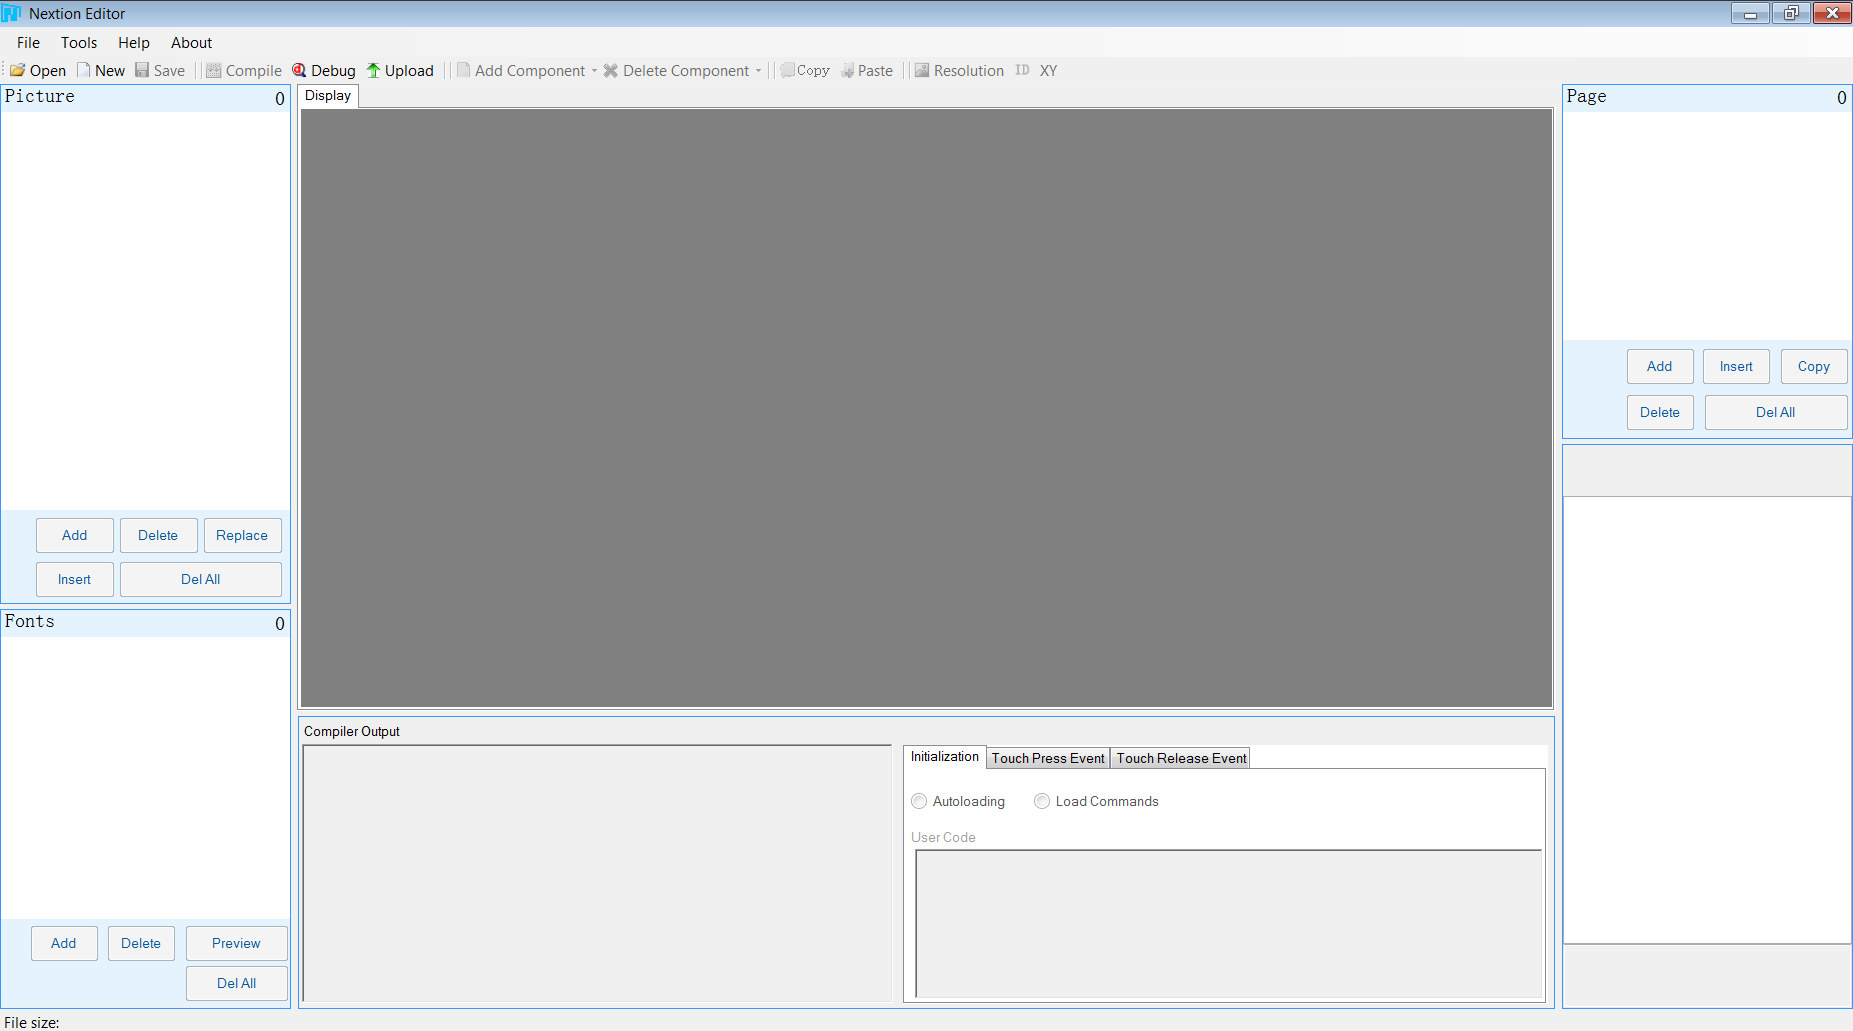
The editor has 6 zones
- Picture – To import pictures from your computer
- Fonts – The list of fixed size fonts generated for your display
- Compiler Output – Show results of creation of HMI files when clicking on “Compile”
- Event Zone – Set behaviors of buttons or other components before or after taps.
- Component Parameter – Will show detailed options for components such as text, button, sliders, and so on.
- Page – To create, modify or delete pages for your user interface
- Display – Main editing window
Before starting a new project, you’ll want to know the resolution of the display you’ve purchased.
 I’m using NX8048T050_011R with 800×480. To get started click on File->New, and you’ll be prompted for the screen resolution and orientation.
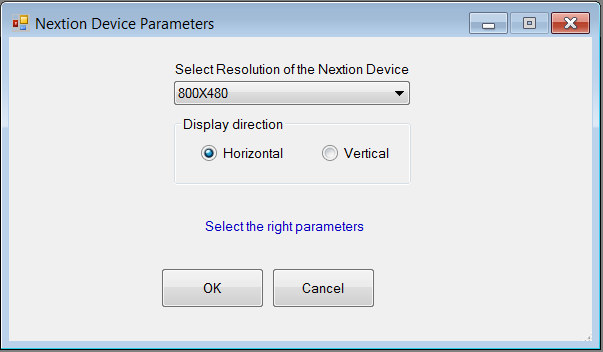
You’ll need to select the one for your display. That means if you have displays with different resolution, you’ll have to design one user interface per resolution. Ideally, this should be done at compile time automatically, but it’s not one feature supported by the system.
I was a bit lazy to read Nextion Editor Quick Start Guide at first, but I recommend you do read it, as the software is not always intuitive, and still work in progress. For example, the software does not support drag and drop for pictures, and you need to insert your pictures first, before inserting them with the top menu. Dynamic fonts (TTF) are not supported, so you need to define your font sizes in advance. I have not found a way to move components to lower and higher layer, so for example, you’ll need to create the background image first, as if you create it after other components it will cover them all without options to move it under. There’s no contextual menu when you right-click on components. If the image is larger than the screen, you need to resize it first, or added a “crop” components, instead of “picture” components. Components are created with an inconvenient and small default size, instead of being automatically resize based on your parameters, and I could go on and on.
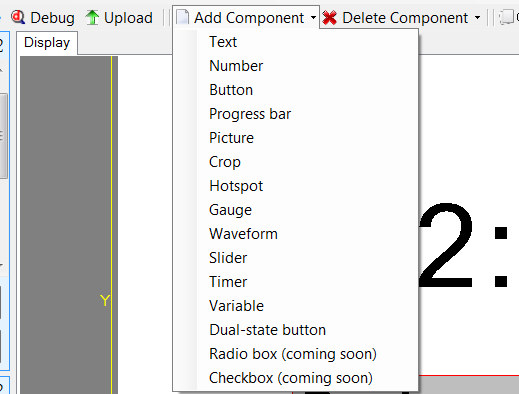
Adding pictures is pretty straightforward. Go to the picture zone, click Add, select and your pictures. Once you have imported the picture, you can click on Add Component->Picture, which will create a p0 component that you can resize and place where you want on your display. Remember to use “Crop” component if your image is larger than the display.
There aren’t any fonts by default, so you’ll have to create your own by clicking on Tools->Font Creator.
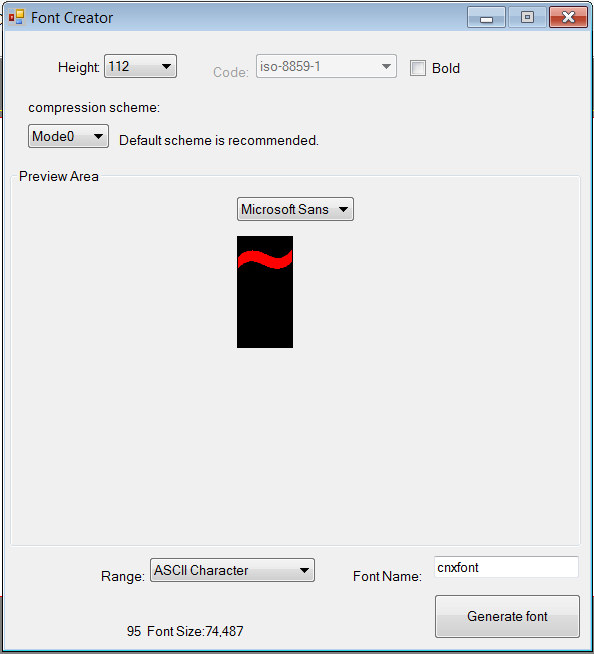
Define a size, select the ISO code and check Bold if needed, then select a font from your computer as well as a range, input a font name and click on Generate font. I’ve done that for two fonts with 112 pixel and 64 pixel fonts.
Once external resources where ready, I created the first page (Hello World – page 0) with a background image, “Hello World!!!” text (Add Component->Text), and “Clock” button (Add Component->Button), and a second one (Clock – page 1) with a “clock”, actually just a Text component, and a back button.
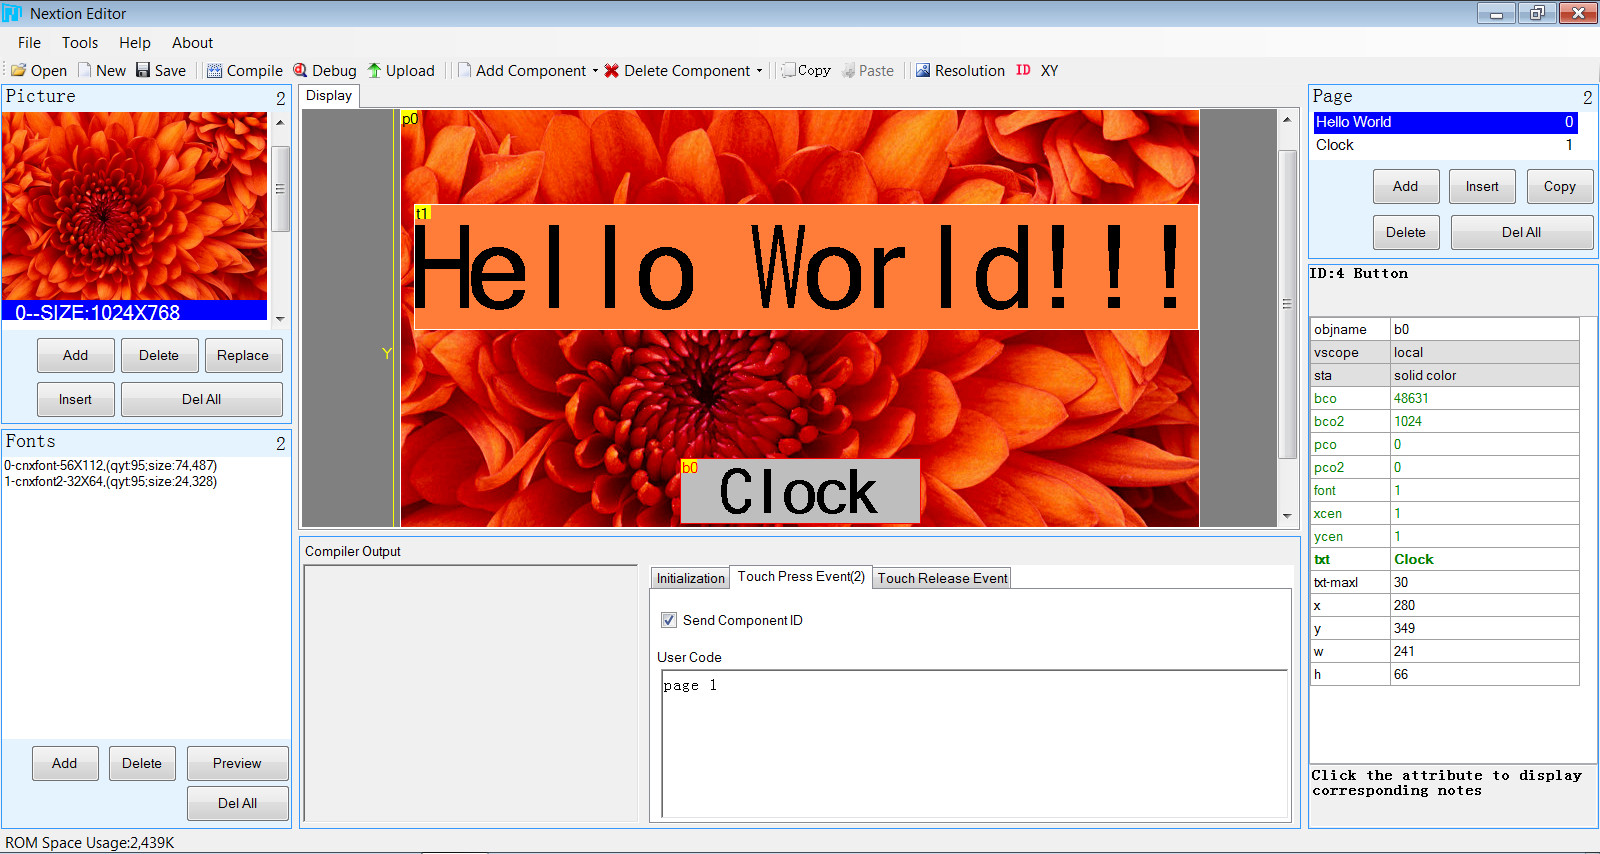
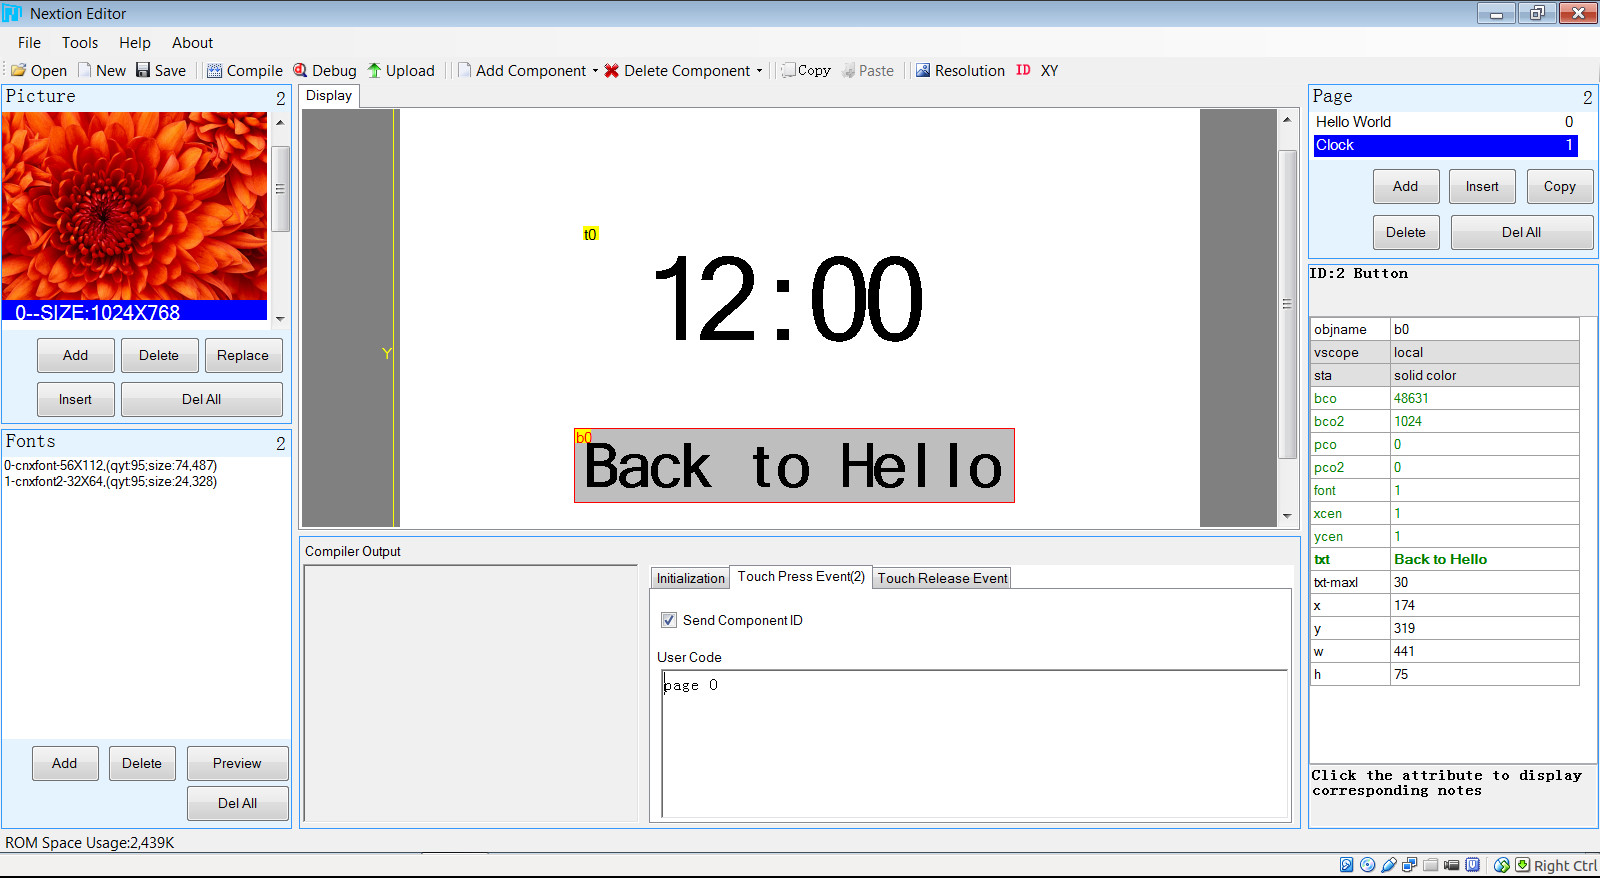
I’ve selected the buttons in both pages in the screenshot above to show I defined Touch Press Event “page 0” for “Back to Hello” button, and “page 1” for the “Clock” button to be able to switch between the two pages. You can see the complete list of components below including slider, timer, progress bar, and upcoming support for Radio boxes and Check boxes.
Once you are happy with the result, you can click on “Compile” to generate the HMI file with .tft extension. Before uploading the interface to Nextion display, you may want to run the simulator to double check it’s working as expected by clicking on “Debug”
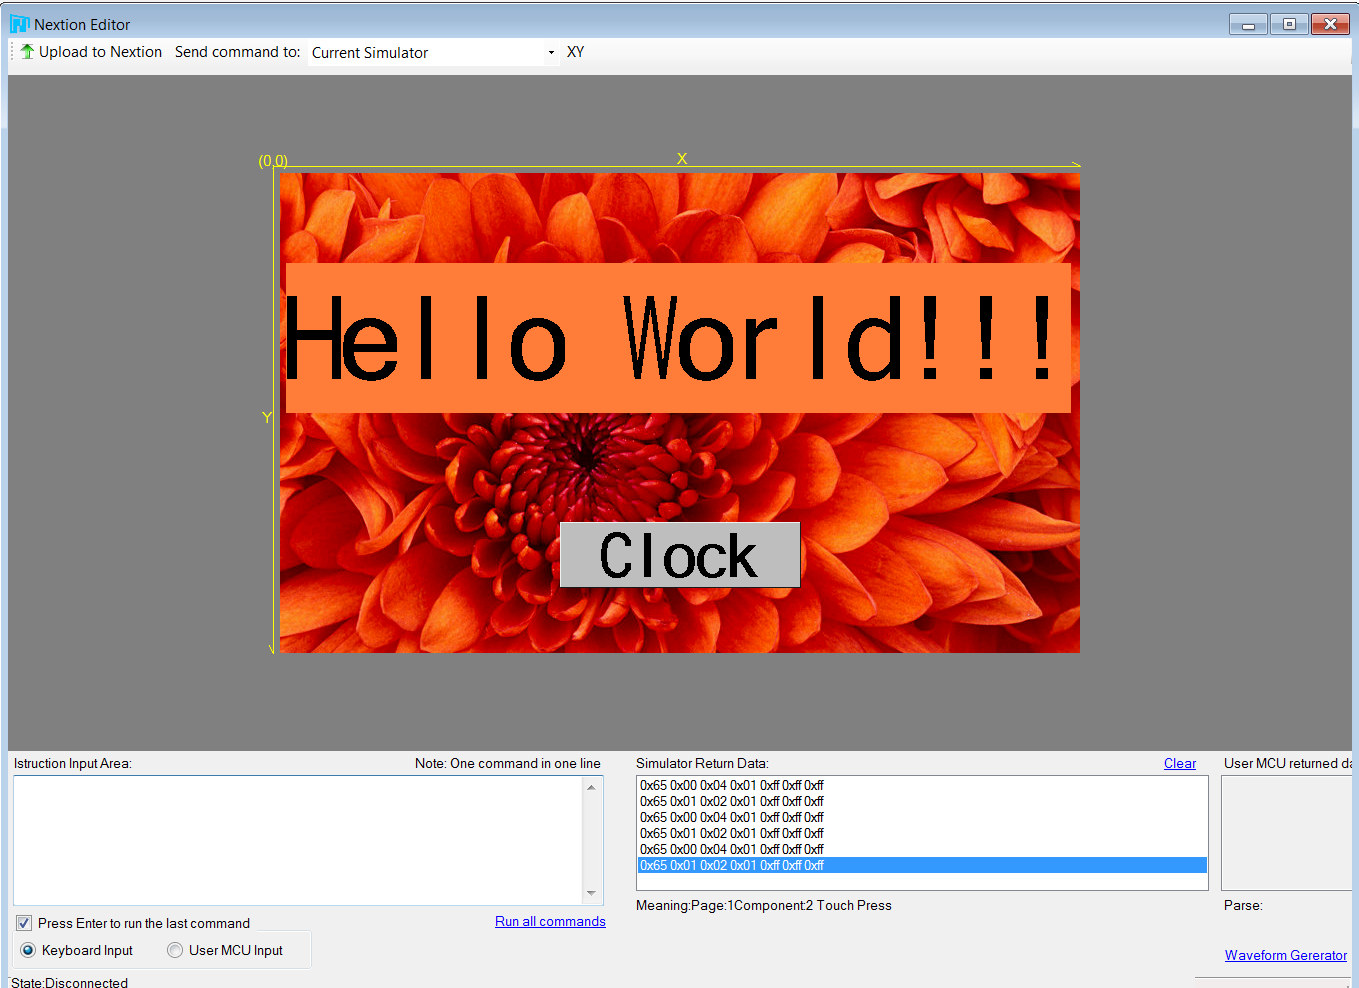
You can click on buttons to switch between the two pages, and monitor the data processed. You could also simulate MCU input in the bottom left part of the simulator, but I have not tried that part.
Now you can load the .tft file to the board, with one of two methods:
- micro SD card method – Go to File->Open build folder, and copy the file (e.g. netxion_cnx.tft) to a micro SD card formatted with FAT32 (32GB mac), and insert it into the board to complete installation. You’ll also need to provide 5V power to the power
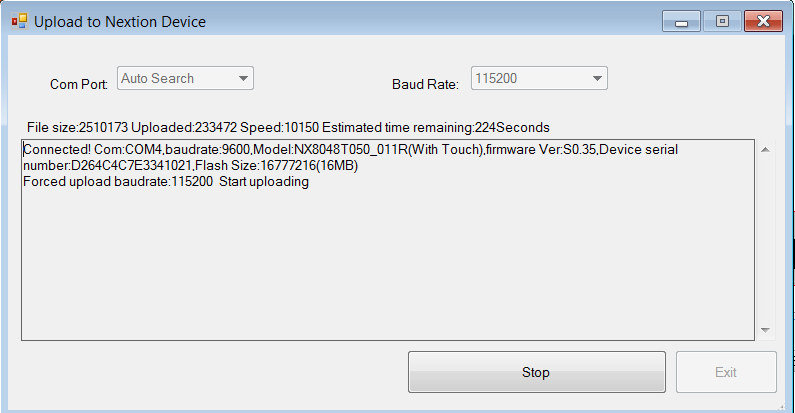
- Serial upload – Connect a 5V USB to TTL debug board to the display’s board and your computer, and click on Upload, and Go
 Progress will show both in Nextion Editor, and on the display with “UART Update” and progress status. If the Windows program says connection failed please double check your debug board connections.
Once the transfer is complete, the user interface will start automatically.
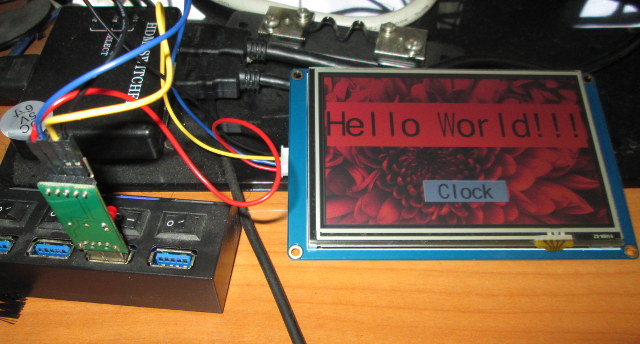
The first time I connected my USB debug board through a USB 2.0 hub, and the display started flickering a lot with nothing displayed. The Wiki states that this is probably a power supply issue (not enough power), and you should disconnect the power immediately to avoid damaging the board.
I explain the steps I followed, and show a quick demo in the video below.
Itead Studio wrote a lot of documentation for their Nextion module, but it looks all over the place to me. You can find more on two documents they provided for reviews with a list of useful links and a list of videos providing tutorials and video demos for Arduino and Raspberry Pi.
The next step for me will be to try using the display(s) with Arduino, Raspberry Pi or ESP8266 boards.
Nextion displays can be purchased on Itead e-Store. Nexteon NX8048T050 5″ display used in this review is going for $64.90, including a micro USB to 2-pin header board that was not in my package, while the 2.4″ display is selling for just $13.90 plus shipping, which would amount to $4.26 for registered airmail to my location.

Jean-Luc started CNX Software in 2010 as a part-time endeavor, before quitting his job as a software engineering manager, and starting to write daily news, and reviews full time later in 2011.
Support CNX Software! Donate via cryptocurrencies, become a Patron on Patreon, or purchase goods on Amazon or Aliexpress


