
I’ve recently received a kit based on Orange Pi mini 2 development board powered by Allwinner H3 quad core processor, but contrary to most other devices or boards I reviewed, this one what sent to me by one of my reader (thanks Jon!) as for various reasons he did not need to get it shipped to him. Today, I’ll start by showing off the kit I received, before writing a quick start guide showing how to install a Debian, and build your own Linux image. The instructions will work for all Orange Pi Allwinner H3 boards, including Orange Pi 2, Orange Pi Plus, and the recently launched Orange Pi PC, which has been rather popular thanks to its low $15 price tag.
Orange Pi mini 2 Board Kit and CSI Camera
This is what I got in the package…
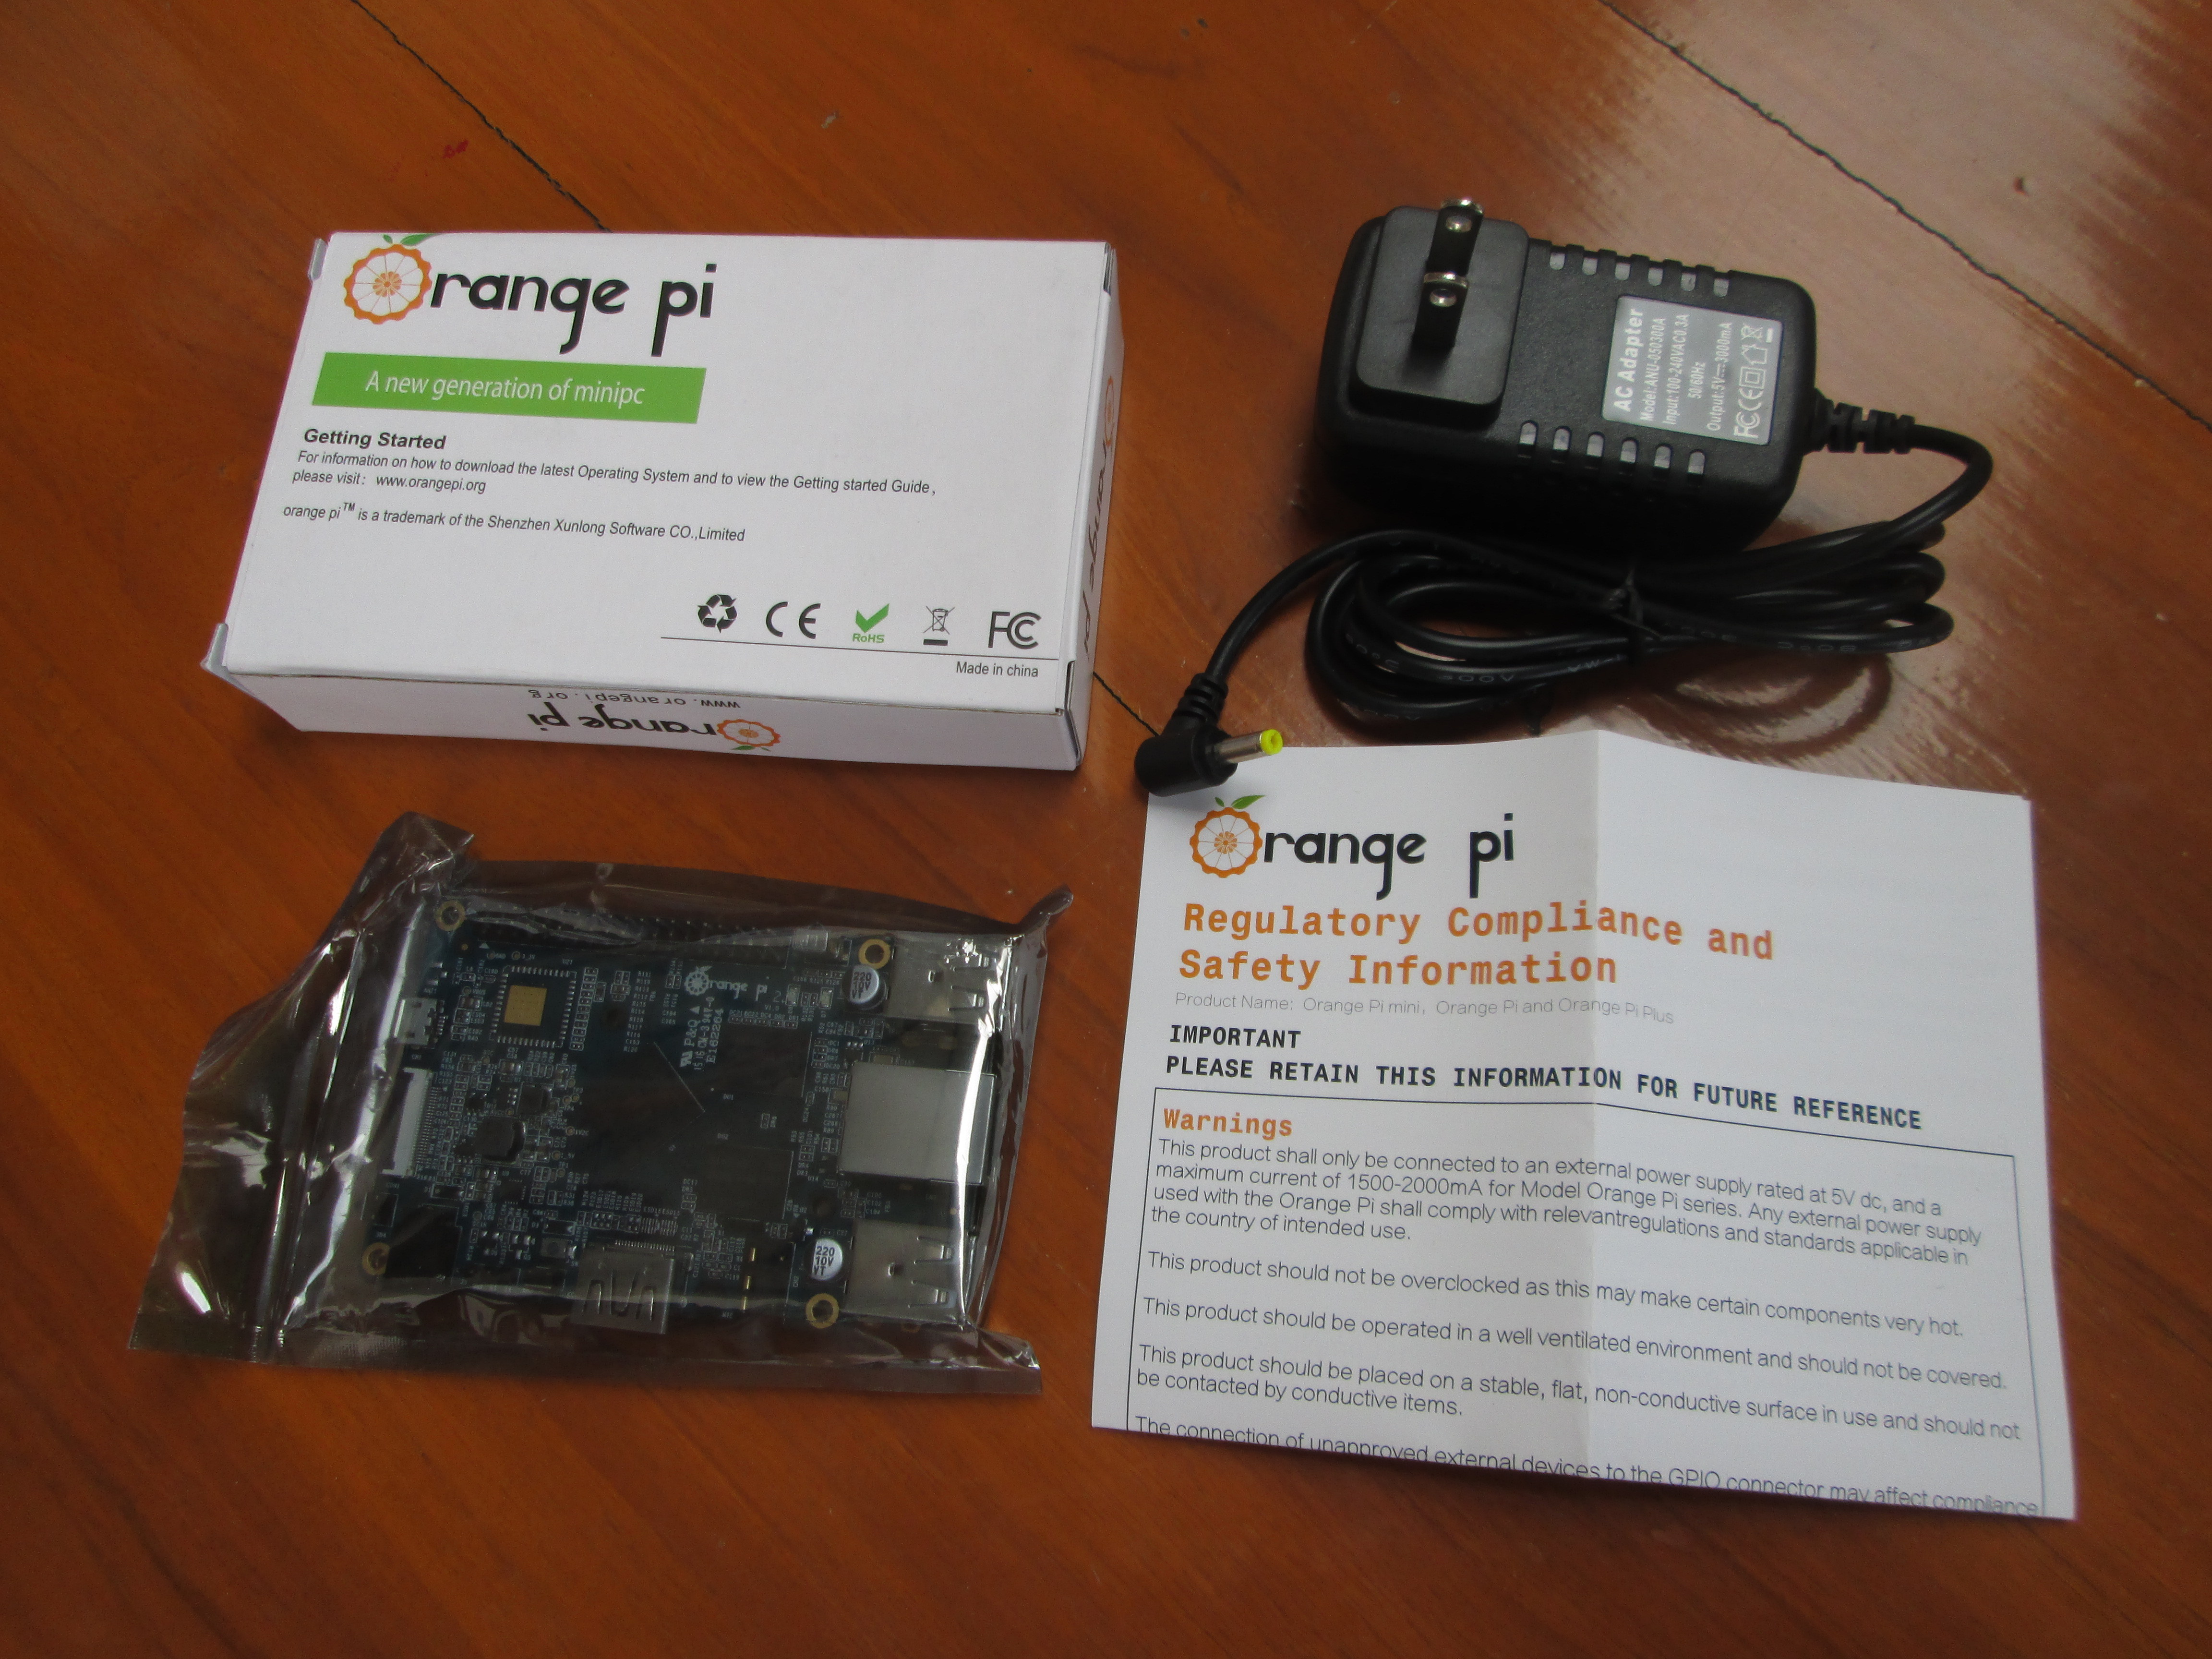
The board with a regulatory compliance and safety information sheet, as well as a 5V/2A power supply, that was bought as part of a kit for $28.90 on Aliexpress. Bear in mind that although Orange Pi boards feature a micro USB OTG port, AFAIK none of them can be power via the micro USB connector, and instead you need to make you have a 5V power adapter with the right barrel size, meaning you can re-use your old smartphone’s charger like you would do with a Raspberry Pi. Shenzhen Xunlong normally offers various kits including power supply and/or acrylic case on their Aliexpress store.
I’ve taken the board out of its anti-static bag, and taken some close up pictures.

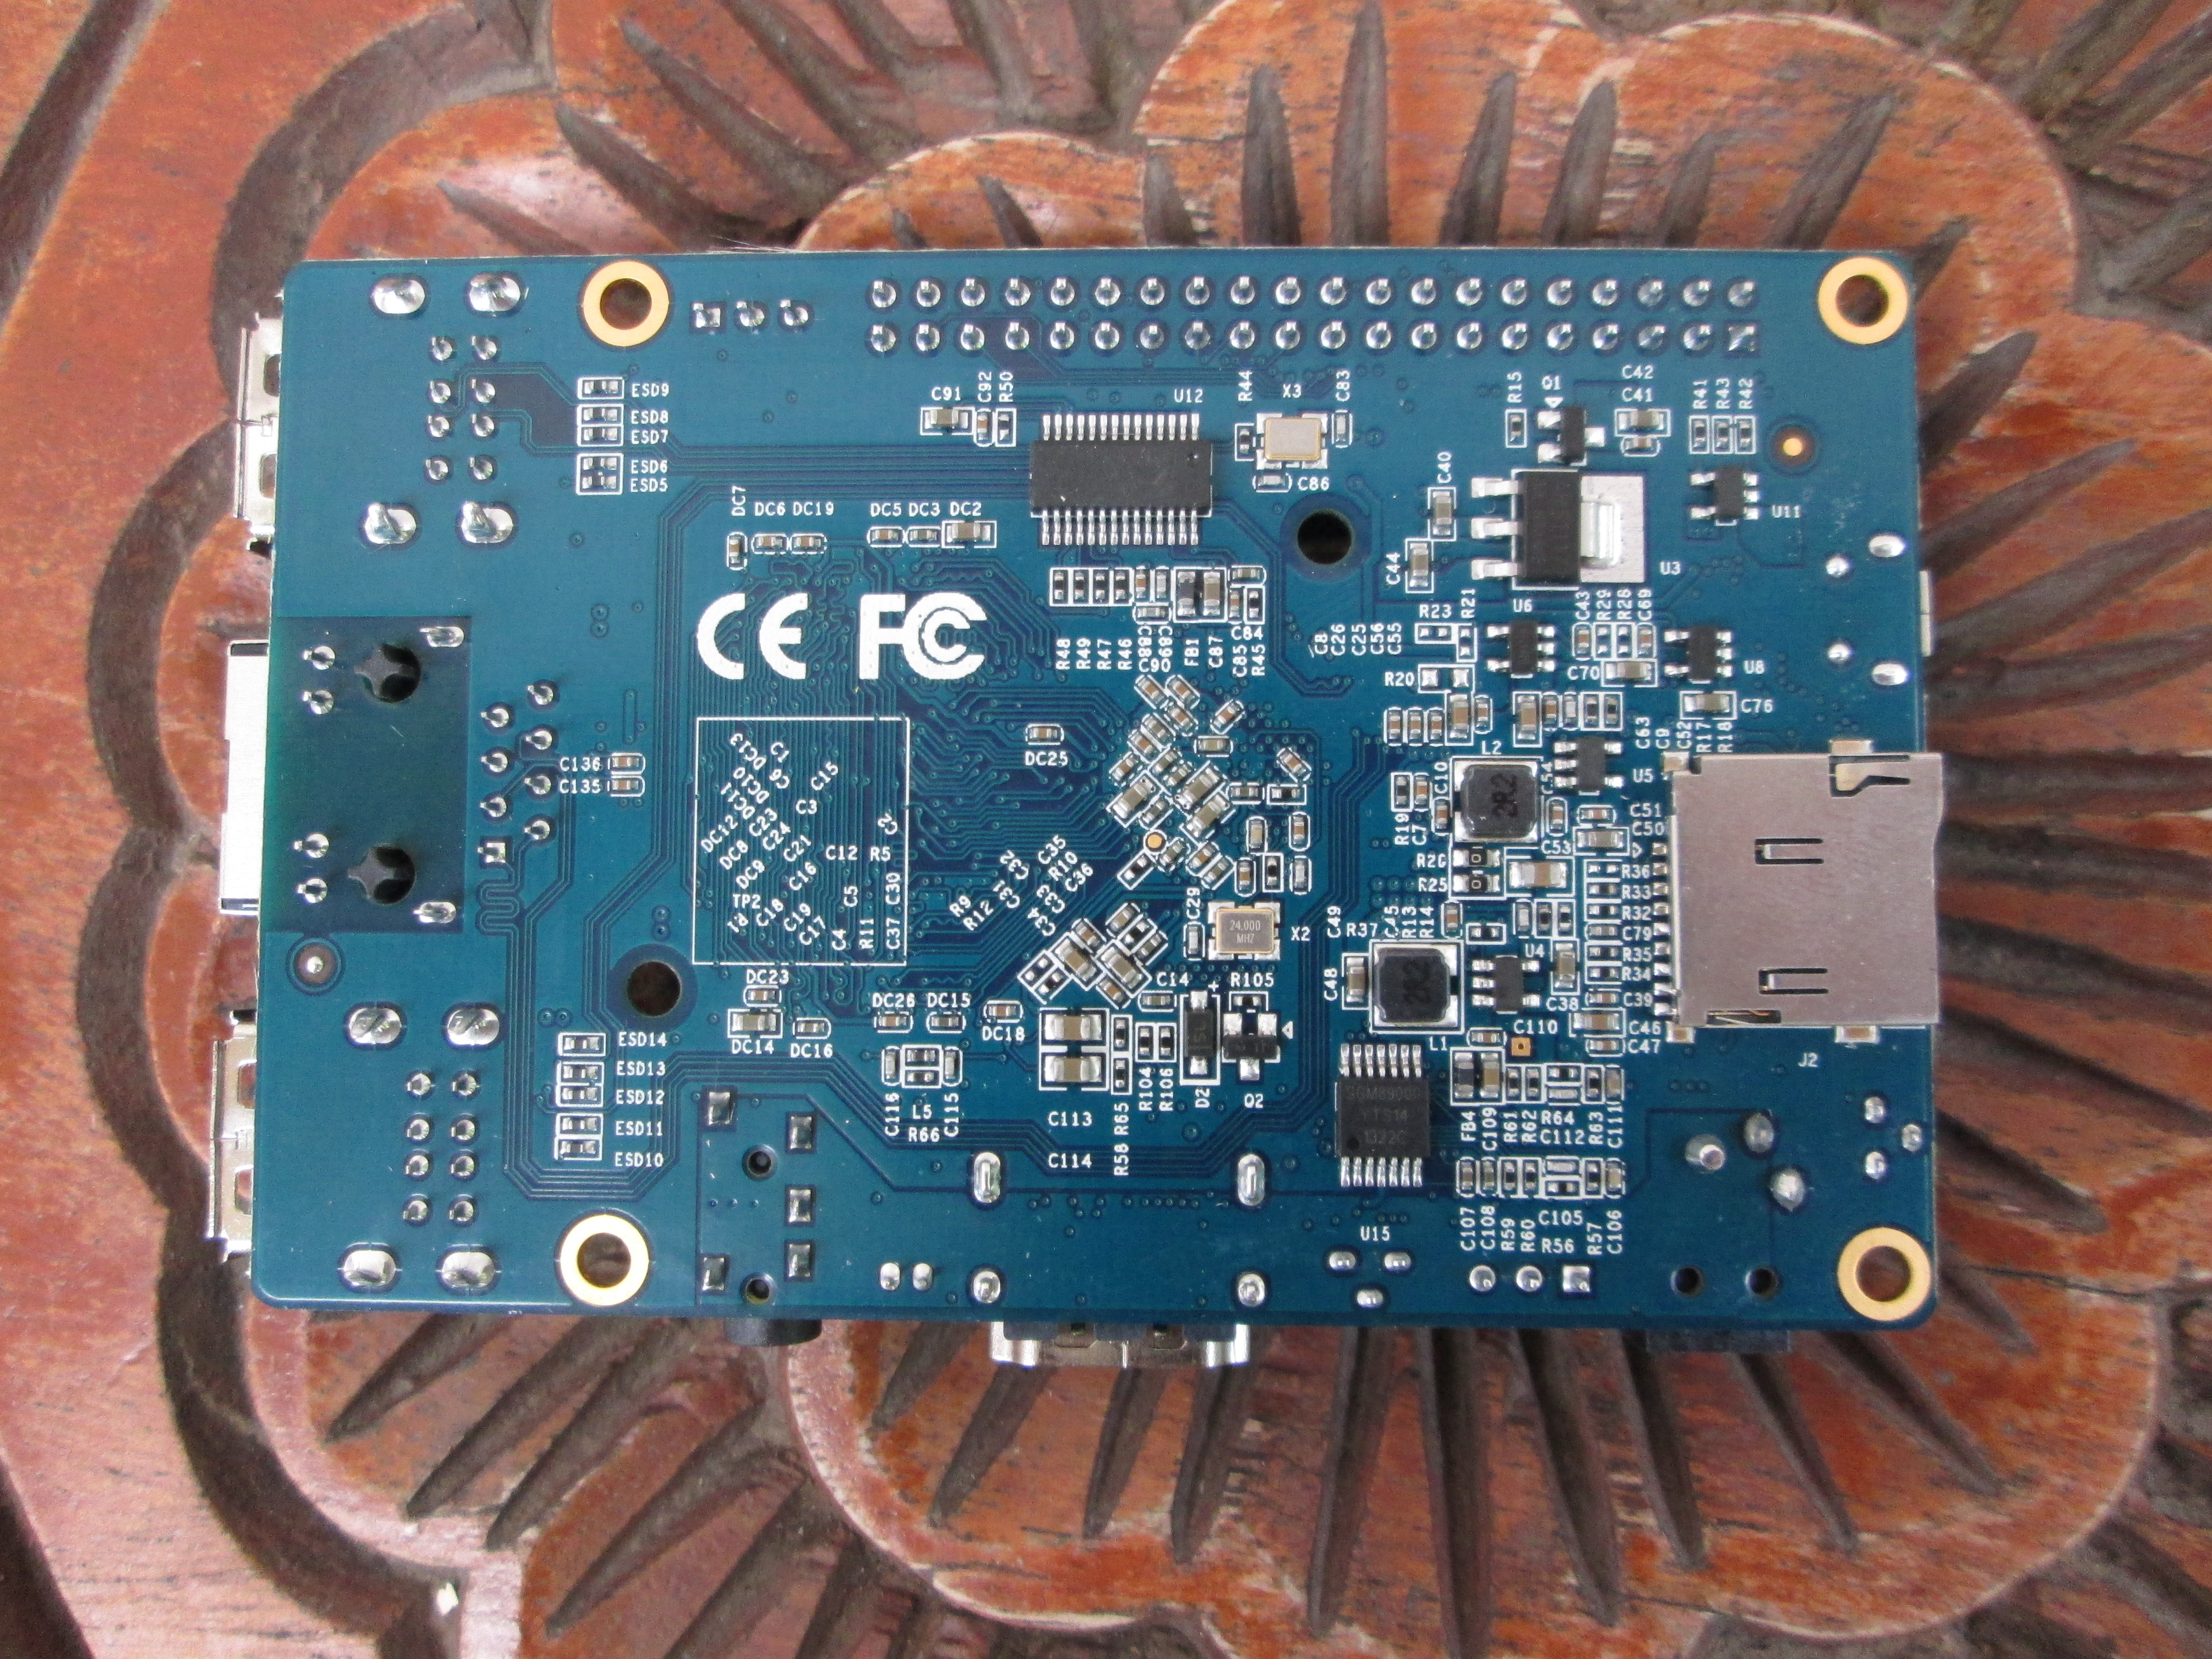
So my board does not include flash, nor a WiFi module (located on the top left corner on the top), which I’ll connect the board via Ethernet, and boot from a micro SD card.
Then I noticed a tiny plastic bag had fallen on my desk… oh!!! a camera…
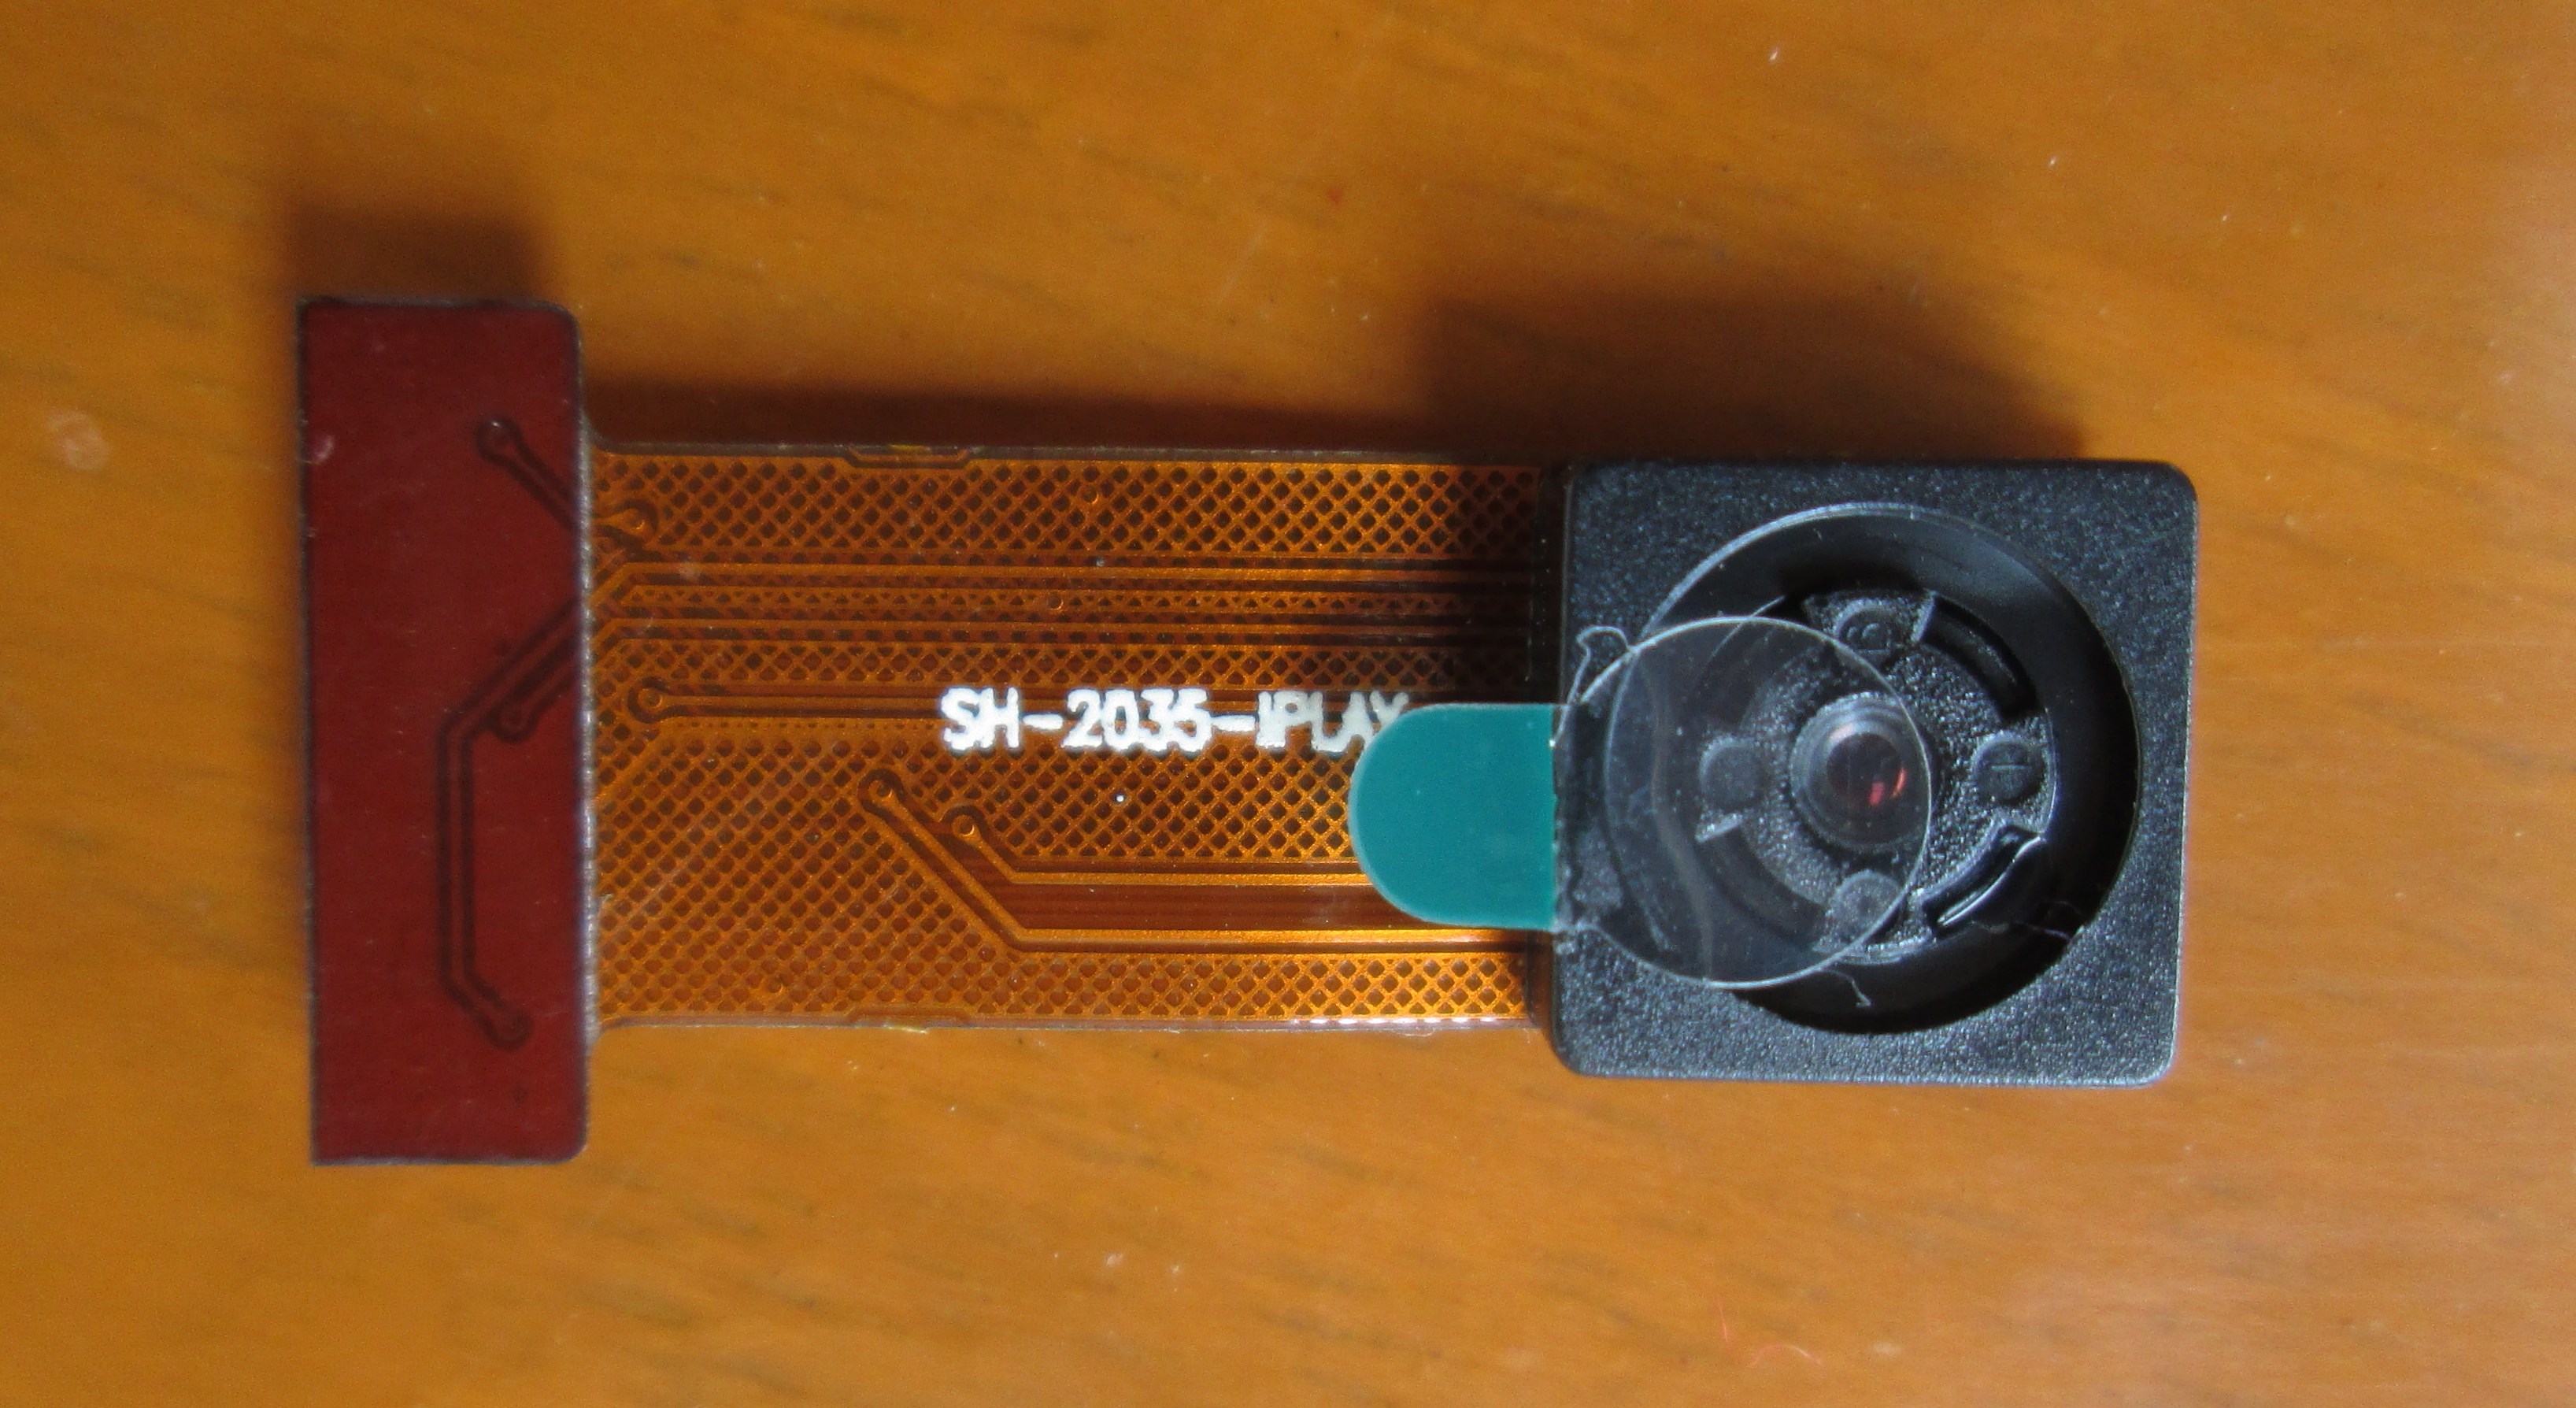
The cable reads SH-2035-IPLAY, and it must the be the $5.90 camera sold on Aliexpress by Xunlong Software, Orange Pi board makers, although the picture differs a bit. So I looked for some documentation about the camera on Orange Pi website, and I found… nothing… Until I looked into the forums, and found somebody managed to make it work after many efforts, as the firmware images were not setup for the camera, and the driver was also missing. I initially intended to try out the camera in this getting started guide, but it will have to be a separate post.
Installing and Setting Up Linux
Orange Pi Allwinner H3 boards support both Android and Ubuntu, but most people buying such development board are likely to prefer running a Linux distribution, and I’ve already tested Android on Allwinner H3 when I reviewed Zidoo X1, so I decided to focus on Linux in this getting started guide. Orange Pi 2 boards and Zidoo X1 are pretty similar hardware platform, and I’ve already installed Orange Pi 2 Lubuntu 14.04 on Zidoo X1 downloaded from Orange Pi Downloads page, and vice versa, Zidoo X1 Android image has also been tested on Orange Pi 2. And in both cases the images run fine, although with some caveats such as WiFi not working with Linux on Zidoo X1.
However, I’ve been recommended to use Linux images released by Loboris forum member instead, so that’s what I’ve done, and among the various Ubuntu, Lubuntu, and Debian images available, I’ve decided to go with Debian 8 Jessie + XFCE image (OrangePI_Jessie_Xfce.img.xz), and you can download the images from Mega or Google Drive. Minimal images without desktop environment for headless operation are also available.
You’ll need a Linux or Windows PC, and a micro SD card to install the Linux image.
These are the steps I followed to install Debian on the micro SD card from a Ubuntu 14.04 computer:
- Install dependencies:
1sudo apt-get install xz-utils pv - Uncompress the firmware:
1xz -d OrangePI_Jessie_Xfce.img.xz - Locate your micro SD card with lsblk (I used a 16GB Class 10 micro SD card):
123456789lsblkNAME MAJ:MIN RM SIZE RO TYPE MOUNTPOINTsda 8:0 0 465.8G 0 disk├─sda1 8:1 0 512M 0 part /boot/efi├─sda2 8:2 0 461.8G 0 part /└─sda3 8:3 0 3.5G 0 part [SWAP]<strong>sdb 8:16 1 14.7G 0 disk</strong>└─sdb1 8:17 1 14.7G 0 part /media/jaufranc/WINPEsr0 11:0 1 1024M 0 rom - Flash the image with dd:
12sudo dd if=OrangePI_Jessie_Xfce.img | pv | sudo dd of=/dev/sdb bs=16Msync
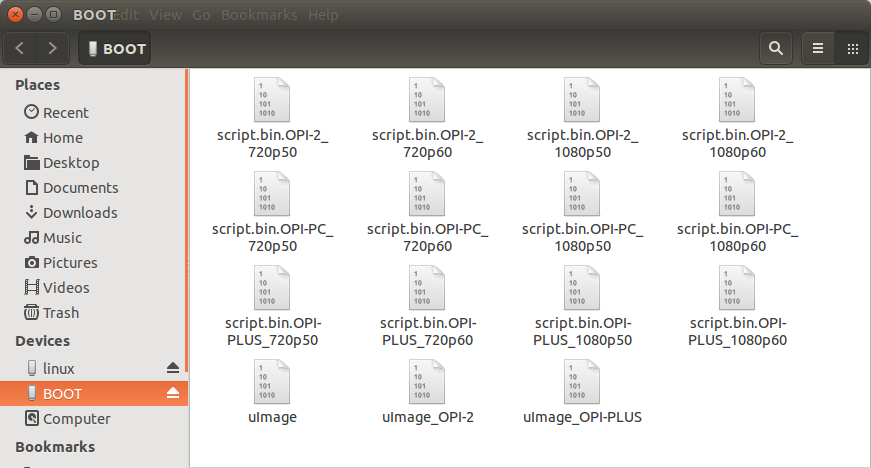
Note: If you are using Windows, use Win32DiskImager to flash the image to the micro SD card instead of going through the first 4 steps shown above. - Remove the micro SD card, and reinsert it again in your computer, it should automount two partitions in the SD card: linux and BOOT.

- You’ll want to select the BOOT partitions, where you’ll find the kernel “uImage_OPI-2” for Orange Pi 2 and Pi PC boards, and “uImage_OPI-PLUS” for Orange Pi Plus boards. uImage in the partition was already uImage_OPi-2 for my board, but to be on the safe side, you can copy the kernel image to uImage. Finally, you’ll also need to select one of the scrip.bin file to match the board and resolution you wish to use. This is what I did in a terminal window for my Orange Pi mini 2 board, but you can also use the desktop to do so in Linux or Windows:
12345pushd /media/jaufranc/BOOTcp uImage_OPI-2 uImagecp script.bin.OPI-2_1080p50 script.binpopdsudo umount /dev/sdb* - Done! The micro SD card is now ready.
You can insert it into your board, and connect the power. After a few seconds you should start seeing the kernel log on the screen, and a little later the login screen.
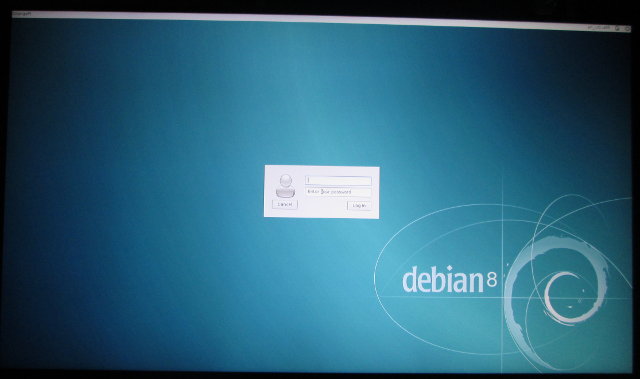 Type the user name “orangepi” and the password “orangepi” to login. There’s still one last step to complete the setup. Open a terminal window:
- If your board has an eMMC, you can install Linux to the internal flash with:
1sudo install_to_emmc
Now power off the board, remove the micro SD card, and start again to run Linux. - If your board has no internal storage, as in my case, you’ll still want to resize the Linux partition to make full use of your SD card capacity with:
12sudo fs_resizereboot

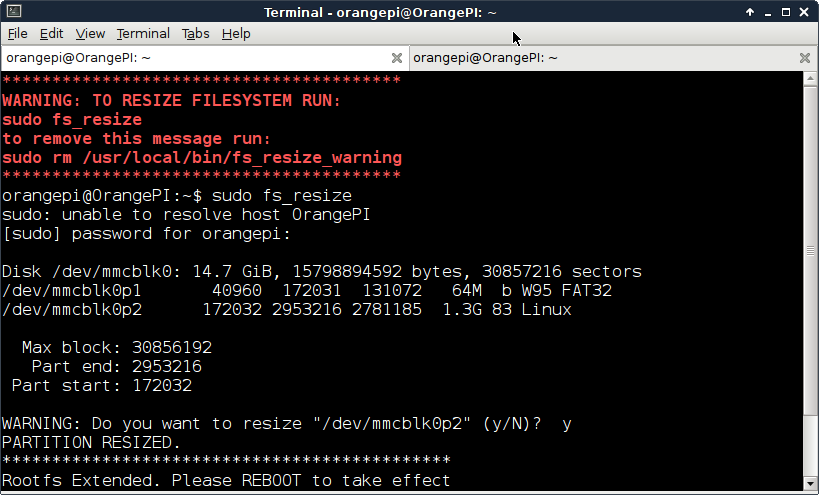
The installation is now complete, have fun! The whole process what quite straightforward thanks to clear instructions provided by Loboris.
Running Debian 8 on Orange Pi mini 2
I’ve quickly tested the image. Chromium is pre-installed, and the developer must be from Croatia, since Chromium will start google.hr by default. Web browsing is fine, but Adobe flash (libpepperflash) is not installed, Thai language is not supported, and Youtube videos are super slow and unwatchable in Chromium. Having said that, you can use SMPlayer to watch YouTube video perfectly fine… in windowed mode (as shown in the screenshot below), but if you go full screen the system can’t cope. I’ve also tried to play a 1080p H.264 video locally, but it won’t play smoothly at all. es2gears (installed with apt-get install mesa-utils-extra) runs, but es2_info reports the render is the software rasterizer.
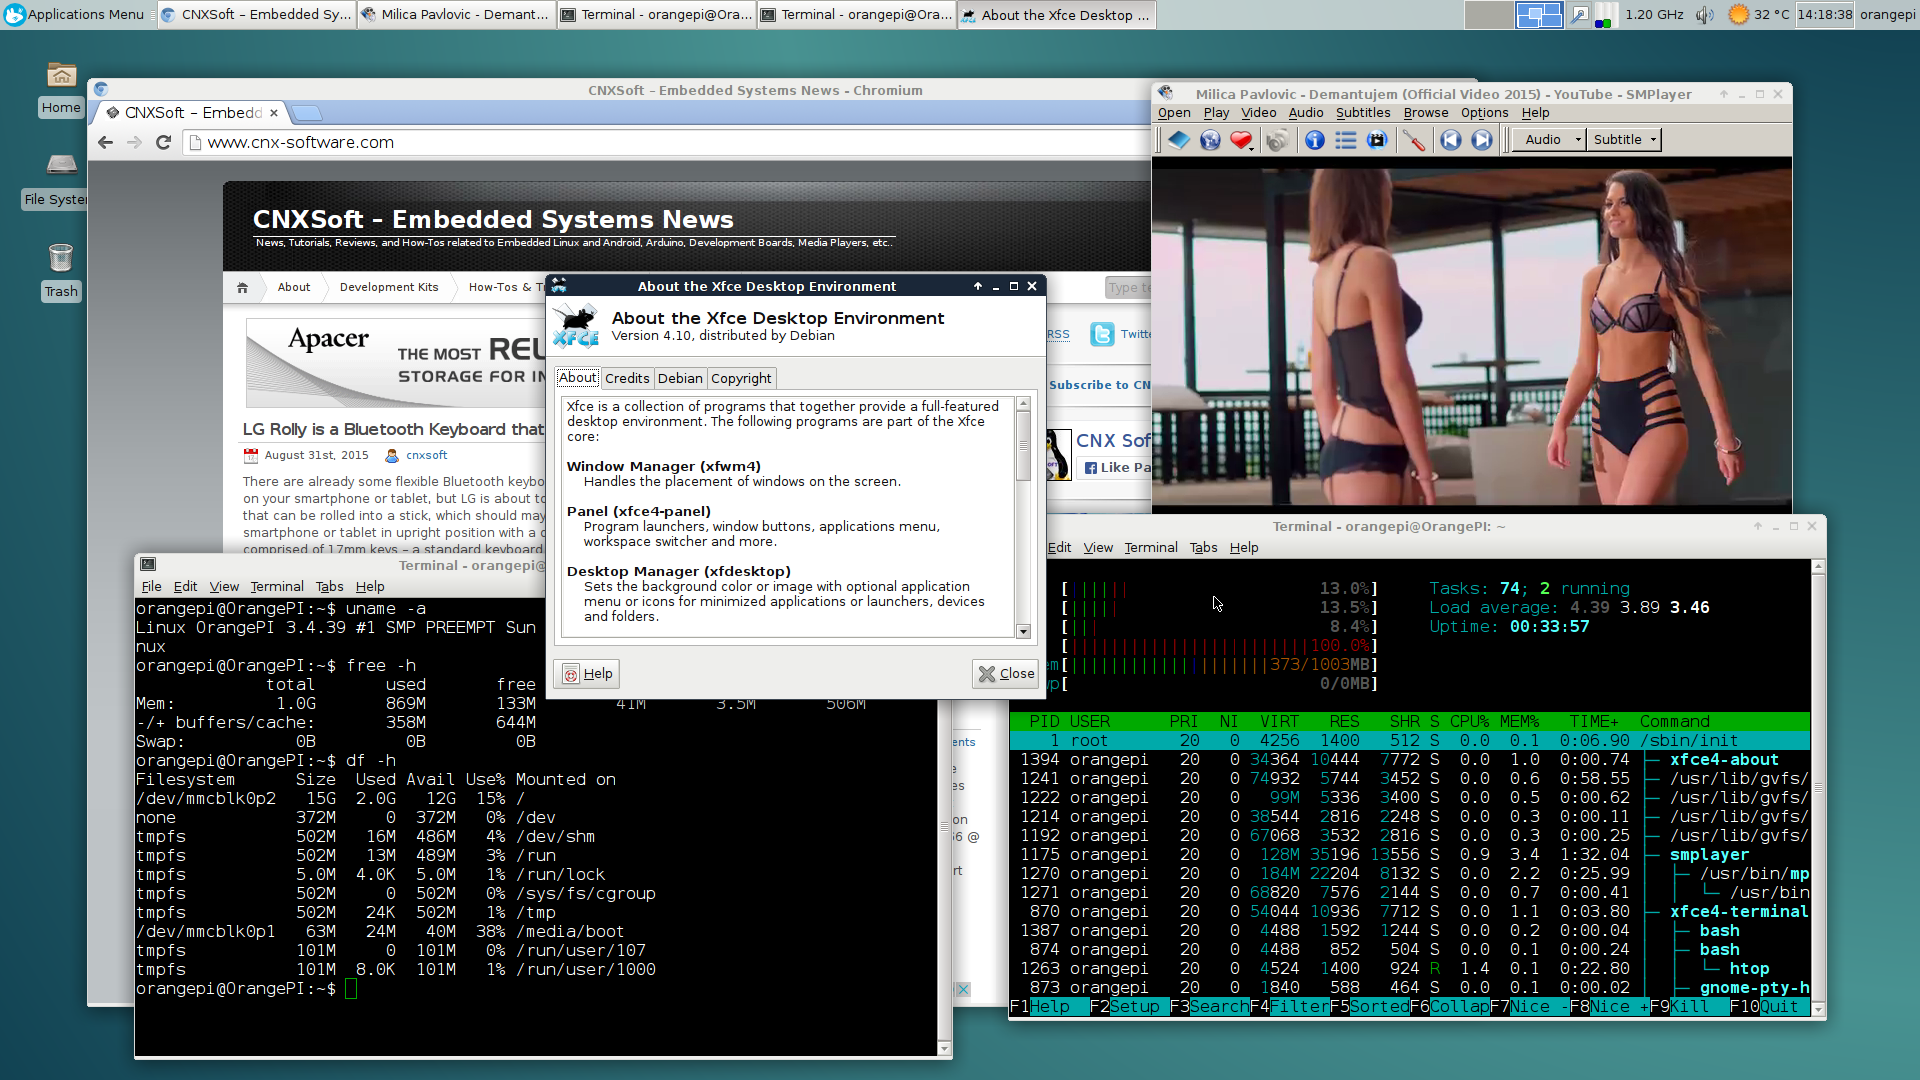
So the image does not support 2D/3D GPU acceleration nor hardware video decoding, but this was to be expected, and these two are usually time consuming to implement. If you need OpenGLES or hardware video decoding, you’ll need to use Android instead. The language issues and lack of Adobe flash support in Chromium should be easy to fix yourself by installing the needed software package such as libpepperflash. I had no problem accessing Internet using Ethernet, I just connected the cable and was good to go.
Here are some details about the image, as well as its memory and storage usage:
|
1 2 3 4 5 6 7 8 9 10 11 12 13 14 15 16 17 18 19 20 21 22 23 24 25 26 27 28 29 30 |
orangepi@OrangePI:~$ uname -a Linux OrangePI 3.4.39 #1 SMP PREEMPT Sun Aug 30 14:14:50 CEST 2015 armv7l GNU/Lx orangepi@OrangePI:~$ cat /etc/issue Debian GNU/Linux 8 \n \l orangepi@OrangePI:~$ cat /sys/devices/system/cpu/cpu0/cpufreq/cpuinfo_max_freq 1536000 orangepi@OrangePI:~$ sudo modprobe gpio-sunxi orangepi@OrangePI:~$ ls /sys/class/gpio_sw/ normal_led PA10 PA13 PA18 PA20 PA6 PA9 PC2 PC7 PG7 PL10 PA0 PA11 PA14 PA19 PA21 PA7 PC0 PC3 PD14 PG8 standby_led PA1 PA12 PA15 PA2 PA3 PA8 PC1 PC4 PG6 PG9 orangepi@OrangePI:~$ free -h total used free shared buffers cached Mem: 1.0G 182M 821M 28M 8.2M 77M -/+ buffers/cache: 96M 906M Swap: 0B 0B 0B orangepi@OrangePI:~$ df -h Filesystem Size Used Avail Use% Mounted on /dev/mmcblk0p2 15G 1.2G 13G 9% / none 372M 0 372M 0% /dev tmpfs 502M 0 502M 0% /dev/shm tmpfs 502M 13M 489M 3% /run tmpfs 5.0M 4.0K 5.0M 1% /run/lock tmpfs 502M 0 502M 0% /sys/fs/cgroup tmpfs 502M 4.0K 502M 1% /tmp /dev/mmcblk0p1 63M 24M 40M 38% /media/boot tmpfs 101M 0 101M 0% /run/user/107 tmpfs 101M 0 101M 0% /run/user/1000 orangepi@OrangePI:~$ |
You’ll notice that the CPU frequency is set to 1.5GHz, instead of 1.2GHz in consumer devices like Zidoo X1, so if you plan to run the system at full speed for an extended period of time, e.g. to build the kernel, you may consider adding a heatsink and a fan to the board.
I’ve also connected a USB to TTL debug board to the 3-pin serial console header of the board, and captured the full boot log with minicom:
|
1 2 3 4 5 6 7 8 9 10 11 12 13 14 15 16 17 18 19 20 21 22 23 24 25 26 27 28 29 30 31 32 33 34 35 36 37 38 39 40 41 42 43 44 45 46 47 48 49 50 51 52 53 54 55 56 57 58 59 60 61 62 63 64 65 66 67 68 69 70 71 72 73 74 75 76 77 78 79 80 81 82 83 84 85 86 87 88 89 90 91 92 93 94 95 96 97 98 99 100 101 102 103 104 105 106 107 108 109 110 111 112 113 114 115 116 117 118 119 120 121 122 123 124 125 126 127 128 129 130 131 132 133 134 135 136 137 138 139 140 141 142 143 144 145 146 147 148 149 150 151 152 153 154 155 156 157 158 159 160 161 162 163 164 165 166 167 168 169 170 171 172 173 174 175 176 177 178 179 180 181 182 183 184 185 186 187 188 189 190 191 192 193 194 195 196 197 198 199 200 201 202 203 204 205 206 207 208 209 210 211 212 213 214 215 216 217 218 219 220 221 222 223 224 225 226 227 228 229 230 231 232 233 234 235 236 237 238 239 240 241 242 243 244 245 246 247 248 249 250 251 252 253 254 255 256 257 258 259 260 261 262 263 264 265 266 267 268 269 270 271 272 273 274 275 276 277 278 279 280 281 282 283 284 285 286 287 288 289 290 291 292 293 294 295 296 297 298 299 300 301 302 303 304 305 306 307 308 309 310 311 312 313 314 315 316 317 318 319 320 321 322 323 324 325 326 327 328 329 330 331 332 333 334 335 336 337 338 339 340 341 342 343 344 345 346 347 348 349 350 351 352 353 354 355 356 357 358 359 360 361 362 363 364 365 366 367 368 369 370 371 372 373 374 375 376 377 378 379 380 381 382 383 384 385 386 387 388 389 390 391 392 393 394 395 396 397 398 399 400 401 402 403 404 405 406 407 408 409 410 411 412 413 414 415 416 417 418 419 420 421 422 423 424 425 426 427 428 429 430 431 432 433 434 435 436 437 438 439 440 441 442 443 444 445 446 447 448 449 450 451 452 453 454 455 456 457 458 459 460 461 462 463 464 465 466 467 468 469 470 471 472 473 474 475 476 477 478 479 480 481 482 483 484 485 486 487 488 489 490 491 492 493 494 495 496 497 498 499 500 501 502 503 504 505 506 507 508 509 510 511 512 513 514 515 516 517 518 519 520 521 522 523 524 525 526 527 528 529 530 531 532 533 534 535 536 537 538 539 540 541 542 543 544 545 546 547 548 549 550 551 552 553 554 555 556 557 558 559 560 561 562 563 564 565 566 567 568 569 570 571 572 573 574 575 576 577 578 579 580 581 582 583 584 585 586 587 588 589 590 591 592 593 594 595 596 597 598 599 600 601 602 603 604 605 606 607 608 609 610 611 612 613 614 615 616 617 618 619 620 621 622 623 624 625 626 627 628 629 630 631 632 633 634 635 636 637 638 639 640 641 642 643 644 645 646 647 648 649 650 651 652 653 654 655 656 657 658 659 660 661 662 663 664 665 666 667 668 669 670 671 672 673 674 675 676 677 678 679 680 681 682 683 684 685 686 687 688 689 690 691 692 693 694 695 696 697 698 699 700 |
HELLO! BOOT0 is starting! boot0 version : 4.0.0 fel_flag = 0x00000000 rtc[0] value = 0x00000000 rtc[1] value = 0x00000000 rtc[2] value = 0x00000000 rtc[3] value = 0x00000000 rtc[4] value = 0x00000000 rtc[5] value = 0x00000000 rtc[6] value = 0x00000000 rtc[7] value = 0x00000000 DRAM DRIVE INFO: V0.8 DRAM Type = 3 (2:DDR2,3:DDR3,6:LPDDR2,7:LPDDR3) DRAM CLK = 672 MHz DRAM zq value: 003b3bfb READ DQS LCDL = 001d1d1e DRAM SIZE =1024 M odt delay dram size =1024 card boot number = 0 card no is 0 sdcard 0 line count 4 [mmc]: mmc driver ver 2014-12-10 21:20:39 [mmc]: ***Try SD card 0*** [mmc]: SD/MMC Card: 4bit, capacity: 15067MB [mmc]: vendor: Man 001d4144 Snr b4140ee4 [mmc]: product: SD [mmc]: revision: 0.2 [mmc]: ***SD/MMC 0 init OK!!!*** sdcard 0 init ok The size of uboot is 000dc000. sum=ede66ee7 src_sum=ede66ee7 Succeed in loading uboot from sdmmc flash. Ready to disable icache. Jump to secend Boot. SUNXI_NORMAL_MODE [ 0.345]e mode U-Boot 2011.09-rc1 (Jun 21 2015 - 19:33:17) Allwinner Technology [ 0.352]version: 1.1.0 normal mode [ 0.360]pmbus: ready not set main pmu id axp_probe error [ 0.375]PMU: pll1 1200 Mhz,PLL6=600 Mhz AXI=400 Mhz,AHB=200 Mhz, APB1=100 Mhz sid read already fel key new mode run key detect no key found no key input dram_para_set start dram_para_set end normal mode [ 0.405]DRAM: 1 GiB relocation Offset is: 35af9000 [box standby] read rtc = 0x0 [box_start_os] mag be start_type no use user_gpio config user_gpio ok gic: normal or no secure os mode workmode = 0 MMC: 0 [ 0.479][mmc]: mmc driver ver 2014-12-10 9:23:00 [ 0.484][mmc]: get sdc_phy_wipe fail. [ 0.488][mmc]: get sdc0 sdc_erase fail. [ 0.492][mmc]: get sdc_f_max fail,use default 50000000Hz [ 0.497][mmc]: get sdc_ex_dly_used fail,use default dly [ 0.503][mmc]: SUNXI SD/MMC: 0 [ 0.516][mmc]: *Try SD card 0* [ 0.549][mmc]: CID 0x1d414453 0x44202020 0x2b4140e 0xe400d2dd [ 0.554][mmc]: mmc clk 50000000 [ 0.558][mmc]: SD/MMC Card: 4bit, capacity: 15067MB [ 0.563][mmc]: boot0 capacity: 0KB,boot1 capacity: 0KB [ 0.568][mmc]: ***SD/MMC 0 init OK!!!*** [ 0.572][mmc]: erase_grp_size:0x1WrBlk * 0x200 = 0x200 Byte [ 0.578][mmc]: secure_feature 0x0 [ 0.581][mmc]: secure_removal_type 0x0 [ 0.585]sunxi flash init ok script config pll_de to 864 Mhz Not Found clk pll_video1 in script script config pll_video to 297 Mhz [boot]disp_init_tv [DISP_TV] disp_init_tv enter g_tv_used screen 0 do not support TV TYPE! [BOOOT_DISP_TV] disp tv device_registered unable to find regulator vcc-hdmi-18 from [pmu1_regu] or [pmu2_regu] enable power vcc-hdmi-18, ret=-1 DRV_DISP_Init end boot_disp.auto_hpd=1 auto hpd check has 0 times! [disk_read_fs] no the partition error: open disp_rsl.fex, maybe it is not exist attched ok, mgr0device0, type=4, mode=4---- ready to set mode [ 1.466]finally, output_type=0x4, output_mode=0x4, screen_id=0x0, disp_par4 fail to find part named env Using default environment In: serial Out: serial Err: serial --------fastboot partitions-------- mbr not exist base bootcmd=run setargs_mmc boot_normal bootcmd set setargs_mmc key 0 cant find rcvy value cant find fstbt value no misc partition is found to be run cmd=run setargs_mmc boot_normal [ 1.504][mmc]: MMC Device 2 not found [ 1.508][mmc]: Can not find mmc dev [ 1.511][mmc]: read first backup failed in fun sdmmc_secure_storage_read l9 sunxi_secstorage_read fail get secure storage map err the private part isn't exist WORK_MODE_BOOT adver not need show sunxi_bmp_logo_display [disk_read_fs] no the partition error: open bootlogo.bmp, maybe it is not exist sunxi bmp info error : unable to open logo file bootlogo.bmp [ 1.544]Hit any key to stop autoboot: 0 [ 4.807][mmc]: blkcnt should not be 0 [ 5.161][mmc]: blkcnt should not be 0 ## Booting kernel from Legacy Image at 40007800 ... Image Name: Linux-3.4.39 Image Type: ARM Linux Kernel Image (uncompressed) Data Size: 8029560 Bytes = 7.7 MiB Load Address: 40008000 Entry Point: 40008000 Verifying Checksum ... OK Loading Kernel Image ... OK OK [ 5.310][mmc]: MMC Device 2 not found [ 5.314][mmc]: mmc not find,so not exit [ 5.318] Starting kernel ... [sun8i_fixup]: From boot, get meminfo: Start: 0x40000000 Size: 1024MB ion_carveout reserve: 160m@0 256m@0 130m@1 200m@1 ion_reserve_common: ion reserve: [0x70000000, 0x80000000]! [ 0.000000] Booting Linux on physical CPU 0 [ 0.000000] Initializing cgroup subsys cpu [ 0.000000] Linux version 3.4.39 (boris@UbuntuMate) (gcc version 4.6.3 201205 [ 0.000000] Ignoring tag cmdline (using the default kernel command line) [ 0.000000] bootconsole [earlycon0] enabled [ 0.000000] cma: CMA: reserved 256 MiB at 70000000 [ 0.000000] Memory policy: ECC disabled, Data cache writealloc [ 0.000000] On node 0 totalpages: 262144 [ 0.000000] free_area_init_node: node 0, pgdat c0d21900, node_mem_map c0dfd00 [ 0.000000] Normal zone: 1710 pages used for memmap [ 0.000000] Normal zone: 0 pages reserved [ 0.000000] Normal zone: 192850 pages, LIFO batch:31 [ 0.000000] HighMem zone: 594 pages used for memmap [ 0.000000] HighMem zone: 66990 pages, LIFO batch:15 [ 0.000000] script_init enter! [ 0.000000] script_init exit! [ 0.000000] PERCPU: Embedded 8 pages/cpu @c1713000 s11840 r8192 d12736 u32768 [ 0.000000] pcpu-alloc: s11840 r8192 d12736 u32768 alloc=8*4096 [ 0.000000] pcpu-alloc: [0] 0 [0] 1 [0] 2 [0] 3 [ 0.000000] Built 1 zonelists in Zone order, mobility grouping on. Total pa0 [ 0.000000] Kernel command line: earlyprintk=ttyS0,115200 loglevel=8 initcalt [ 0.000000] PID hash table entries: 4096 (order: 2, 16384 bytes) [ 0.000000] Dentry cache hash table entries: 131072 (order: 7, 524288 bytes) [ 0.000000] Inode-cache hash table entries: 65536 (order: 6, 262144 bytes) [ 0.000000] Memory: 1024MB = 1024MB total [ 0.000000] Memory: 761624k/761624k available, 286952k reserved, 8192K highmm [ 0.000000] Virtual kernel memory layout: [ 0.000000] vector : 0xffff0000 - 0xffff1000 ( 4 kB) [ 0.000000] fixmap : 0xfff00000 - 0xfffe0000 ( 896 kB) [ 0.000000] vmalloc : 0xf0000000 - 0xff000000 ( 240 MB) [ 0.000000] lowmem : 0xc0000000 - 0xef800000 ( 760 MB) [ 0.000000] pkmap : 0xbfe00000 - 0xc0000000 ( 2 MB) [ 0.000000] modules : 0xbf000000 - 0xbfe00000 ( 14 MB) [ 0.000000] .text : 0xc0008000 - 0xc095ad7c (9548 kB) [ 0.000000] .init : 0xc095b000 - 0xc0ca9e40 (3388 kB) [ 0.000000] .data : 0xc0caa000 - 0xc0d24378 ( 489 kB) [ 0.000000] .bss : 0xc0d24b2c - 0xc0dfcdf8 ( 865 kB) [ 0.000000] Preemptible hierarchical RCU implementation. [ 0.000000] Additional per-CPU info printed with stalls. [ 0.000000] NR_IRQS:544 [ 0.000000] Architected local timer running at 24.00MHz. [ 0.000000] Switching to timer-based delay loop [ 0.000000] sched_clock: 32 bits at 24MHz, resolution 41ns, wraps every 1789s [ 0.000000] Console: colour dummy device 80x30 [ 0.000000] console [tty0] enabled, bootconsole disabled [ 0.000000] Booting Linux on physical CPU 0 [ 0.000000] Initializing cgroup subsys cpu [ 0.000000] Linux version 3.4.39 (boris@UbuntuMate) (gcc version 4.6.3 201205 [ 0.000000] CPU: ARMv7 Processor [410fc075] revision 5 (ARMv7), cr=10c5387d [ 0.000000] CPU: PIPT / VIPT nonaliasing data cache, VIPT aliasing instructie [ 0.000000] Machine: sun8i [ 0.000000] Ignoring tag cmdline (using the default kernel command line) [ 0.000000] bootconsole [earlycon0] enabled [ 0.000000] cma: CMA: reserved 256 MiB at 70000000 [ 0.000000] Memory policy: ECC disabled, Data cache writealloc [ 0.000000] On node 0 totalpages: 262144 [ 0.000000] free_area_init_node: node 0, pgdat c0d21900, node_mem_map c0dfd00 [ 0.000000] Normal zone: 1710 pages used for memmap [ 0.000000] Normal zone: 0 pages reserved [ 0.000000] Normal zone: 192850 pages, LIFO batch:31 [ 0.000000] HighMem zone: 594 pages used for memmap [ 0.000000] HighMem zone: 66990 pages, LIFO batch:15 [ 0.000000] script_init enter! [ 0.000000] script_init exit! [ 0.000000] PERCPU: Embedded 8 pages/cpu @c1713000 s11840 r8192 d12736 u32768 [ 0.000000] pcpu-alloc: s11840 r8192 d12736 u32768 alloc=8*4096 [ 0.000000] pcpu-alloc: [0] 0 [0] 1 [0] 2 [0] 3 [ 0.000000] Built 1 zonelists in Zone order, mobility grouping on. Total pa0 [ 0.000000] Kernel command line: earlyprintk=ttyS0,115200 loglevel=8 initcalt [ 0.000000] PID hash table entries: 4096 (order: 2, 16384 bytes) [ 0.000000] Dentry cache hash table entries: 131072 (order: 7, 524288 bytes) [ 0.000000] Inode-cache hash table entries: 65536 (order: 6, 262144 bytes) [ 0.000000] Memory: 1024MB = 1024MB total [ 0.000000] Memory: 761624k/761624k available, 286952k reserved, 8192K highmm [ 0.000000] Virtual kernel memory layout: [ 0.000000] vector : 0xffff0000 - 0xffff1000 ( 4 kB) [ 0.000000] fixmap : 0xfff00000 - 0xfffe0000 ( 896 kB) [ 0.000000] vmalloc : 0xf0000000 - 0xff000000 ( 240 MB) [ 0.000000] lowmem : 0xc0000000 - 0xef800000 ( 760 MB) [ 0.000000] pkmap : 0xbfe00000 - 0xc0000000 ( 2 MB) [ 0.000000] modules : 0xbf000000 - 0xbfe00000 ( 14 MB) [ 0.000000] .text : 0xc0008000 - 0xc095ad7c (9548 kB) [ 0.000000] .init : 0xc095b000 - 0xc0ca9e40 (3388 kB) [ 0.000000] .data : 0xc0caa000 - 0xc0d24378 ( 489 kB) [ 0.000000] .bss : 0xc0d24b2c - 0xc0dfcdf8 ( 865 kB) [ 0.000000] Preemptible hierarchical RCU implementation. [ 0.000000] Additional per-CPU info printed with stalls. [ 0.000000] NR_IRQS:544 [ 0.000000] Architected local timer running at 24.00MHz. [ 0.000000] Switching to timer-based delay loop [ 0.000000] sched_clock: 32 bits at 24MHz, resolution 41ns, wraps every 1789s [ 0.000000] Console: colour dummy device 80x30 [ 0.000000] console [tty0] enabled, bootconsole disabled [ 0.019915] Calibrating delay loop (skipped), value calculated using timer f) [ 0.019970] pid_max: default: 32768 minimum: 301 [ 0.020237] Mount-cache hash table entries: 512 [ 0.021109] Initializing cgroup subsys cpuacct [ 0.021139] Initializing cgroup subsys freezer [ 0.021185] CPU: Testing write buffer coherency: ok [ 0.021241] ftrace: allocating 25527 entries in 75 pages [ 0.050249] CPU0: thread -1, cpu 0, socket 0, mpidr 80000000 [ 0.050282] [sunxi_smp_prepare_cpus] enter [ 0.050323] Setting up static identity map for 0x406b0b30 - 0x406b0b88 [ 0.051148] CPU1: Booted secondary processor [ 0.051148] CPU1: thread -1, cpu 1, socket 0, mpidr 80000001 [ 0.051278] CPU2: Booted secondary processor [ 0.051278] CPU2: thread -1, cpu 2, socket 0, mpidr 80000002 [ 0.051278] CPU3: Booted secondary processor [ 0.051278] CPU3: thread -1, cpu 3, socket 0, mpidr 80000003 [ 0.060172] Brought up 4 CPUs [ 0.060255] SMP: Total of 4 processors activated (19200.00 BogoMIPS). [ 0.060824] devtmpfs: initialized [ 0.063132] wakeup src cnt is : 1. [ 0.063152] [exstandby]leave extended_standby_enable_wakeup_src : event 0x800 [ 0.063175] [exstandby]leave extended_standby_enable_wakeup_src : wakeup_gpi0 [ 0.063200] [exstandby]leave extended_standby_enable_wakeup_src : wakeup_gpi0 [ 0.063225] sunxi pm init [ 0.063353] pinctrl core: initialized pinctrl subsystem [ 0.073783] NET: Registered protocol family 16 [ 0.074436] DMA: preallocated 2048 KiB pool for atomic coherent allocations [ 0.074436] script_sysfs_init success [ 0.074436] sunxi_dump_init success [ 0.074436] gpiochip_add: registered GPIOs 0 to 383 on device: sunxi-pinctrl [ 0.074436] sunxi-pinctrl sunxi-pinctrl: initialized sunXi PIO driver [ 0.074436] hw-breakpoint: found 5 (+1 reserved) breakpoint and 4 watchpoint. [ 0.074436] hw-breakpoint: maximum watchpoint size is 8 bytes. [ 0.074436] script config pll_video to 297 Mhz [ 0.074448] script config pll_de to 864 Mhz [ 0.074470] script config pll_ve to 402 Mhz [ 0.074503] sunxi_default_clk_init [ 0.074519] try to set pll6ahb1 to 200000000 [ 0.074546] try to set ahb clk source to pll6ahb1 [ 0.074564] set ahb clk source to pll6ahb1 [ 0.074583] try to set ahb1 to 200000000 [ 0.074602] try to set apb1 to 100000000 [ 0.074934] ===fe3o4==== sunxi_root_procfs_attach ret:0 [ 0.080214] bio: create slab at 0 [ 0.080363] [ARISC] :sunxi-arisc driver v1.04 [ 0.094759] [ARISC] :arisc version: [v0.1.34] [ 0.171321] [ARISC] :sunxi-arisc driver v1.04 startup succeeded [ 0.180381] SCSI subsystem initialized [ 0.180567] usbcore: registered new interface driver usbfs [ 0.180645] usbcore: registered new interface driver hub [ 0.180684] usbcore: registered new device driver usb [ 0.180684] twi_chan_cfg()335 - [twi0] has no twi_regulator. [ 0.180684] twi_chan_cfg()335 - [twi1] has no twi_regulator. [ 0.180684] twi_chan_cfg()335 - [twi2] has no twi_regulator. [ 0.180684] Linux video capture interface: v2.00 [ 0.180694] Advanced Linux Sound Architecture Driver Version 1.0.25. [ 0.181165] Bluetooth: Core ver 2.16 [ 0.181213] NET: Registered protocol family 31 [ 0.181232] Bluetooth: HCI device and connection manager initialized [ 0.181257] Bluetooth: HCI socket layer initialized [ 0.181277] Bluetooth: L2CAP socket layer initialized [ 0.181318] Bluetooth: SCO socket layer initialized [ 0.181520] cfg80211: Calling CRDA to update world regulatory domain [ 0.181599] Switching to clocksource arch_sys_counter [ 0.192021] FS-Cache: Loaded [ 0.192297] CacheFiles: Loaded [ 0.201839] NET: Registered protocol family 2 [ 0.202107] IP route cache hash table entries: 32768 (order: 5, 131072 bytes) [ 0.202633] TCP established hash table entries: 131072 (order: 8, 1048576 by) [ 0.204247] TCP bind hash table entries: 65536 (order: 7, 786432 bytes) [ 0.205040] TCP: Hash tables configured (established 131072 bind 65536) [ 0.205064] TCP: reno registered [ 0.205084] UDP hash table entries: 512 (order: 2, 16384 bytes) [ 0.205128] UDP-Lite hash table entries: 512 (order: 2, 16384 bytes) [ 0.205407] NET: Registered protocol family 1 [ 0.205736] RPC: Registered named UNIX socket transport module. [ 0.205764] RPC: Registered udp transport module. [ 0.205782] RPC: Registered tcp transport module. [ 0.205801] RPC: Registered tcp NFSv4.1 backchannel transport module. [ 0.368203] hw perfevents: enabled with ARMv7 Cortex_A7 PMU driver, 5 countee [ 0.368348] sunxi_reg_init enter [ 0.369085] audit: initializing netlink socket (disabled) [ 0.369143] type=2000 audit(0.360:1): initialized [ 0.372253] highmem bounce pool size: 64 pages [ 0.373421] Installing knfsd (copyright (C) 1996 [email protected]). [ 0.374072] NTFS driver 2.1.30 [Flags: R/W]. [ 0.374195] fuse init (API version 7.18) [ 0.374897] Btrfs loaded [ 0.374932] msgmni has been set to 1471 [ 0.375932] io scheduler noop registered [ 0.375956] io scheduler deadline registered [ 0.376038] io scheduler cfq registered (default) [ 0.376457] [DISP]disp_module_init [ 0.376760] cmdline,disp= [ 0.395144] [DISP] Fb_map_kernel_logo,line:925:Fb_map_kernel_logo failed! [ 0.423097] Console: switching to colour frame buffer device 240x67 [ 0.451729] [DISP]disp_module_init finish [ 0.452010] sw_uart_get_devinfo()1503 - uart0 has no uart_regulator. [ 0.452161] sw_uart_get_devinfo()1503 - uart1 has no uart_regulator. [ 0.452307] sw_uart_get_devinfo()1503 - uart2 has no uart_regulator. [ 0.452857] uart0: ttyS0 at MMIO 0x1c28000 (irq = 32) is a SUNXI [ 0.453003] sw_uart_pm()890 - uart0 clk is already enable [ 0.453134] sw_console_setup()1233 - console setup baud 115200 parity n bitsn [ 0.645126] console [ttyS0] enabled [ 1.241849] uart1: ttyS1 at MMIO 0x1c28400 (irq = 33) is a SUNXI [ 1.242101] uart2: ttyS2 at MMIO 0x1c28800 (irq = 34) is a SUNXI [ 1.242570] sunxi_cmatest_init enter [ 1.242602] sunxi_cmatest_init success [ 1.246313] loop: module loaded [ 1.423178] sunxi_spi_chan_cfg()1355 - [spi-0] has no spi_regulator. [ 1.801619] sunxi_spi_chan_cfg()1355 - [spi-1] has no spi_regulator. [ 1.946137] spi spi0: master is unqueued, this is deprecated [ 1.958178] tun: Universal TUN/TAP device driver, 1.6 [ 1.969249] tun: (C) 1999-2004 Max Krasnyansky <[email protected]> [ 1.982383] PPP generic driver version 2.4.2 [ 1.992774] PPP BSD Compression module registered [ 2.003514] PPP Deflate Compression module registered [ 2.019959] PPP MPPE Compression module registered [ 2.030960] NET: Registered protocol family 24 [ 2.041542] PPTP driver version 0.8.5 [ 2.051494] ehci_hcd: USB 2.0 'Enhanced' Host Controller (EHCI) Driver [ 2.084578] sunxi-ehci sunxi-ehci.1: SW USB2.0 'Enhanced' Host Controller (Er [ 2.099289] sunxi-ehci sunxi-ehci.1: new USB bus registered, assigned bus nu1 [ 2.113961] sunxi-ehci sunxi-ehci.1: irq 104, io mem 0xf1c1a000 [ 2.140045] sunxi-ehci sunxi-ehci.1: USB 0.0 started, EHCI 1.00 [ 2.152902] hub 1-0:1.0: USB hub found [ 2.162783] hub 1-0:1.0: 1 port detected [ 2.193163] sunxi-ehci sunxi-ehci.2: SW USB2.0 'Enhanced' Host Controller (Er [ 2.207903] sunxi-ehci sunxi-ehci.2: new USB bus registered, assigned bus nu2 [ 2.222499] sunxi-ehci sunxi-ehci.2: irq 106, io mem 0xf1c1b000 [ 2.250036] sunxi-ehci sunxi-ehci.2: USB 0.0 started, EHCI 1.00 [ 2.262356] ehci_irq: highspeed device connect [ 2.273153] hub 2-0:1.0: USB hub found [ 2.283095] hub 2-0:1.0: 1 port detected [ 2.293466] ohci_hcd: USB 1.1 'Open' Host Controller (OHCI) Driver [ 2.326090] sunxi-ohci sunxi-ohci.2: SW USB2.0 'Open' Host Controller (OHCI)r [ 2.340358] sunxi-ohci sunxi-ohci.2: new USB bus registered, assigned bus nu3 [ 2.354520] sunxi-ohci sunxi-ohci.2: irq 107, io mem 0xf1c1b400 [ 2.424514] hub 3-0:1.0: USB hub found [ 2.434351] hub 3-0:1.0: 1 port detected [ 2.444637] Initializing USB Mass Storage driver... [ 2.455772] usbcore: registered new interface driver usb-storage [ 2.468086] USB Mass Storage support registered. [ 2.478899] usbcore: registered new interface driver ums-alauda [ 2.491303] usbcore: registered new interface driver ums-cypress [ 2.503731] usbcore: registered new interface driver ums-datafab [ 2.516035] usbcore: registered new interface driver ums_eneub6250 [ 2.528437] usbcore: registered new interface driver ums-freecom [ 2.540632] usbcore: registered new interface driver ums-isd200 [ 2.552627] usbcore: registered new interface driver ums-jumpshot [ 2.564770] usbcore: registered new interface driver ums-karma [ 2.576541] usbcore: registered new interface driver ums-onetouch [ 2.588539] usbcore: registered new interface driver ums-realtek [ 2.600395] usbcore: registered new interface driver ums-sddr09 [ 2.610047] usb 2-1: new high-speed USB device number 2 using sunxi-ehci [ 2.624731] usbcore: registered new interface driver ums-sddr55 [ 2.636556] usbcore: registered new interface driver ums-usbat [ 2.648347] usbcore: registered new interface driver usbserial [ 2.660012] usbserial: USB Serial Driver core [ 2.670054] usbcore: registered new interface driver option [ 2.681497] USB Serial support registered for GSM modem (1-port) [ 2.693777] file system registered [ 2.704175] android_usb gadget: Mass Storage Function, version: 2009/09/11 [ 2.717074] android_usb gadget: Number of LUNs=3 [ 2.727360] lun0: LUN: removable file: (no medium) [ 2.737999] lun1: LUN: removable file: (no medium) [ 2.748638] lun2: LUN: removable file: (no medium) [ 2.759482] android_usb gadget: android_usb ready [ 2.761132] hub 2-1:1.0: USB hub found [ 2.761262] hub 2-1:1.0: 4 ports detected [ 2.788628] uinput result 0 , vmouse_init [ 2.798738] mousedev: PS/2 mouse device common for all mice [ 2.810177] sunxikbd_init failed. [ 2.818920] ls_fetch_sysconfig_para: type err device_used = 0. [ 2.830685] =========script_get_err============ [ 2.840842] ltr_init: ls_fetch_sysconfig_para err. [ 2.851696] sunxi-rtc sunxi-rtc: rtc core: registered sunxi-rtc as rtc0 [ 2.864298] i2c /dev entries driver [ 2.873568] IR RC5(x) protocol handler initialized [ 2.884131] sunxi tsc version 0.1 [ 2.893053] tscdev_init: tsc driver is disabled [ 2.903281] sunxi cedar version 0.1 [ 2.912363] [cedar]: install start!!! [ 2.921661] [cedar]: install end!!! [ 2.930579] sunxi_wdt_init_module: sunxi WatchDog Timer Driver v1.0 [ 2.942768] sunxi_wdt_probe: devm_ioremap return wdt_reg 0xf1c20ca0, res->stf [ 2.954115] sunxi_wdt_probe: initialized (g_timeout=16s, g_nowayout=0) [ 2.971851] wdt_enable, write reg 0xf1c20cb8 val 0x00000000 [ 2.983253] timeout_to_interv, line 167 [ 2.992661] interv_to_timeout, line 189 [ 3.002019] wdt_set_tmout, write 0x000000b0 to mode reg 0xf1c20cb8, actual tc [ 3.016730] device-mapper: ioctl: 4.22.0-ioctl (2011-10-19) initialised: dm-m [ 3.031489] Bluetooth: HCI UART driver ver 2.2 [ 3.042139] [mmc]: SD/MMC/SDIO Host Controller Driver(v1.109 2014-12-4 20:511 [ 3.059078] [mmc]: get mmc0's sdc_power is null! [ 3.060209] usb 2-1.1: new low-speed USB device number 3 using sunxi-ehci [ 3.082751] [mmc]: get mmc1's sdc_power is null! [ 3.093453] [mmc]: get mmc1's 2xmode ok, val = 1 [ 3.104081] [mmc]: get mmc1's ddrmode ok, val = 1 [ 3.114210] [mmc]: MMC host used card: 0x3, boot card: 0x0, io_card 2 [ 3.127183] [mmc]: sdc0 set ios: clk 0Hz bm OD pm OFF vdd 3.3V width 1 timinB [ 3.145302] [mmc]: sdc1 set ios: clk 0Hz bm OD pm OFF vdd 3.3V width 1 timinB [ 3.164039] usbcore: registered new interface driver usbhid [ 3.175193] usbhid: USB HID core driver [ 3.187914] asoc: sndcodec sunxi-codec mapping ok [ 3.201419] asoc: sndhdmi sunxi-hdmiaudio.0 mapping ok [ 3.213352] generic-usb 0003:1A2C:0002.0001: input,hidraw0: USB HID v1.10 Ke0 [ 3.213396] oprofile: using arm/armv7-ca7 [ 3.241233] u32 classifier [ 3.244881] generic-usb 0003:1A2C:0002.0002: input,hidraw1: USB HID v1.10 De1 [ 3.267536] Actions configured [ 3.276671] Netfilter messages via NETLINK v0.30. [ 3.287367] nf_conntrack version 0.5.0 (15996 buckets, 63984 max) [ 3.301521] ctnetlink v0.93: registering with nfnetlink. [ 3.312330] NF_TPROXY: Transparent proxy support initialized, version 4.1.0 [ 3.325013] NF_TPROXY: Copyright (c) 2006-2007 BalaBit IT Ltd. [ 3.336742] xt_time: kernel timezone is -0000 [ 3.340214] usb 2-1.3: new low-speed USB device number 4 using sunxi-ehci [ 3.359362] IPv4 over IPv4 tunneling driver [ 3.369524] gre: GRE over IPv4 demultiplexor driver [ 3.380143] ip_gre: GRE over IPv4 tunneling driver [ 3.391155] ip_tables: (C) 2000-2006 Netfilter Core Team [ 3.402381] arp_tables: (C) 2002 David S. Miller [ 3.412771] TCP: cubic registered [ 3.421662] Initializing XFRM netlink socket [ 3.431795] NET: Registered protocol family 10 [ 3.442852] Mobile IPv6 [ 3.450781] ip6_tables: (C) 2000-2006 Netfilter Core Team [ 3.462119] IPv6 over IPv4 tunneling driver [ 3.472798] NET: Registered protocol family 17 [ 3.477299] generic-usb 0003:0458:003A.0003: input,hidraw2: USB HID v1.11 Mo0 [ 3.501841] NET: Registered protocol family 15 [ 3.512341] Bluetooth: RFCOMM TTY layer initialized [ 3.523237] Bluetooth: RFCOMM socket layer initialized [ 3.534379] Bluetooth: RFCOMM ver 1.11 [ 3.543939] Bluetooth: BNEP (Ethernet Emulation) ver 1.3 [ 3.555283] Bluetooth: BNEP filters: protocol multicast [ 3.566535] Bluetooth: HIDP (Human Interface Emulation) ver 1.2 [ 3.578657] L2TP core driver, V2.0 [ 3.587868] PPPoL2TP kernel driver, V2.0 [ 3.597615] L2TP IP encapsulation support (L2TPv3) [ 3.608392] L2TP netlink interface [ 3.617577] L2TP ethernet pseudowire support (L2TPv3) [ 3.628675] VFP support v0.3: implementor 41 architecture 2 part 30 variant 5 [ 3.642653] ThumbEE CPU extension supported. [ 3.652813] Registering SWP/SWPB emulation handler [ 3.664258] cmdline,disp= [ 3.672598] [HDMI] power vcc-hdmi-18 [ 3.712638] sunxi-rtc sunxi-rtc: setting system clock to 1970-01-01 00:58:08) [ 3.727058] ths_fetch_sysconfig_para: type err device_used = 1. [ 3.740412] CPU Budget:Register notifier [ 3.750327] CPU Budget:register Success [ 3.759994] sunxi-budget-cooling sunxi-budget-cooling: Cooling device regist0 [ 3.777719] [rf_pm]: select module num is 7 [ 3.787905] [rf_pm]: module power0 name vcc-wifi-33 [ 3.798775] [rf_pm]: failed to fetch module_power1 [ 3.809550] [rf_pm]: mod has no chip_en gpio [ 3.819679] [rf_pm]: failed to fetch lpo_use_apclk [ 3.830335] [rf_pm]: regulator on. [ 3.839563] [wifi_pm]: wifi gpio init is OK !! [ 3.849774] ALSA device list: [ 3.858212] #0: audiocodec [ 3.866437] #1: sndhdmi [ 3.876576] Freeing init memory: 3384K [ 4.125051] [mmc]: mmc 0 detect change, present 1 [ 4.320100] [DISP] disp_device_attached_and_enable,line:159:attched ok, mgr09 [ 4.640076] [mmc]: sdc0 set ios: clk 0Hz bm PP pm UP vdd 3.3V width 1 timingB [ 4.659232] [mmc]: sdc0 power_supply is null [ 4.690048] [mmc]: sdc0 set ios: clk 400000Hz bm PP pm ON vdd 3.3V width 1 tB [ 4.722355] [mmc]: *** sunxi_mci_dump_errinfo(L826): smc 0 err, cmd 52, RTO! [ 4.738049] [mmc]: *** sunxi_mci_dump_errinfo(L826): smc 0 err, cmd 52, RTO! [ 4.748027] [mmc]: sdc0 set ios: clk 400000Hz bm PP pm ON vdd 3.3V width 1 tB [ 4.772408] [mmc]: sdc0 set ios: clk 400000Hz bm PP pm ON vdd 3.3V width 1 tB [ 4.790570] *******************Try sdio******************* [ 4.803242] [mmc]: *** sunxi_mci_dump_errinfo(L826): smc 0 err, cmd 5, RTO ! [ 4.817944] [mmc]: *** sunxi_mci_dump_errinfo(L826): smc 0 err, cmd 5, RTO ! [ 4.832484] [mmc]: *** sunxi_mci_dump_errinfo(L826): smc 0 err, cmd 5, RTO ! [ 4.846454] [mmc]: *** sunxi_mci_dump_errinfo(L826): smc 0 err, cmd 5, RTO ! [ 4.856432] *******************Try sd ******************* [ 4.870650] [mmc]: sdc0 set ios: clk 400000Hz bm PP pm ON vdd 3.3V width 1 tB [ 4.885745] [mmc]: sdc0 set ios: clk 400000Hz bm PP pm ON vdd 3.3V width 1 tB [ 4.903221] [mmc]: sdc0 set ios: clk 400000Hz bm PP pm ON vdd 3.3V width 1 tB [ 4.941513] [mmc]: sdc0 set ios: clk 25000000Hz bm PP pm ON vdd 3.3V width 1B [ 4.958691] [mmc]: sdc0 set ios: clk 25000000Hz bm PP pm ON vdd 3.3V width 1B [ 4.973681] [mmc]: sdc0 set ios: clk 50000000Hz bm PP pm ON vdd 3.3V width 1B [ 4.988612] [mmc]: sdc0 set ios: clk 50000000Hz bm PP pm ON vdd 3.3V width 4B [ 5.003466] mmc0: new high speed SDHC card at address 59b4 [ 5.014511] mmcblk0: mmc0:59b4 SD 14.7 GiB [ 5.025223] mmcblk0: p1 p2 [ 5.033423] *******************sd init ok******************* [ 5.959243] EXT4-fs (mmcblk0p2): couldn't mount as ext3 due to feature incoms [ 6.050977] EXT4-fs (mmcblk0p2): couldn't mount as ext2 due to feature incoms [ 6.174425] EXT4-fs (mmcblk0p2): mounted filesystem with ordered data mode. ) [ 6.670244] systemd[1]: systemd 215 running in system mode. (+PAM +AUDIT +SE) [ 6.691605] systemd[1]: Detected architecture 'arm'. [ 6.755740] systemd[1]: Failed to insert module 'autofs4' [ 6.770453] systemd[1]: Set hostname to . [ 7.081716] systemd[1]: Starting Forward Password Requests to Wall Directory. [ 7.095354] systemd[1]: Started Forward Password Requests to Wall Directory . [ 7.108611] systemd[1]: Expecting device dev-ttyS0.device... [ 7.125093] systemd[1]: Starting Remote File Systems (Pre). [ 7.146369] systemd[1]: Reached target Remote File Systems (Pre). [ 7.158091] systemd[1]: Starting Encrypted Volumes. [ 7.173667] systemd[1]: Reached target Encrypted Volumes. [ 7.184582] systemd[1]: Starting Dispatch Password Requests to Console Direc. [ 7.198511] systemd[1]: Started Dispatch Password Requests to Console Direct. [ 7.212295] systemd[1]: Starting Paths. [ 7.226768] systemd[1]: Reached target Paths. [ 7.236604] systemd[1]: Set up automount Arbitrary Executable File Formats F. [ 7.252059] systemd[1]: Starting Swap. [ 7.266476] systemd[1]: Reached target Swap. [ 7.276134] systemd[1]: Expecting device dev-mmcblk0p1.device... [ 7.292951] systemd[1]: Starting Root Slice. [ 7.307935] systemd[1]: Created slice Root Slice. [ 7.318107] systemd[1]: Starting User and Session Slice. [ 7.334425] systemd[1]: Created slice User and Session Slice. [ 7.345839] systemd[1]: Starting /dev/initctl Compatibility Named Pipe. [ 7.363916] systemd[1]: Listening on /dev/initctl Compatibility Named Pipe. [ 7.376868] systemd[1]: Starting Delayed Shutdown Socket. [ 7.393658] systemd[1]: Listening on Delayed Shutdown Socket. [ 7.405165] systemd[1]: Starting Journal Socket (/dev/log). [ 7.421960] systemd[1]: Listening on Journal Socket (/dev/log). [ 7.433592] systemd[1]: Starting udev Control Socket. [ 7.454787] systemd[1]: Listening on udev Control Socket. [ 7.465911] systemd[1]: Starting udev Kernel Socket. [ 7.481934] systemd[1]: Listening on udev Kernel Socket. [ 7.492957] systemd[1]: Starting Journal Socket. [ 7.508824] systemd[1]: Listening on Journal Socket. [ 7.519583] systemd[1]: Starting System Slice. [ 7.535252] systemd[1]: Created slice System Slice. [ 7.545943] systemd[1]: Started File System Check on Root Device. [ 7.557945] systemd[1]: Starting system-getty.slice. [ 7.574479] systemd[1]: Created slice system-getty.slice. [ 7.585825] systemd[1]: Starting system-serial\x2dgetty.slice. [ 7.603414] systemd[1]: Created slice system-serial\x2dgetty.slice. [ 7.615778] systemd[1]: Mounted POSIX Message Queue File System. [ 7.627822] systemd[1]: Mounted Huge Pages File System. [ 7.639198] systemd[1]: Starting Create list of required static device nodes. [ 7.731000] systemd[1]: Starting udev Coldplug all Devices... [ 7.871485] systemd[1]: Mounting Debug File System... [ 7.966644] systemd[1]: Starting Load Kernel Modules... [ 8.042746] systemd[1]: Started Set Up Additional Binary Formats. [ 8.058036] systemd[1]: Starting LSB: Set keymap... [ 8.133882] RTL871X: module init start [ 8.146102] RTL871X: rtl8189es v4.3.0.4_11916.20140724_COB [ 8.158888] RTL871X: build time: Aug 27 2015 21:55:02 [ 8.170462] systemd[1]: Starting Journal Service... [ 8.183227] [wifi_pm]: set wl_reg_on 0 ! [ 8.244330] [mmc]: sdc1 set ios: clk 0Hz bm PP pm UP vdd 3.3V width 1 timingB [ 8.262102] [mmc]: sdc1 power_supply is null [ 8.279937] systemd[1]: Started Journal Service. [ 8.290086] [mmc]: sdc1 set ios: clk 400000Hz bm PP pm ON vdd 3.3V width 1 tB [ 8.312427] [mmc]: *** sunxi_mci_dump_errinfo(L826): smc 1 err, cmd 52, RTO! [ 8.313260] [mmc]: *** sunxi_mci_dump_errinfo(L826): smc 1 err, cmd 52, RTO! [ 8.313287] [mmc]: sdc1 set ios: clk 400000Hz bm PP pm ON vdd 3.3V width 1 tB [ 8.315800] [mmc]: sdc1 set ios: clk 400000Hz bm PP pm ON vdd 3.3V width 1 tB [ 8.317733] [mmc]: *** sunxi_mci_dump_errinfo(L826): smc 1 err, cmd 8, RTO ! [ 8.317776] *******************Try sdio******************* [ 8.318590] [mmc]: *** sunxi_mci_dump_errinfo(L826): smc 1 err, cmd 5, RTO ! [ 8.319436] [mmc]: *** sunxi_mci_dump_errinfo(L826): smc 1 err, cmd 5, RTO ! [ 8.320273] [mmc]: *** sunxi_mci_dump_errinfo(L826): smc 1 err, cmd 5, RTO ! [ 8.321108] [mmc]: *** sunxi_mci_dump_errinfo(L826): smc 1 err, cmd 5, RTO ! [ 8.321137] *******************Try sd ******************* [ 8.321950] [mmc]: *** sunxi_mci_dump_errinfo(L826): smc 1 err, cmd 55, RTO! [ 8.322781] [mmc]: *** sunxi_mci_dump_errinfo(L826): smc 1 err, cmd 55, RTO! [ 8.323614] [mmc]: *** sunxi_mci_dump_errinfo(L826): smc 1 err, cmd 55, RTO! [ 8.324444] [mmc]: *** sunxi_mci_dump_errinfo(L826): smc 1 err, cmd 55, RTO! [ 8.324470] *******************Try mmc******************* [ 8.324482] [mmc]: sdc1 set ios: clk 400000Hz bm OD pm ON vdd 3.3V width 1 tB [ 8.325422] [mmc]: *** sunxi_mci_dump_errinfo(L826): smc 1 err, cmd 1, RTO ! [ 8.325457] [mmc]: sdc1 set ios: clk 0Hz bm OD pm OFF vdd 3.3V width 1 timinB [ 8.325584] [mmc]: sdc1 power_supply is null [ 8.328187] [mmc]: sdc1 set ios: clk 0Hz bm PP pm UP vdd 3.3V width 1 timingB [ 8.329726] [mmc]: sdc1 power_supply is null [ 8.344315] [wifi_pm]: set wl_reg_on 1 ! [ 8.344552] RTL871X: module init ret=0 [ 8.350089] [mmc]: sdc1 set ios: clk 300000Hz bm PP pm ON vdd 3.3V width 1 tB [ 8.372625] [mmc]: *** sunxi_mci_dump_errinfo(L826): smc 1 err, cmd 52, RTO! [ 8.373723] [mmc]: *** sunxi_mci_dump_errinfo(L826): smc 1 err, cmd 52, ! [ 8.373747] [mmc]: sdc1 set ios: clk 300000Hz bm PP pm ON vdd 3.3V width 1 tB [ 8.376360] [mmc]: sdc1 set ios: clk 300000Hz bm PP pm ON vdd 3.3V width 1 tB [ 8.378544] [mmc]: *** sunxi_mci_dump_errinfo(L826): smc 1 err, cmd 8, RTO ! [ 8.378566] *******************Try sdio******************* [ 8.379644] [mmc]: *** sunxi_mci_dump_errinfo(L826): smc 1 err, cmd 5, RTO ! [ 8.380734] [mmc]: *** sunxi_mci_dump_errinfo(L826): smc 1 err, cmd 5, RTO ! [ 8.381824] [mmc]: *** sunxi_mci_dump_errinfo(L826): smc 1 err, cmd 5, RTO ! [ 8.382914] [mmc]: *** sunxi_mci_dump_errinfo(L826): smc 1 err, cmd 5, RTO ! [ 8.382934] *******************Try sd ******************* [ 8.384010] [mmc]: *** sunxi_mci_dump_errinfo(L826): smc 1 err, cmd 55, RTO! [ 8.385100] [mmc]: *** sunxi_mci_dump_errinfo(L826): smc 1 err, cmd 55, RTO! [ 8.386191] [mmc]: *** sunxi_mci_dump_errinfo(L826): smc 1 err, cmd 55, RTO! [ 8.387280] [mmc]: *** sunxi_mci_dump_errinfo(L826): smc 1 err, cmd 55, RTO! [ 8.387301] *******************Try mmc******************* [ 8.387309] [mmc]: sdc1 set ios: clk 300000Hz bm OD pm ON vdd 3.3V width 1 tB [ 8.388491] [mmc]: *** sunxi_mci_dump_errinfo(L826): smc 1 err, cmd 1, RTO ! [ 8.388516] [mmc]: sdc1 set ios: clk 0Hz bm OD pm OFF vdd 3.3V width 1 timinB [ 8.388624] [mmc]: sdc1 power_supply is null [ 8.391204] [mmc]: sdc1 set ios: clk 0Hz bm PP pm UP vdd 3.3V width 1 timingB [ 8.392727] [mmc]: sdc1 power_supply is null [ 8.410029] [mmc]: sdc1 set ios: clk 200000Hz bm PP pm ON vdd 3.3V width 1 tB [ 8.433142] [mmc]: *** sunxi_mci_dump_errinfo(L826): smc 1 err, cmd 52, RTO! [ 8.434766] [mmc]: *** sunxi_mci_dump_errinfo(L826): smc 1 err, cmd 52, RTO! [ 8.434789] [mmc]: sdc1 set ios: clk 200000Hz bm PP pm ON vdd 3.3V width 1 tB [ 8.437654] [mmc]: sdc1 set ios: clk 200000Hz bm PP pm ON vdd 3.3V width 1 tB [ 8.440397] [mmc]: *** sunxi_mci_dump_errinfo(L826): smc 1 err, cmd 8, RTO ! [ 8.440425] *******************Try sdio******************* [ 8.442036] [mmc]: *** sunxi_mci_dump_errinfo(L826): smc 1 err, cmd 5, RTO ! [ 8.443662] [mmc]: *** sunxi_mci_dump_errinfo(L826): smc 1 err, cmd 5, RTO ! [ 8.445286] [mmc]: *** sunxi_mci_dump_errinfo(L826): smc 1 err, cmd 5, RTO ! [ 8.446911] [mmc]: *** sunxi_mci_dump_errinfo(L826): smc 1 err, cmd 5, RTO ! [ 8.446931] *******************Try sd ******************* [ 8.448542] [mmc]: *** sunxi_mci_dump_errinfo(L826): smc 1 err, cmd 55, RTO! [ 8.450166] [mmc]: *** sunxi_mci_dump_errinfo(L826): smc 1 err, cmd 55, RTO! [ 8.451792] [mmc]: *** sunxi_mci_dump_errinfo(L826): smc 1 err, cmd 55, RTO! [ 8.453417] [mmc]: *** sunxi_mci_dump_errinfo(L826): smc 1 err, cmd 55, RTO! [ 8.453436] *******************Try mmc******************* [ 8.453445] [mmc]: sdc1 set ios: clk 200000Hz bm OD pm ON vdd 3.3V width 1 tB [ 8.455187] [mmc]: *** sunxi_mci_dump_errinfo(L826): smc 1 err, cmd 1, RTO ! [ 8.455210] [mmc]: sdc1 set ios: clk 0Hz bm OD pm OFF vdd 3.3V width 1 timinB [ 8.455312] [mmc]: sdc1 power_supply is null [ 8.457883] [mmc]: sdc1 set ios: clk 0Hz bm PP pm UP vdd 3.3V width 1 timingB [ 8.459405] [mmc]: sdc1 power_supply is null [ 8.480037] [mmc]: sdc1 set ios: clk 150000Hz bm PP pm ON vdd 3.3V width 1 tB [ 8.503675] [mmc]: *** sunxi_mci_dump_errinfo(L826): smc 1 err, cmd 52, RTO! [ 8.505846] [mmc]: *** sunxi_mci_dump_errinfo(L826): smc 1 err, cmd 52, RTO! [ 8.505871] [mmc]: sdc1 set ios: clk 150000Hz bm PP pm ON vdd 3.3V width 1 tB [ 8.508998] [mmc]: sdc1 set ios: clk 150000Hz bm PP pm ON vdd 3.3V width 1 tB [ 8.512301] [mmc]: *** sunxi_mci_dump_errinfo(L826): smc 1 err, cmd 8, RTO ! [ 8.512321] *******************Try sdio******************* [ 8.514466] [mmc]: *** sunxi_mci_dump_errinfo(L826): smc 1 err, cmd 5, RTO ! [ 8.516626] [mmc]: *** sunxi_mci_dump_errinfo(L826): smc 1 err, cmd 5, RTO ! [ 8.518786] [mmc]: *** sunxi_mci_dump_errinfo(L826): smc 1 err, cmd 5, RTO ! [ 8.520946] [mmc]: *** sunxi_mci_dump_errinfo(L826): smc 1 err, cmd 5, RTO ! [ 8.520967] *******************Try sd ******************* [ 8.523113] [mmc]: *** sunxi_mci_dump_errinfo(L826): smc 1 err, cmd 55, RTO! [ 8.525273] [mmc]: *** sunxi_mci_dump_errinfo(L826): smc 1 err, cmd 55, RTO! [ 8.527433] [mmc]: *** sunxi_mci_dump_errinfo(L826): smc 1 err, cmd 55, RTO! [ 8.529593] [mmc]: *** sunxi_mci_dump_errinfo(L826): smc 1 err, cmd 55, RTO! [ 8.529613] *******************Try mmc******************* [ 8.529622] [mmc]: sdc1 set ios: clk 150000Hz bm OD pm ON vdd 3.3V width 1 tB [ 8.531921] [mmc]: *** sunxi_mci_dump_errinfo(L826): smc 1 err, cmd 1, RTO ! [ 8.531944] [mmc]: sdc1 set ios: clk 0Hz bm OD pm OFF vdd 3.3V width 1 timinB [ 8.532046] [mmc]: sdc1 power_supply is null [ 10.415347] systemd-udevd[112]: starting version 215 [ 17.043196] EXT4-fs (mmcblk0p2): re-mounted. Opts: errors=remount-ro [ 18.648096] systemd-journald[106]: Received request to flush runtime journal1 [ 29.440066] CPU Budget: Temperature: 75 Limit state:1 item[1200000,4,-1,0 0] [ 29.452533] [ddrfreq] temperature=75 C, ddr freq up [ 29.462581] CPU Budget:update CPU 0 cpufreq max to 1200000 min to 480000 [ 30.480073] CPU Budget: Temperature: 75 Limit state:0 item[1536000,4,-1,0 0] [ 30.494021] [ddrfreq] temperature=73 C, ddr freq up [ 33.500092] CPU Budget: Temperature: 75 Limit state:1 item[1200000,4,-1,0 0] [ 33.500104] [ddrfreq] temperature=75 C, ddr freq up [ 33.500133] CPU Budget:update CPU 0 cpufreq max to 1200000 min to 480000 [ 34.510110] CPU Budget: Temperature: 75 Limit state:0 item[1536000,4,-1,0 0] [ 34.525955] [ddrfreq] temperature=73 C, ddr freq up Debian GNU/Linux 8 OrangePI ttyS0 OrangePI login: |
The boot time to the login window is about 45 seconds with my SD card.
Creating Your Own Linux Image for Orange Pi Allwinner H3 Boards
Loboris did not only provide binary images, but also the scripts to create a full image from scratch. It won’t build the Linux kernel from source however, but you can download the Linux SDK from Orange Pi website if you wish to customize the kernel or build your own drivers.
You can run the scripts to create an image in a Ubuntu or Debian computer, or even Orange Pi board itself.
First, download and extract make_linux.tar.gz from Mega, install some dependencies:
|
1 2 3 4 |
sudo apt-get install debootstrap qemu-user-static mkdir ~/edev/orangepi2 tar xvf make_linux.tar.gz cd make_linux |
Now you’ll need to edit param.sh with you favorite editor:
|
1 2 3 4 5 6 7 8 9 10 11 12 13 14 15 16 17 18 19 20 21 22 23 24 25 26 27 28 29 30 31 32 33 34 35 36 37 38 39 40 41 42 43 44 45 46 47 48 49 50 51 52 53 54 55 56 57 58 59 60 61 62 63 64 65 66 67 68 69 70 71 72 73 74 75 76 77 78 79 80 81 82 83 84 85 86 87 88 89 90 91 92 93 94 95 96 97 98 99 100 101 102 103 104 105 106 107 108 109 110 111 112 113 114 115 116 117 118 119 120 121 122 123 124 125 126 127 128 129 |
# ===================================================== # ==== P A R A M E T E R S ============================ # ===================================================== # ***************************************************** # Set to "yes" to create realy minimal image * # ***************************************************** ONLY_BASE="yes" # ***************************************************** # Set hostname, user to be created * # and root and user passwords * # ***************************************************** HOSTNAME="CNXSoftPI" USER="cnxsoft" ROOTPASS="orangepi2" USERPASS="orangepi2" # ***************************************************** # Set timezone, for default (HOST'S) set _timezone="" * # ***************************************************** _timezone="Etc/UTC" #_timezone="" # ***************************************************** # SET IF YOU WANT TO INSTALL SPECIFIC LANGUAGE, * # COMMENT FOR DEFAULT (HOST) settings * # ***************************************************** LANGUAGE="en" LANG="en_US.UTF-8" # ***************************************************** # Set the base name of your image. * # Distro name is automaticaty appended, and the image * # will be "image_name-distro.img" * # --------------------------------------------------- * # IF image_name="", image file won't be created, * # installation will be created in local directories * # linux-$distro & boot-$distro * # YOU CAN CREATE THE IMAGE LATER RUNNING: * # sudo ./image_from_dir <DEVICE|IMAGE> * # === IT IS THE RECOMMENDED WAY OF IMAGE CREATION === * # --------------------------------------------------- * # IF image_name is BLOCK DEVICE (/dev/sdXn) * # LINUX filesystem will be created directly on it * # Partition must exist ! * # IF _format="" partition will NOT be formated * # otherwyse it will be formated with specified format * # ***************************************************** image_name="" #image_name="minimal" #image_name="/dev/sdg" # ***************************************************** # Filesystem type for linux partition * # If btrfs is selectet, partition will be mounted * # "compressed" option, you can save some sdcard space * # --------------------------------------------------- * # Used when creating the system directly on SDCard or * # SDCard image file and in "image_from_dir" script * # ***************************************************** _format="ext4" #_format="btrfs" # ***************************************************** # SD Card partitions sizes in MB (1024 * 1024 bytes) * # --------------------------------------------------- * # If creating on physical sdcard (not image) you can * # set "linuxsize=0" to use maximum sdcard size * # --------------------------------------------------- * # When creating the image with "image_from_dir" script* # "linuxsize" is calculated from directory size * # ***************************************************** fatsize=64 linuxsize=800 # ***************************************************** # Select ubuntu/debian distribution and repository * # === SELECT ONLY ONE distro AND ONE repo === * # ***************************************************** # === Ubuntu === #distro="precise" #distro="trusty" #distro="utopic" distro="vivid" repo="http://ports.ubuntu.com/ubuntu-ports" # === Debian === #distro="wheezy" #distro="jessie" #repo="http://ftp.hr.debian.org/debian" raspbian="no" # === Raspbian === #distro="wheezy" #distro="jessie" #repo="http://archive.raspbian.org/raspbian" #raspbian="yes" # ****************************************************** # If creating the image, you can xz compress the image * # after creation and make the md5sum file * # to do that automatically, set _compress="yes" * # ****************************************************** _compress="yes" # ===================================================== # IF YOU WANT TO HAVE BOOT FILES ON EXT4 PARTITION = # AND NOT ON SEPARATE FAT16 PARTITION = # set _boot_on_ext4="yes" and = # FAT partitin won't be created = # --------------------------------------------------- = # DO NOT CHANGE FOR NOW ! = # ===================================================== _boot_on_ext4="no" # ^^^^ P A R A M E T E R S ^^^^^^^^^^^^^^^^^^^^^^^^^^^^ # ^^^^^^^^^^^^^^^^^^^^^^^^^^^^^^^^^^^^^^^^^^^^^^^^^^^^^ |
I’ve only modified the first two sections of the file in order to build a minimal Ubuntu vivid image with CNXSoftPI as the hostname.
Let’s start the build:
|
1 |
sudo ./create_image |
It took less than 20 minutes on my machine. If you want to modify the rootfs, you can chroot in linux-vidid directory:
|
1 |
sudo chroot linux-vivid /usr/bin/qemu-arm-static -cpu cortex-a9 /bin/bash |
Finally, once you are done, you can create a Ubuntu vivid image with:
|
1 |
sudo ./image_from_dir linux-vivid <image_name> |
This will create <image_name>.img that you can dump to a micro SD card or explained in the first part of this post, as well as <image_name).img.xz that you can distribute.
If you want to go further you may want to checkout Orange Pi Wiki, and checkout what others have done so far on Orange Pi Forums.

Jean-Luc started CNX Software in 2010 as a part-time endeavor, before quitting his job as a software engineering manager, and starting to write daily news, and reviews full time later in 2011.
Support CNX Software! Donate via cryptocurrencies, become a Patron on Patreon, or purchase goods on Amazon or Aliexpress


