
Last year, I wrote instructions and provided a download link about a minimal image for Raspberry Pi based on Raspbian. The compressed image is 84MB, and the good thing about it is that you can just use apt-get to install packages. The problem is that it’s not actually that small as once it is uncompressed the rootfs is still a massive 414 MB.
So today, I’ll explain how to create a smaller (and custom) image using the Yocto Project, a platform that let you build an embedded Linux distribution matching exactly your project’s requirements. Other advantages are that the build is configurable with config files, so it’s easily reproducible with a few command lines, and it might turn out to be useful to learn more about the Yocto Project as many boards and SoC are now making use of the framework, including Freescale i.MX6 (Wandboard, Olinuxino-imx233, Sabrelite, etc…), the Beagleboard, and Minnowboard to name a few.
If you just want the image, you can download the compressed image (12MB), extract it, use dd to copy it to your SD card, and gparted to resize the rootfs. This is an image that’s only useful for (headless) embedded systems, but more likely than not, you’d want to customize it with the instructions below.
I got started with instructions from pimpmypi, but these are a little old, and now everything seems much simpler. I’ve performed the steps below in a PC running Ubuntu 12.04 LTS, and with most dependencies required (e.g. build-essentials, git) already installed.
First you need to get poky and the meta layer for Raspberry Pi:
|
1 2 3 4 5 |
mkdir yocto cd yocto git clone -b dylan git://git.yoctoproject.org/poky.git cd poky git clone -b dylan git://git.yoctoproject.org/meta-raspberrypi |
dylan is the codename of the latest Yocto Project release (Version 1.4).
Then you can run the following command line to initialize some environment variables and the build directory:
|
1 |
. oe-init-build-env build |
Now edit conf/local.conf with vim or nano to optimize the build speed depending on your PC processor (generally number of threads/cores +1), set the machine as Raspberry Pi, and possibly adjust the GPU memory, by updating or adding the corresponding lines:
|
1 2 3 4 |
BB_NUMBER_THREADS = "9" PARALLEL_MAKE = "-j 9" MACHINE ?= "raspberrypi" GPU_MEM = "16" |
You may want to check the README if you want to overclock your R-Pi board, change the rootfs type, add VC-1 or/and MPEG-2 licenses, or disable overscan. All those extra options, including GPU_MEM, can be added by editing config.txt directly in the SD card, but doing it before the build makes the steps automatically reproducible.
You also need to add the path to meta-raspberrypi in conf/bblayers file, so that it looks like:
|
1 2 3 4 5 6 |
BBLAYERS ?= " \ /home/jaufranc/edev/rpi/yocto/poky/meta \ /home/jaufranc/edev/rpi/yocto/poky/meta-yocto \ /home/jaufranc/edev/rpi/yocto/poky/meta-yocto-bsp \ <strong> /home/jaufranc/edev/rpi/yocto/poky/meta-raspberrypi \</strong> " |
Now we’re ready to build the image. There are two images possible: rpi-basic-image and rpi-hwup-image, both of will provide a minimal image, but rpi-basic-image will add ssh-server-dropbear (for ssh server support) and splash (for the splash screen). Let’s go with rpi-basic-image:
|
1 |
bitbake rpi-basic-image |
It took just over one hour in my computer, but it may take less or much more time depending on your computer and/or Internet connection.
Once the build is complete you should see a file called tmp/deploy/images/rpi-basic-image-raspberrypi.rpi-sdimg, which is a symlink to the binary image you want to dump on your SD card. The file size is 80MB, but it can be compressed to 12MB if you want to distribute over the Internet:
|
1 |
7z a -t7z -m0=lzma -mx=9 -mfb=64 -md=32m -ms=on rpi-basic-image-raspberrypi-20130702123605.rootfs.rpi-sdimg.7z rpi-basic-image-raspberrypi-20130702123605.rootfs.rpi-sdimg |
Now insert an SD card in your Linux computer, and check the device name:
|
1 2 3 4 5 6 7 8 9 10 11 |
lsblk NAME MAJ:MIN RM SIZE RO TYPE MOUNTPOINT sr0 11:0 1 1024M 0 rom sda 8:0 0 931.5G 0 disk ├─sda1 8:1 0 915.5G 0 part / ├─sda2 8:2 0 1K 0 part └─sda5 8:5 0 16G 0 part [SWAP] sdc 8:32 0 931.5G 0 disk └─sdc1 8:33 0 931.5G 0 part /media/SEAGATE EXTENSION sdb 8:16 1 241.3M 0 disk └─sdb1 8:17 1 240.3M 0 part |
Since I have a USB hard drive attached to my computer I do this all the time, because sometimes the SD card is /dev/sdb, and other times /dev/sdc, and if I use the wrong one, all my data will be lost.
Let’s copy the image with dd or dd.sh:
|
1 |
sudo dd.sh if=tmp/deploy/images/rpi-basic-image-raspberrypi.rpi-sdimg of=/dev/sdb bs=1M |
Now remove the SD card, and reinsert it. The ext-3 partition in the image is only 55MB, so to make full use of your SD card storage capacity, you need to resize the partition with the command line, or easier, with gparted. Resizing from the Raspberry Pi won’t work with this image, as resize2fs utility is not available.
We’re now ready to try it out. Let’s insert the SD card into the Raspberry Pi, and connect the power. You can access the console via HDMI, the UART port, or if you’ve connected an Ethernet cable via ssh.
Near the end of the boot, or when you access the board with SSH, you should see:
|
1 2 3 |
Poky 9.0 (Yocto Project 1.4 Reference Distro) 1.4.1 raspberrypi ttyAMA0 raspberrypi login: |
Login with as root without password.
Let’s check some details about the kernel:
|
1 2 |
uname -a Linux raspberrypi 3.6.11 #1 PREEMPT Tue Jul 2 18:05:23 ICT 2013 armv6l GNU/Linux |
busybox:
|
1 2 3 4 5 6 7 8 9 10 11 12 13 14 15 16 17 18 19 20 |
BusyBox v1.20.2 (2013-07-02 18:09:51 ICT) multi-call binary. ... Currently defined functions: [, [[, ar, ash, awk, basename, bunzip2, bzcat, cat, chattr, chgrp, chmod, chown, chroot, chvt, clear, cmp, cp, cpio, cut, date, dc, dd, deallocvt, df, diff, dirname, dmesg, dnsdomainname, du, dumpkmap, dumpleases, echo, egrep, env, expr, false, fbset, fdisk, fgrep, find, flock, free, fsck, fsck.minix, fuser, grep, groups, gunzip, gzip, halt, head, hexdump, hostname, hwclock, id, ifconfig, ifdown, ifup, insmod, ip, kill, killall, klogd, less, ln, loadfont, loadkmap, logger, logname, logread, losetup, ls, lsmod, md5sum, microcom, mkdir, mkfifo, mkfs.minix, mknod, mkswap, mktemp, modprobe, more, mount, mv, nc, netstat, nohup, nslookup, od, openvt, patch, pidof, ping, ping6, pivot_root, poweroff, printf, ps, pwd, rdate, readlink, realpath, reboot, renice, reset, rfkill, rm, rmdir, rmmod, route, run-parts, sed, seq, setconsole, sh, sleep, sort, start-stop-daemon, stat, strings, stty, swapoff, swapon, switch_root, sync, sysctl, syslogd, tail, tar, tee, telnet, test, tftp, time, top, touch, tr, traceroute, true, tty, udhcpc, udhcpd, umount, uname, uniq, unzip, uptime, users, usleep, vi, watch, wc, wget, which, who, whoami, xargs, yes, zcat |
available space:
|
1 2 3 4 5 6 7 8 |
df -h Filesystem Size Used Available Use% Mounted on /dev/root 212.5M 42.8M 158.9M 21% / devtmpfs 108.0M 4.0K 108.0M 0% /dev tmpfs 116.0M 188.0K 115.8M 0% /var/volatile tmpfs 116.0M 0 116.0M 0% /dev/shm tmpfs 116.0M 0 116.0M 0% /media/ram /dev/mmcblk0p1 19.9M 8.2M 11.7M 41% /media/mmcblk0p1 |
and available memory:
|
1 2 3 4 5 |
free -h total used free shared buffers Mem: 237628 19872 217756 0 1456 -/+ buffers: 18416 219212 Swap: 0 0 0 |
We’ve got a recent kernel, only 42.8MB of the root file system is used, and 232MB RAM available on a Raspberry Pi Model B with 256 MB RAM.
Let’s check the kernel config on the board:
|
1 |
zcat /proc/config.gz |
You can download the kernel config for details.
If you want to save even more memory, or add features, you can change the kernel configuration with:
|
1 |
bitbake virtual/kernel -c menuconfig |
and build the kernel with:
|
1 |
bitbake virtual/kernel |
Busybox can also be tuned with the commands:
|
1 2 |
bitbake busybox -c menuconfig bitbake busybox |
The images recipes are located in poky/meta-raspberrypi/recipes-core/images, and you you could copy rpi-basic-image.bb to rpi-myappliance-image.bb, and edit the later to add the recipes/packages you need.
But this may be difficult, if you don’t know exactly what you need, and luckily the Yocto Project also have a graphical interface called “hob” that you can just start from the build directory. Let’s start with rpi-hwup-image for the Raspberry Pi by selecting the corresponding machine and base image:
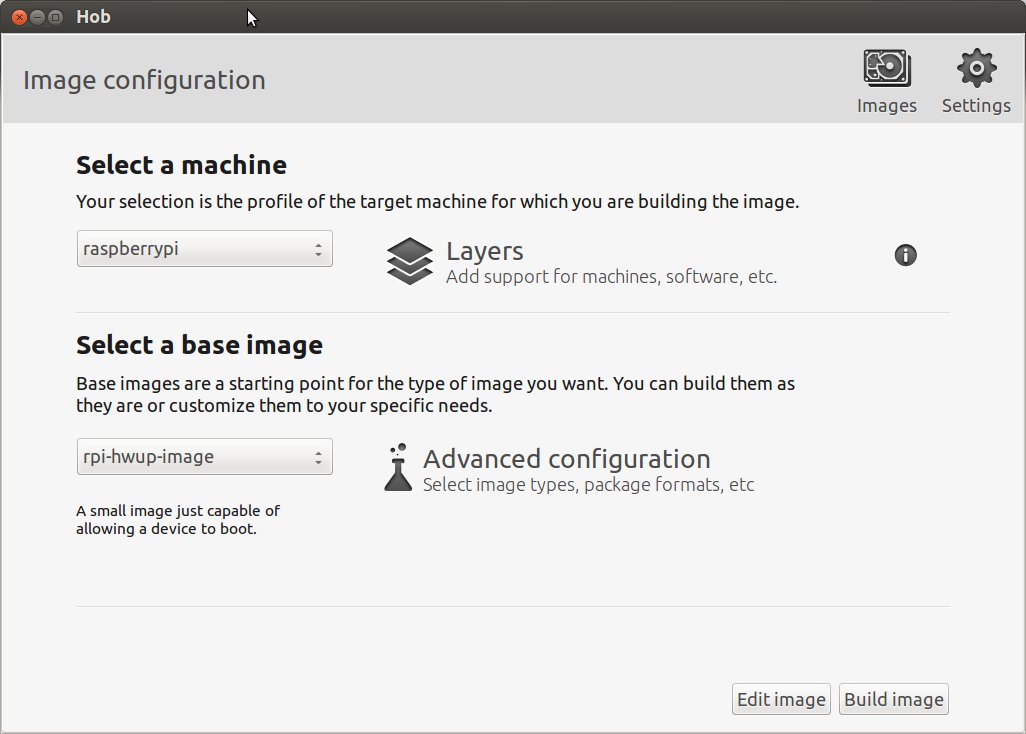
You can then either select “Edit Image” to add recipes and/or package groups, or simply click “Build Image” to start the build. Let’s just do that. The build is now much faster since most packages have already been built when we ran “bitbake rpi-basic-image”.
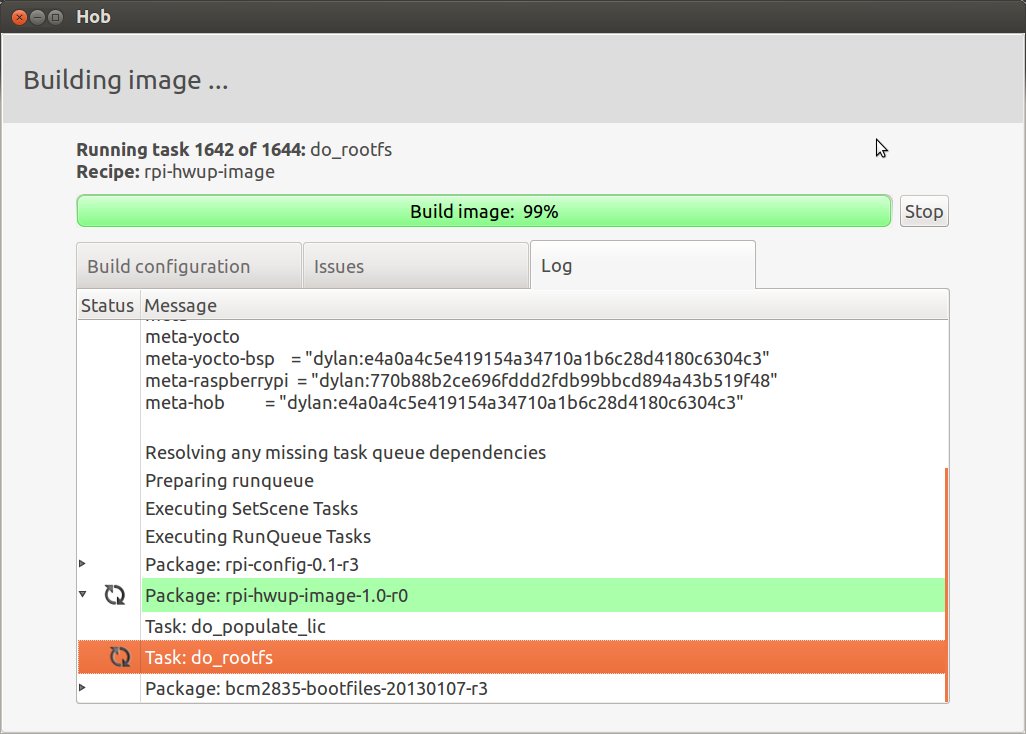
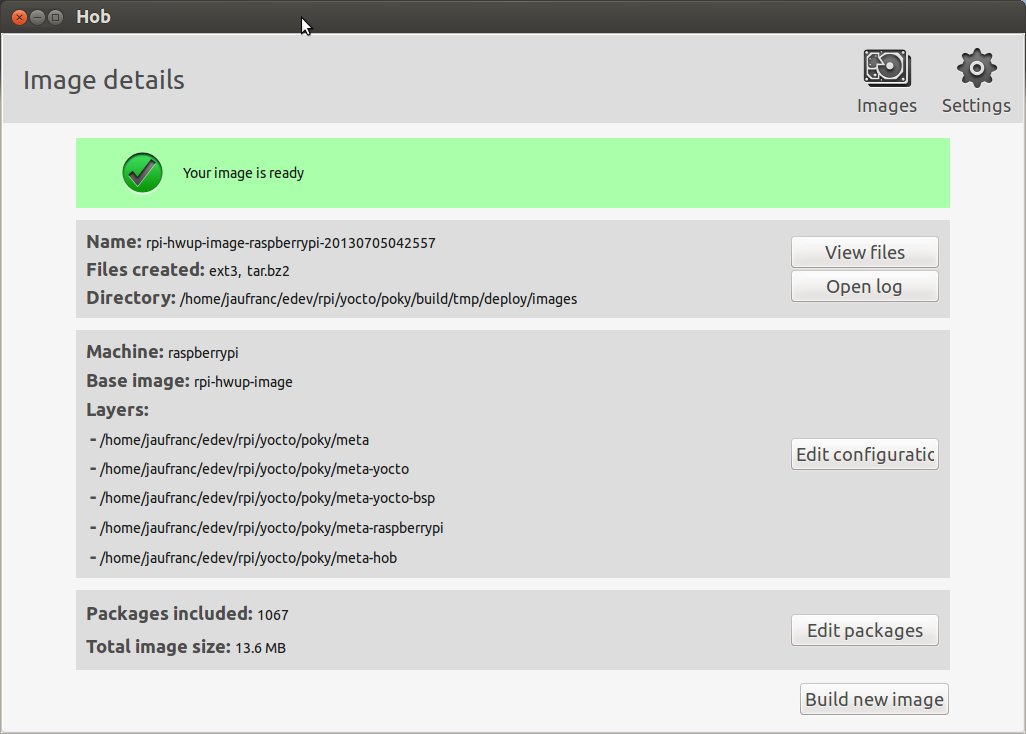
After a few minutes, you should the “Your image is ready” window below with easy access to the binaries and log files:
If instead of clicking “Build Image”, you clicked on “Edit image” you’d have access to the list of included recipes, all recipes and package groups. In the screenshot below I searched for recipes with “bcm” and “rpi” names. bcm2835 is used for GPIO support, so you may want to include it in the build.

Once you’ve selected the required packages, click on “Build Packages”, and after a while, Step 2 window will appear and let you click on “Build Image”. Your custom SD card image will be available in tmp/deploy/images/ directory with the name hob-image-raspberrypi.rpi-sdimg.
That’s just a small overview of what’s possible with the Yocto Project for the Raspberry Pi board. For further details you may want to check the project’s documentation, and you may also read Hob’s manual for specific details about Yocto’s GUI.

Jean-Luc started CNX Software in 2010 as a part-time endeavor, before quitting his job as a software engineering manager, and starting to write daily news, and reviews full time later in 2011.
Support CNX Software! Donate via cryptocurrencies, become a Patron on Patreon, or purchase goods on Amazon or Aliexpress


