Build a Raspberry Pi 2 Minimal Image with The Yocto Project

The Yocto Project is a build system that allows developers to make custom Linux distributions matching their exact needs. I’ve already shown how to build a 12MB Compressed image for the Raspberry Pi with Yocto, but the Raspberry Pi 2 has recently been added to the project, so I’ve tried to build it too in a machine running Ubuntu 14.04.
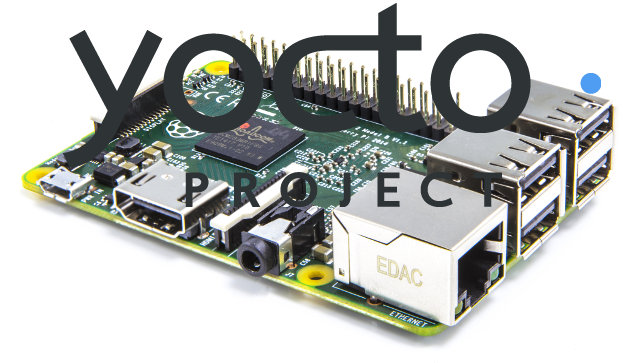
Raspberry_Pi_2_Yocto_ProjectI’ll use poky since it’s the default, but you could also build the system for Angstrom or without distributions (OpenEmbedded Core only). The steps to get the code is just the same as for the Raspberry Pi:

You just need to checkout master, and not any branch (like dizzy) since R-Pi 2 is not yet supported in any release. Initialize some environment variables and the build directory:

Now edit conf/local.conf with vim or nano to set the machine to raspberrypi2 instead of qemux86:

There are more Raspberry Pi specific option in the README for setting the GPU memory, overclocking, adding VC-1 or/and MPEG-2 licenses, and so on.

You also need to add the path to meta-raspberrypi in conf/bblayers file, so that it looks like:


Two minimal images are available: rpi-basic-image and rpi-hwup-image. I’ve built rpi-basic-image, which adds ssh-server-dropbear (for ssh server support) and splash (for the splash screen).

This will take a while, possibly over one or more hours, and upon completion the log shown in the terminal windows should look similar to:

The step “0: bcm2835-bootfiles-20150206-r3 do_fetch (pid 25484)” may take a long time as it’s cloning a few gigabytes of data for the firmware stored in GitHub. Just be patient, this step took several hours on my machine.

You can now flash the image to a micro SD card with:


Where you need to replace X with the letter of your SD card, which you can check with lsblk. Alternatively, you could also flash the image with Win32DiskImager in Windows. Here’s the compiled image for your reference: rpi-basic-image-raspberrypi2-20150227091441.rootfs.rpi-sdimg (104 MB). You’ll also need to use tools like gparted to expand the ext-4 partition to make use of all the space on your micro SD card.

You’d then just have to insert the micro SD card into your Raspberry Pi 2, boot, and login as root without password. I have not tried, since I don’t have a Raspberry Pi 2 yet.

Share this:

Support CNX Software! Donate via cryptocurrencies, become a Patron on Patreon, or purchase goods on Amazon or Aliexpress

ROCK 5 ITX RK3588 mini-ITX motherboard
Subscribe
Notify of
guest
The comment form collects your name, email and content to allow us keep track of the comments placed on the website. Please read and accept our website Terms and Privacy Policy to post a comment.
40 Comments
oldest
newest
Jean
Jean
9 years ago

I got the Model B on raspbian to run with about 50Mb RAM usage only, acting as a router and bandwidth usage controller for about 9 people.

Do you think Yocto will be a better choice for basic tasks?

zoobab
9 years ago

The openwrt image is roughly the same size:

https://downloads.openwrt.org/snapshots/trunk/brcm2708/generic/

The openwrt-brcm2708-ext4.img is 50M but it is a pre-extend file system with 50MB space, but it weights 5M.

But I cannot find the kernel in the rootfs image. So might be a little bit less.

Hussam
9 years ago

A better compromise between Yocto and Raspbian is Arch ARM Linux’s port… It runs Arch so you can use pacman to install the latest packages of software. It is a minimal install…no desktop environment..no bloatware no junk…install just what you need.

Al
Al
9 years ago

There is no one best distro.

If you need minimal or completely customised look at yocto/angstrom or build your own arch linux
thing to remember is you need to maintain it and do any patching for security bugs etc

For learning and newcomers to raspberry pi stick with raspian
otherwise go for your favourite/prefered distro.

VL
VL
9 years ago

If you need qt 4 or 5 on your board, plus a full cross compiling environnement with qtcreator, Yocto is the best option I found so far.
(the other one is to cross compile qmake from source).

Raphael
Raphael
9 years ago

For some reason I never seems to be able to build the image. I always get an error message :

“ERROR: OE-core’s config sanity checker detected a potential misconfiguration.
Either fix the cause of this error or at your own risk disable the checker (see sanity.conf).
Following is the list of potential problems / advisories:

Please set a valid MACHINE in your local.conf or environment”

There must be something I’m missing and/or do not understand. Could you please give me a hint as to why the “MACHINE” argument “raspberrypi” and “raspberrypi2” are not accepted.

Raphael
Raphael
9 years ago


Yes I did.

I think conf/local.conf doesn’t exist if you don’t run “. oe-init-build-env build” first.

I tried to do what’s in your other post on the raspberrypi with the dylan branch of poky and I get the same error message.

Raphael
Raphael
9 years ago


Ok, My bad… I did a mistake in bblayers.conf

I now get a lot of errors from bitbake. Seems to be python related… I’ll try to work thoses out.

Thanks for the nice blog post

JJ
JJ
9 years ago

Thanks for your articles really helped me to get started. I have found out that if you add these two parameters to your build/conf/local.conf file you get an image with free space so you don’t have to expand the size afterwards. IMAGE_EXTRA_SPACE = “4194304” IMAGE_ROOTFS_EXTRA_SPACE = “4194304” This gives you 4GB free space on the file system. And another useful parameter is this one. IMAGE_OVERHEAD_FACTOR = “1.5” It set the overhead factor to 50% default is 30% so this is another way to get more free space on the file system. But last and the best parameter in my opinion… Read more »

Eike
Eike
9 years ago

Hi
I have trouble getting the thing to work for my rpi2 model B
as soon as I start bitbake it shows an error after 4% parsing recipes “ERROR: Unable to determine endianness for architecture ‘armv7l’ … please add it to siteinfo.bbclass

If I add the armv7l entry to meta/classes/siteinfo.bbclass by copying the regular arm entry and just changing it to armv7l
bitbake starts to run and brings an error “can not map armv7l to a linux kernel architecture” but continuous!
after it starts the tasks and it reaches task 4 of 2000somthing… it stops running with several errors

Eike
Eike
9 years ago

Please help, what did I do wrong?
Thanks
Eike

Aananth C N
Aananth C N
9 years ago

Hi,

The image generated by following the procedure mentioned above works without any issues on Raspberry Pi 2. Thanks.

But when I tried to add some graphics application on top of this, I get following error:
| No package ‘egl’ found
| No package ‘glesv2’ found

For the benefit of others like me, can you add a section on how to add these packages.

Eike
Eike
9 years ago

Hi Aananth
I followed the exact same procedure as mentioned above and get the error I described….
Any idea why that might be?

Thanks

Eike
Eike
9 years ago

could it be that its not working for me because I try to do it via an Ubuntu 14.10 installation on the raspberry Pi2?

Aananth C N
Aananth C N
9 years ago

@Eike
Hi Elke,

My 2 cents:

The problem you stated above is related to endianness of the “target” architecture. The build system seems to be bit confused. So, I see it as a configuration problem than a environment or OS issue. Note: I did not face such issues. I used Ubuntu 14.04.

Can you double confirm if you set the value of MACHINE as raspberrypi2?

Also can you paste all your error messages in http://pastebin.com/ and copy the link to that page here. That should allow as to understand the issue in more detail.

stratego
stratego
9 years ago

I followed the above directions,b ut for some reason the produced image does not include several critical packages, such as python. Are these not supposed to be included, or am I doing something wrong?

stratego
stratego
9 years ago

@stratego
This is for the raspberrypi2

stratego
stratego
9 years ago

I managed to fix my previous issue, but now I am having trouble with wiringPi. It appears to install successfully, but as near as I can tell, only the gpio portions make it into the image. the various header files, at least (wiringPi.h, ect.) are nowhere to be found. Please advise

Anmol
Anmol
9 years ago

Hi,

Thanks a ton for this! I was able to build and boot on a RPI2B:


Poky (Yocto Project Reference Distro) 1.8+snapshot-20150527 raspberrypi2 /dev/ttyAMA0

raspberrypi2 login: root
root@raspberrypi2:~# uname -a
Linux raspberrypi2 3.18.11 #1 SMP PREEMPT Wed May 27 01:41:03 CDT 2015 armv7l GNU/Linux
root@raspberrypi2:~#

How do I go about building a full file-system?

Thanks,
Anmol.

PistoleroJesse
9 years ago

Is it just me or are a lot of people trying to go with a minimal install and stick to using python? Seems like a conflict of interest…

valicfu
valicfu
9 years ago

Raphael : For some reason I never seems to be able to build the image. I always get an error message : “ERROR: OE-core’s config sanity checker detected a potential misconfiguration. Either fix the cause of this error or at your own risk disable the checker (see sanity.conf). Following is the list of potential problems / advisories: Please set a valid MACHINE in your local.conf or environment” There must be something I’m missing and/or do not understand. Could you please give me a hint as to why the “MACHINE” argument “raspberrypi” and “raspberrypi2″ are not accepted. I had this. Check… Read more »

Muthu
Muthu
9 years ago

i want to add bluetooth feature to this image. any one can provide the steps to do this?

Richard
Richard
9 years ago

Ubuntu 15.04..

Failed to create a file with a long name in TMPDIR. Please use a filesystem that does not unreasonably limit filename length.
Failed to create a file with a long name in SSTATE_DIR. Please use a filesystem that does not unreasonably limit filename length.

help

Karim
Karim
9 years ago

Hello,

I tried to build the image following the above steps.
Unfortunatly the “bitbake” process ends up with a compile error of the kernel:

/home/kai/poky/build-raspberrypi2/tmp/work-shared/raspberrypi2/kernel-source/drivers/misc/vc04_services/interface/vchiq_arm/vchiq_arm.c: In function ‘set_resume_state’:
/home/kai/poky/build-raspberrypi2/tmp/work-shared/raspberrypi2/kernel-source/drivers/misc/vc04_services/interface/vchiq_arm/vchiq_arm.c:1780:1: error: inlining failed in c
all to always_inline ‘set_suspend_state’: function not inlinable
set_suspend_state(VCHIQ_ARM_STATE_T *arm_state,
^
/home/kai/poky/build-raspberrypi2/tmp/work-shared/raspberrypi2/kernel-source/drivers/misc/vc04_services/interface/vchiq_arm/vchiq_arm.c:1836:3: error: called from here
set_suspend_state(arm_state, VC_SUSPEND_IDLE);

I’m using Yocto 1.8 and I have downloaded the latest raspberry meta files from git.
Any idea how to fix it ?

K.

Karim
Karim
9 years ago

cnxsoft :
@Karim
Somebody had a similar issue @ https://gcc.gnu.org/bugzilla/show_bug.cgi?id=63220
You might have to change the code, or as a workaround CFLAGS optimization level.

Indeed. Wht kind of workaround may I write? And how to include this workaround in Yocto workflow ? I’m a newbie in Yocto (for 1 week).
Thanks for your suggestion.

Andreas
Andreas
9 years ago

This short tutorial worked out of the box! Great!

bitbake informed me to install some additional packages. Which i did.
After “dd”, do not forget to call “sync”
cu
Andreas

Simply ignore the:
WARNING: Host distribution “openSUSE-project-13.2” has not been validated with this version of the build system; you may possibly experience unexpected failures. It is recommended that you use a tested distribution.

jim
jim
8 years ago

@Jean-Luc Aufranc (CNXSoft) Well, I’ve just started with the Pi 2 now, so YMMV. But with the FreeScale units I deal with, I can create cross-compile tools to build software (whether GNU or in-house developed). It’s nowhere near as easy as “apt-get install bind9” so Raspbian would be a lot easier for a beginner. We use Yocto, however, since if we don’t specifically include it in the recipe, it never gets into the finished image. So the image is smaller, RAM use is tightly controlled, and the exploit exposure surface is kept as small as possible. All important considerations for… Read more »

Steve
Steve
8 years ago

@Raphael
I had this error, but Yocto is pretty clear about what it is missing. It is saying it cannot find the specified machine.

I looked over the instructions I had followed and they left out a rather important layer:
/home/steveda/rpi2b/poky-fido-1.8/meta-raspberrypi \

Adding that layer in bblayers.conf and that error goes away…

Mark Rush
Mark Rush
8 years ago

About half-way through the build process, I am getting a missing file error:
/home/mrush/yocto/poky/build/tmp/work/raspberrypi2-poky-linux-gnueabi/u-boot-rpi/git-r0/git/include/linux/compiler-gcc.h:87:30: fatal error: linux/compiler-gcc5.h: No such file or directory
compilation terminated.

Is anyone else experiencing this?

I cloned both yocto:master branches as per the instructions above and am doing the build on a fresh install of Ubuntu 14.04 server:
uname -a
Linux buildsvr2 3.19.0-49-generic #55~14.04.1-Ubuntu SMP Fri Jan 22 11:24:31 UTC 2016 x86_64 x86_64 x86_64 GNU/Linux

I did a simple “apt-get install build-essential”. Is there something more I should have done?

Mark Rush
Mark Rush
8 years ago

@Jean-Luc Aufranc (CNXSoft) Thank you for the reply. That was actually the first thing that I did. However, when I copied the compiler-gcc5.h over to the location bitbake was expecting it, I then got a huge number of errors. That’s when I decided that the issue wasn’t simply a missing file, but rather some sort of set up problem on my machine. So, in my message, I specified that my build machine is a fresh Ubuntu 14.04 server in which I performed the following steps: sudo su apt-get update apt-get upgrade apt-get dist-upgrade reboot sudo apt-get install build-essential git sudo… Read more »

Mark Rush
Mark Rush
8 years ago

@Mark Rush
Found the problem. Had to patch compiler-gcc.h to use the gcc inline version instead of c99.

Boardcon Rockchip and Allwinner SoM and SBC products