
I’ve already spent some time to test MeLE PCG03 Bay Trail-T mini PC in Windows 8.1, including a detailed video and audio review in Kodi 14.1. Since I don’t have anything else to do with Windows on the machine, I’ve decided to install Ubuntu instead, completely wiping out Windows 8.1. Since you pay around $30 for the Windows license, MeLE PCG03 is not the ideal platform computer for this little exercise due to the extra cost, but it should also work with other Intel Atom Z3735F based computer that may not come with a license.
At first I planed to go with Ubuntu 14.10 Mate ISO image, and it boots fine, but was curious to try from “scratch” with another ISO, so I went with Ubuntu 15.04 Alpha 2 (64-bit) image. I just went to the first link Google Search provided me and did not pay attention enough, and ended-up install Lubuntu instead, but you should be able to use any Linux AMD64 ISO with the instructions below.
The first step is to create a bootable USB flash drive.
So after downloading vivid-desktop-amd64.iso with BitTorrent, I started a Windows 7 virtual machine (but I could have done it directly in MeLE PCG03 instead), downloaded and install Rufus (Rufus 1.4.22), and create a bootable USB flash drive with the following options:
- GPT partition scheme for UEFI computer
- FAT32 with 32KB cluster (Other insructions recommend 64KB, but it was not available in the drop list).
- LIVECD label (maybe not important) and vivid-desktop-amd64.iso image
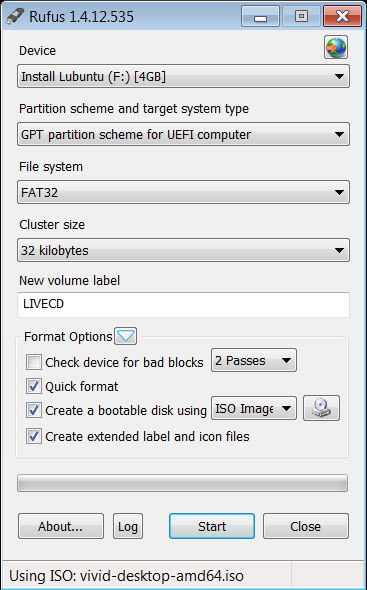 Make sure Rufus has selected the right Device, and click on “Start”.
Once this is done, you’ll need to download bootia32.efi, and copy it in /EFI/BOOT folder in the USB flash drive.
Now connect the USB flash to your MeLE PCG03 or other Intel Bay Trail-T device, power the device, press F7 to get to the UEFI menu, and select your USB flash drive in order to boot into Ubuntu 15.04.
If all you want to do is try Ubuntu (or the other Linux 64-bit ISO image you’ve selected), you are done.
But let’s install it instead. MeLE provided instructions to re-install Windows on PCG03, but when I asked for the firmware files, they kept quiet…, so you may want to backup your Windows installation first.
There are three partitions:
|
1 2 3 4 5 6 7 8 9 10 11 12 |
sudo fdisk -l /dev/mmcblk0 Disk /dev/mmcblk0: 29.1 GiB, 31268536320 bytes, 61071360 sectors Units: sectors of 1 * 512 = 512 bytes Sector size (logical/physical): 512 bytes / 512 bytes I/O size (minimum/optimal): 512 bytes / 512 bytes Disklabel type: gpt Disk identifier: 8665F60E-4024-4C68-9E4E-57DCF3C2278F Device Start End Sectors Size Type /dev/mmcblk0p1 2048 616447 614400 300M Microsoft basic data /dev/mmcblk0p2 616448 821247 204800 100M EFI System /dev/mmcblk0p3 821248 61069311 60248064 28.7G Microsoft basic data |
Which I backed up as follows:
|
1 2 3 4 |
sudo apt-get install pv sudo dd if=/dev/mmcblk0p1 | pv | dd of=WIN_P1.img bs=16M sudo dd if=/dev/mmcblk0p2 | pv | dd of=WIN_P2.img bs=16M sudo dd if=/dev/mmcblk0p3 | pv | dd of=WIN_P3.img bs=16M |
But it might be a better idea to just get a single file:
|
1 |
sudo dd if=/dev/mmcblk0 | pv | dd of=WIN_MELEPCG03.img bs=16M |
That way in case you want to re-flash Windows, start Linux from the USB flash drive, and re-install it with:
|
1 |
sudo dd if=WIN_MELEPCG03.img | pv | sudo dd of=/dev/mmcblk0 bs=16M |
So you won’t need to potentially have to re-partition the eMMC flash with gparted, as would be the case for a separate backup file for each partition.
I’ve then re-partitioned the eMMC flash to format p3 as ext-4 and add a fourth partition for a 2GB swap, which may not be ideal on flash based device due to wear and tear:
|
1 |
sudo gparted /dev/mmcblk0 |
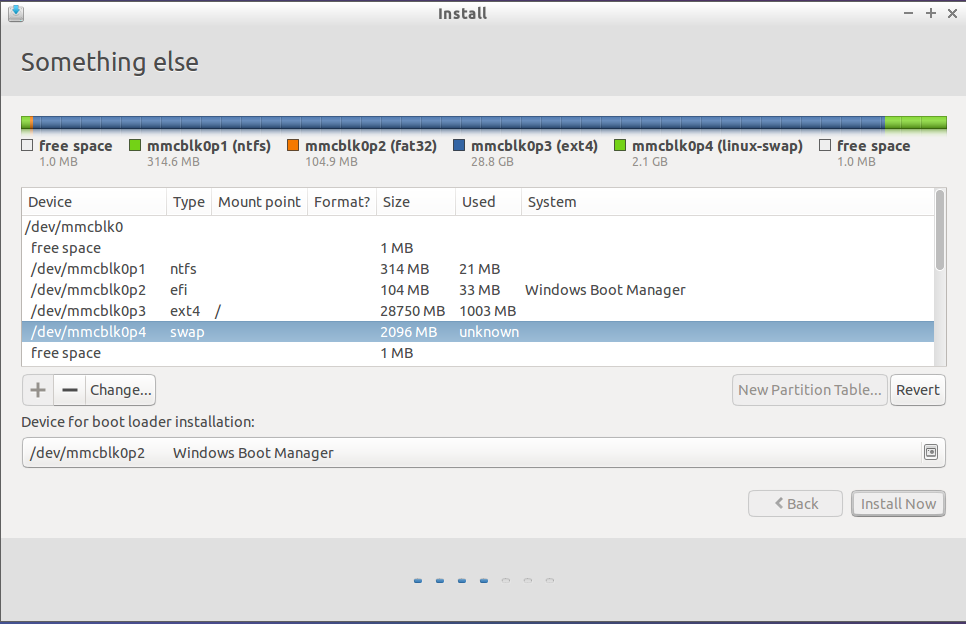
 Now click on Install Lubuntu 15.04, and follow the instructions until they ask about the installation type (erase everything, install side-by-side..), where you need to select “Something Else”, and set:
- /dev/mmcblk0p3 to ext4 mount to /
- /dev/mmcblk0p4 to swap
- I’ve also changed “Device for boot loader installation” to /dev/mmcblk0p2, but it might not be necessary to change that part.
Carry on with the installation. Once it’s complete, you’ll still need to boot from USB one more time in order to install the 32-bit version of grub. Reboot, press F7, select your USB drive, and once you are in Grub (showing Ubuntu, Advanced options for Ubuntu, Windows Boot Manager, System setup), press ‘c’ to enter the grub terminal, and type the following commands in order to load the kernel and initramfs, and boot from the internal flash:
|
1 2 3 |
linux <span class="o">(</span>hd1,gpt3<span class="o">)</span>/boot/vmlinuz-3.18.0-13-generic <span class="nv">root</span><span class="o">=</span>/dev/mmcblk0p3 initrd <span class="o">(</span>hd1,gpt3<span class="o">)</span>/boot/initrd-3.18.0-13-generic boot |
The exact command will depend on your device and chosen linux distribution, but since grub support auto-completion it’s quite easy. For type “linux (hd”, and press tab to select the right drive and partition, then “/boot/vm”, and press tab again to select the right kernel, and so on.
Login into Ubuntu with the username / password you selected during installation, make sure you’ve connected an Ethernet cable,. and install 32-bit grub with efi support:
|
1 2 3 |
sudo apt-get install grub-efi-ia32 grub-efi-ia32-bin sudo cp /boot/efi/EFI/ubuntu/grubia32.efi /boot/efi/EFI/ubuntu/grubx64.efi sudo update-grub2 |
And now you’re done… Depending on your platform, you may also need to check your BIOS settings to make sure Secure Boot is disabled, and in my case at the beginning I had either a black screen (Ubuntu) or just the two lines (Advanced options for Ubuntu):
|
1 2 |
Loading Linux 3.18.0.13-generic.... Loading initial ramdisk... |
So I went to the BIOS in Advanced->Security Configuration, and disabled Intel TXE, which seems to have made the trick.
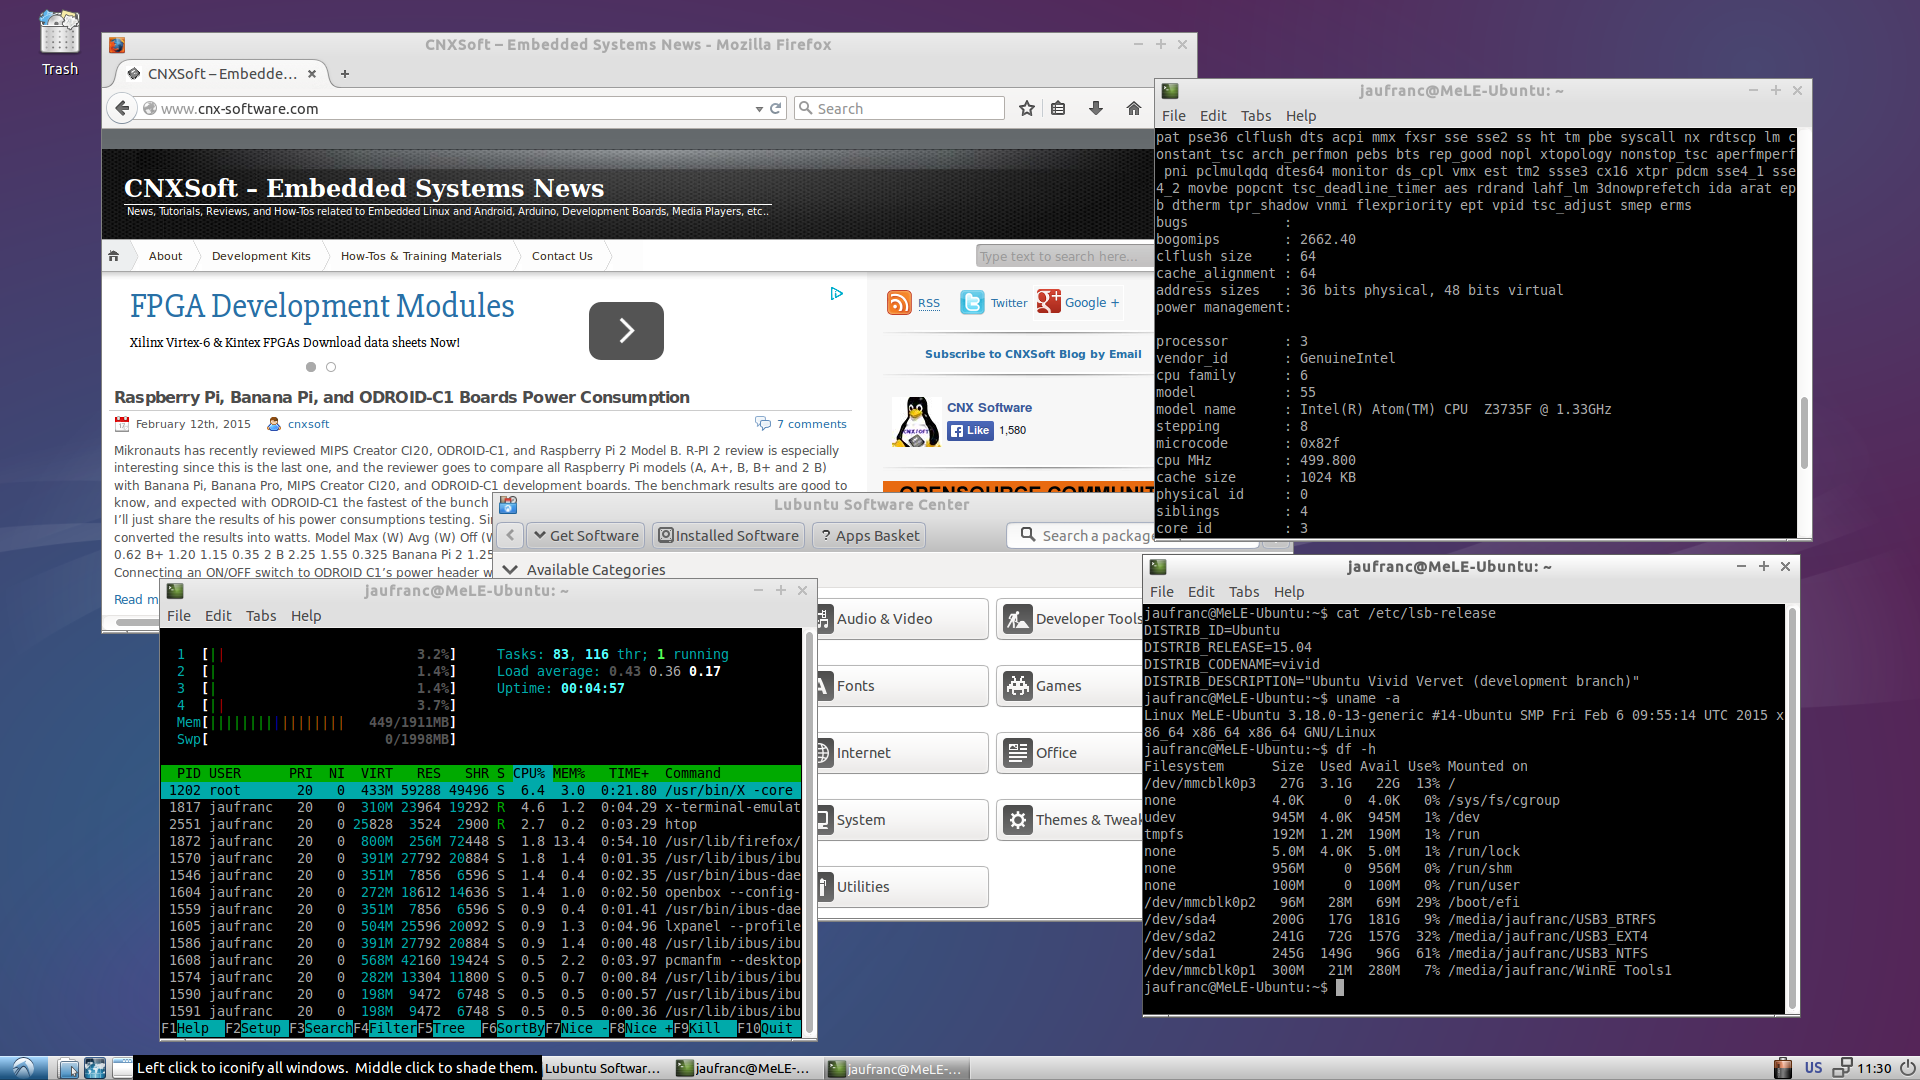
 Boot time takes about 12 seconds from the time I press enter in grub to the login screen.
I haven’t tested it much for now, except from some web browsing, and playing YouTube in Firefox (very slow), but before doing my deeply into testing, I’d like to find out a way to enable audio on the platform, at least via the 3.5mm headphone jack, as HDMI audio may be more complicated. A workaround tried by other people is to use a USB sound card. Here’s the full boot log where you’ll see that the audio chipset (ALC5640) is detected, but the driver (byt-rt5640) fails to initialize it.
I adapted instructions from the three sources below:
- Linuxium triple boot method (Android, Windows, Linux) on MeegoPad T01.
- Ubuntu on Bay Trail tablets.
- Installing Ubuntu on Asus T100’s internal flash

Jean-Luc started CNX Software in 2010 as a part-time endeavor, before quitting his job as a software engineering manager, and starting to write daily news, and reviews full time later in 2011.
Support CNX Software! Donate via cryptocurrencies, become a Patron on Patreon, or purchase goods on Amazon or Aliexpress


