I plan to play around with Bluetooth 4.0 LE in Linux using the Raspberry Pi as an hardware platform together with a small LCD display and possibly a relay board. Instead of having boards spread around, I thought it might be a good idea if I could design a case for my setup. I wanted to be able to connect small external boards and things like LEDs, it had to be easily assembled and disassembled, modular so that I could add or remove circuits easily, and about as cheap as existing “dumb” cases. So I though why not use stripboards (perfboards) for that? I searched the web to find out if other people had the same idea, and could only find one other person, but he does not appear to have completed assembly, nor actually used the stripboards to add hardware features. I decided to give it a try anyway, and I’ve now completed the assembly. I’ll show what I’ve done so far in this first blog post. Apart from the serial port connection, I have not worked on the connections with the LCD display, LEDs, and relay board, nor worked on the software side as I’m still waiting for some components.
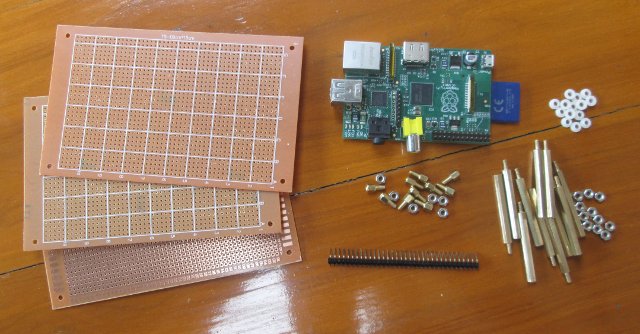
In order to design the casing, we’ll need a Raspberry Pi for measurement, 3 stripboards / perfboards, short M3 stand-offs to place under the bottom board, lift the Raspberry Pi from the soldering pads, and as screws, long M3 stand-offs to serve as fixation between the top and bottom boards, and as support for the sides of the enclosure, plastic caps for insulation to avoid short-circuiting the bottom of the Raspberry Pi, and a right-angle pin header strip which I’ll cut into small 3 pin headers, and solder to the sides of the casing in order to insert them in the bottom board.
If you’re interested in my exact shopping list, I bought the following items on-line for the basic enclosure (prices include shipping):
- 5 Perfboards (14.6 cm x 9.3 cm) – $6.60
- 30 Stand-offs with M3 nuts (40 mm high) – $10.03
- 50 Stand-offs with M3 nuts (6 mm high) – $5.25
- 1000 plastic screw isolation caps – $4.20
- 10x 40 pin 2.54mm right angle pin header strip – $2.78
Total price of the order is $28.86, but if I only include the parts I used: 3 boards, 5 long stand-offs, 13 short stand-offs, 4 isolation caps, and one pin header strip, the total cost is about $7.30 which definitely fits into the cheap casing category.
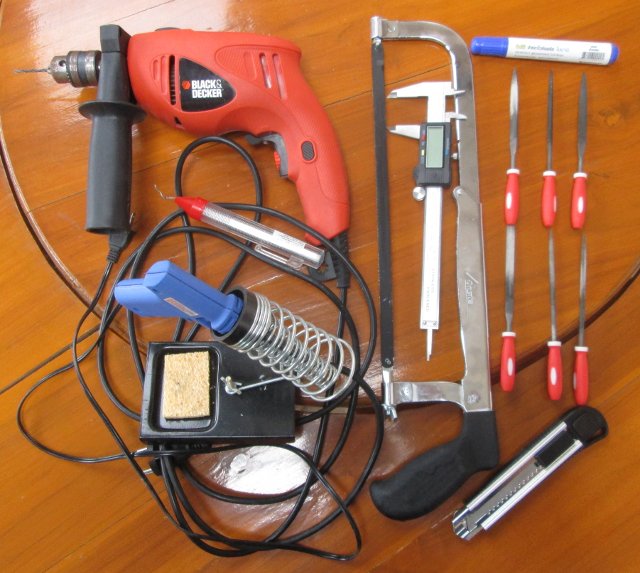
You’ll also need a few tools.
A power drill to drill holes for stand-offs and the connectors’ openings, an hack saw to cut the boards, a caliper or ruler for measurements, a few small wood files, a cutter, and a soldering iron. A marker pen is also convenient to mark the solder pads that you need to drill.
The dust from stripboards may not be good for health, so make sure you don’t breathe the dust in, or wear a mask.
I started by locating 4 flat areas on the bottom of the Raspberry Pi board, drilled holes at the corresponding pads on the bottom board, inserted and fastened 4 short stand-offs, and added the plastic cap on top for insulation. The plastic caps (for M3 screws) I bought are actually not suited to be placed on top of the stand-offs, so I used a cutter to allow them to bend enough to be inserted. I also used a glue gun to fix them. There’s probably a better solution for insulation. I also added 4 short stand-offs on the 4 holes at the extremities of the perfboard.
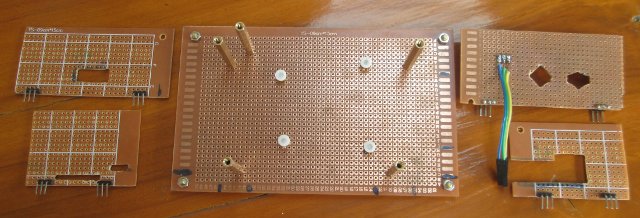
With the hack saw, I’ve then cut another perfboard into 4 pieces to make the sides of the enclosure. Since I found it difficult to cut perfectly straight, I’ve allowed for one extra row of solder pads while cutting, and I removed the excess with sandpaper. Once those are cut and polished in shape, I’ve soldered two 3-pin right angle header to each of my little boards. More measurements are needed to provide the openings for the Raspberry Pi connectors, as well as some work with the power drill, hack saw, and wood files. I normally start by drilling a few pads, and finish the job with the wood files. Finally, we need to add five high stand-offs both for supporting the sides of the enclosure, and fastening the top board.
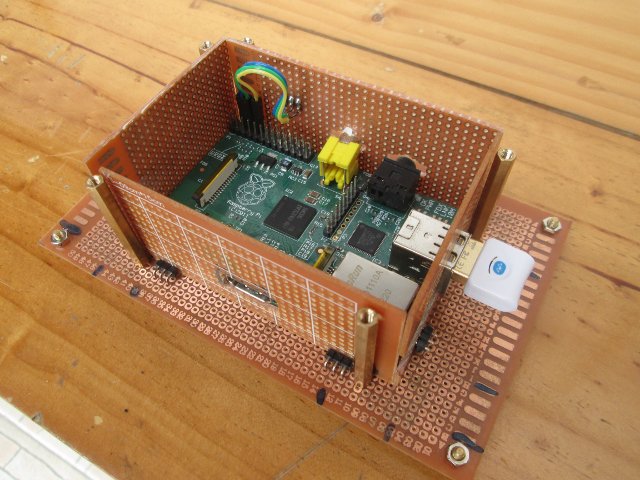
For assembly, you just to to insert the header pins of the side boards in the solder pads of the bottom board between the high stand-offs, insert the SD card, add the top board with 5 holes, and add 5 M3 screws or short stand-offs, and you’re done.
If you don’t plan to add any circuits to your casing, you can just use a bare top perfboard, but it becomes much more interesting if you add other components, LEDs, sensors, or other fun stuffs. The example below shows an LCD display with an SPI interface (not connected).
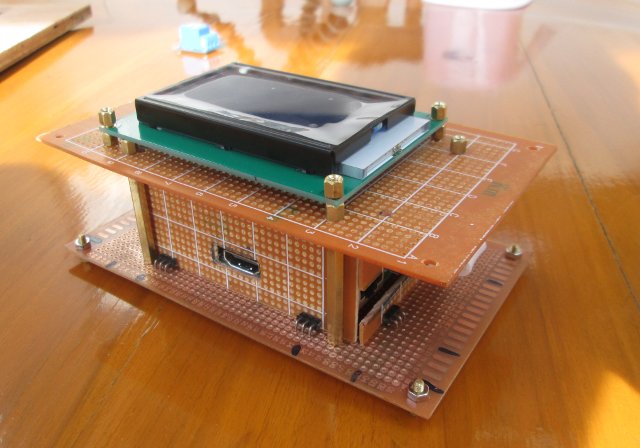
I initially planned to cut the bottom and top boards, but I finally decided against it, because it’s some extra work :), and more importantly, you need the 4 short stand-offs because of the header pins and nuts under the boards, and having large top and bottom with the same size allows you to orientate the casing however you please: vertically, horizontal, along the short sides, along the long sides, etc…
Here are a few more pictures if you want to check them out: Side 1 , Side 2, Side 3, and Side 4.
You can also watch how to assemble the different parts in the video below.
I plan to write part 2 with a LED based top board, a working LCD display top board, and possibly some other ideas I may gather until the second post.
Update: Part2 is up @ DIY Stripboard/Veroboard Enclosure for Raspberry Pi

Jean-Luc started CNX Software in 2010 as a part-time endeavor, before quitting his job as a software engineering manager, and starting to write daily news, and reviews full time later in 2011.
Support CNX Software! Donate via cryptocurrencies, become a Patron on Patreon, or purchase goods on Amazon or Aliexpress


