Every Friday, Olimex organizes an online competition where they give away one of their board. They’ll ask a (usually simple) technical question on their twitter account at 22h00 (GMT+7), and all you have to do is to reply to their tweet with the correct answer within one hour. The winner is then selected randomly with random.org. There are usually 50 to 100 respondents so the odds are pretty good.
I played a few times, and finally, I was lucky enough to win an A13-OLinuXino-MICRO development board at the beginning of December. I received it yesterday, after UPS took a whooping 15 days to deliver the board (Way to go UPS!). The board can be purchased on Olimex for 35 Euros plus shipping and taxes, or even lower if you order larger quantities.
A13-OLinuXino-MICRO is a stripped down version of A13-OLinuXino-WIFI with the following specs:
- SoC – AllWinner A13 Cortex A8 processor at 1GHz with Mali400 GPU
- System Memory – 256 MB RAM (128Mbit x 16)
- Storage – microSD card slot for booting the Linux image
- Video Output – VGA video output. LCD signals are available on connector.
- Audio I/O – 3.5mm headphone jack + Microphone input pads (no connector)
- USB – 1x USB host +1x USB OTG which can power the board
- UEXT connector – To connect UEXT modules like Zigbee, Bluetooth, Relays, etc
- 3 “GPIO” connectors (2x 40-pin and 1x 10-pin) – Those give access to NAND flash, GPIOs, I2C, UARTs and SDIO2 signals, as well as 5 system pins: +5V, +3.3V, GND, RESET, NMI.
- LCD Connector – You can connect an optional 7″ LCD provided by Olimex, or connect your own.
- Misc – 1 reset key, 1 U-boot/FEL key, 2 LEDs, 4 mounting holes, UART1 header and pads for JTAG and UART0.
- Power – 5V DC input power supply
- Dimensions – 100 x 85 mm
As usual, I will first post some unboxing pictures, then try Linux on the board, and give some kind of review.
A13-OLinuXino-MICRO Unboxing
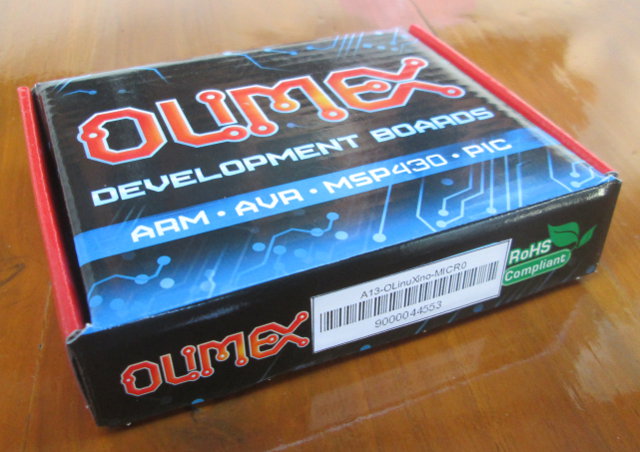
The board comes in a small Olimex branded package, and as is the case for the Raspberry Pi, the only item in the package is the board.
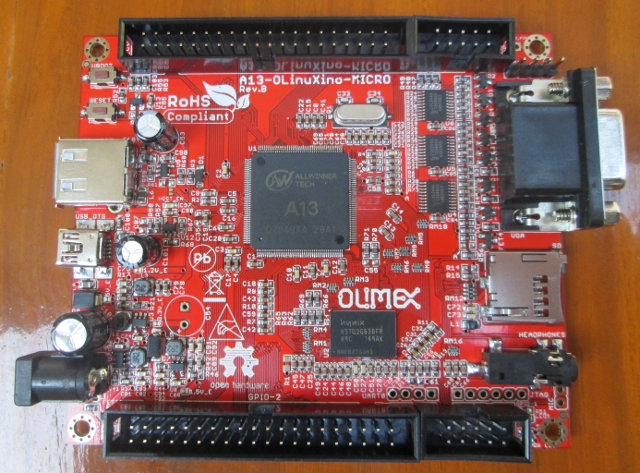
Let’s have a look at the top of the board first, where all the components and connectors are placed.

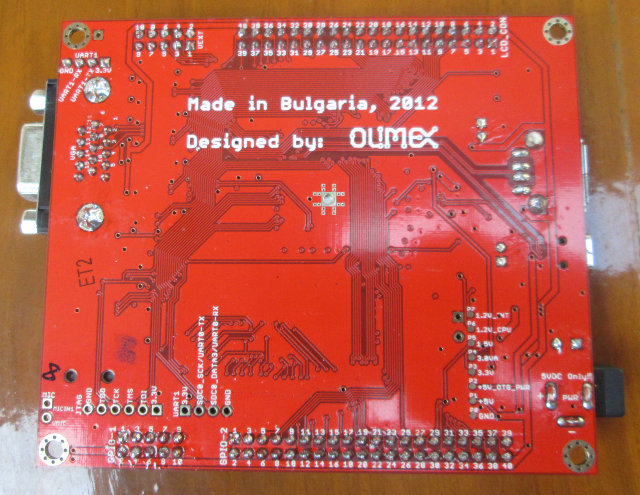
The back of the board shows markings for the GPIO connectors, VGA, UARTs, JTAG and some test points for the different voltages on the board.

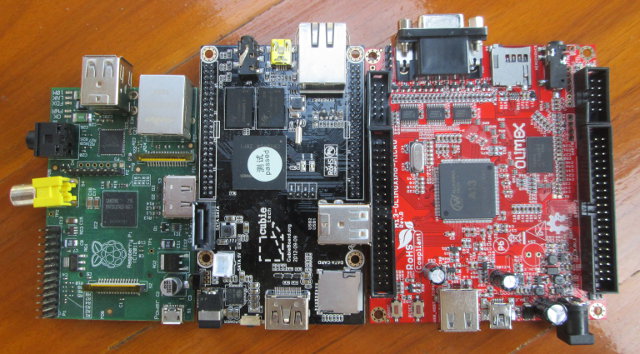
I’ve also taken a picture of the Olimex board with two other well-known low cost boards…

A13-OLinuXino is larger than the Cubieboard and almost twice as big as the Raspberry Pi.
Getting Started with Olimex A13-OLinuXino-MICRO
First you’ll need to get some external accessories such as:
- A power supply – A 5V/2A power supply to connect to the 5+ jack or the miniUSB port. A microUSB port might have been preferably since most mobile phones used this type of USB connector.
- A USB hub – This is optional but since there’s only a USB Host port, it is required unless you only plan to connect one USB device (e.g. USB keyboard).
- USB to Serial Board – Again, this is optional but it is really useful for debugging purpose in case there’s an issue with the bootloader and/or kernel, or you simply don’t want/need to plug the board to a VGA monitor.
- Display – VGA monitor or LCD
- Keyboard and mouse
- Wi-Fi / Ethernet USB Dongle – Optional
- a microSD for Linux and storage
One good thing with Olimex is that they have free user’s manuals for their boards. That may seem trivial, but the Cubieboard simply do not have one, and the Raspberry Pi does have one, but you need to pay for it. Of course, all boards have some free resources online, but it’s still nice to have most of what you need in one document.
So let’s download A13-OLinuXino-MICRO user’s manual first. It a 30-page PDF document that gives you an overview of the board, explains how to get started with the board, and gives a detailed hardware description of the board (pin and connectors descriptions), some information about AllWinner A13 SoC, and some links to the design files (schematics & PCB layout in PDF and Eagle format).
Since the board does not have flash, you need to load a Linux image to a microSD card first. Olimex currently just has a preliminary Debian image for the board (A13_Micro_Debian_first_preliminary_release-06122012.rar – 737 MB). This is a compressed SD card image, so simply uncompress it, and dump it to a microSD card with dd (Linux) or Win32DiskImager (Windows).
Time to connect the board. I’ve inserted by Debian SD card, and connected a USB keyboard, the serial to USB adapter I use with the Mele A1000 to UART1, a VGA cable to my monitor and a power supply to the microUSB port.
Everything looks fine, I can see U-Boot and the kernel output in putty and the VGA monitors light, but the boots take over 2 minutes, as it’s stuck in udev, as it apparently tries to find another USB host that does not exists, and times out after 120 seconds.
|
1 2 3 4 5 |
Waiting for /dev to be fully populated... udevadm settle - timeout of 120 seconds reached, the event queue contains: /sys/devices/platform/sw-ohci.1/usb3 (581) /sys/devices/platform/sw-ohci.1/usb3/3-0:1.0 (582) /sys/devices/platform/sw-ohci.1/usb3/usb_device/usbdev3.1 (583) |
Finally, I can login (Username: root | Password: password), and check a few things about the board in the serial terminal:
|
1 2 3 4 5 6 7 8 9 10 11 12 13 14 15 16 17 18 19 20 21 22 23 24 25 26 27 28 29 30 |
Debian GNU/Linux wheezy/sid A13Micro ttyS0 A13Micro login: root Password: Last login: Thu Jan 1 00:17:25 UTC 1970 on ttyS0 Linux A13Micro 3.0.52+ #10 PREEMPT Wed Dec 5 16:01:52 EET 2012 armv7l The programs included with the Debian GNU/Linux system are free software; the exact distribution terms for each program are described in the individual files in /usr/share/doc/*/copyright. Debian GNU/Linux comes with ABSOLUTELY NO WARRANTY, to the extent permitted by applicable law. root@A13Micro:~# uname -a Linux A13Micro 3.0.52+ #10 PREEMPT Wed Dec 5 16:01:52 EET 2012 armv7l GNU/Linux root@A13Micro:~# free -mh total used free shared buffers cached Mem: 165M 32M 133M 0B 4.0M 12M -/+ buffers/cache: 16M 149M Swap: 0B 0B 0B root@A13Micro:~# df -h Filesystem Size Used Avail Use% Mounted on rootfs 1.8G 729M 992M 43% / /dev/root 1.8G 729M 992M 43% / devtmpfs 83M 0 83M 0% /dev tmpfs 17M 120K 17M 1% /run tmpfs 5.0M 0 5.0M 0% /run/lock tmpfs 34M 0 34M 0% /tmp tmpfs 34M 0 34M 0% /run/shm root@A13Micro:~# |
So there’s 165 MB available for Linux, as the rest of the 256MB RAM is mainly reversed for A13 GPU, and the rootfs is 1.8GB with 729 MB used. Since I’ve got a 4GB microSD card, let’s increase the rootfs size to make full use of the available space on the microSD:
- Run fdisk to delete and re-create the rootfs partition (p2)
1fdisk /dev/mmcblk0 - Reboot the board, and resize the partition:
1resize2fs /dev/mmcblk0p2 - Enjoy the extra space:
123df -hFilesystem Size Used Avail Use% Mounted onrootfs 3.6G 731M 2.7G 22% /
When I’ve then tried to login via the VGA screen, I realize the USB keyboard did not work at all with this board, which could explain the many USB debug message I could see in the serial terminal…
If you want to use LCD instead of VGA, the script files to do so are in script_GPIO_LCD_800x480 directory in the FAT partition of the microSD card.
More Information and Technical Support
If you prefer to build u-boot & the kernel yourself, and use your own rootfs, you can follow the instructions in Building bootable SD-card with Debian Linux Image for A13-OLinuXino. Those are the instructions for A13-OLinuXino, so you may have to adapt the instructions for A13-OLinuXino-MICRO.
If you want to use/test the latest kernel and bootloader, there’s an easier method using sunxi-linux nightly builds. If you don’t want to keep the rootfs but update the kernel and U-boot you can do as follows:
|
1 2 3 4 |
wget https://github.com/linux-sunxi/sunxi-bsp/raw/master/scripts/sunxi-media-create.sh chmod 755 sunxi-media-create.sh wget http://dl.linux-sunxi.org/amery/sunxi-3.0/latest/a13_olinuxino_hwpack.tar.xz /sunxi-media-create.sh /dev/sdX a13_olinuxino_hwpack.tar.xz norootfs |
This will create an image for A13-OLinuXino board (512MB RAM), and if you try directly the system will crash at boot time. So until a13_olinuxino-micro_hwpack.tar.xz becomes available, you’ll need to copy the script.bin file from the Debian image to the FAT partition.
You can get hardware and software support on Olimex Forums and consult A13-OLinuXino-MICRO Wiki (In construction). If you are modifying the the kernel or u-boot source code or find bugs related to the kernel/u-boot, contacting sunxi-linux mailing-list may be a better option.
Conclusion
If I just look at the board specifications and compare it to other low cost boards such as the Raspberry Pi or Cubieboard, Olimex A13-OLinuXino may not look the best value at 35 Euro + shipping, and Debian is not really stable on this board right now, although I’m pretty sure it will eventually be.
One of the advantage of the Olimex board is the VGA connector which is missing on the other 2 boards aforementioned. A13-OLinuXino-MICRO also has 4 expansion headers, including the UEXT connector that gives you access to over 20 low cost modules. This can make the board very attractive for embedded projects as it’s relatively straightforward to add some features such as GSM/GPRS, sensors, GPS. RF connectivity…
Finally, all Olimex boards are open source hardware, which means you’ll get access to hardware design files (and not only PDF) and source code, which is not fully the case for most other boards, especially for the schematics in original format and PCB layout.

Jean-Luc started CNX Software in 2010 as a part-time endeavor, before quitting his job as a software engineering manager, and starting to write daily news, and reviews full time later in 2011.
Support CNX Software! Donate via cryptocurrencies, become a Patron on Patreon, or purchase goods on Amazon or Aliexpress


Note: USB host is HIGH SPEED this is why it doesn;t support HID keyboards and mouses, but you can connect keyboard or mouse to the USB-OTG connector if you have proper cable or if you use USB-MINI-TO-USB-HOST adapter like this one: https://www.olimex.com/Products/Components/Misc/USB-MINI-2-USB-HOST/
or if you place USB hub between the USB-host and the keyboard/mouse