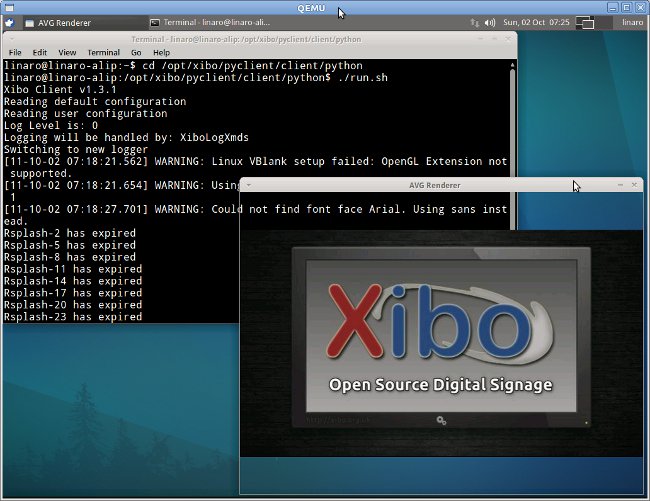
Xibo (pronounced eX-E-bO) is an open source, multi-display, multi-zone, fully scheduled digital signage solution written in Python (there is also a dotnet version). This is a client /server solution that can run on Windows or Linux.
If you are not familiar with Xibo you can visit http://xibo.org.uk/ or/and read my introduction XIBO: An Open Source Digital Signage Server/Client.
Since I had not seen digital signage solution running on low cost ARM development platform such as Beagleboard, Pandaboard or Origen, I decided to give the Xibo python client a try using qemu to emulate Gumstix Overo COM (OMAP 3530). Porting Xibo to ARM could provide several benefits compared to x86 platform:
- Lower hardware cost
- Lower power consumption (and electricity bill)
- Smaller form factor allowing easier integration in displays and in transportation (e.g. buses, subway trains).
- Easier to implement new digital signage features such as touch screen support, 3G connectivity, location based advertisement (with GPS), etc…
Please note that usually the hardware cost is not very critical in digital signage as most of the cost is related to maintenance (e.g. content update).
Since I just wanted to see if Xibo could run, the initial goal was to run a simple layout with pictures and text so I disabled Berkelium the library to render webpages (more on that later). [Update: I’ve now cross-compiled Berkelium so that you can run the full version of Xibo on ARM]. The host computer runs Ubuntu 11.04 (Natty) and I used Xibo 1.3.1 (development release) client and server.
Here are the steps I followed:
- Setup QEMU to emulate the Overo COM and run the ARM Internet Platform (ALIP) image based on linaro.
- Cross-compiled libavg for ARM and copy the binaries files in the qemu image, since this is needed by the python client. After the steps described in Cross-compile libavg for ARM are completed, copy the files as follows:
mkdir mnt
sudo mount -o loop,offset=$[106496*512] overo_sd_alip.img mnt
cp libs/lib/python2.7/site-packages/libavg/* mnt/usr/lib/python2.7/site-packages/libavg/ -rf
cd mnt/usr/lib/python2.7/dist-packages/
mv libavg libavg-old
ln -s ../site-packages/libavg libavg
cd ../../../../..
sudo umount mnt - Start qemu for the Overo board:
sudo qemu-system-arm -M overo -m 256 -drive file=./overo_sd_alip.img,if=sd,cache=writeback -clock unix -serial stdio -device usb-kbd -device usb-mouse
- Install the Xibo Python Client, by running the following script (xibo-install.sh) as root in the qemu terminal:
123456789101112131415161718192021222324252627#!/bin/shapt-get update > /dev/nullapt-get install wgetapt-get install bzrapt-get install -y libdc1394-22 libgraphicsmagick++3 libgraphicsmagick3 bzr python-soappy python-feedparser python-serial libavcodec52 libavformat52 libswscale0 libsdl1.2debian-pulseaudio libvdpau1apt-get install libboost-python1.42.0apt-get install libboost-thread1.42.0apt-get install libavcodec-devcd /opt/xibo && bzr branch lp:xibo pyclient## renames the directory# mv biela pyclient# grants 777 read/write permissions to allchmod -R 777 /opt/xibo# opens configuration client by Matt Holdercd /opt/xibo/pyclient/client/python/ && ./configure.pyecho " "echo "========================================================"echo " All done. Navigate to /opt/xibo/pyclient/client/python"echo " to make changes to site.cfg "echo " For more info on the Python client, visit: "echo " http://wiki.xibo.org.uk/wiki/Install_Guide_Python_Client"echo "========================================================"echo " " - Alternatively, instead of running ./configure.py, you could configure the Python Client manually:
cd /opt/xibo/pyclient/client/python
cp site.cfg.default site.cfg
vi site.cfgAnd change xmdsUrl to match your server IP, xmdsKey to a key of your choice (will be used during server installation below) , set requireXmds=true and change width and height to set the window resolution.
- Modify the source code of the Python client to disable the BrowserNode plugin.Edit XiboClient.py in /opt/xibo/pyclient/client/python and comment out the following line:
self.player.loadPlugin(“libbrowsernode”)
- Run Xibo Python Client:
sudo ./run.sh
After a while you should be able to see the Xibo splash screen.

- Install and Configure the server on Linux and/or Windows.
You can do this part at any stage during installation, e.g. while your computer builds libavg.
If you want to install the server on Windows XP, you can follow the instructions I provided in XIBO: An Open Source Digital Signage Server/Client (for server installation). To install xibo in Linux (e.g. on the host where the emulator is running), refer to http://wiki.xibo.org.uk/wiki/Install_Guide_Xibo_Server. After that you’ll need to create a layout, add media files and schedule the layout for the client. You can learn how to do that in Xibo Open Source Digital Signage Tutorial / Demo. Remember to license the client in Xibo dashboard.
I only tried a layout with 2 pictures (no videos due to performance issues) and a text zone in the bottom. The 2 pictures zone could show perfectly, but the text zone could not. The reason is that the text is converted to an html file (accessible in /opt/xibo/pyclient/client/python/data) . So even for text display, the Berkelium library is needed contrary to what I expected initially. So finally, I converted the text zone into a picture zone in order to achieve the result below.

Xibo Python Client can run successfully in an ARM platform running Linux. Further work would be needed to achieve full functionality:
- Cross-compiling Berkelium.
- Cross-compiling libbrowsernode.
- Try Xibo Client on real hardware.
- Performance Optimization for the target platform (e.g. Hardware Video decoding).

Jean-Luc started CNX Software in 2010 as a part-time endeavor, before quitting his job as a software engineering manager, and starting to write daily news, and reviews full time later in 2011.
Support CNX Software! Donate via cryptocurrencies, become a Patron on Patreon, or purchase goods on Amazon or Aliexpress


