I’ve been wondering how the Raspberry Pi would handle WordPress. I’ve found some instructions using Apache 2, but this may not be the best server to use for this type of low-end hardware. nginx server requires less resources, and as it is what I already setup for this blog, I decided to give it a try on the Pi.
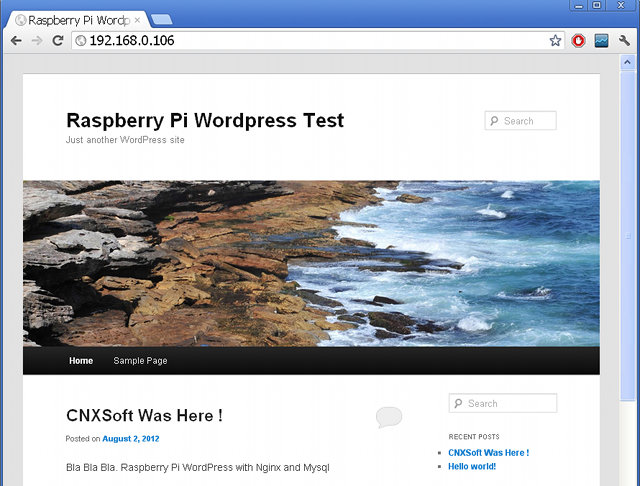
I’ll provide all the detailed steps I followed below, but you can also download the compressed SD card image (113 MB), uncompress it and copy it to an SD card the usual way. After the system boots, find your Raspberry Pi’s IP address, type it in your PC’s browser, and you should see the page pictured below. If you want to login to the dashboard, the username is “admin” and the password “raspberry”.
Instructions to Install WordPress on Raspberry Pi
You can use your default Debian Linux distribution (e.g. Raspbian) if space if not an issue, but all what I did below is based on Raspbian minimal image.
Install ngnix, php and mysql in the server:
|
1 2 |
sudo apt-get update sudo apt-get install nginx php5-fpm php5-cli php5-curl php5-gd php5-mcrypt php5-mysql php5-cgi mysql-server |
You’ll be asked for mysql root password. I used “raspberry” of course!
Create a nginx configuration file for your WordPress blog in /etc/nginx/sites-available/wordpress:
|
1 2 3 4 5 6 7 8 9 10 11 12 13 14 15 16 17 18 19 20 21 22 23 24 25 26 27 28 29 30 31 32 33 34 35 36 37 38 39 40 41 42 43 44 45 46 |
# Upstream to abstract backend connection(s) for php upstream php { server unix:/var/run/php5-fpm.sock; } server { ## Your only path reference. root /srv/www/wordpress/public_html; listen 80; ## Your website name goes here. Change to domain.ltd in VPS server_name _; access_log /srv/www/wordpress/logs/access.log; error_log /srv/www/wordpress/logs/error.log; ## This should be in your http block and if it is, it's not needed here. index index.php; location = /favicon.ico { log_not_found off; access_log off; } location = /robots.txt { allow all; log_not_found off; access_log off; } location / { # This is cool because no php is touched for static content try_files $uri $uri/ /index.php; } location ~ \.php$ { #NOTE: You should have "cgi.fix_pathinfo = 0;" in php.ini include fastcgi_params; fastcgi_intercept_errors on; fastcgi_pass php; } location ~* \.(js|css|png|jpg|jpeg|gif|ico)$ { expires max; log_not_found off; } } |
Enable your wordpress blog:
|
1 2 3 |
sudo ln -s ../sites-available/wordpress ../sites-enabled/wordpress sudo rm default sudo rm ../sites-enabled/default |
As mentioned in the note in the config file above, edit /etc/php5/fpm/php.ini to enable the line:
|
1 |
cgi.fix_pathinfo = 0; |
You can try if nginx is running properly at this point, first start it:
|
1 |
sudo service nginx start |
and try to access it from your PC’s browser using Raspberry Pi IP address (e.g. 192.168.0.106), you should see:
Welcome to nginx!
Now let’s download and extract WordPress into the RPi:
|
1 2 3 4 5 6 |
sudo mkdir -p /srv/www/wordpress/logs/ sudo mkdir -p /srv/www/wordpress/public_html cd /srv/www/wordpress/public_html sudo wget http://wordpress.org/latest.tar.gz sudo tar xzvf latest.tar.gz sudo mv wordpress/* . |
Now let’s follow WordPress installation instructions:
|
1 2 3 4 5 6 7 8 9 10 11 12 13 14 15 16 17 18 19 |
$ mysql -u root -p Enter password: Welcome to the MySQL monitor. Commands end with ; or \g. Your MySQL connection id is 5340 to server version: 3.23.54 Type 'help;' or '\h' for help. Type '\c' to clear the buffer. mysql> CREATE DATABASE wordpress; Query OK, 1 row affected (0.00 sec) mysql> GRANT ALL PRIVILEGES ON wordpress.* TO "wordpress"@"localhost"IDENTIFIED BY "raspi"; Query OK, 0 rows affected (0.00 sec) mysql> FLUSH PRIVILEGES; Query OK, 0 rows affected (0.01 sec) mysql> EXIT Bye $ |
In /srv/www/wordpress/public_html directory edit WordPress configuration:
|
1 2 |
sudo cp wp-config-sample.php wp-config.php sudo edit wp-config.php |
and update the database details as follows:
|
1 2 3 4 5 |
define('DB_NAME', 'wordpress'); /** MySQL database username */ define('DB_USER', 'wordpress'); /** MySQL database password */ define('DB_PASSWORD', 'raspi'); |
Finally change the directory permissions and start(or restart) nginx and php5-fpm.
|
1 2 3 |
sudo chown www-data.www-data /srv/www/wordpress/public_html/ -R sudo service nginx restart sudo service php5-fpm restart |
Now access the following IP address in your PC’s web browser
http://192.168.0.106/wp-admin/install.php
Where you need to replace 192.168.0.106 with your Raspberry Pi IP address.

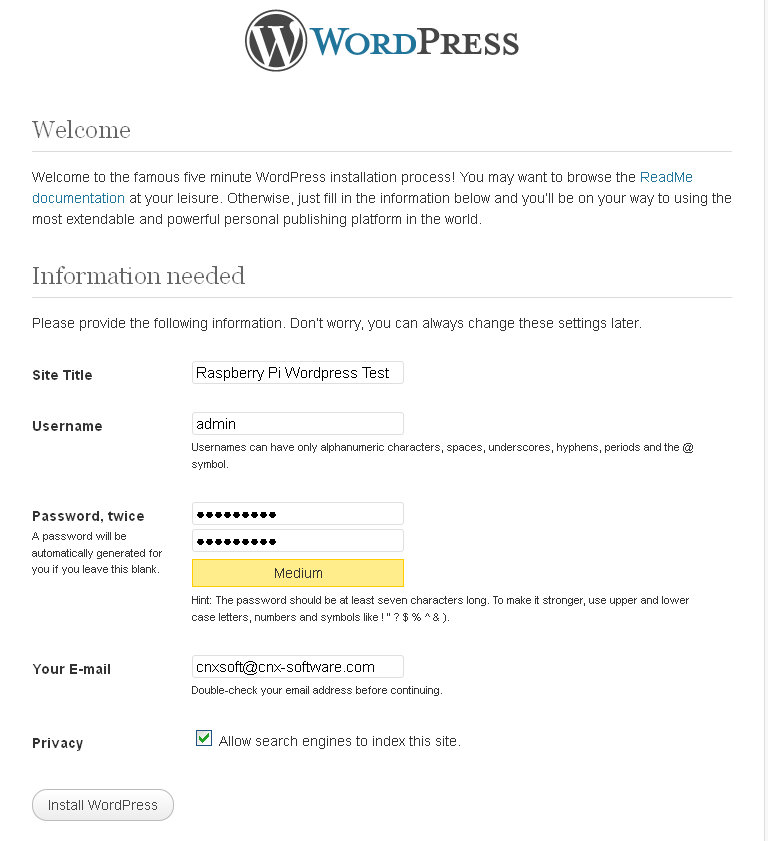
Fill the details (I used “raspberry” password), click on Install WordPress, and follow the installation instructions in your browser. You should now be able to login to the Dashboard and create a post. For better performance, I’ve installed W3 Total Cache plugin, and enabled Page, Browser and Object caching. Once caching is enabled, the pages should load immediately (less than a second) for non-logged in users. I did experience one issue with caching enabled but not working. This was solved by clearing my browser cookies. Go figure. Since the dashboard is not cached, editing posts and adding pictures is somewhat slow but still usable.
WordPress Benchmarks on Raspberry Pi
Finally, I’ve done some benchmarks on the main page using ApacheBench from another Linux machine on the LAN with 10 concurrent users making 100 requests:
|
1 2 3 4 5 6 7 8 9 10 11 12 13 14 15 16 17 18 19 20 21 22 23 24 25 26 27 28 29 30 31 32 33 34 35 36 37 38 39 40 41 42 43 |
ab -n 100 -c 10 http://192.168.0.106/ This is ApacheBench, Version 2.3 Copyright 1996 Adam Twiss, Zeus Technology Ltd, http://www.zeustech.net/ Licensed to The Apache Software Foundation, http://www.apache.org/ Benchmarking 192.168.0.106 (be patient).....done Server Software: nginx/1.2.1 Server Hostname: 192.168.0.106 Server Port: 80 Document Path: / Document Length: 9614 bytes Concurrency Level: 10 Time taken for tests: 29.091 seconds Complete requests: 100 Failed requests: 0 Write errors: 0 Total transferred: 989300 bytes HTML transferred: 961400 bytes Requests per second: 3.44 [#/sec] (mean) Time per request: 2909.116 [ms] (mean) Time per request: 290.912 [ms] (mean, across all concurrent requests) Transfer rate: 33.21 [Kbytes/sec] received Connection Times (ms) min mean[+/-sd] median max Connect: 1 2 2.0 1 15 Processing: 1003 2820 373.4 2888 3778 Waiting: 959 2763 371.6 2828 3687 Total: 1006 2822 373.2 2889 3792 Percentage of the requests served within a certain time (ms) 50% 2889 66% 2907 75% 2909 80% 2915 90% 2928 95% 2929 98% 3598 99% 3792 100% 3792 (longest request) |
With this simple WordPress page, the Raspberry Pi can handle 3.44 Requests per second, which is equivalent to around 12,400 requests per hour or nearly 300,000 requests per day.
You might want to try to further improve performance by using PHP APC and Varnish, or replacing MySQL with SQLite3.

Jean-Luc started CNX Software in 2010 as a part-time endeavor, before quitting his job as a software engineering manager, and starting to write daily news, and reviews full time later in 2011.
Support CNX Software! Donate via cryptocurrencies, become a Patron on Patreon, or purchase goods on Amazon or Aliexpress


